Set up the Financial period workspace and closing schedule
Period-end and year-end are busy times for financial people in every company. During the first few days of each period and new fiscal year, an effort is made to close out the prior period/year to begin the next one. Microsoft Dynamics 365 Finance provides a user-friendly workspace for creating and managing closing processes.
Set up the closing processes
To set up the closing processes, you need to:
- Perform period close processing.
- Define your team and work calendar.
- Create closing templates.
Period close processing
Typically, organizations close subledgers and the general ledger at the end of each period and fiscal year to prepare internal financial reporting and external financial statements. The goal of the close process is to complete all financial transactions in progress and post the transaction through to the general ledger. Each department has tasks to complete as part of the closing process. All tasks must be completed to close out a period by the required date. After closing is complete, no one will be able to post other transactions for that period or year.
Finance allows you to define a closing schedule in a template and then apply the template to a period. This feature gives visibility into the tasks’ statuses for the individuals who are responsible for tasks and the managers who oversee the closing processes. Those who are responsible for the overall closing schedule will be able to track progress more efficiently.
Setup requirements
The closing process involves tasks that specific people perform on specific days. The schedule is often based on the day of the week for the first day of a period. For Dynamics 365 Finance to help you manage the period close, make sure that you define each of the following parameters:
- Calendars - Indicate the days that are considered workdays for the close process.
- Task areas - Represent the groups that are involved in the close process, such as Accounts payable, Accounts receivable, and Inventory management.
- Tasks - The activities that occur during a close.
- Closing roles - The roles for the people who are responsible for working on tasks. You can assign only one person to a closing role.
- Resources - The people who perform the tasks. Each resource is assigned one or more closing roles.
Each parameter is described in detail in the next few sections. You can set up closing parameters by going to General ledger > Period close > Financial period close.
Inventory value report
You can use the Inventory value report to perform reconciliation between the general ledger and inventory. To learn more about the Inventory value report, see Inventory value report
Define your team and work calendar
Defining your team and work calendar involves defining the closing roles, resources, task areas, and calendar.
Closing roles
Closing roles are generic descriptions of the person who manages a particular task. The system assigns closing roles to tasks, rather than specific resources to tasks, to make it easier to change who performs a task in the future. Changing the person who's assigned to a closing role will change all tasks that are assigned to that role for newly generated schedules.

Resources
Resources are the people who do the work for the close. To add a resource for a period close process, you first need to define the resource as a worker in the system. You can assign a resource to many closing roles.
If a resource is moved to a new department or leaves an organization, you can assign their closing roles to a different resource. All tasks that are assigned to this closing role will be assigned to the new resource for future schedules. This approach helps make it easier to change the person who's responsible for a set of tasks. If you already generated a closing schedule, you'll need to manually change assignments to a new resource.
For example, an employee might have two closing roles (AR Invoicing Clerk and AR Payments Clerk) and will be assigned all tasks that are assigned to either closing role.
A person might oversee a period close but might not perform the individual tasks in the close. Therefore, you need to define that person as a resource so that they can view the status information for a period close.
Task areas
Task areas allow users to filter based on tasks for a specific group. For example, an Accounts payable manager might want to check the status of all accounts payable tasks during a particular close.
You can define as many task areas as you want. You can assign each task to only one task area.
Calendar
Dynamics 365 Finance doesn't use fiscal calendars to create a closing schedule. Instead, the period close feature has its own calendars. In some organizations, the finance team works over the weekend to complete the close. In other organizations, the final close day for the month is dependent on which day that the first day of the month falls on.
The calendar functionality allows you to create an overall schedule that might or might not include weekends. You can modify calendars to add holidays and weekends as needed.
When defining your calendar, you need to consider what happens at the end of the fiscal year. Closing a period or fiscal year rarely occurs on the last day of a period or fiscal year. The last period close and the year-end close happen in the next fiscal year. We recommend that you create a calendar with an end date far into the future. You can create a calendar that runs for years and use the calendar for both period and fiscal year closing tasks.
The following screenshot shows a five-day calendar that spans two fiscal years.
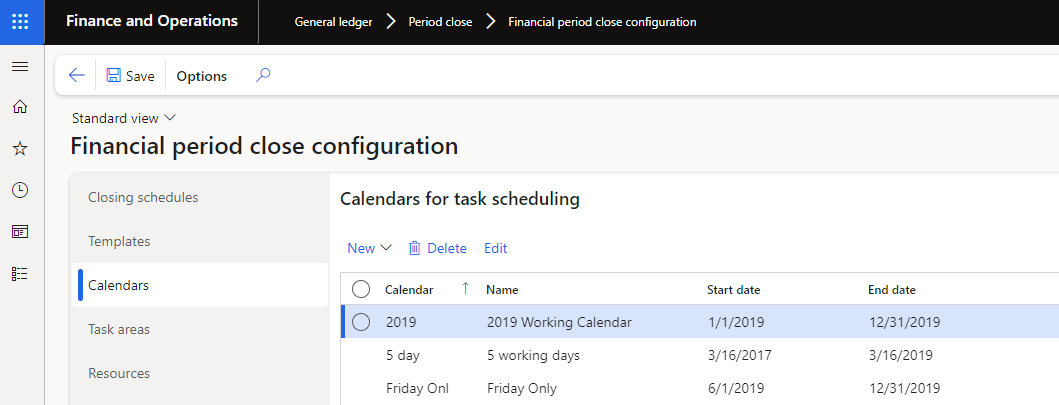
To create a calendar, complete the required fields on the Calendars for task scheduling page.
You can use the Edit calendar page to change the days that should be considered working days. This page allows you to change weekend days to a working day during period or year-end closing, or you can change holidays to non-working days.
Create closing templates
You can use closing templates to create the generic list of tasks, along with who is responsible for the task and the relative due date of the task. Additionally, you can create an optional link to navigate to a page within Finance or an external URL where the resource can complete the task.
Define tasks
A task is an activity or finite piece of work that must be completed on a certain day within a closing schedule. Each task can only be assigned to one person. If an activity requires two people, you'll need to split up the work into two or more tasks.
When you create tasks, you'll decide the level of detail and the words that you want to use to describe each task and the dependencies between tasks. For example, an organization might require that all pending vendor invoices and accounts payable payment journals should be posted prior to completing the accounts payable currency revaluation.
The Dependencies menu and the Attachments menu will appear when you select the ellipsis (...) button above the task grid.
Create the template schedule
The template schedule pulls the setup together. It's a list of tasks or activities. For each task in the list, you'll complete the following components:
Task area – Define a task area to group together and filter the list of tasks.
Due date – Define the date as it relates to the end of the period (0 is the last day of the period and 1 is the first day of the next period). Enter a positive value, a negative value, or zero (0). You can also specify a time of day for the due date.
Closing role – The closing role is assigned to a single resource at any point in time. When a schedule is generated from the template, whichever resource is assigned to the closing role will be assigned to the task that's generated from the template.
Company – Assign one or more companies to the task. Some tasks might need to be completed for all companies, while other tasks will be unique for an individual company. Consider the schedule for when a task must be completed for each company. If the relative due date is different for one or more companies, you might need to create a unique task.
Task links – A link helps users navigate directly to the page within Dynamics 365 Finance or go to a URL that is used to complete the task. You can only specify one link for each task. If multiple pages or URLs exist, consider splitting the task into multiple tasks.
You can choose links from menu items that are grouped by module. You can't create your own links without adding the menu item to the module’s menu page. You can link Financial reporting reports to a task by using the URL that displays when you're viewing the report. The menu items that you can select from are shown by module.
Dependency -Select one or more tasks that must be completed prior to the task.
Attachments – Include attachments that have specific instructions, external forms to complete, or Microsoft Excel workbooks to help simplify the task. The attachments that are assigned to the template task will be copied to the generated schedule. Each company that uses Dynamics 365 Finance has its own set of tasks for closing a period or fiscal year.
The following list shows common tasks that you might choose to use:
- Post all transactions for period end.
- Verify that all journals are posted.
- Settle invoices and payments within Accounts payable and Accounts receivable.
- Settle ledger transactions (optional).
- Run foreign currency revaluation for Accounts payable, Accounts receivable, Cash and Bank management, and General ledger to generate unrealized gain or loss amounts.
- Process required allocations.
- Reconcile the subledgers to General ledger.
- Post period-end adjustments manually.
- Journalize transactions and review the Ledger journal report.
- Perform a consolidation by using a consolidation company or financial reporting.
- Generate period-end financial statements by using financial reporting.
- Set ledger periods to On hold so that no further posting occurs. You can also restrict a period to a specific user group while period-end activities are occurring, for better control. It's a best practice to not use the Permanently closed status because you can't reopen a period if you permanently close it.
You can be as granular as you want in your closing schedule.
Create period close schedules
When you've set up the closing templates, you'll create a closing schedule. You can create a new schedule from the Financial period close configuration page by selecting Closing schedules. The information that you'll provide for a schedule includes:
- A short name for the schedule (it could be as simple as 2022-02).
- A descriptive name for the schedule.
- The period start and end date.
Note
For a fiscal year close, you'll use the full year.
- A closing template to use for creation of the schedule.
- The calendar that specifies the working days.
- The companies for which to create the schedule. Use the dropdown list to select one or more companies. A schedule with tasks will be created for each selected company.
The following actions happen when you create a closing schedule:
- Each task that's listed in the template will be added to the schedule. The task area that's assigned to the task will be put into the schedule line.
- The due date/time of the task will be calculated based on the end date that you specified for the period when creating the schedule.
- Resources will be assigned to each task by looking at the closing role that's assigned to the task and the resource who's currently assigned to that closing role.
- Task dependencies will be generated based on the template.
The due date for tasks that aren't completed by the Due date will display in red and a warning symbol will display.
Review and adjust the schedule
The person who's responsible for the overall schedule should review the generated schedule and then adjust as required. For example, if the person who's responsible for a task isn't working when the task is due, you can reassign the task to someone else. Only people who are listed as resources in the financial period end configuration will be available for selection. You can add a person as a resource without assigning them a closing role if they need to fill in for someone else.
You might want to manually adjust due dates around a person’s absence or other activities that may be happening at the time.
When you select Edit to modify a task, you'll make your changes in the Edit task page.
The schedule is available when it's generated. You can't generate, edit, and then release to the team. Plan to make your changes in the same session where you first generate the schedule.
Manage the closing process
To manage the closing process, you'll need to review and update tasks, review the status, and complete the close.
Review and update tasks
Several ways are available for you to review the status of specific tasks for a period close. The easiest way is to use the Financial period close workspace. When you open a workspace, nothing will display until you select the closing schedule.
After you've selected the schedule, the workspace will display tasks based on your security rights. Some users will only see the tasks that are assigned to them, while other roles (such as managers) might see all tasks for the schedule, allowing them to manage their team’s closing tasks. The tiles show the past due tasks, tasks that are due today, tasks that can't be performed yet due to dependencies, and the tasks that are open or not complete.
You can modify the schedule on the Financial period close workspace by adding tasks and changing assignments. When you complete a task, the time and your user identifier are recorded to indicate completion. Each task brings with it any attachments from the template. You can include attachments as you perform a task to provide evidence of completion or documentation that needs to be retained for the tasks.
You can also use the All financial period close tasks page, which is available from the Period close group of the General ledger module menu. This page allows you to view more columns on the page, add alerts, and set custom filters. Additionally, this page lets you view tasks across multiple closing schedules. At the beginning of each fiscal year, tasks might overlap from the last period of the prior year and the year-end close.
To view the details behind any single task, select the task name from the All financial period close tasks page in the Financial period close workspace. This action will display the specific page that's used to complete the task. For example, selecting the Post pending vendor invoices task will display the Pending vendor invoices page, as shown in the following screenshot.
Workspaces and all financial period close task pages provide warnings within the schedule. An exclamation point (!) will display if a task is overdue. A padlock will display if a task can't be completed because dependencies aren't yet complete.

Status
The best way to view the status is to use the tiles on the Financial period close workspace. These tiles provide a quick, high-level view of a closing schedule and information such as the number of tasks completed, tasks that are overdue, and tasks that can't be completed due to incomplete dependencies. You can create your own tiles to add to this workspace to monitor the status of individual task areas/departments, or you can use whatever filters make sense for your close process.
Complete the close
When the close is complete, the schedule will be locked and can't be changed. You can lock the schedule, even if all tasks are not complete. When a schedule is locked, it will no longer appear in the Financial period close workspace. You can open the All financial period close tasks page to view the history. You can unlock the schedule if necessary.
