Install and update Teams client software
Installing the Teams desktop client is a fairly straightforward process, and most users could complete this procedure without administrative intervention. One way for users to install the client is to connect to the Download Microsoft Teams website and select the client they want to install.
However, in most organizations, administrators will want to exert more control over the process to ensure users don’t experience problems. In this unit, you’ll learn about the available options for administrative control over the installation process for the Teams desktop client.
Tip
When you install Teams, the Teams installer logs the sequence of events to %LocalAppData%\SquirrelTemp\SquirrelSetup.log. Review this log if you experience problems during installation.
Manage installation and update options for Teams desktop client
Aside from downloading the desktop client from the Download Microsoft Teams website, users can initiate an automated installation process from the Office portal.
User initiated installation from the Office portal
Users can install the Microsoft 365 apps (formerly Office 365 ProPlus), including Teams desktop client, by using the following procedure:
Sign in to Office 365 with their Microsoft 365 account.
Select the Install Office shortcut, and then:
- Select Office 365 apps to install the standard Microsoft 365 apps, including Teams.
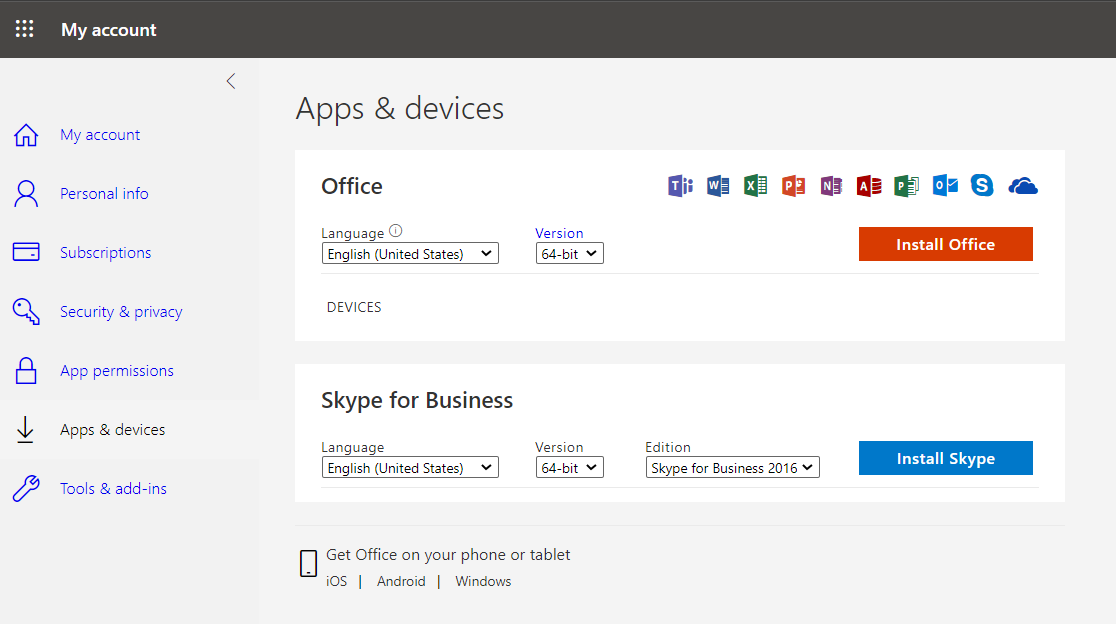
- Select Other install options to choose open the My account page, displayed in the following screenshot.
If users choose the second option, they can choose to install the standard Microsoft 365 apps, or else choose to install the Skype for Business client.
Manage installation and update options in Microsoft 365 admin center
Microsoft 365 administrators can control the available installation and update options for Microsoft 365 apps in Microsoft 365. From the Microsoft 365 admin center, use the following procedure:
In the Microsoft 365 admin center, in the search box, enter office install.
From the list of returned results, select Office installation options.
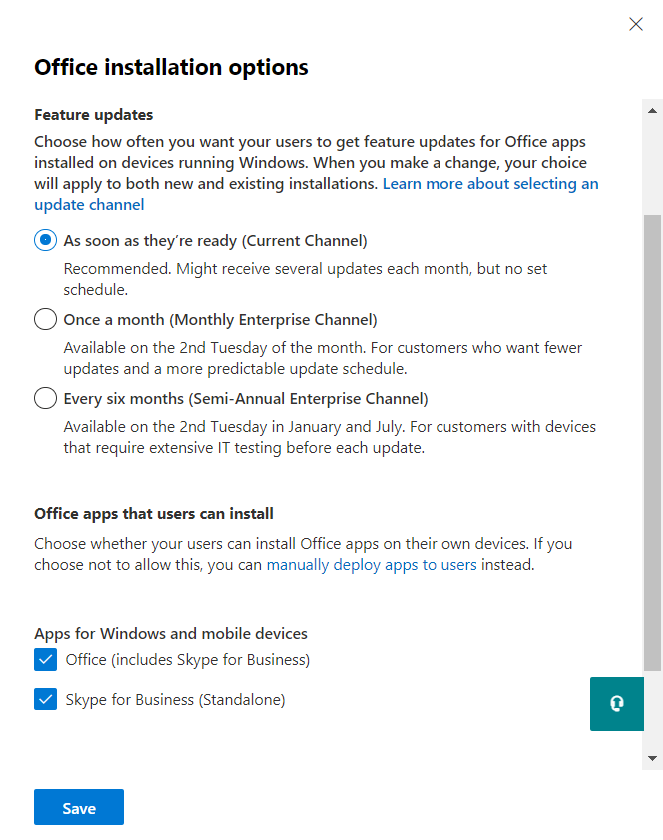
On the Office installation options blade, displayed below, under the Feature updates heading, choose one of the following update channels for Office:
- As soon as they’re ready (Current Channel)
- Once a month (Monthly Enterprise Channel)
- Every six months (Semi-Annual Enterprise Channel)
Under the Office apps that users can install heading, select or deselect the following options:
Under the Apps for Windows and mobile devices heading:
- Office (includes Skype for Business)
- Skype for Business (Standalone)
Under the Apps for Mac heading:
- Office
- Skype for Business (X EI Capitan 10.11 or higher)
Select Save.
Manage installation and update options in Intune
Microsoft 365 administrators can also use Intune to deploy and update Microsoft 365 apps, including Teams.
Important
You can only use Intune to manage apps if you have a Enterprise Mobility + Security subscription. You must also assign users an Enterprise Mobility + Security license.
To deploy Microsoft 365 apps to Windows devices, use the following procedure:
In the Microsoft Endpoint Manager admin center, select the Apps node, and then select Windows.
On the Windows app page, select Add, and then, in the Select app type blade, select Windows 10 beneath the Microsoft 365 Apps heading.
Click Select.
In the Add Microsoft 365 Apps wizard, on the App suite information tab, make any changes you want, and then select Next.
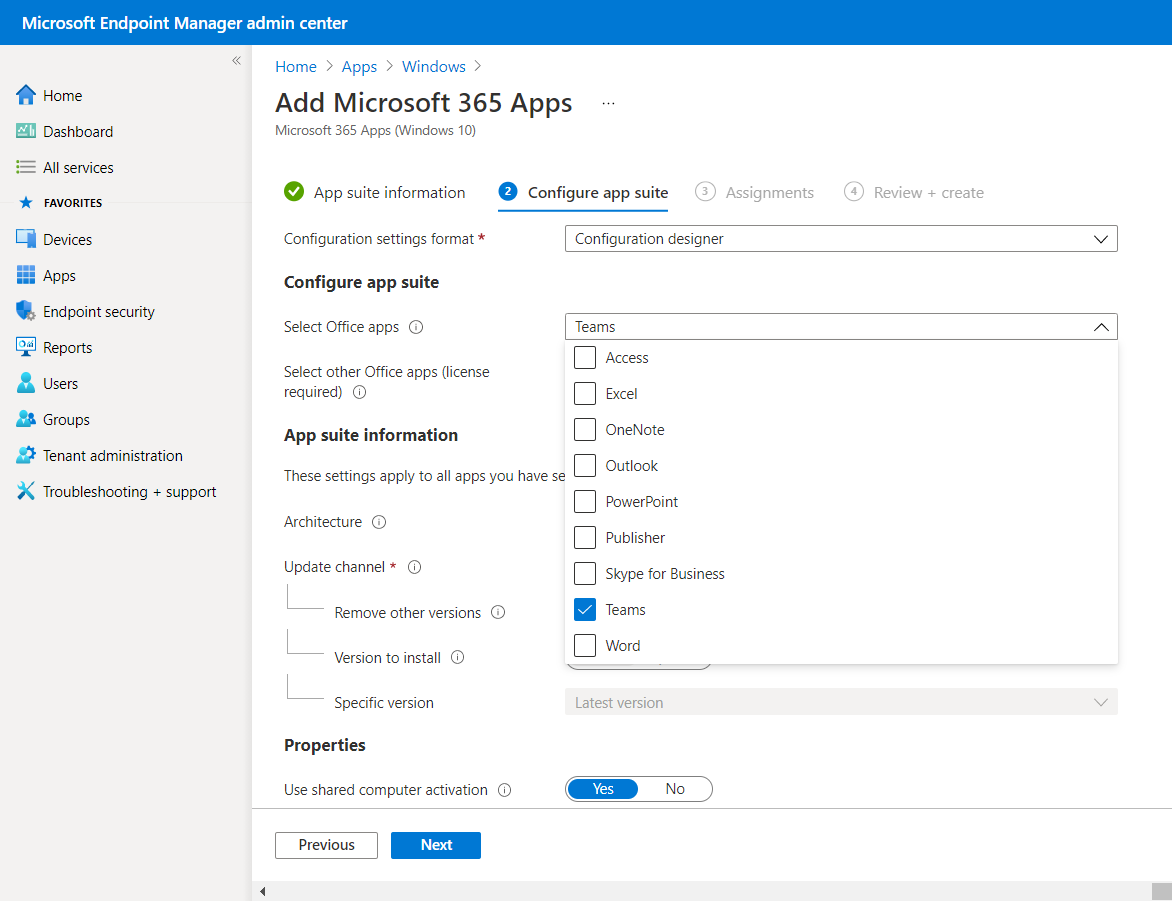
On the Configure app suite tab, in the Select Office apps list, select those apps you want to deploy. You can choose only Teams if you want, as shown in the following screenshot.
Under the App suite information heading, select the following options:
- Architecture: choose 32-bit or 64-bit
- Update channel: Monthly Enterprise Channel, Current Channel, Semi-Annual Channel.
- Remove other versions: Yes or No
- Version to install: Latest or Specific
- Specific version: Latest version or other, numbered version
Configure the remaining options as required, and then select Next.
On the Assignments tab, choose whether the app is Required or Available for enrolled devices. Then choose which users, groups, or devices will receive the apps. Select Next, and then select Create.
Tip
The process for deploying apps to macOS is broadly similar.
You can also use Intune to deploy the Teams client to Android and iOS/iPadOS devices.
Troubleshoot updates
After you have installed Teams, updates are applied periodically according to the update channel you selected.
Tip
You can also manually update Teams from within the Teams client. Select the ellipsis button, and then select Check for updates.
If you experience problems when updating, you should collect and review available logs. After you have installed Teams, the log location is located in the %LocalAppData%\Microsoft\Teams folder. In this folder, you’ll find two log files:
- SquirrelSetup.log. This file is written by Update.exe, which is an executable that services the Teams app.
- Logs.txt. This file is used by the Teams app (specifically Teams.exe) to record significant application events. It could contain update failure information.
Important
Because these log files contain personally identifiable information, they're not sent to Microsoft.
If these logs don’t provide useful insights, then consider collecting and analyzing application and system logs using Windows Sysinternals.
Use the procedure in the Collect and analyze application and system logs document to learn more.
Next unit: Troubleshoot Teams client startup and configuration
Having an issue? We can help!
- For issues related to this module, explore existing questions using the #Microsoft 365 Training tag or Ask a question on Microsoft Q&A.
- For issues related to Certifications and Exams, post on Certifications Support Forums or visit our Credentials Help.