Exercise - Connect and stream Azure Digital Twin data to wind turbine assets
An Azure SignalR Service has been exposed as part of the ARM template that you deployed. This service and associated setup lets you connect to Azure Digital Twins. We've created a data pipeline to retrieve data from digital twins, which is abstracted from the client app that runs in mixed reality.
Azure SignalR Service overview
Azure SignalR Service simplifies the process of adding real-time web functionality to applications over HTTP. This real-time functionality allows the service to push content updates to connected clients, such as a single page web or mobile application. As a result, clients are updated without the need to poll the server or submit new HTTP requests for updates. Any scenario that requires pushing data from server to client in real time can use Azure SignalR Service. Traditional real-time features that often require polling from a server can also use Azure SignalR Service.
You can easily integrate the Azure SignalR Service with other Azure services, which opens up other possible scenarios. For example, Azure Functions can use the REST API to push notifications to the Azure SignalR Service, which then pushes data to connected clients in real time. The Azure SignalR Service, used with IoT Hub, can enable real-time sensor data to be transmitted to connected clients to support real-time monitoring scenarios.
Real-time scenarios often come with high-frequency data flows and large quantities of concurrent connections between the client and server. They require nontrivial infrastructure setup to get the functionality up and running at scale. Configuring this infrastructure at scale is difficult. The configuration usually requires application-specific logic at various network layers. The Azure SignalR Service handles those issues so you can focus on the application logic that delivers real-time connected experiences. You can scale real-time functionality dynamically while paying only for what you use. The service also inherits Azure SignalR Service capabilities for persistent connections over various transports.
A wide variety of industries have used Azure SignalR Service for any application type that requires real-time content updates. Here are some examples that are good to use Azure SignalR Service:
- High frequency data updates: gaming, voting, polling, and auction
- Dashboards and monitoring: company dashboard, financial market data, instant sales update, multi-player game leader board, and IoT monitoring
- Real-time location on map: logistic tracking, delivery status tracking, transportation status updates, and GPS apps
- Real time targeted ads: personalized real-time push ads and offers, and interactive ads
- Collaborative apps: coauthoring, whiteboard apps, and team-meeting software
- Push notifications: social network, email, game, and travel alerts
- Real-time broadcasting: live audio/video broadcasting, live captioning, translating, and events/news broadcasting
- IoT and connected devices: real-time IoT metrics, remote control, real-time status, and location tracking
- Automation: real-time trigger from upstream events
For your wind-turbine use case, the communication layer between the Azure Digital Twins wind-turbine data and your mixed-reality device uses the Azure SignalR Service and a SignalR client embedded in the mixed-reality app.
To expose the data to your client app by using Azure Digital Twins, you need to connect to the Azure SignalR Service. The mixed-reality app that you're building implements a SignalR client to connect to the SignalR service. Establishing communication between the SignalR client and the Azure SignalR service requires the client to invoke the negotiate function in the SignalR service.
Configure your DeviceSimulator with your Azure Digital Twins connection parameters and authentication details captured in the previous exercise.
Get app credentials
Open DeviceSimulator.sln in Visual Studio and configure the
DeviceSimulatorwith the host name for the Azure Digital Twins resource type created by the ARM template.Open the Azure_config_settings.txt text file that you created in the last exercise that contains the key Azure Digital Twins configuration parameters using a text editor. Alternatively, if your PowerShell session remains active, look for the output from your
get-contentcommand.From the Azure_config_settings.txt file or from the output of your
get-contentcommand in PowerShell, locate the key/value pair for theadtHostNamekey and copy the value. It should look similar to:Consolehttps://myprojadtxxxxxxxxxx.api.eus.digitaltwins.azure.net
In your Visual Studio DeviceSimulator solution, open the AzureIoTHub.cs file in the editor by double-clicking the file from Solution Explorer. Paste the value for your
adtHostNamekey/pair copied from Step 2 into the adtInstanceUrl string variable.


Configure the device simulator with primary connection string
Configure the DeviceSimulator with the primary connection string for the IoT Hub that the ARM template created.
From the Azure_config_settings.txt file or from the output of your
get-contentcommand in PowerShell, locate the key/value pair for theconnectionStringkey and copy the value. It should look similar to:ConsoleHostName=myprojHubxxxxxxxxxx.azure-devices.net;SharedAccessKeyName=iothubowner;SharedAccessKey= xxxxxxxxxxxxxxxxxxxxxxxxxxxxxxxxxxxxxxxxxxxx”In your Visual Studio
DeviceSimulatorsolution, open the AzureIoTHub.cs file in the editor and paste yourconnectionStringvalue copied in the previous step into the iotHubConnectionString string variable.
Configure the device simulator with authentication keys
Configure the DeviceSimulator with the authentication keys that the ARM template created.
Open the AppCredentials.txt text file that you created in the previous exercise.
In your Visual Studio DeviceSimulator solution, open the PropUpdater.cs file in the editor. Copy and paste the globally unique identifiers (GUIDs) from your text file to the .cs file. Use the following mappings from the .cs variables to the JSON data output in your text file:
AppCredentials.txt PropUpdater.cs appId clientId password clientSecret tenant tenantId 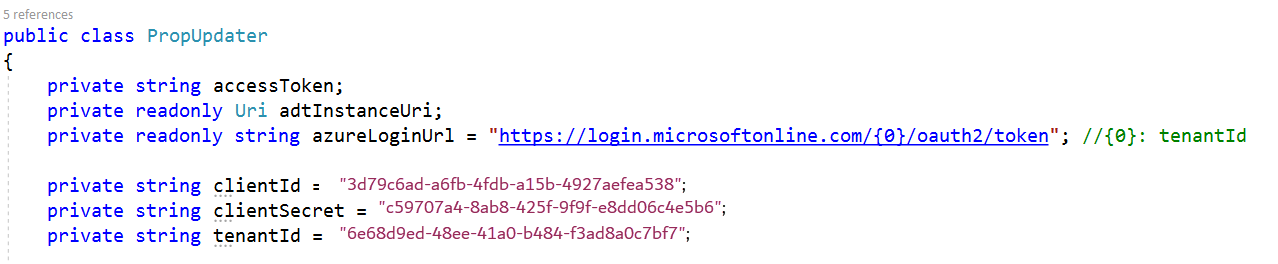
Select File > Save All to save your work in Visual Studio.

Connect your Azure Digital Twins prefab in Unity to the digital twins so that you can receive simulated telemetry data from the DeviceSimulator.
Add the Azure Digital Twins connection prefab
Add the Azure Digital Twins connection prefab asset to your Unity scene and configure.
Return to your Unity project.
Select the
ADTConnectiongame object in the Hierarchy. If it's missing from your hierarchy, drag the Assets > ADTPrefabs > ADTConnection prefab asset to your scene hierarchy.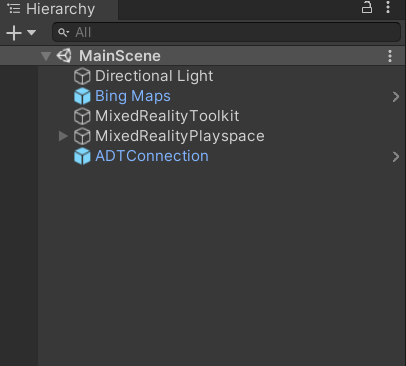
Open the text file that you created in the last exercise, Azure_config_settings.txt, in a text editor. The file contains the key Azure Digital Twins configuration parameters. Alternatively, if your PowerShell session remains active, look for the output from your
get-contentcommand.From the Azure_config_settings.txt file or from the output of your
get-contentcommand in PowerShell, locate the key/value pair for thesignalRNegotiatePathkey and copy the value. It should look similar to:Consolehttps://myprojfuncappxxxxxxxxxx.azurewebsites.net/api/negotiateAdd this value to the Url parameter under ADT Data Handler (Script) with the Function Url obtained in Step 1. Include everything in the URL up to and including
…/api. Don't include the last backslash or the word negotiate.
Save the scene.

Now that the Azure services are set up and the appropriate pointers are within your Unity scene, you can create a user interface (UI) to visualize the operations data.
Next unit: Exercise - Create Azure Digital Twin equipped user interfaces
Having an issue? We can help!
- For issues related to this module, explore existing questions using the #azure training tag or Ask a question on Microsoft Q&A.
- For issues related to Certifications and Exams, post on Certifications Support Forums or visit our Credentials Help.