Work with Azure CLI
Azure CLI lets you control nearly every aspect of every Azure resource.
You can work with Azure resources such as resource groups, storage, VMs, Microsoft Entra ID, containers, and machine learning.
Commands in the CLI are structured in groups and subgroups.
Each group represents a service provided by Azure, and the subgroups divide commands for these services into logical groupings.
So, how do you find the commands you need? One way is to use the az find command.
For example, if you want to find commands that might help you manage a storage blob, you can use the following find command:
az find blob
If you know the command's name you want, the help argument for that command will get you more detailed information on the command—also, a list of the available subcommands for a command group.
For example, here's how you would get a list of the subgroups and commands for managing blob storage:
az storage blob --help
Creating resources
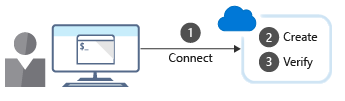
When creating a new Azure resource, typically, there are three high-level steps:
Connect to your Azure subscription.
Create the resource.
Verify that creation was successful.
1. Connect
Because you're working with a local Azure CLI installation, you'll need to authenticate before you can execute Azure commands.
You do it by using the Azure CLI login command:
az login
Azure CLI will typically launch your default browser to open the Azure sign in page.
If it doesn't work, follow the command-line instructions, and enter an authorization code in the Enter Code dialog box.
After a successful sign in, you'll be connected to your Azure subscription.
2. Create
You'll often need to create a new resource group before you create a new Azure service.
So we'll use resource groups as an example to show how to create Azure resources from the Azure CLI.
The Azure CLI group create command creates a resource group.
You need to specify a name and location.
The name parameter must be unique within your subscription.
The location parameter determines where the metadata for your resource group will be stored.
You use strings like "West US," "North Europe," or "West India" to specify the location.
Instead, you can use single-word equivalents, such as "westus," "northeurope," or "westindia."
The core syntax to create a resource group is:
az group create --name <name> --location <location>
3. Verify installation
For many Azure resources, Azure CLI provides a list subcommand to get resource details.
For example, the Azure CLI group list command lists your Azure resource groups.
It's helpful to verify whether resource group creation was successful:
az group list
To get more concise information, you can format the output as a simple table:
az group list --output table
If you have several items in the group list, you can filter the return values by adding a query option using, for example, the following command:
az group list --query "[?name == '<rg name>']"
Note
You format the query using JMESPath, which is a standard query language for JSON requests.
You can learn more about this filter language at http://jmespath.org/.
Using Azure CLI in scripts
To use Azure CLI commands in scripts, you'll need to be aware of any issues around the shell or environment you use to run the script.
For example, in a bash shell, you can use the following syntax when setting variables:
variable="value"
variable=integer
If you use a PowerShell environment for running Azure CLI scripts, you'll need to use the following syntax for variables:
$variable="value"
$variable=integer