Create a custom connector for Business Central
With Business Central, we have more reasons why we need custom connectors. By default, the prebuilt connectors are only for exposed APIs. There are at least three reasons why you might need custom connectors:
If your Microsoft Power Platform app requires any other table in Business Central with no exposed API. In this case, you first need to create a custom API for this data in Business Central and then create a custom connector in Microsoft Power Platform.
If you make custom tables in Business Central and you need them connected with your Microsoft Power Platform app. Again, after you create these tables, you should create a custom API in Business Central and a custom connector in Microsoft Power Platform.
You have added a new field to an existing table covered with a standard API and you want to use this new field with your prebuilt connector. It will unfortunately not be possible as customization isn't seen by default. Therefore, you'll need to create a custom connector as well.
Custom connectors are used in the same way as Microsoft-managed connectors. You'll need to create a connection to your custom API in Business Central or other APIs and then use it to call any operations that you've exposed in your custom connector.
Start with custom connector and update general details
To create a custom connector, you need to describe the API you want to connect to in such a way that the connector understands the APIs operations and data structures. In this unit, you create a custom connector from scratch, if you follow along with the steps provided.
Before you start making a custom connector for Business Central, you must prepare some parameters relevant for the custom connector building process. Let's start with these parameters.
You need the following parameters: Tenant ID, Environment Name, Web Service Access Key, Username and Company ID. To find them, follow these steps.
Copy the Tenant ID from the Business Central Admin Center.
To do this click on the gear icon in the upper-right corner and select Admin Center. The Business Central Admin Center appears in the new tab in your web browser.
View all your environments in the environment list.
To see details of each environment, click on the environment you want to use. In this case you can select between Production and Sandbox.
In this example, we'll use the Sandbox environment.
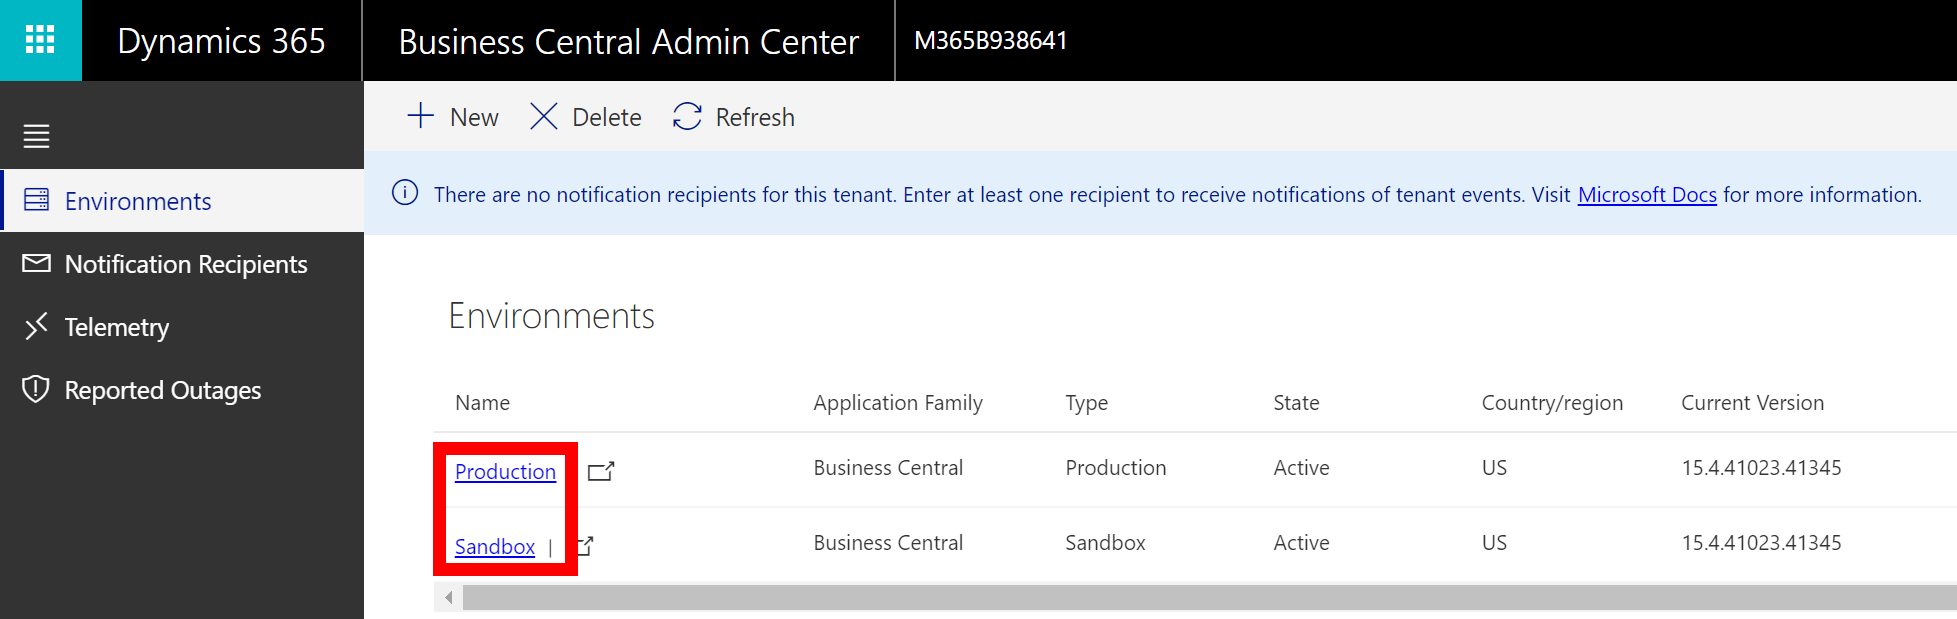
When you click on Sandbox, you'll see all the Details about this environment as well as Version Management.
In Details, copy the part of the URL between
https://businesscentral.dynamics.comand/Sandbox.Copy this Tenant ID to your notepad.

Now find your Environment name. Find it in the same place where you located your Tenant ID. Copy the Name to your notepad.
Open the Sandbox environment in Business Central to locate the Web Service Access Key and Username. To do so, select the URL link from your previous screen.
In the Sandbox environment, select the search icon, enter Users, and then select the related link.
Select the user you want to use as an admin in the custom connector and select it to open the User Card page.
Run the Change Web Service Key action from the ribbon and click Yes in the pop-up window.
Select Key Never Expires or Key Expiration Date and click OK.
Copy the value from Web Service Access Key field to your notepad.

From the User Card page, you also need to copy the User Name to your notepad as you'll need it later.
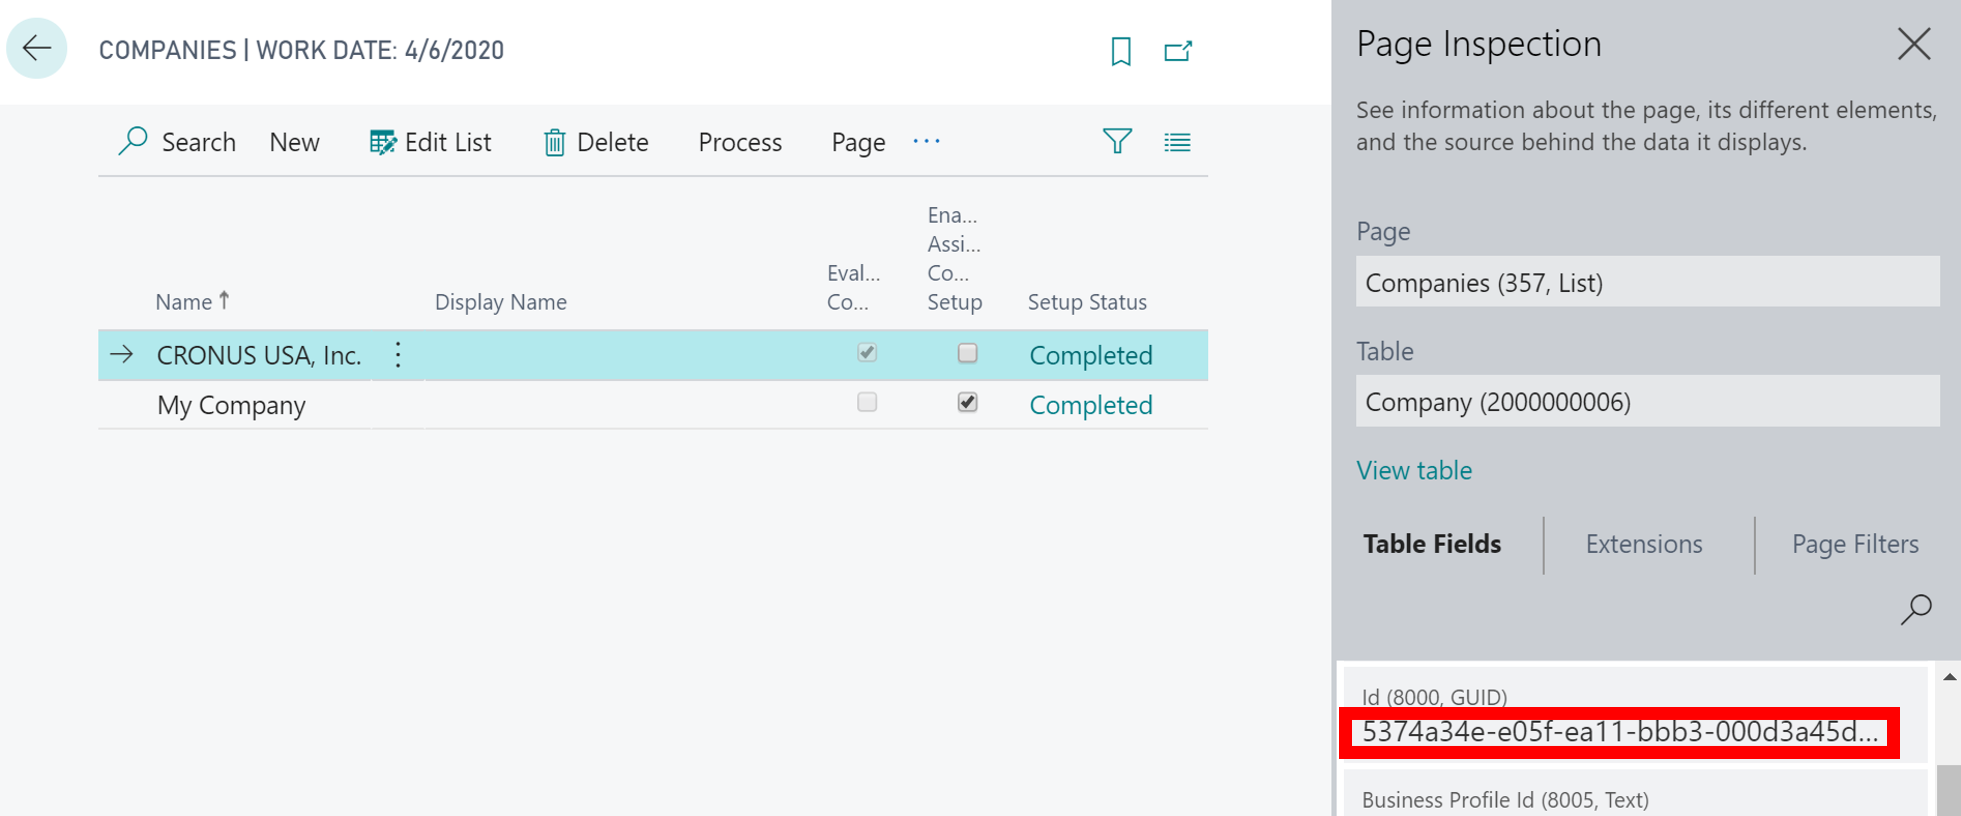
Next, copy the Company ID. To do this, select the search icon, enter Companies, and then select the related link.
Select the company you want to use and open Page Inspection, by using the Ctrl+Alt+F1 keys.
In Page Inspection, find the field Id (8000, GUID) and copy the value to your notepad.


Now you have all the necessary parameters and we can continue with the creation of a custom connector. To create the custom connector, you can start with either of Microsoft Power Platform tools, Power Apps or Power Automate.
First you need to expand Data in the left menu and select Custom Connectors. Then in the right top bar select the New custom connector and select Create from blank.

Watch the following demonstration on how to create a custom connector.
Authentication types
There are two options available for authentication in custom connectors against the data source:
OAuth: for both Production and Sandbox environments
Basic Authentication: only for Sandbox environment
OAuth is an open standard for authorizing access to web services and APIs from native clients and websites in Microsoft Entra ID. When you are using Basic Authentication, as you already saw in the video, you need to use Username and Web Service Access Key instead of password.
Connector definitions
As we experienced during the creation of the custom connector, the custom connector wizard provides many options to define how your connector functions, and how it can be exposed in Power Apps and Power Automate.
We already discovered how to configure them, but there are still some explanations left to be made. In the Definition page, the left area displays any Actions, References, and Policies that are defined for the connector.
References and Policies are not relevant for Business Central. We need to focus on Actions. Actions determine the operations that users can perform. Actions can be used to read, create, update, or delete resources in the underlying connector.

After you enter the Summary and Operation ID, you need to configure Request and Response:
Request defines the pre-requirements needed to make a request and describes a single operation parameter. A unique parameter is defined by a combination of a name and location. You can use one of the following verbs to describe the operations available on a single path: GET, DELETE, POST, PUT, HEAD, OPTIONS, AND PATCH.
Response defines the shape of response returned by the underlying connector when making the request.
The Validation area displays any issues that are detected in the API definition. Check the status, then at the top right of the wizard, choose Update connector if everything is ok.