Create an Azure Machine Learning data labeling project
A common task when developing a custom object detection model is the need to process unlabeled image data so that it can be converted to a labeled dataset for model training and validation purposes. Unlabeled data often features various samples that reflect the type of data that would be captured at the site where the object detection model is to be employed. This data could include subtle transformations, for example, introduction of "noise" into the image data to produce a more robust training set. Azure Machine Learning Data Tools in Azure Machine Learning studio allow teams to manage their collections of unlabeled data into labeled datasets that accommodate the classes that would be detected by the trained object detection model.
Create an Azure Machine Learning data labeling project
If you haven't already launched the Azure Machine Learning studio from the Machine Learning Overview mentioned at the end of the previous section, sign in to Azure Machine Learning studio now, and select your workspace.
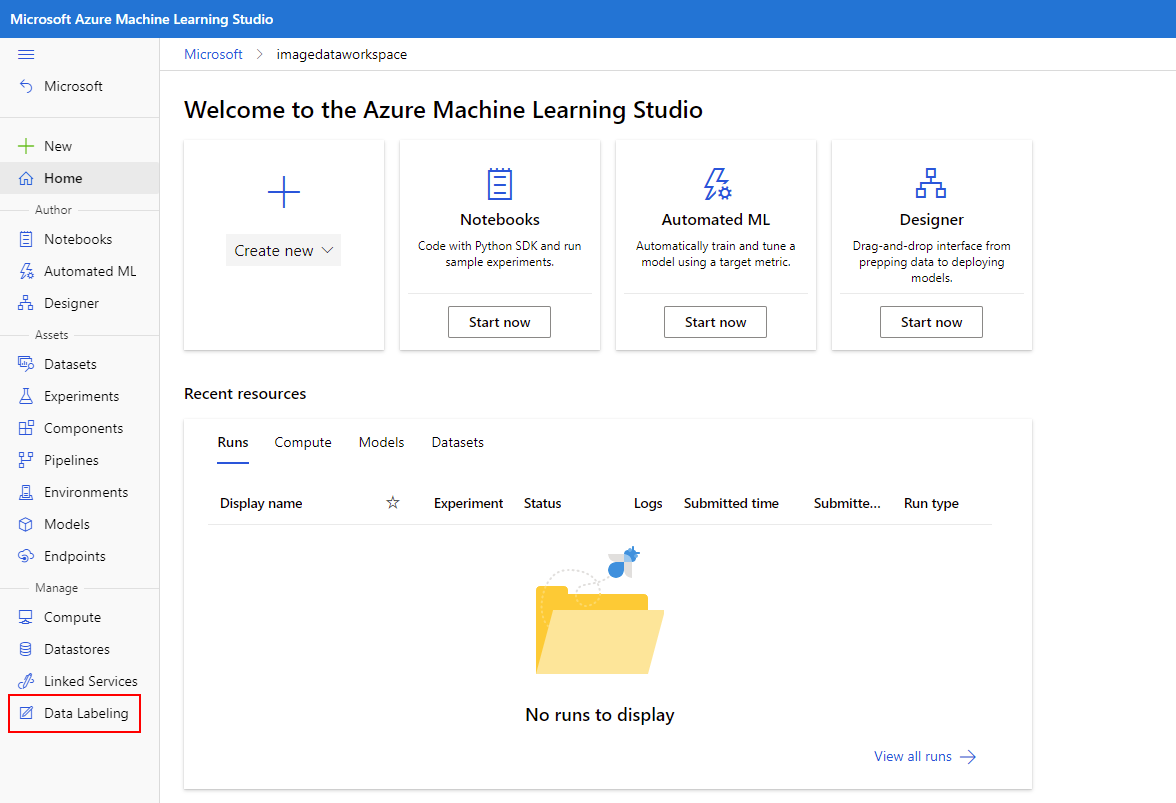
On the left-hand pane, locate the Manage section and select Data Labeling.
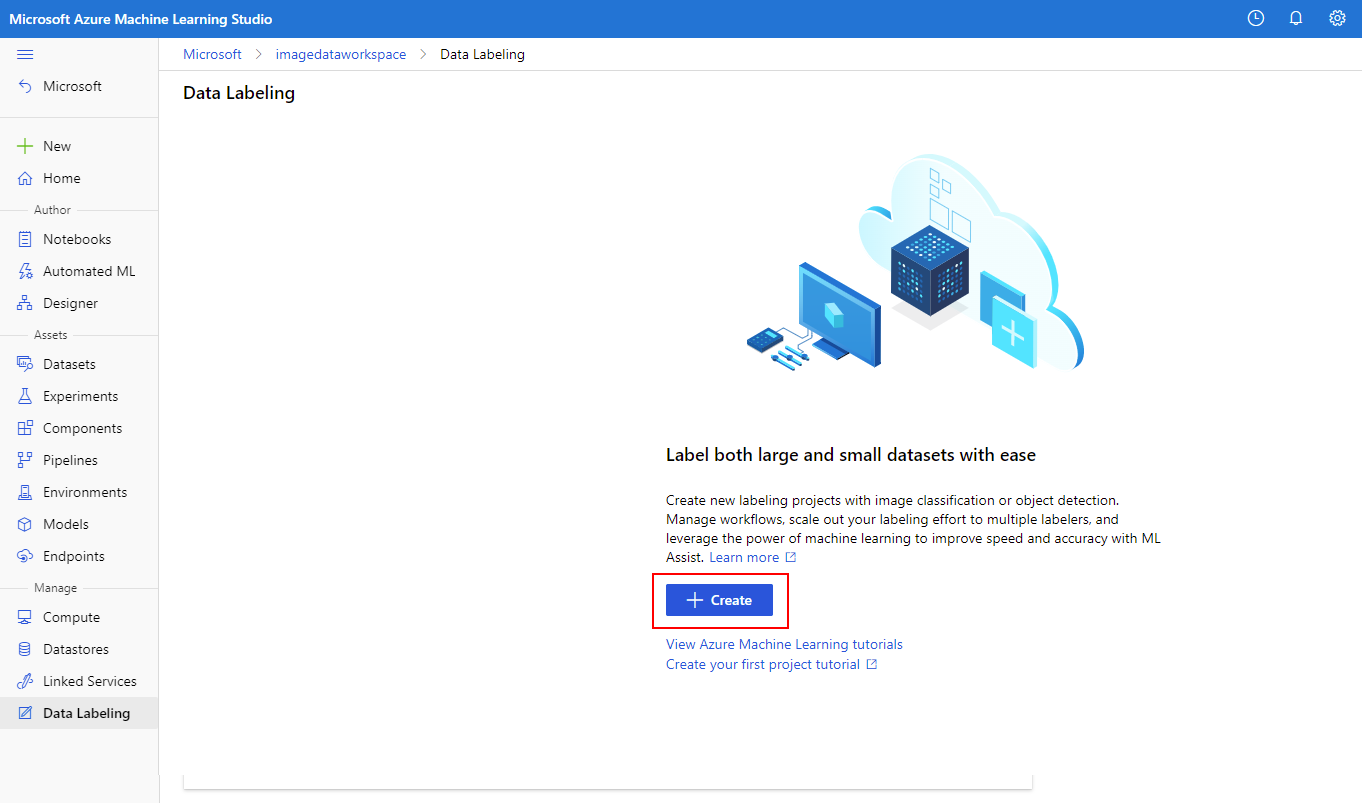
On the resulting screen, select + Create.
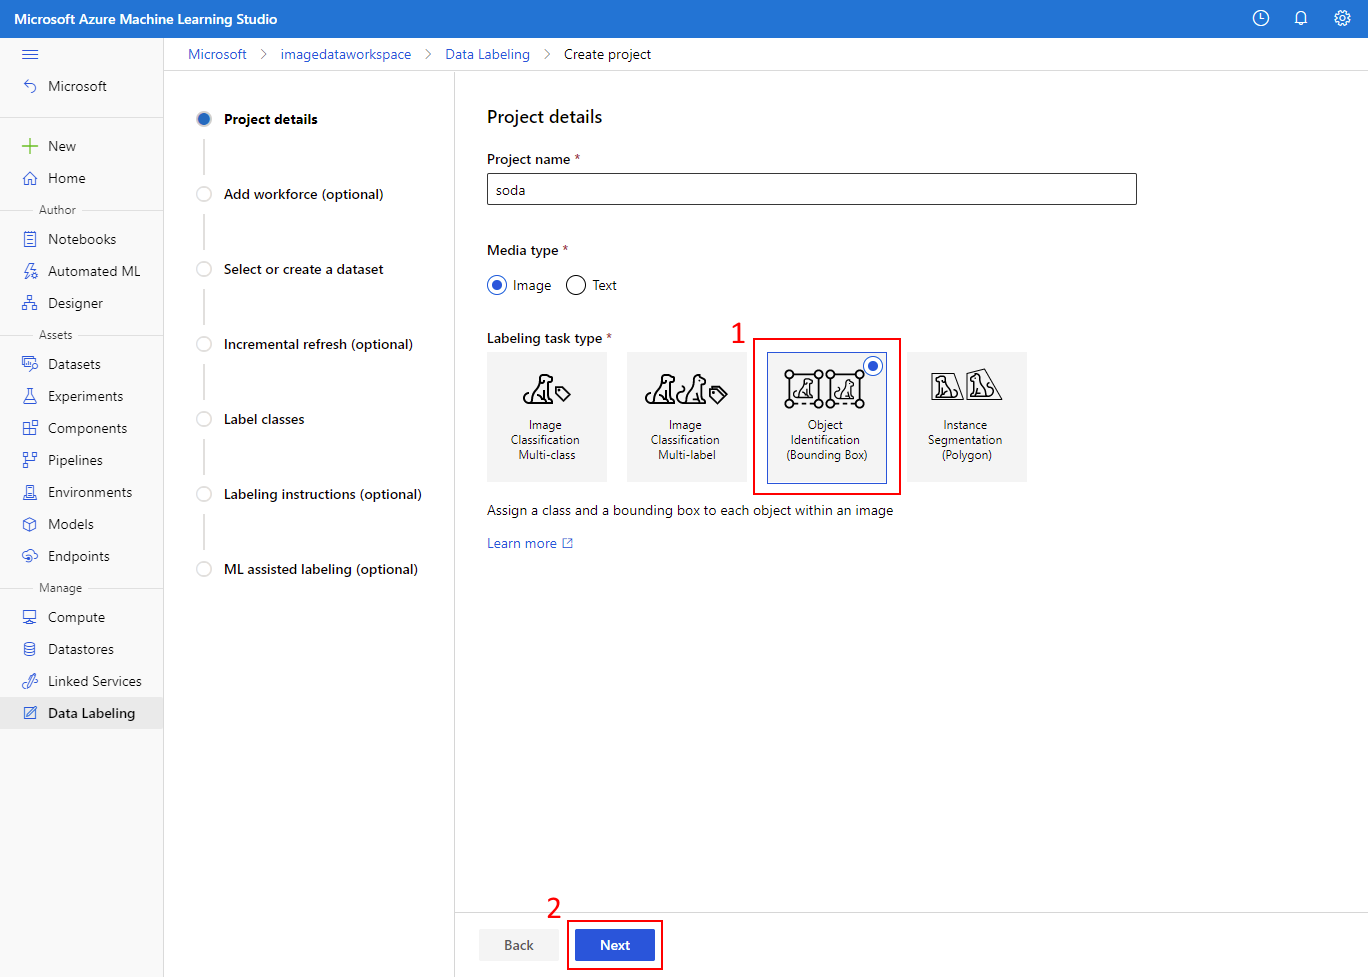
Under the Project details section, give your project a name that is specific to the particular detection task at hand and select Object Identification (Bounding Box) from the menu, then select Next.
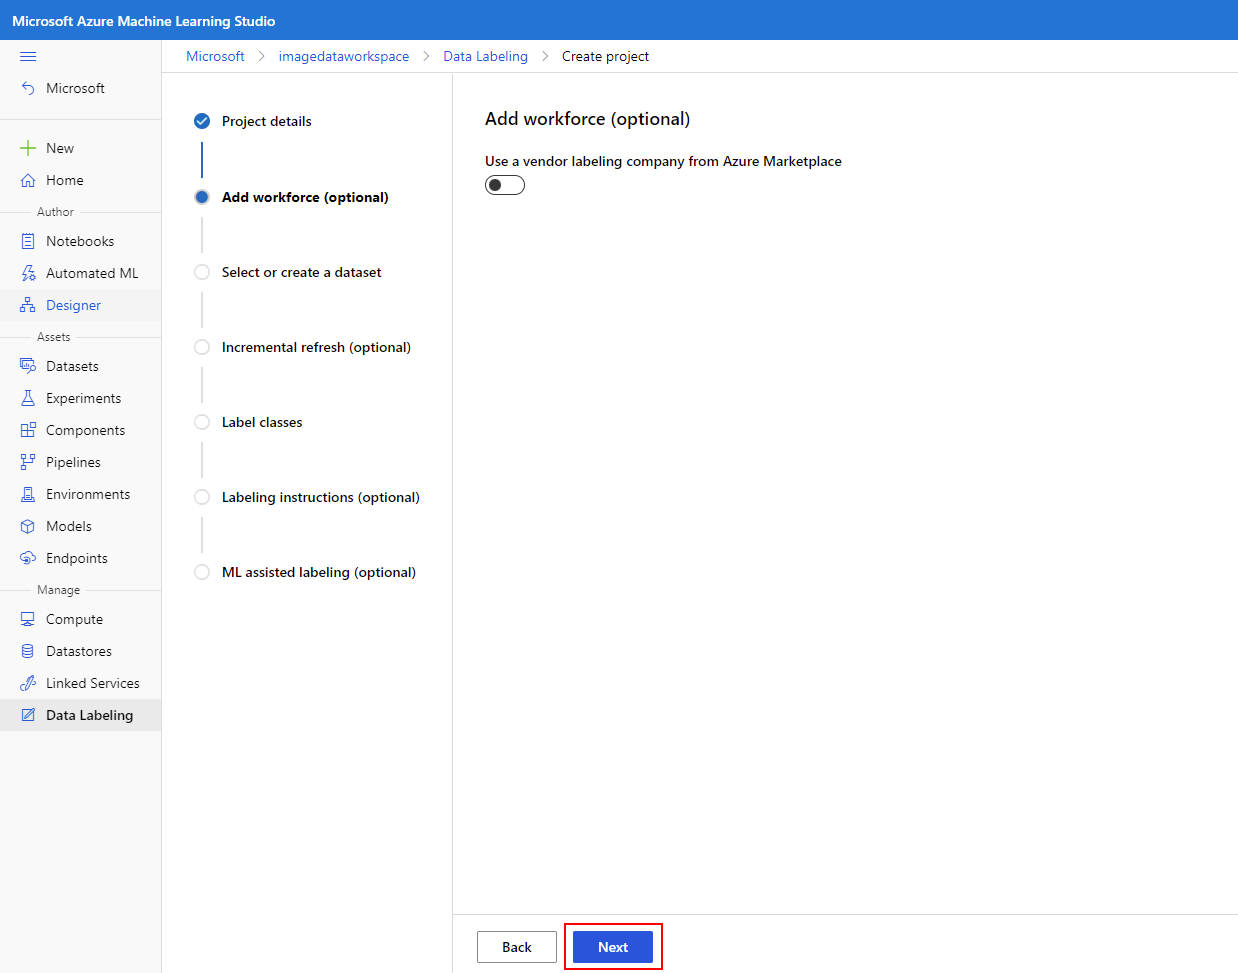
In the Add workforce (optional) screen, we'll leave the option disabled and select Next to continue.
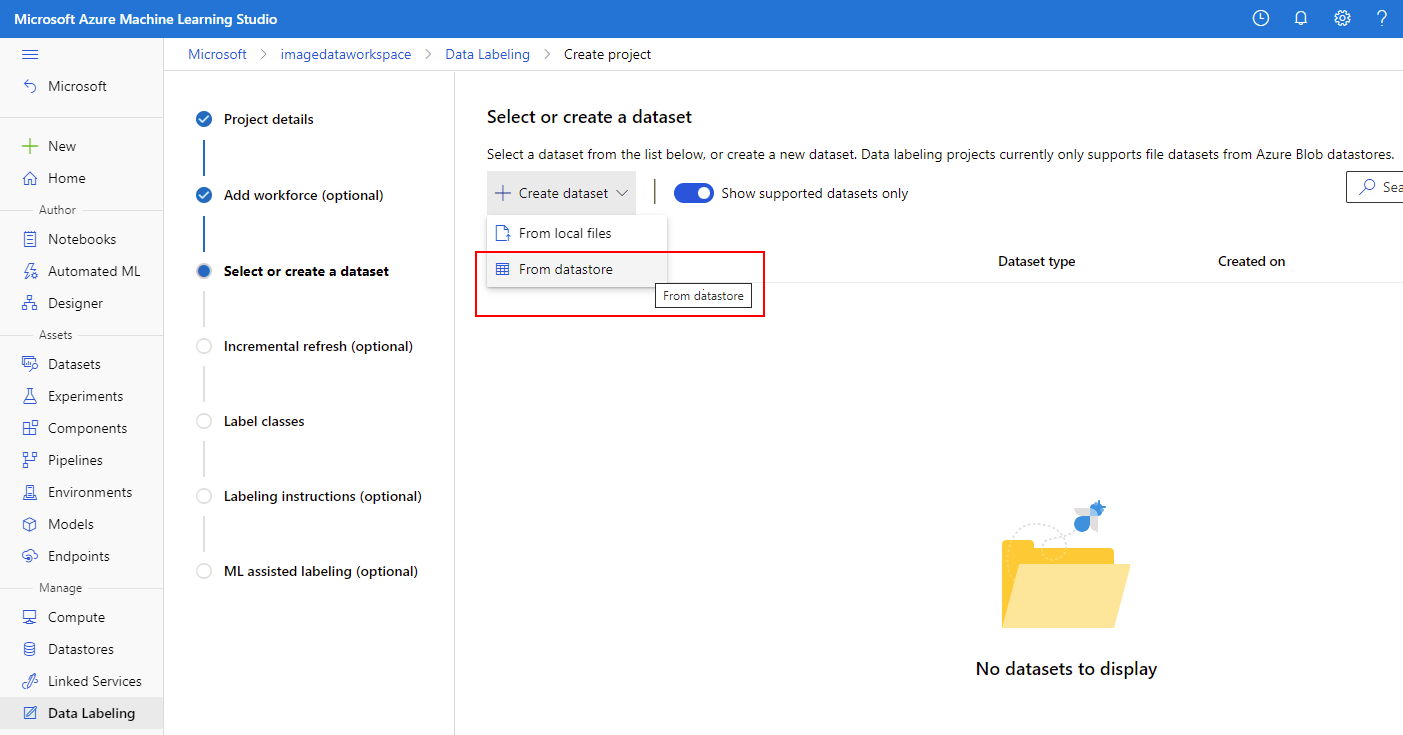
When prompted to Select or create dataset choose + Create dataset and select the From datastore option.
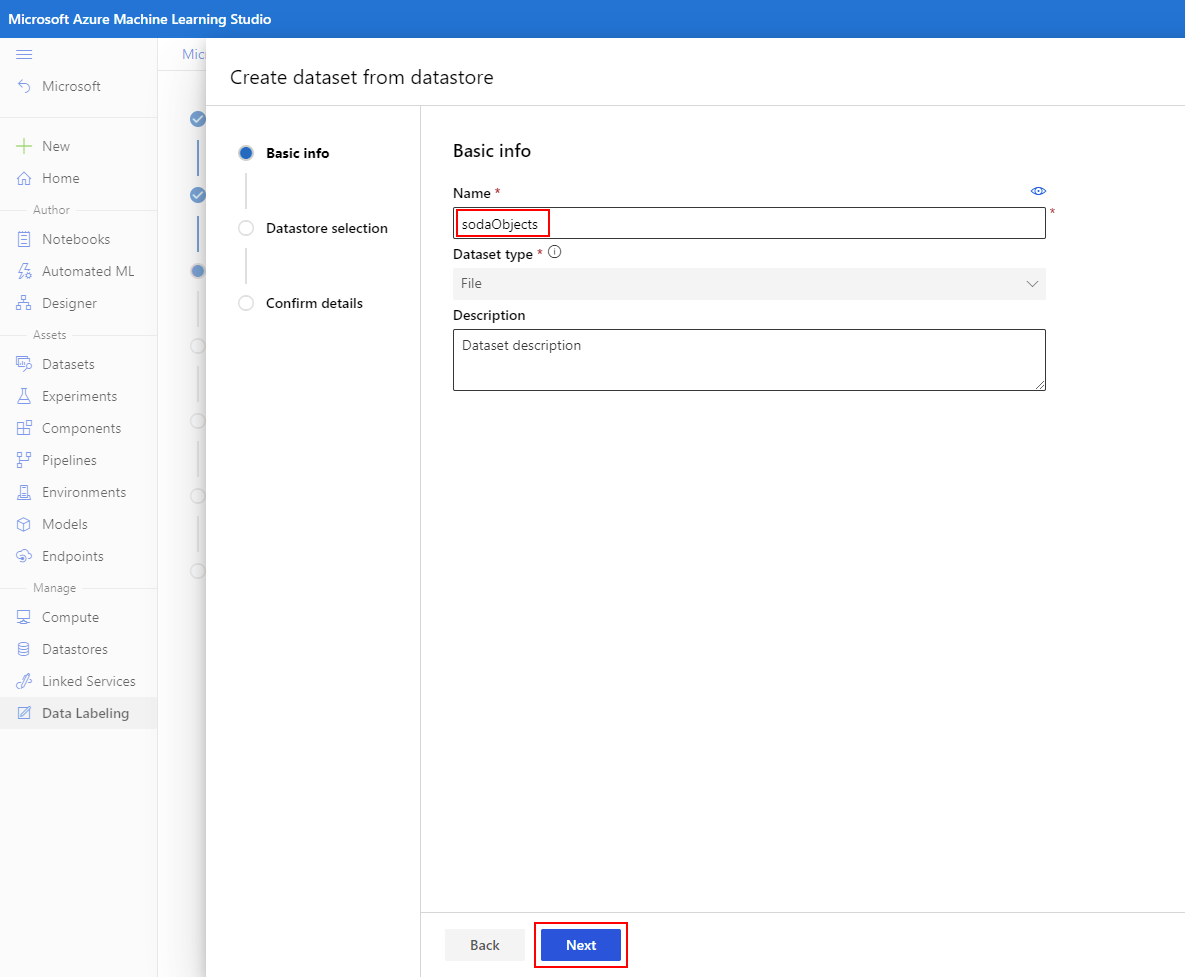
Give your new dataset the unique name, for example, sodaObjects that reflects the images captured in support of the detection task and select Next.
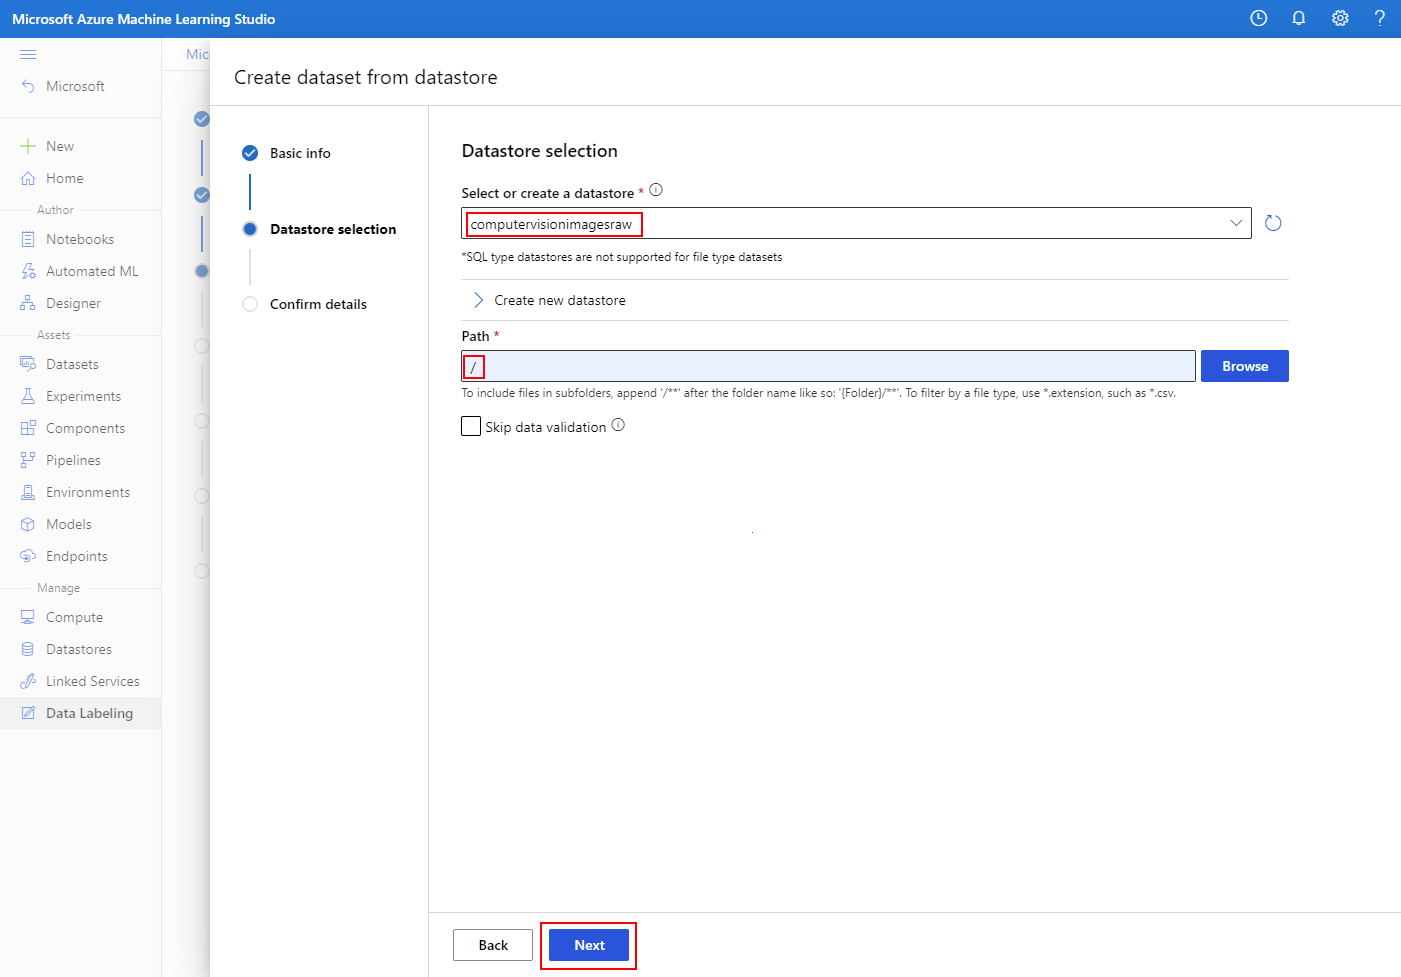
Under Datastore selection, choose the datastore name that you added previously, which contains the untagged image data. Here, you can also provide a wildcard path if you wish to pull only images from specified partitions. If you wish to pull all images from the container, enter / as the path and select Next.
Confirm details about your new dataset and select Create.

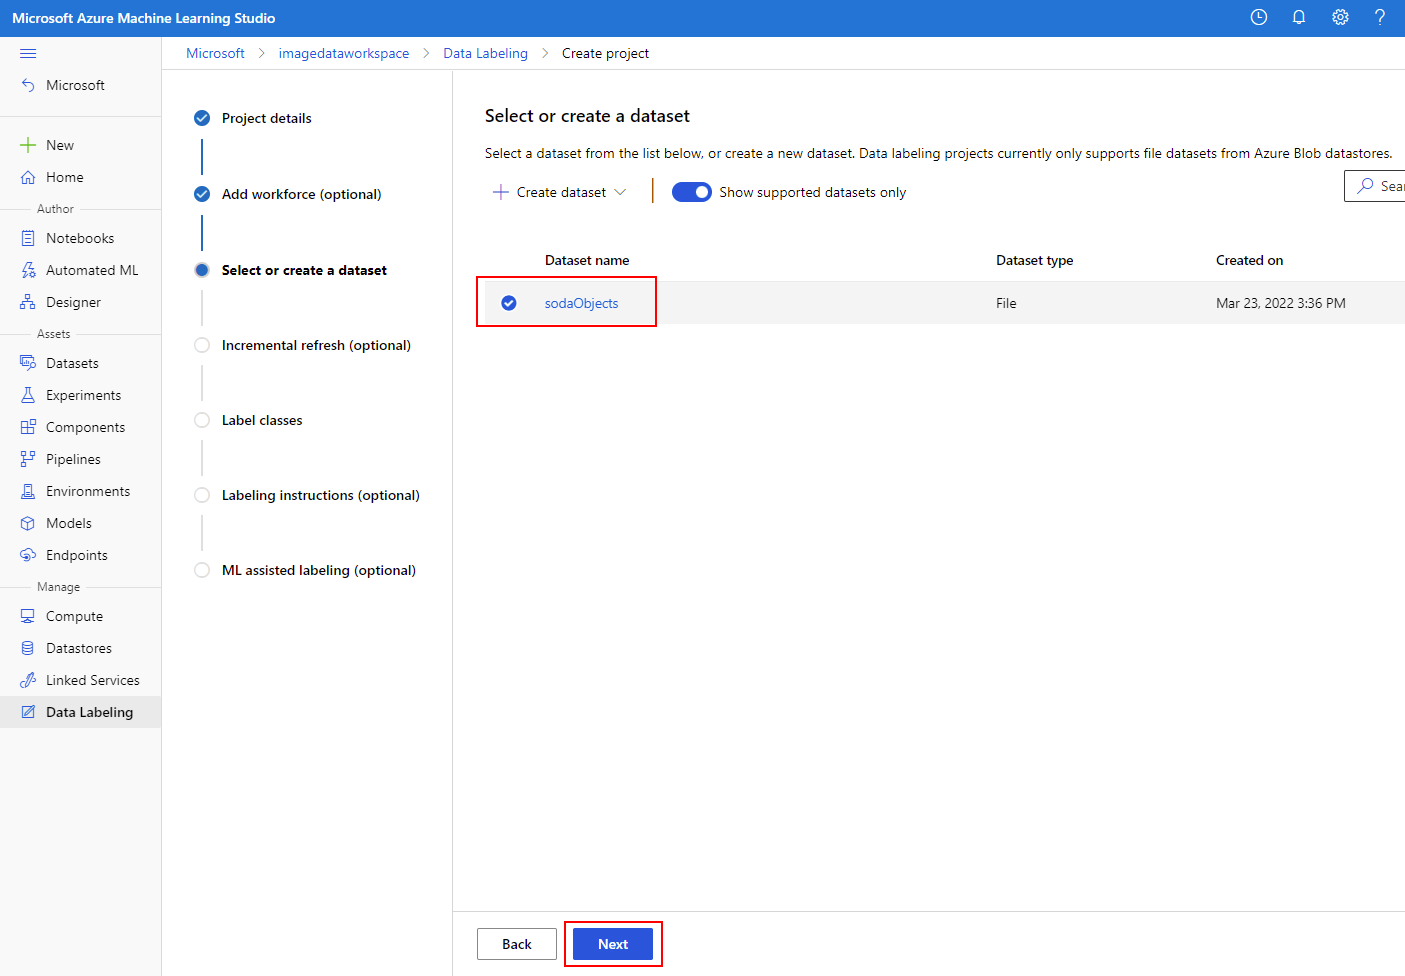
Choose the newly created dataset, then select Next.
You'll be prompted to Enable incremental refresh at regular intervals. This feature will automatically add newly captured images to your data labeling project. Enable this option as shown, then select Next.

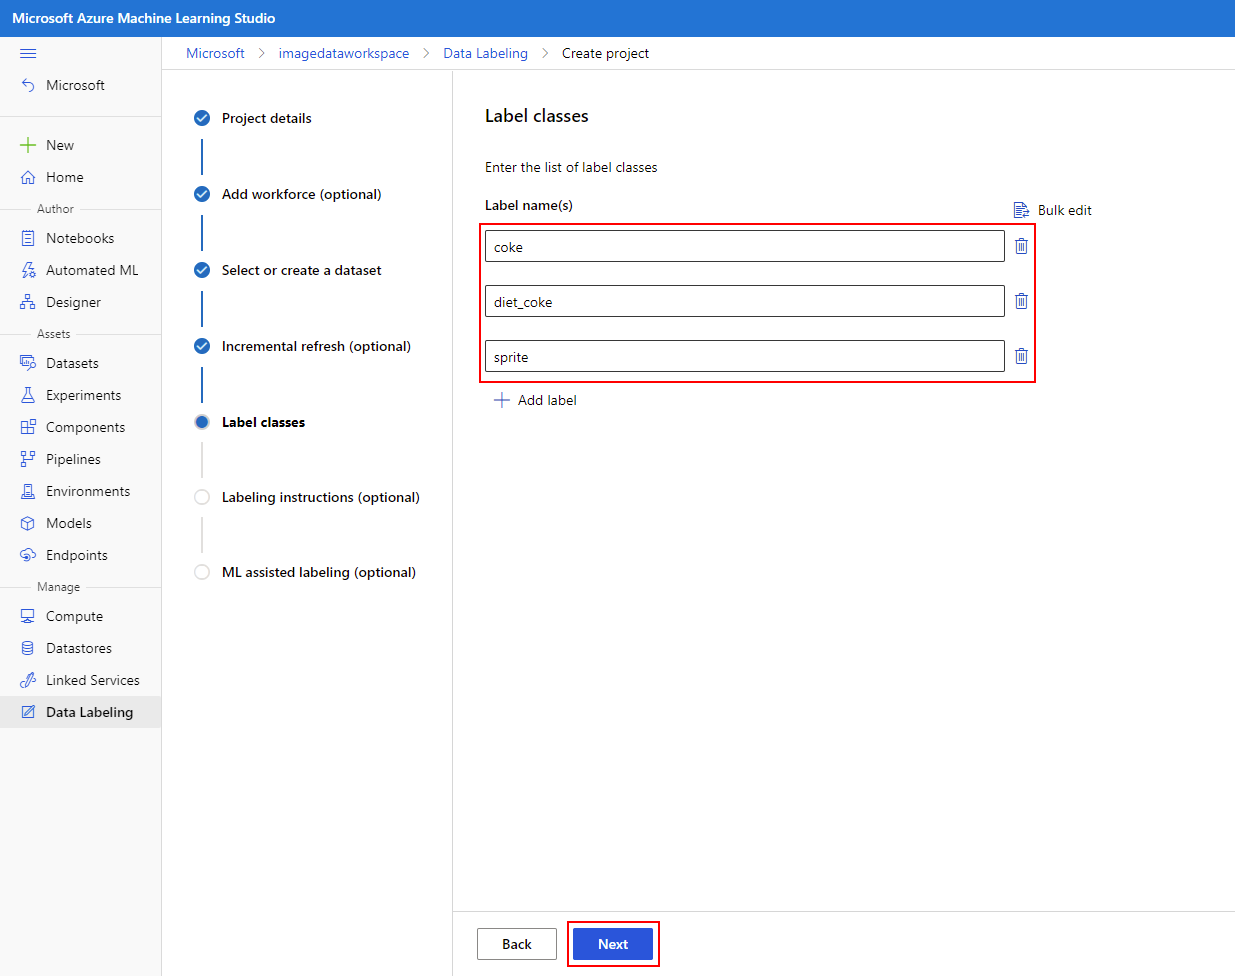
On the next panel, add label classes for all objects or defects you wish to detect - include positive and negative classes here.
You may optionally add labeling instructions in the following section, we'll leave this section empty and select Next.

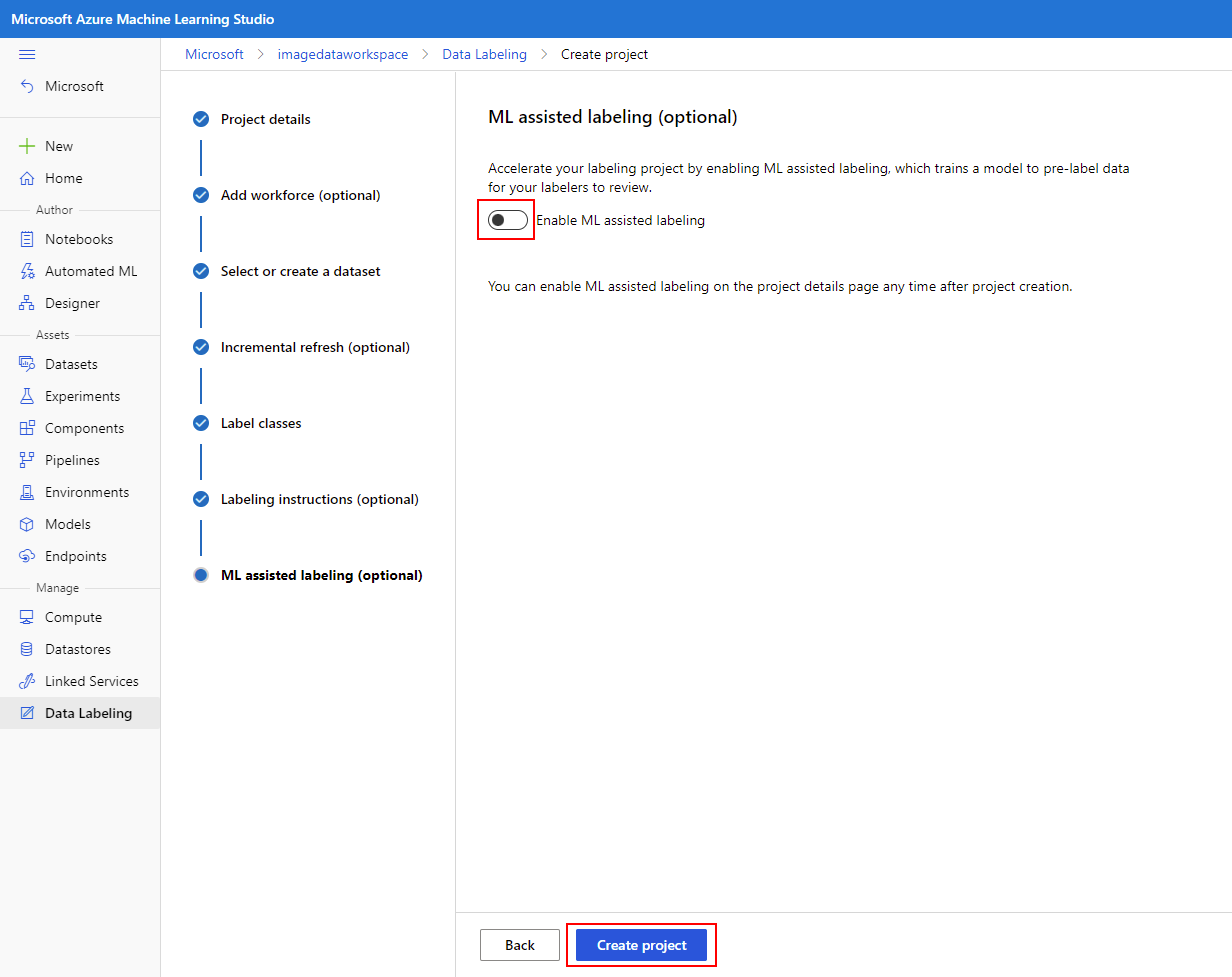
You can optionally use ML assisted labeling which will accelerate your data labeling process, particularly as more data is captured. For this Learning Module, we won’t be using this option. Disable the option as shown then select Create project.


Next unit: Label images with Azure Machine Learning data labeling tools
Having an issue? We can help!
- For issues related to this module, explore existing questions using the #azure training tag or Ask a question on Microsoft Q&A.
- For issues related to Certifications and Exams, post on Certifications Support Forums or visit our Credentials Help.