Lab - Create a new custom table and enable attachments
Read this first - before you start the lab!
Important
For this lab, do not sign in with your credentials. Use the following steps to sign in to your lab environment with the correct credentials.
- Select Launch VM mode in this unit.
- You'll see a PowerShell window and a Windows Command window appear. After about two to three minutes, they'll close, and Power Apps will open automatically. Wait for the Power Apps home screen.
- To see the lab instructions, select the Instructions tab on the lab side bar.
You can now begin your work on this lab.
Create a new custom table
This exercise shows you how to create a new custom table in Dataverse.
In your browser, go to https://make.powerapps.com, From the left navigation menu, select Tables. If you don't see the Tables on the left, you can select More, then in the flyout menu find and select Tables.
In the menu at the top, select the + New table dropdown and choose Set advanced properties.
Enter the following for Display name: PC Manufacturers
Select Save.
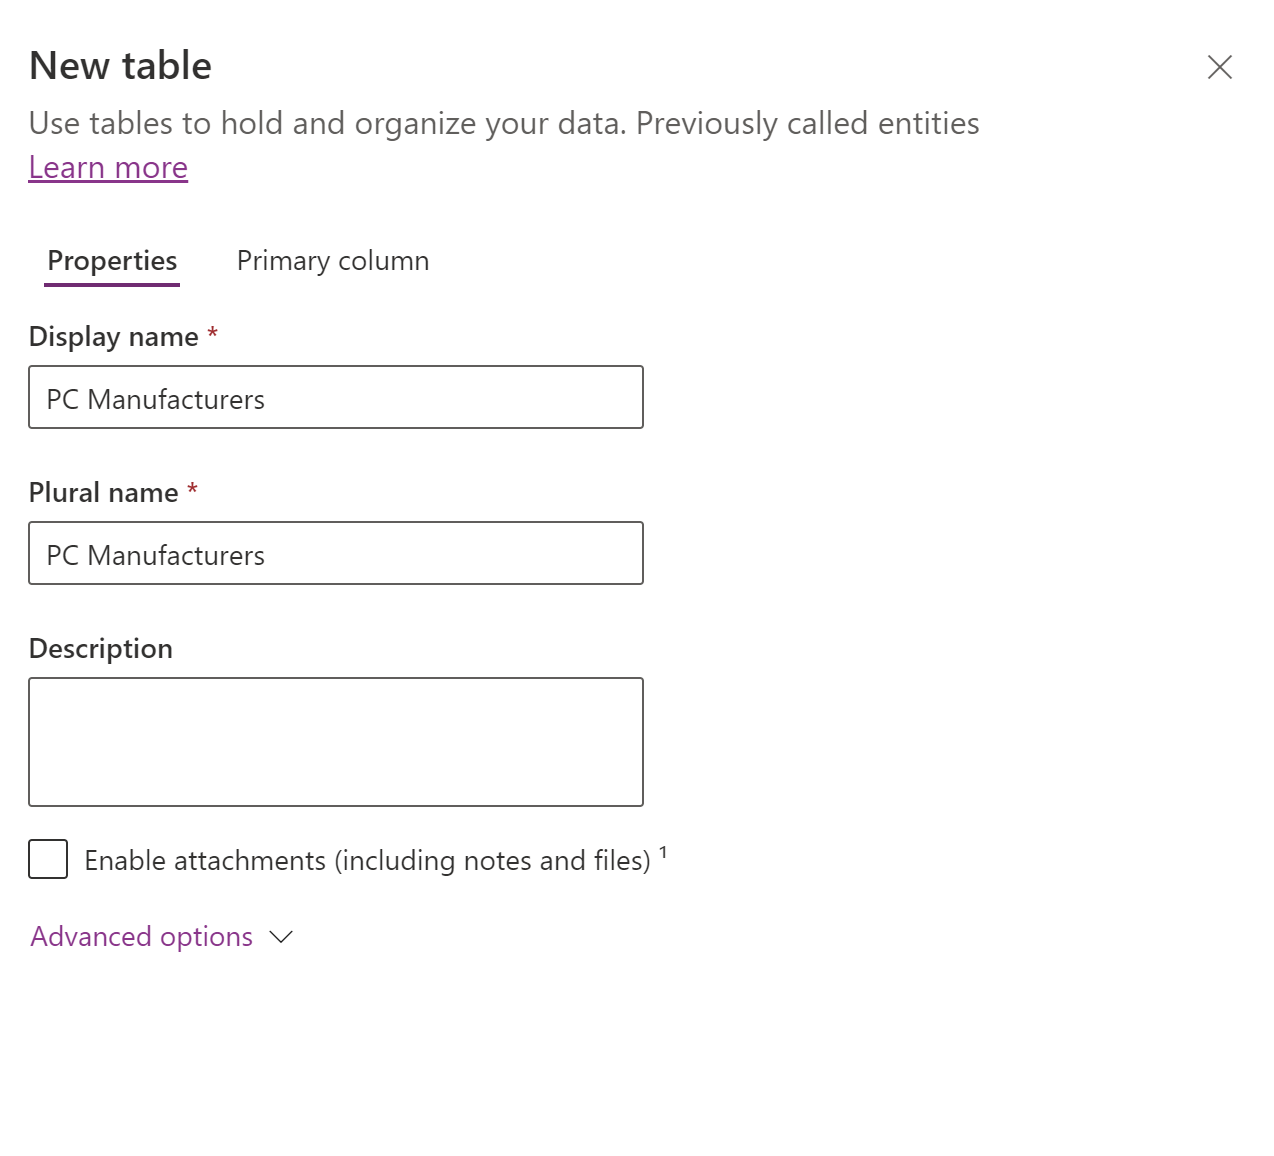
Enable attachments
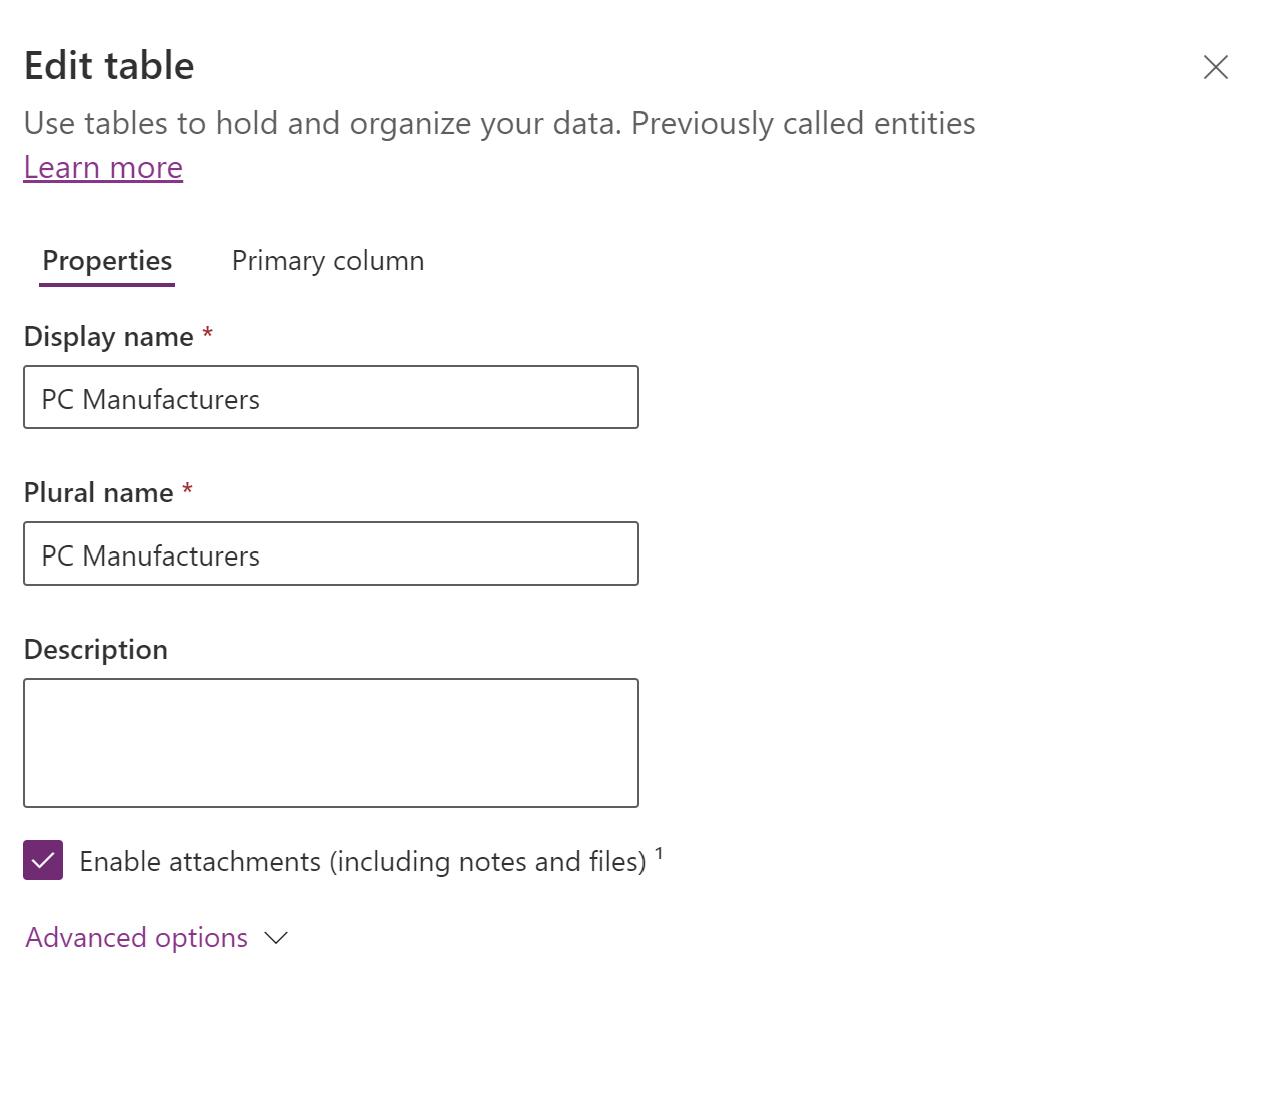
You should now see the new table PC Manufacturers, you'll also notice several more settings, options, and features available to you.
To enable attachments, select Properties, in the Table Properties section.
In the Edit table properties pane, select the Enable attachments (including notes and files) check box.
Select the Save button at the bottom to apply these changes to your table.
Now if you go back into your table properties again, by selecting Properties. You notice, the Enable attachments (including notes and files) option is greyed out and can't be undone.
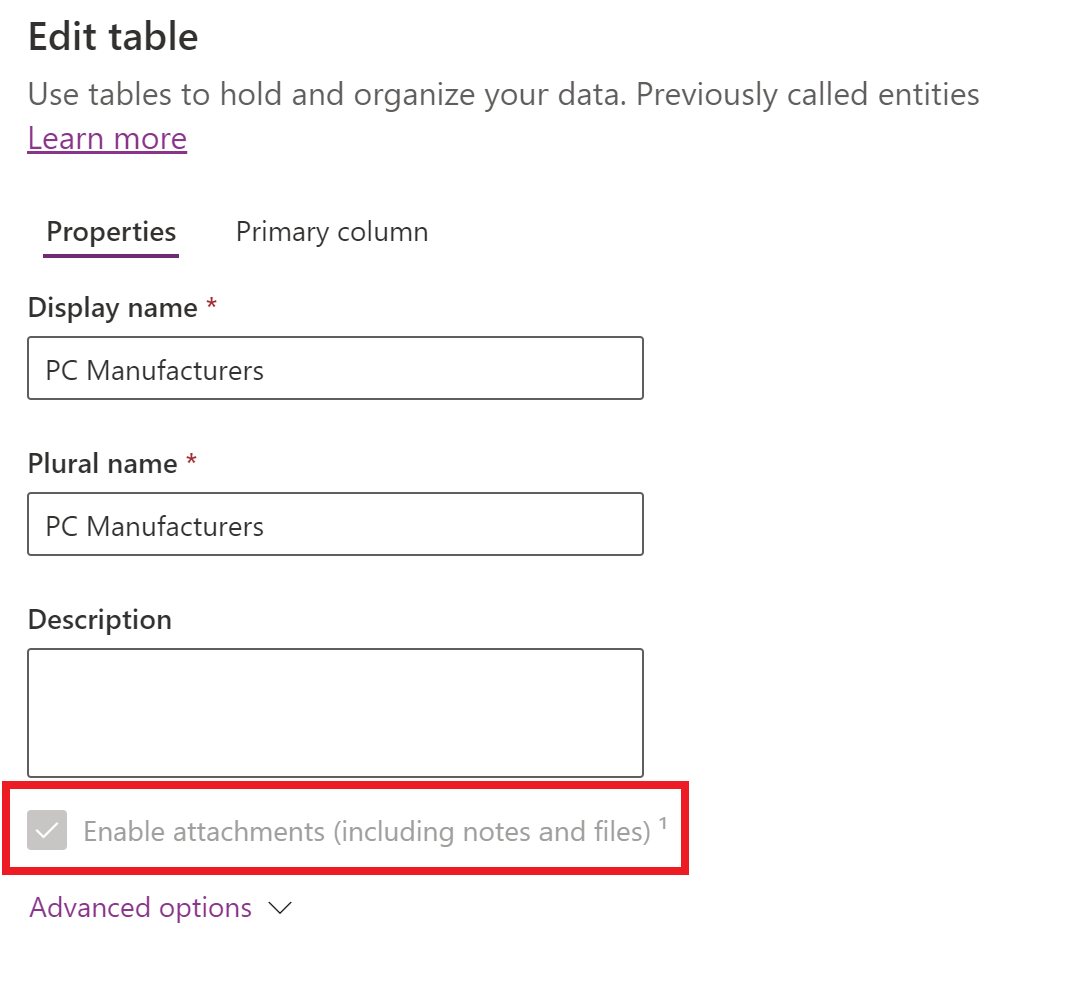
This is just something to keep in mind when working with tables and planning to enable attachments.