Create a Microsoft Defender for Cloud baseline
Microsoft Defender for Cloud provides unified security management and advanced threat protection for workloads that run in Azure, on-premises, and in other clouds. The following Defender for Cloud recommendations, if followed, will set various security policies on an Azure subscription. These policies define the set of controls that are recommended for your resources with an Azure subscription.
Microsoft Defender for Cloud security recommendations
The following sections describe the Microsoft Defender for Cloud recommendations that are in CIS Microsoft Azure Foundations Security Benchmark v. 1.3.0. Included with each recommendation are the basic steps to complete in the Azure portal. You should complete these steps for your own subscription and by using your own resources to validate each security recommendation. Keep in mind that Level 2 options might restrict some features or activity, so carefully consider which security options you decide to enforce.
Enable enhanced security features - Level 2
Microsoft Defender for Cloud is offered in two modes, Without enhanced security features (Free) and With enhanced security features. Enabling enhanced security extends the capabilities of the Free mode to workloads that run in private clouds and other public clouds. Enhanced security also provides unified security management and threat protection across your hybrid cloud workloads. This mode also adds advanced threat detection capabilities, such as:
- Built-in behavioral analytics and machine learning to identify attacks and zero-day exploits.
- Access and application controls to reduce exposure to network attacks and malware.
Microsoft Defender for Cloud with all enhanced security features offers threat detection provided with Microsoft Security Response Center and supports resources deployed in:
- Azure Virtual Machines
- Virtual machine scale sets
- Azure App Service
- Azure SQL Server
- Azure Storage
Sign in to the Azure portal. Search for and select Microsoft Defender for Cloud.
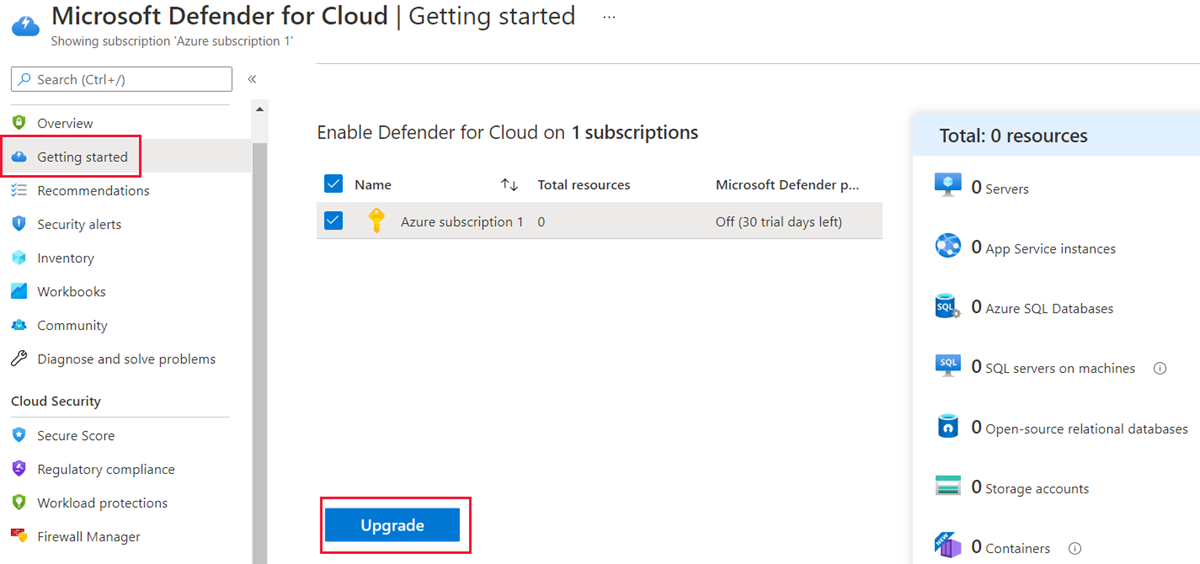
In the left menu under General, select Getting started.
Select the Upgrade tab, and then select the subscription to upgrade. The Resources pane shows the resources that will be protected and the billing cost per resource.
Select the Upgrade button.
View Microsoft Defender for Cloud built-in security policies
To see the Microsoft Defender for Cloud security policies for your Azure subscription:
Sign in to the Azure portal. Search for and select Microsoft Defender for Cloud.
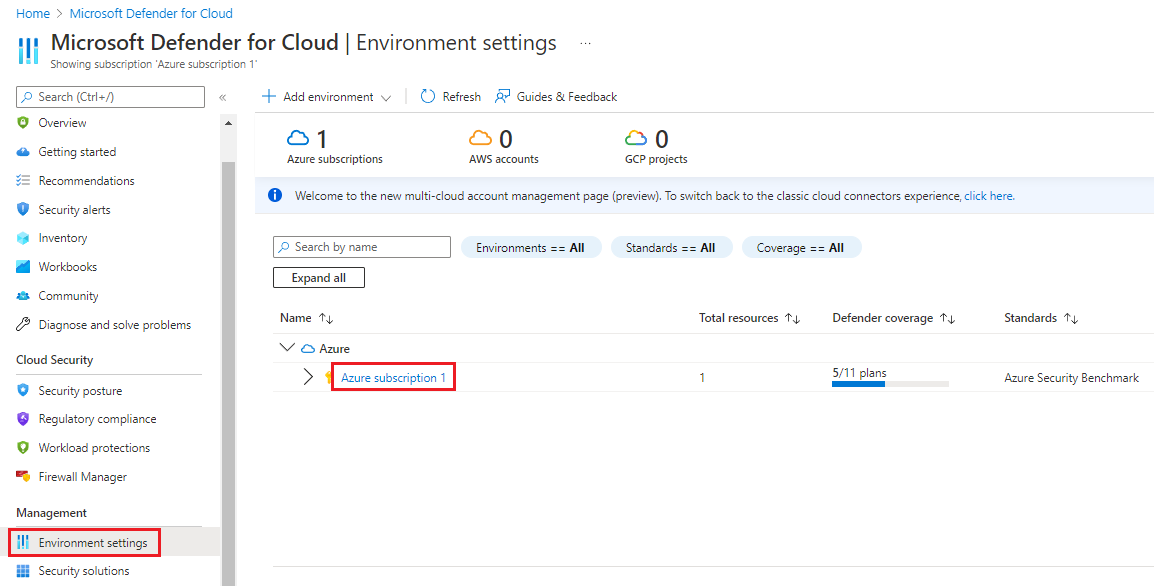
In the left menu under Management, select Environment settings.
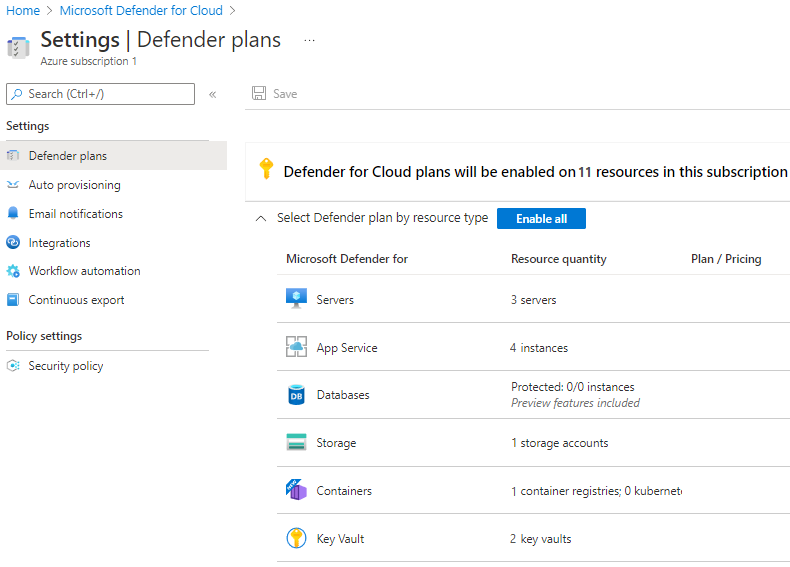
Select the subscription to open the Policy settings pane.
The enabled policies define the Microsoft Defender for Cloud recommendations, as shown in the following example:
Enable automatic provision of the Log Analytics agent - Level 1
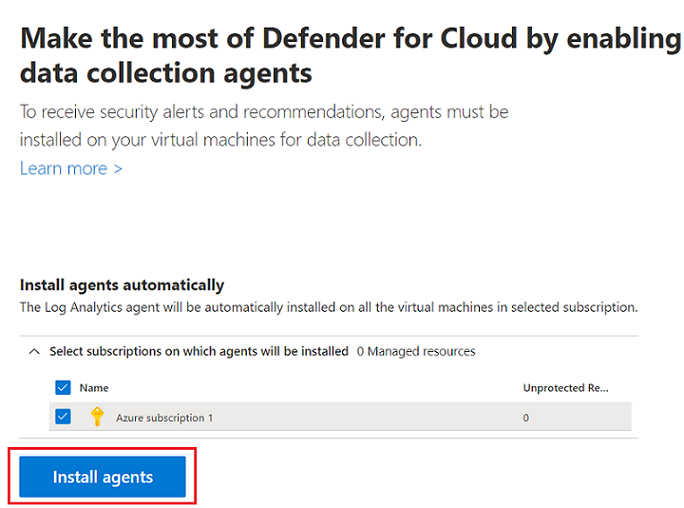
When you enable automatic provisioning, Defender for Cloud installs the Azure Log Analytics agent on all supported Azure VMs and on any new VMs you create. Automatic provisioning is strongly recommended.
Sign in to the Azure portal. Search for and select Microsoft Defender for Cloud.
In the left menu under General, select Getting started.
Select the Install agents tab, and then select the subscription to install agents on.
Select the Install agents button.
Enable System Updates - Level 1
Microsoft Defender for Cloud daily monitors Windows and Linux VMs and computers for missing operating system updates. Defender for Cloud retrieves a list of available security and critical updates from Windows Update or Windows Server Update Services (WSUS). Which updates are on the list depends on which service you configure on a Windows computer. Defender for Cloud also checks for the latest updates on Linux systems. If your VM or computer is missing a system update, Defender for Cloud recommends that you apply system updates.
Sign in to the Azure portal. Search for and select Microsoft Defender for Cloud.
In the left menu under Management, select Environment settings.
Select the subscription.
In the left menu, select Security policy.
Under Default initiative, select a subscription or management group.
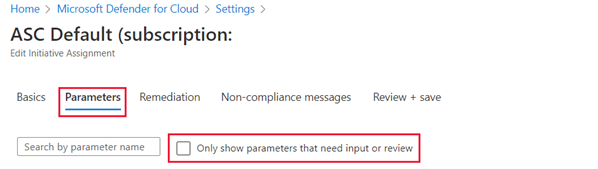
Select the Parameters tab.
Ensure that the Only show parameters that need input or review box is cleared.
Ensure that System updates should be installed on your machines is one of the policies listed.
In the following example, the Microsoft Defender for Cloud agent hasn't been deployed to a VM or physical machine, so the message AuditIfNotExists appears. AuditIfNotExists enables auditing on resources that match the if condition. If the resource isn't deployed, NotExists appears.
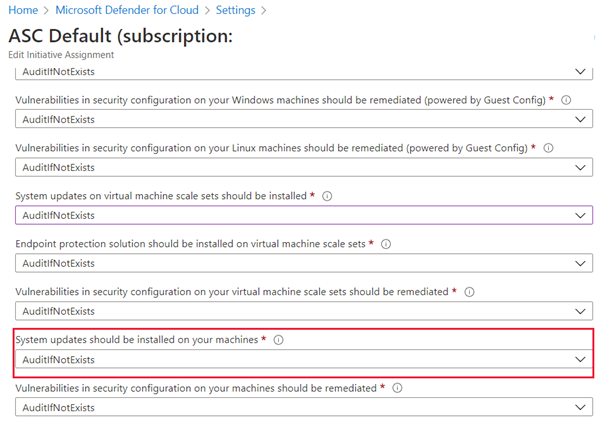
If System updates should be installed on your machines is enabled, Audit appears. If deployed but disabled, Disabled appears.
If you change any settings, select the Review + Save tab, and then select Save.
Enable Security Configurations - Level 1
Microsoft Defender for Cloud monitors security configurations by applying a set of more than 150 recommended rules for hardening the OS. These rules are related to firewalls, auditing, password policies, and more. If a machine is found to have a vulnerable configuration, Defender for Cloud generates a security recommendation.
Sign in to the Azure portal. Search for and select Microsoft Defender for Cloud.
In the left menu under Management, select Environment settings.
Select the subscription.
In the left menu, select Security policy.
Under Default initiative, select a subscription or management group.
Select the Parameters tab.
Ensure that Vulnerabilities in security configuration on your virtual machine scale sets should be remediated is one of the policies.
If you change any settings, select the Review + Save tab, and then select Save.
Note
All of the following policy categories that have a (*) in their title are on the Parameters tab. In some cases, there are several options in each category.
Enable endpoint protection (*) - Level 1
Endpoint protection is recommended for all VMs.
Enable disk encryption (*) - Level 1
Microsoft Defender for Cloud recommends that you use Azure Disk Encryption if you have Windows or Linux VM disks. Disk encryption lets you encrypt your Windows and Linux infrastructure as a service (IaaS) VM disks. Encryption is recommended for both the OS and the data volumes on your VM.
Enable Network Security Groups (*) - Level 1
Microsoft Defender for Cloud recommends that you enable a network security group (NSG). NSGs contain a list of Access Control List (ACL) rules that allow or deny network traffic to your VM instances in a virtual network. NSGs can be associated either with subnets or with individual VM instances within that subnet. When an NSG is associated with a subnet, the ACL rules apply to all the VM instances in that subnet. In addition, traffic to an individual VM can be restricted further by associating an NSG directly with that VM.
Enable a web application firewall (*) - Level 1
Microsoft Defender for Cloud might recommend that you add a web application firewall (WAF) from a Microsoft partner to secure your web applications.
Enable vulnerability assessment (*) - Level 1
The vulnerability assessment in Microsoft Defender for Cloud is part of the Defender for Cloud VM recommendations. If Defender for Cloud doesn't find a vulnerability assessment solution installed on your VM, it recommends that you install one. A partner agent, after being deployed, starts reporting vulnerability data to the partner's management platform. In turn, the partner's management platform provides vulnerability and health monitoring data back to Defender for Cloud.
Enable storage encryption (*) - Level 1
When storage encryption is enabled, any new data in Azure Blob Storage and Azure Files is encrypted.
Enable JIT network access (*) - Level 1
Just-in-time (JIT) network access can be used to lock down inbound traffic to your Azure VMs. JIT network access reduces exposure to attacks while providing easy access to connect to VMs when needed.
Enable adaptive application control (*) - Level 1
Adaptive application control is an intelligent, automated end-to-end approved application listing solution from Microsoft Defender for Cloud. It helps you control which applications can run on your Azure and non-Azure VMs (Windows and Linux), which, among other benefits, helps harden your VMs against malware. Defender for Cloud uses machine learning to analyze the applications running on your VMs. It helps you apply the specific approval rules by using adaptive application control intelligence. The capability greatly simplifies the process of configuring and maintaining approved application policies.
Enable SQL auditing and threat detection (*) - Level 1
Microsoft Defender for Cloud recommends that you turn on auditing and threat detection for all databases on your servers that run Azure SQL. Auditing and threat detection can help you maintain regulatory compliance, understand database activity, and gain insight into discrepancies and anomalies that might alert you to business concerns or suspected security violations.
Enable SQL encryption (*) - Level 1
Microsoft Defender for Cloud recommends that you enable Transparent Data Encryption (TDE) on SQL databases running in Azure. TDE protects your data and helps you meet compliance requirements by encrypting your database, associated backups, and transaction log files at rest. Enabling TDE doesn't require making changes to your applications.
Set security contact email and phone number - Level 1
Microsoft Defender for Cloud recommends that you provide security contact details for your Azure subscription. Microsoft uses this information to contact you if the Microsoft Security Response Center finds that your customer data has been accessed by an unauthorized party. The Microsoft Security Response Center performs select security monitoring of the Azure network and infrastructure and receives threat intelligence and abuse complaints from third parties.
Sign in to the Azure portal. Search for and select Cost Management + Billing. Depending on your subscriptions, you'll either see the Overview pane or the Billing scopes pane.
- If you see the Overview pane, continue to the next step.
- If you see the Billing scopes pane, select your subscription to go to the Overview pane.
In the Overview pane, in the left menu under Settings, select Properties.
Validate the contact information that appears. If you need to update the contact information, select the Update sold to link and enter the new information.
If you change any settings, select Save.

Enable Send me emails about alerts - Level 1
Microsoft Defender for Cloud recommends that you provide security contact details for your Azure subscription.
Sign in to the Azure portal. Search for and select Microsoft Defender for Cloud.
In the left menu under Management, select Environment settings.
Select the subscription.
In the left menu under Settings, select Email notifications.
In the All users with the following roles dropdown, select your role or, in Additional email addresses (separated by commas), enter your email address.
Select the Notify about alerts with the following severity checkbox, select an alert severity, and then select Save.

Enable Send email also to subscription owners - Level 1
Microsoft Defender for Cloud recommends that you provide security contact details for your Azure subscription.
In the Email notifications pane described in the preceding section, you can add more email addresses separated by commas.
If you change any settings, in the menu bar, select Save.