Exercise - Create a cloud-init script for use with Azure CycleCloud
When provisioning nodes for a cluster, you might want to be able to perform custom configuration tasks during the operating system boot process, before any scheduler-driven changes take effect. These tasks can include, for example, updating path environment variables, configuring Domain Name System (DNS) name resolution settings, or binding nodes to a Microsoft Entra Domain Services (AD DS) domain.
To implement this functionality, you decide to explore the use of cloud-init in Azure CycleCloud clusters and test it with a simple Bash script that modifies the content of a local file on each node. You intend to validate the outcome by connecting to cluster nodes and reviewing the content of the modified files.
Note
When authoring cloud-init scripts, you can use any scripting or configuration method that the operating system running on target nodes can recognize and process, including traditional shell scripting, Python, and YAML.
In this exercise, you'll perform the following tasks:
- Task 1: Configure SSH-based authentication to Azure CycleCloud cluster nodes
- Task 2: Add a cloud-init script to the cluster nodes
- Task 3: Verify the cloud-init functionality on the scheduler node
- Task 4: Verify the cloud-init functionality on the compute nodes
- Task 5: Clean up the exercise environment
Note
Ensure that you successfully completed the previous exercise before you start this exercise.
Task 1: Configure SSH-based authentication to Azure CycleCloud cluster nodes
To validate the cloud-init scripts' execution, you'll connect to cluster nodes with Azure CycleCloud CLI from Azure Cloud Shell. This connection relies on SSH key-based authentication, so you'll need to upload the private key corresponding to the public key distributed to cluster nodes to the Azure Cloud Shell home directory.
Navigate to the Azure portal, and when prompted, authenticate with a Microsoft account or a Microsoft Entra account that has the Contributor or Owner role in the Azure subscription you're using in this module.
From the Azure portal, open the Cloud Shell by selecting its icon in the toolbar next to the search box and ensure that you're running a Bash session.
In the Azure Cloud Shell pane, in the pane's toolbar, select the fourth icon displaying a page with a pair of vertical arrows pointing in the opposite directions. Then, in the drop-down menu, select Upload.
In the Open dialog box, navigate to the location of the .pem file containing the private key and select Open.
Run the following commands in Cloud Shell to move the uploaded .pem file to the correct location and configure necessary file-level permissions (replace the
<private_key.pem>placeholder with the name of the .pem file):mkdir -p ~/.ssh mv private_key.pem ~/.ssh chmod 600 ~/.ssh/cc-ssh-keys.pem
Task 2: Add a cloud-init script to the cluster nodes
The option to add scripts to the cluster nodes is available directly from the Azure CycleCloud graphical interface. You'll use it to assign the same cloud-init script to the scheduler and compute nodes and verify its functionality. The script adds an entry 10.10.10.10 cc.contoso.com to the /etc/hosts file.
If you're not yet connected to the Azure CycleCloud web application, open another browser window and navigate to the https://<IP_address> URL. If you're prompted, confirm that you want to proceed.
If you're prompted to authenticate, sign in by providing credentials of your Azure CycleCloud application user account with the Administrator role.
In the Azure CycleCloud graphical interface, navigate to the Clusters page. In the list of clusters, select the contoso-custom-slurm-lab-cluster entry, then select Edit.
In the Edit contoso-custom-slurm-lab-cluster pop-up window, select the Cloud-init entry, and on the scheduler tab in the Cloud-init configuration section, enter the following script:
#!/bin/bash
echo "10.10.10.10 www.contoso.com" >> /etc/hosts
In the same pop-up window, with the Cloud-init entry selected, select each of the remaining tabs (including cuda, hpc, and htc) and enter the same script. Select Save.
Task 3: Verify the cloud-init functionality on the scheduler node
To verify the cloud-init functionality on the scheduler node, you'll start the cluster. This will trigger provisioning of the scheduler node. After the node is running, you'll be able to connect to it from the Azure Cloud Shell and verify that the /etc/hosts file contains the entry 10.10.10.10 www.contoso.com.
In the browser window displaying the Azure CycleCloud web application, select the Start link on the contoso-custom-slurm-lab-cluster page. When prompted to confirm, select OK.
Note
If the cluster is already running, you'll need to terminate and restart it in order to apply the updated configuration, otherwise that configuration won't be visible in the subsequent steps.
In the list of nodes, select the Scheduler entry and monitor its status on the Details pane, waiting until it changes from Acquiring to Ready.
Note
This might take about three minutes.
On the Details pane, select Connect. In the Connect to node: scheduler pop-up window, in the Using the CycleCloud CLI section, select the entry containing the command allowing you to connect to the scheduler node and select Close:
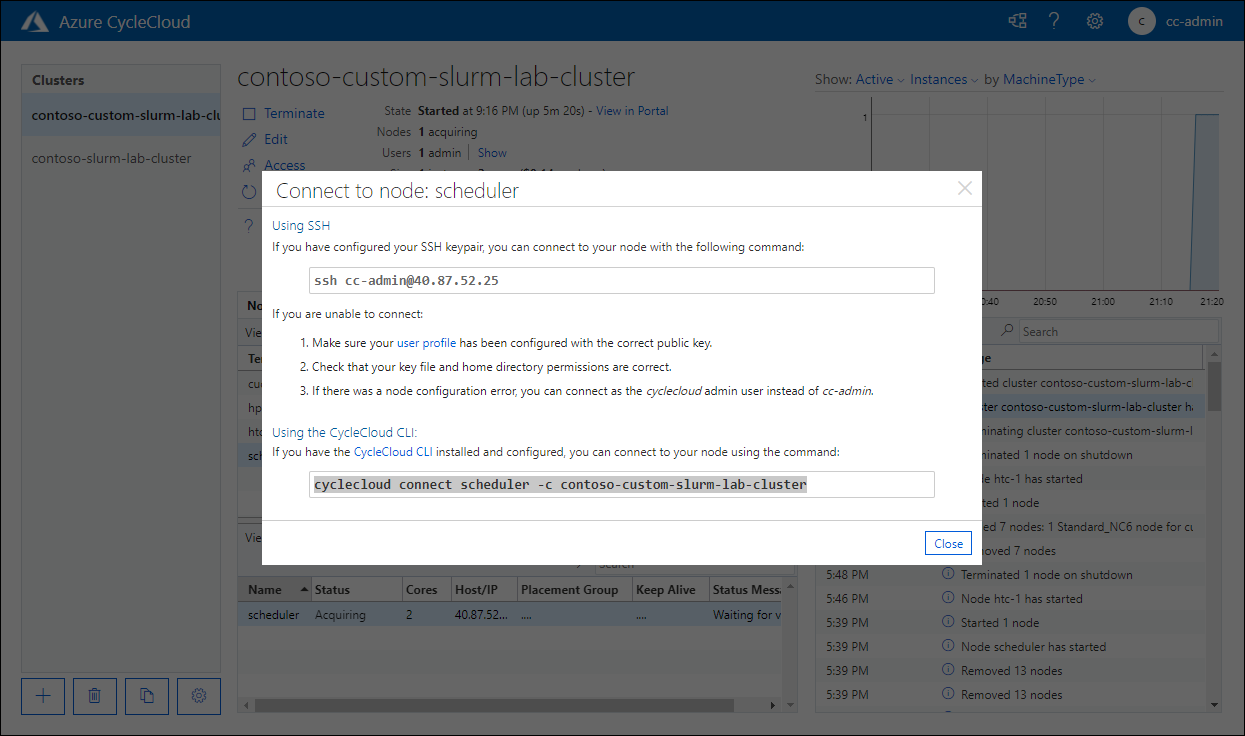
Note
The command should have the format
cyclecloud connect scheduler -c contoso-custom-slurm-lab-clusterSwitch to the web browser window with the Cloud Shell pane and run the command you copied in the previous step.
Note
The command should generate output in the following format:
m@Azure:~$ cyclecloud connect scheduler -c contoso-custom-slurm-lab-cluster
Connecting to cc-admin@40.87.52.25 (contoso-custom-slurm-lab-cluster scheduler) using SSH
[cc-admin@ip-0A000304 ~]$
When you're connected to the scheduler node, run the following command to verify that the /etc/hosts file contains the entry 10.10.10.10
www.contoso.com:grep "10.10.10.10 www.contoso.com" /etc/hostsNote
The command should generate output in the following format:
[cc-admin@ip-0A000304 ~]$ grep "10.10.10.10 www.contoso.com" /etc/hosts
10.10.10.10 www.contoso.com
Task 4: Verify the cloud-init functionality on the compute nodes
Now, you'll repeat the equivalent sequence of steps to verify cloud-init functionality on the compute nodes.
Important
Before you can apply the equivalent procedure to verify the cloud-init functionality on the compute nodes, you need to remove and reallocate the corresponding virtual machine scale set. This step is specific to the Slurm-based clusters because, in this case, the scheduler autoscale integration requires the Azure CycleCloud to prepopulate the compute nodes. As a result, the cloud-init configuration you applied previously in this exercise wouldn't affect already existing nodes.
While connected to the scheduler node, run the following commands in Cloud Shell to remove and reallocate the compute nodes in your Azure CycleCloud cluster and terminate the connection to the scheduler node:
sudo -i
cd /opt/cycle/jetpack/system/bootstrap/slurm
./cyclecloud_slurm.sh remove_nodes
./cyclecloud_slurm.sh scale
exit
exit
Note
You'll be presented with the messages stating Attempting to remove the following nodes followed by re-scaling cluster complete once this step completes.
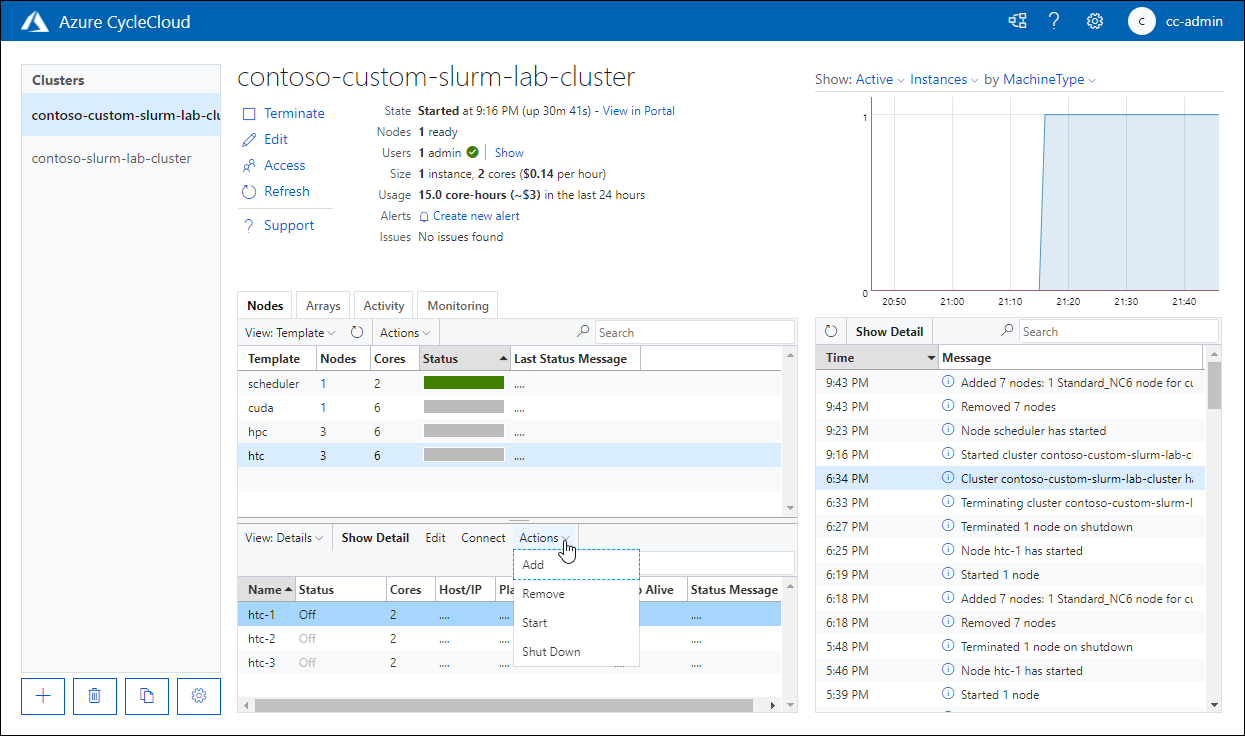
On your computer, switch to the web browser window displaying the contoso-custom-slurm-lab-cluster page of the Azure CycleCloud web application. On the Nodes tab, select the htc row, and on the Details pane, select the htc-1 entry, then select the Actions tab header. In the drop-down menu, select Start, and select OK when prompted to confirm.
On the Details pane, monitor the newly started node and wait until its status changes from Acquiring to Ready.
Note
This might take about three minutes.
On the Details pane, select Connect. In the Connect to node: htc-1 pop-up window, select the entry in the Using the CycleCloud CLI section containing the command allowing you to connect to the scheduler node and select Close:
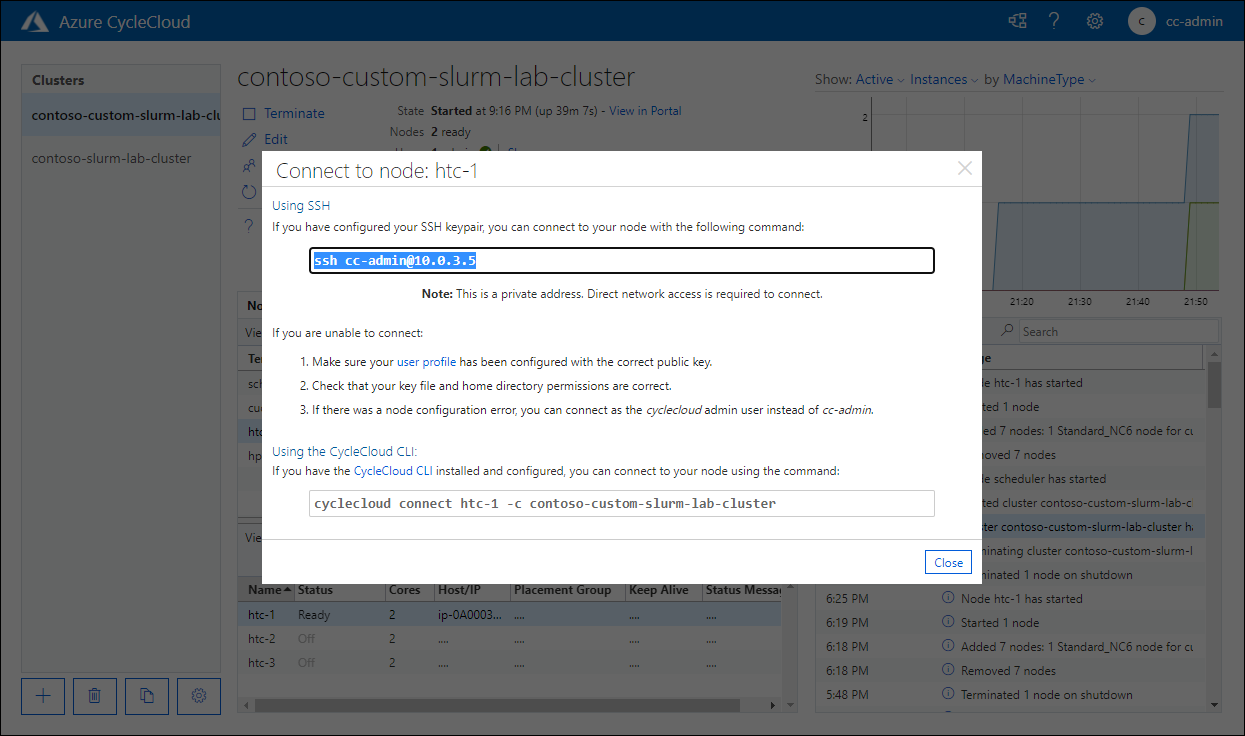
Note
The command should have the format
cyclecloud connect htc-1 -c contoso-custom-slurm-lab-cluster.Switch to the Cloud Shell pane and run the command you copied in the previous step.
Note
The command should generate output in the following format:
m@Azure:~$ cyclecloud connect htc-1 -c contoso-custom-slurm-lab-cluster
Connecting to cc-admin@10.0.3.5 (contoso-custom-slurm-lab-cluster htc-1) through SSH bastion at cc-admin@40.87.52.25
[cc-admin@ip-0A000305 ~]$
When you're connected to the htc-1 node, run the following command to verify that the /etc/hosts file contains the entry 10.10.10.10
www.contoso.com:cat /etc/hosts | grep "10.10.10.10 www.contoso.com"Note
You should delete all resources you deployed in this and previous exercises of this module once you reach this point. This allows you to avoid the charges associated with maintaining these resources against your Azure subscription.
Task 5: Clean up the lab environment
Your testing of the cluster customization by using Azure CycleCloud application is completed. To avoid unnecessary costs associated with the use of Azure resources, you'll now terminate the cluster and remove all of the resources you provisioned throughout the exercises of this module.
In the web browser displaying the graphical interface of the Azure CycleCloud web application, select the Terminate link on the contoso-custom-slurm-lab-cluster page, and when prompted to confirm, select OK.
Monitor the termination process.
Note
The process involves deprovisioning of the Azure VM serving the role of the cluster's head node. This might take about five minutes.
Note
To delete all other resources you provisioned in this lab, you'll delete the resource groups hosting the cluster resources.
In the Azure portal, navigate to the blade of the resource group hosting cluster resources, select the Delete resource group entry in the toolbar. In the Enter resource group name to confirm deletion text box, enter the name of the resource group and select Delete. Select Delete again to confirm deletion.
Note
There might be additional resources groups associated with your Slurm resources. To avoid extra charges, make sure to delete all of these Slurm-related resource groups and their resources.
Congratulations! You successfully completed the third and final exercise of this module. In this exercise, you explored the use of cloud-init in Azure CycleCloud clusters and tested it with a simple Bash script that modified the content of a local file on each node. You validated the outcome by connecting to cluster nodes and reviewing the content of the modified files. Afterwards, you terminated the cluster and deleted all cluster resources you used in this module to avoid any unnecessary costs.