Prepare your app deployment tools and resources
In this guided project, you configure Azure resources and other tools to demonstrate the suitability of Azure Container Apps as a deployment option.
Important
An Azure subscription and GitHub account are required for this guided project. For your Azure subscription, we recommend that you have the Owner, Azure account administrator, or Azure co-administrator role. The Contributor role does not provide the permissions required to complete all tasks in this guided project module.
Project overview
You work on a devops team for a technology company named Fabrikam Inc. The team is looking into using Azure Container Apps to run containerized cloud-native apps. Fabrikam has been using Azure Kubernetes Service (AKS) to run containers. Although the team is obtaining the benefits of running apps as containers and from using Kubernetes as a host, they've discovered that they're not using advanced AKS features. For example, they're not using the custom service mesh or autoscaling features. The team believes they can both simplify and improve efficiency of their devops implementation by switching to Azure Container Apps. The team believes that switching to Azure Container Apps will:
- Improve their ability to publish and run containerized apps at scale.
- Reduce the complexity of their current devops implementation.
- Save resources by using scale-to-zero and built-in autoscaling capabilities.
You have been tasked with developing a proof-of-concept solution. The solution must demonstrate the team's ability to:
- Configure a secure connection between Azure Container Registry and Azure Container Apps.
- Create and configure a container app in Azure Container Apps.
- Configure continuous integration by using Azure Pipelines.
- Scale a deployed app in Azure Container Apps.
- Manage revisions in Azure Container Apps.
Your goal for this module is to implement a solution that demonstrates the deployment of cloud-native apps using Azure Container Apps. To achieve this goal, you complete the following activities:
- Set up the host environment and deployment resources.
- Configure Azure Container Registry for a secure connection with Azure Container Apps.
- Create and configure a container app in Azure Container Apps.
- Configure continuous integration using an Azure pipeline.
- Configure traffic-splitting and revision management.
Setup
To set up the host environment and deployment resources, you complete the following tasks:
Configure host environment tools.
- Install Docker Desktop.
- Install Visual Studio Code with Docker and Azure App Service extensions.
- Install Azure CLI with
containerappextension. - Install Windows PowerShell.
Configure Azure resources that support the container apps solution.
- Configure a Resource Group.
- Configure a Virtual Network and subnets.
- Configure Service Bus.
- Configure Azure Container Registry.
Configure app and deployment resources that support the container apps solution.
- Create a WebAPI app and publish to a GitHub repository.
- Create Docker image and push to Azure Container Registry.
- Configure an Azure DevOps project and starter pipeline.
- Deploy a self-hosted Windows agent.
Install Docker Desktop
Complete the following steps to install Docker Desktop.
Open a browser window, and then navigate to the Docker Desktop install page: https://docs.docker.com/desktop/install/windows-install/
Links to instructions for Mac and Linux installs are available on this page.
Ensure that you're working on a computer that meets system requirements.
Follow the online instructions to install Docker Desktop.
Install the .NET Software Development Kit
Complete the following steps to install the .NET Software Development Kit (SDK).
Open a browser window, and then navigate to the .NET download page: https://dotnet.microsoft.com/download
On the Download .NET page, select the latest Long Term Support (LTS) version of the .NET SDK.
Wait for the installer file to finish downloading, and then run the .NET SDK installer file.
On a Windows PC, you can find your Downloads folder using File Explorer. Double-click the installation file to begin the installation process.
On the .NET SDK Installer window, select Install.
Install Visual Studio Code with Docker and Azure App Service extensions
Complete the following steps to install Visual Studio Code with Docker and Azure App Service extensions.
Open a browser window, and then navigate to: https://code.visualstudio.com.
In the browser window, select Download for Windows.
Note
The Download page for Visual Studio Code automatically detects your operating system. It displays the version to download for your operating system, such as Linux, macOS, or Windows.
Wait for the installer file to finish downloading, and then use a file explorer application to navigate to your computer’s downloads folder.
In your file explorer application, select and run the Visual Studio Code installer file.
Note
You can install Visual Studio Code using either the User Installer or System Installer. The User Installer installs Visual Studio Code just for the current user, while the System Installer installs Visual Studio Code for all users. The User Installer is the recommended option for most users.
Select I accept the license agreement, and then continue following the online instructions to complete the installation.
Accept the default options during the remainder of the installation.
Ensure that you have Visual Studio Code open.
On the Activity bar, select Extensions.
In the Search Extensions in Marketplace textbox, enter C#
Entering "C#" filters the list of extensions to show only the extensions that have something to do with C# coding.
In the filtered list of available extensions, select the extension labeled "C# Dev Kit - Official C# extension from Microsoft" that's published by Microsoft.
To install the extension, select Install.
Wait for the installation to complete.
On the EXTENSIONS view, replace C# with docker.
In the filtered list of available extensions, select the extension labeled Docker that's published by Microsoft.
To install the extension, select Install.
Wait for the installation to complete.
On the EXTENSIONS view, replace docker with azure app service.
In the filtered list of available extensions, select the extension labeled Azure App Service that's published by Microsoft.
To install the extension, select Install.
Wait for the installation to complete.
Close Visual Studio Code.
Install Azure CLI and the containerapp extension
Complete the following steps install Azure CLI and the containerapp extension.
Open a browser window, and then navigate to: /cli/azure/install-azure-cli.
You can use any browser, such as the Microsoft Edge browser or the Chrome browser.
In the browser window, follow the instructions for installing/updating Azure CLI for your computer's operating system.
The current version of the Azure CLI is 2.65.0. For information about the latest release, see the release notes. To find your installed version and see if you need to update, run
az version. You can runaz upgradeto install the latest version.Open a command line or terminal application, such as Windows Command Prompt.
Sign in to Azure using the
az logincommand.Follow the prompts to complete the authentication process.
Install the Azure Container Apps extension using the
az extension add --name containerapp --upgradecommand.
Install Microsoft PowerShell
Complete the following steps to install Microsoft PowerShell.
Open a browser window, and then navigate to: /powershell/scripting/install/installing-powershell.
In the browser window, follow the instructions for installing/updating PowerShell for your computer's operating system.
Configure a Resource Group for your Azure resources
Complete the following steps to configure a resource group for your Azure resources.
Open a browser window, and then navigate to the Azure portal: https://portal.azure.com/
Ensure that your Azure account has permission to create resources and assign RBAC permissions. Check the RBAC role(s) assigned to your account before you continue.
The Contributor role isn't able to assign Azure RBAC permissions. We recommend using an account that has been assigned the Owner, Azure account administrator, or Azure co-administrator role for your Azure subscription. Other role combinations could provide sufficient access to complete this guided project module but have not been tested.
On the top search bar of the Azure portal, in the Search textbox, enter resource group
In the search results, select Resource groups, and then select + Create.
On the Basics tab, configure the resource group as follows:
Subscription: Specify the Azure subscription that you're using to complete the guided project.
Resource group: Enter RG1
Region: Select Central US.
Select Review + create.
Once validation has passed, select Create.
Configure a Virtual Network and subnets
Complete the following steps to configure a Virtual Network and subnets.
Ensure that you have your Azure portal open in a browser window.
On the top search bar of the Azure portal, in the Search textbox, enter virtual network
In the search results, select Virtual networks.
Select Create virtual network.
On the Basics tab, configure your virtual network as follows:
- Subscription: Ensure that the Azure subscription that you're using for this guided project is selected.
- Resource group name: Select RG1
- Virtual network name: Enter VNET1
- Region: Ensure that Central US is selected.
Select the IP addresses tab.
On the IP addresses tab, under Subnets, select default.
On the Edit subnet page, configure the subnet as follows:
- Name: Enter
PESubnet - Starting address: Ensure that 10.0.0.0 is specified.
- Subnet size: Ensure that /24 (256 addresses) is specified.
- Name: Enter
Select Save.
On the IP addresses tab, select + Add a subnet.
On the Add a subnet page, configure the subnet as follows:
- Name: Enter
ACASubnet - Starting address: Ensure that 10.0.4.0 is specified.
- Subnet size: Ensure that /23 (512 addresses) is specified.
- Name: Enter
Select Add.
Select Review + create.
Once validation has passed, select Create.
Wait for the deployment to complete.
Configure Service Bus
Complete the following steps to configure a Service Bus instance.
Ensure that you have your Azure portal open in a browser window.
On the top search bar of the Azure portal, in the Search textbox, enter service bus
In the search results, select Service Bus.
Select Create service bus namespace.
On the Basics tab, configure your Service bus namespace as follows:
- Subscription: Ensure that the Azure subscription that you're using for this guided project is selected.
- Resource group name: Select RG1
- Namespace name: Enter sb-az2003- followed by your name or initials. For example: sb-az2003-cah.
- Location: Ensure that Central US is selected.
- Pricing tier: Select Basic.
Select Review + create.
Once the Validation succeeded message appears, select Create.
Wait for the deployment to complete.
Configure Azure Container Registry
Complete the following steps to configure a Container Registry instance.
Ensure that you have your Azure portal open in a browser window.
On the top search bar of the Azure portal, in the Search textbox, enter container registry
In the search results, select Container registries.
On the Container registries page, select Create container registry or + Create.
On the Basics tab of the Create container registry page, specify the following information:
Note
The name of your Registry must be unique. Also, the Premium tier is required for private link with private endpoints.
- Subscription: Ensure that the Azure subscription that you're using for this guided project is selected.
- Resource group: Select RG1.
- Registry name: Enter acraz2003 followed by your initials and date. For example: acraz2003cah25oct
- Location: Ensure that Central US is selected.
- SKU: Select Premium.
Important
There is a daily fee associated with the Premium tier. You are responsible for the cost of the Azure resources that you use during this guided project. For more information, see the Azure Container Registry pricing page: https://azure.microsoft.com/pricing/details/container-registry/
Select Review + create.
Select Create.
After the deployment has completed, open the deployed resource.
On the left-side menu, under Settings, select Networking.
On the Networking page, on the Public access tab, ensure that All networks is selected.
On the left-side menu, under Settings, select Properties.
On the Properties page, select Admin user, and then select Save.
Create a WebAPI app and publish to a GitHub repository
Complete the following steps to create a WebAPI app and publish to a GitHub repository.
Open Visual Studio Code.
On the File menu, select Open Folder.
Create a new folder named AZ2003 in a location that is easy to find.
For example, create a folder named AZ2003 on the Windows Desktop.
On the Terminal menu, select New Terminal.
At the terminal command prompt, to create a new ASP.NET Web API project, enter the following command:
dotnet new webapi --no-httpsAt the terminal command prompt, run the following dotnet CLI command:
dotnet buildOn the View menu, select Command Palette, and then run the following command: .NET: Generate Assets for Build and Debug.
If the command generates an error message, select OK, and then run the command again.
In the root project folder, create a .gitignore file that contains the following information:
[Bb]in/
[Oo]bj/
On the File menu, select Save All.
Open the Source Control view.
Select Publish to GitHub.
If prompted, to enable the GitHub extension to sign in using GitHub, select Allow, and then provide authorization in GitHub.
In Visual Studio Code, select Publish to GitHub public repository.
Ensure that the bin and obj folders are not included in the repository.
Create Docker image and push to Azure Container Registry
Complete the following steps to create a Docker image and push the image to your Azure Container Registry.
Ensure that you have your AZ2003 code project open in Visual Studio Code.
To create a Dockerfile, run the following command in the Command Palette: Docker: Add Docker Files to Workspace.
When prompted, specify the following information:
- Application Platform: .NET ASP.NET Core.
- Operating System: Linux.
- Ports: 5000.
- Docker Compose files: No.
At a terminal command prompt, run the following docker CLI command:
docker build --tag aspnetcorecontainer:latest .The syntax for the build command is:
docker build --tag <image name>:<image tag> .This command builds a container image that is hosted by Docker and accessible using the Docker extension for VS Code.
Wait for the Docker Build command to complete.
Open the Visual Studio Code Command Palette, and then run the following command: Docker Images: Push.
When the command runs, enter the following information:
Select the docker image name that you created:
aspnetcorecontainerSelect the image tag that you created:
latest
If you see a message stating that no registry is connected, select Connect Registry, and then enter the following information:
Registry provider: Select Azure. Follow the online instructions to verify your Azure account if needed.
Azure subscription: Select the Azure Subscription that you're using for this guided project.
Select your Azure Container Registry resource. For example: acraz2003cah25oct
An image tag is generated. For example:
acraz2003cah12oct.azurecr.io/aspnetcorecontainer:latestTo push the image to your Container Registry, press Enter.
The following Docker command is executed:
docker image push acraz2003cah12oct.azurecr.io/aspnetcorecontainer:latestWait for the image to be pushed to your Azure Container Registry.
Open the Source Control view, and then Commit and Sync your file updates.
Configure Azure DevOps and a starter Pipeline
Complete the following steps to configure Azure DevOps and a starter Pipeline:
Open the Azure portal.
On the top search bar, in the Search textbox, enter devops
In the search results, select Azure DevOps organizations.
Select My Azure DevOps Organizations.
If you haven’t created an organization, select Free or Create new organization.
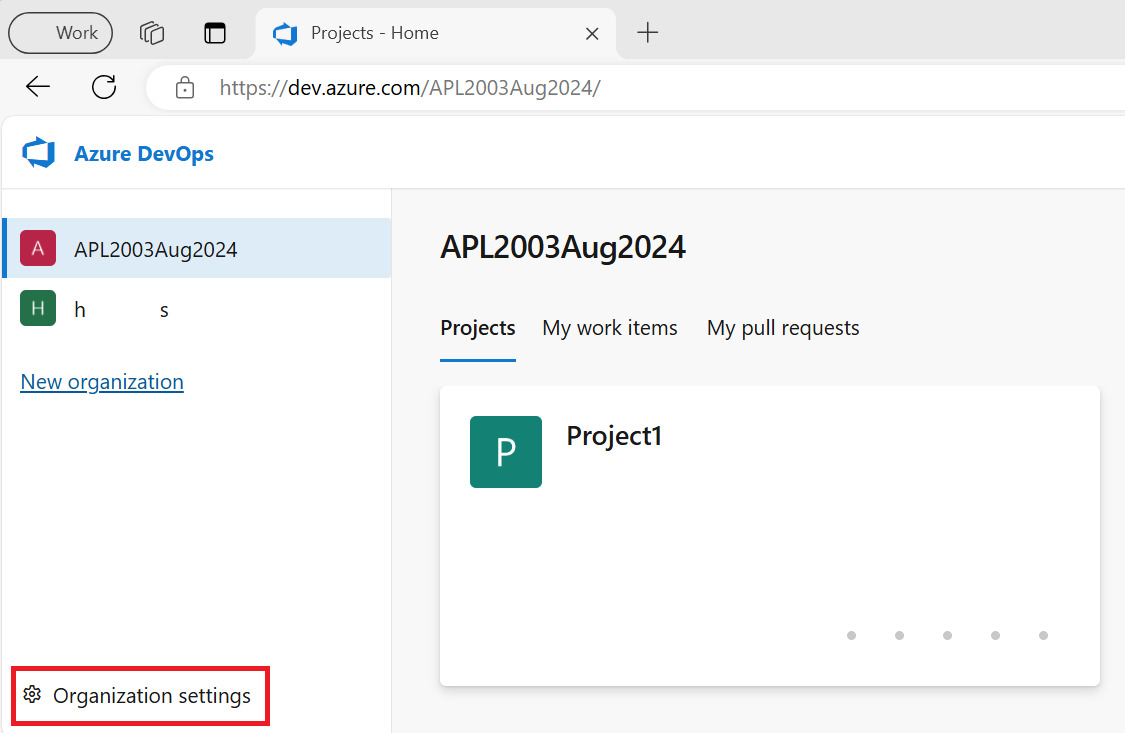
On the home page of your organization, in the lower-left corner of the page, select Organization settings.
On the left side menu under Security, select Policies.
Ensure that the Allow public projects policy is set to On.
Return to the home page of your organization.
To create a new project, select New project.
If you created a new organization, you may see the Create a project to get started page.
On the Create new project page, specify the following information:
- Project name: Project1
- Description: AZ-2003 project
- Visibility: Public
On the Create new project page, select Create project.
On the left-side menu, select Repos.
Under Import a repository, select Import.
On the Import a Git repository page, enter the URL for the GitHub repository you created for your code project, and then select Import.
Your repository URL should be similar to the following example:
https://github.com/<your account>/AZ2003On the left-side menu, select Pipelines.
Select Create Pipeline.
Select Azure Repos Git.
On the Select a repository page, select Project1.
Select Starter pipeline.
Under Save and Run, select Save, and then select Save.
To rename the pipeline to
Pipeline1, complete the following steps:On the left-side menu, select Pipelines.
To the right of the Project1 pipeline, select More options, and then select Rename/move.
In the Rename/move pipeline dialog, under Name, enter Pipeline1 and then select Save.
Note
Don't run the pipeline now. You will configure this pipeline during the project exercises.
Deploy a self-hosted Windows agent
For an Azure Pipeline to build and deploy Windows, Azure, and other Visual Studio solutions you need at least one Windows agent in the host environment.
Complete the following steps to deploy a self-hosted Windows agent:
Ensure that you're signed-in to Azure DevOps with the user account you're using for your Azure DevOps organization.
For example:
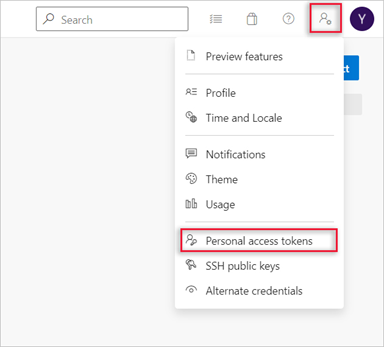
https://dev.azure.com/{your organization}From the home page of your organization, open your user settings, and then select Personal access tokens.
To create a personal access token, select + New Token.
Under Name, enter AZ2003.
At the bottom of the Create a new personal access token window, to see the complete list of scopes, select Show all scopes.
For the custom designed scope, select Agent Pools (Read & manage) and Deployment Groups (Read & manage).
Ensure that all the other boxes are cleared.
Select Create.
On the Success page, to copy the token, select Copy to clipboard.
You use this token when you configure the agent.
Ensure that you're signed into Azure DevOps as the Azure DevOps organization owner.
Select your DevOps organization, and then select Organization settings.
On the left side menu under Pipelines, select Agent pools.
If the Get the agent dialog box opens, skip to the next step.
If a list of Agent pools is displayed, complete the following steps:
To select the default pool, select Default.
If the Default pool doesn't exist, select Add pool, and then enter the following information:
Under Pool type, select Self-hosted.
Under Name, enter default
Select Create.
To open the pool that you just created, select default.
Select Agents, and then select New agent.
On the Get the agent dialog box, complete the following steps:
Select the Windows tab.
On the left pane, select the processor architecture of the installed Windows OS version on your machine.
The x64 agent version is intended for 64-bit Windows, whereas the x86 version is intended for 32-bit Windows.
On the right pane, select Download.
Follow the instructions to download the agent.
Use File Explorer to create the following folder location for the agent:
C:\agentsUnpack the agent zip file into the directory you created.
Open PowerShell as an Administrator.
Navigate to the "C:\agents" directory, and then enter the following PowerShell command:
.\configRespond to the configuration prompts as follows:
- Enter server URL >: enter the URL for your DevOps organization. Such as:
https://dev.azure.com/<your organization> - Enter authentication type (press enter for PAT) >: press Enter.
- Enter personal access token >: Paste-in the personal access token that you copied to the clipboard earlier.
- Enter agent pool (press enter for default) >: press Enter.
- Enter agent name (press enter for YOUR-PC-NAME) > enter az2003-agent
- Enter work folder (press enter for _work) >: press Enter.
- Enter run agent as service? (Y/N) (press enter for N) >: enter Y
- Enter enable SERVICE_SID_TYPE_UNRESTRICTED for agent service (Y/N) (press enter for N) >: enter Y
- Enter User account to use for the service (press enter for NT AUTHORITY\NETWORK SERVICE) >: press Enter.
- Enter whether to prevent service starting immediately after configuration is finished? (Y/N) (press enter for N) >: press Enter.
A message informing you that the agent started successfully is displayed.
For extra help, see the following documentation: /azure/devops/pipelines/agents/windows-agent
- Enter server URL >: enter the URL for your DevOps organization. Such as:
You're now ready to begin the Guided project exercises. Good luck!