Exercise - Prepare tables for distribution
Before you can migrate a single-node database to a multi-node distributed cluster, you must prepare the tables in the database for distribution. In this exercise, you provision a single-node Azure Cosmos DB for PostgreSQL database, create and populate several tables, and then prepare the tables for migration to a multi-node distributed database.
Provision an Azure Cosmos DB for PostgreSQL database
To ensure that you can modify the Tailspin Toys database and to measure the impact that those updates might have on the multitenant SaaS application, you want to first set up a development database to test the migration from a single-node cluster to a multi-node cluster. You start by provisioning an Azure Cosmos DB for PostgreSQL single-node database that mimics the configuration of the Tailspin Toys current production database. The selected node compute and storage sizes allow you to scale the database horizontally without downtime.
In a web browser, go to the Azure portal.
Select Create a resource > Databases > Azure Cosmos DB > Create. You can also use the search box to find the resource.
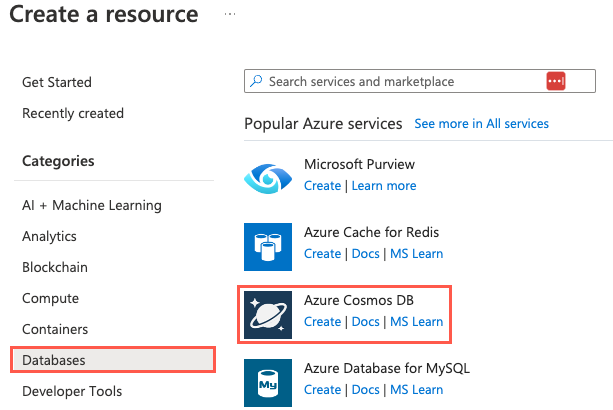
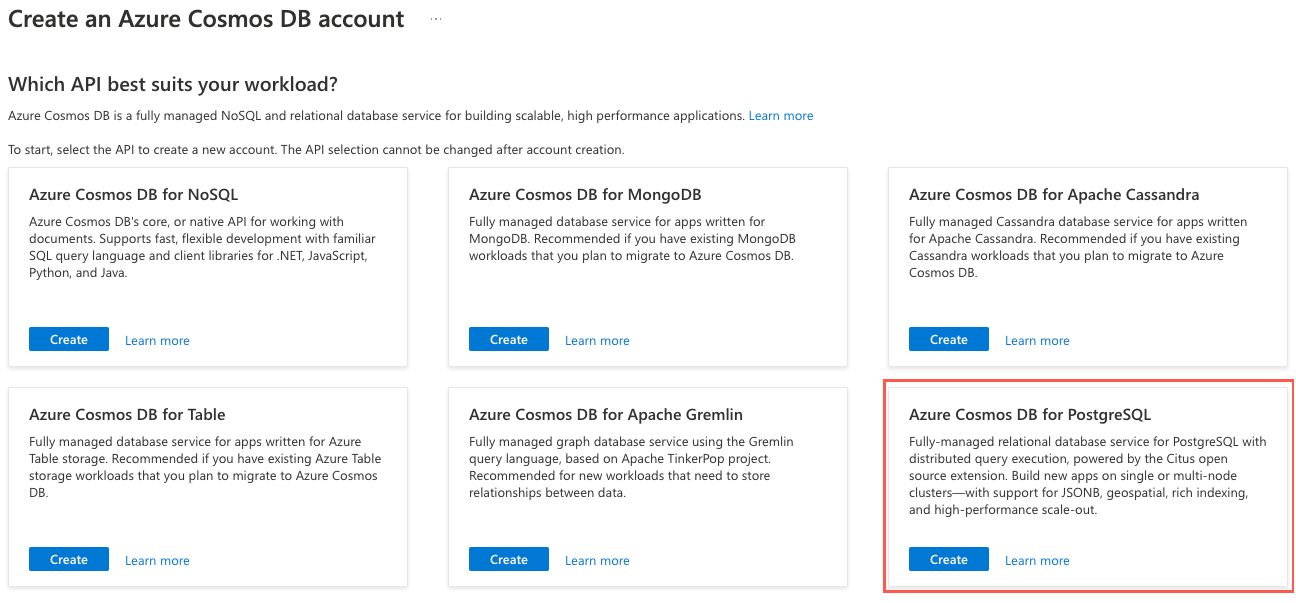
Under Which API best suits your workload?, on the Azure Cosmos DB for PostgreSQL tile, select Create.
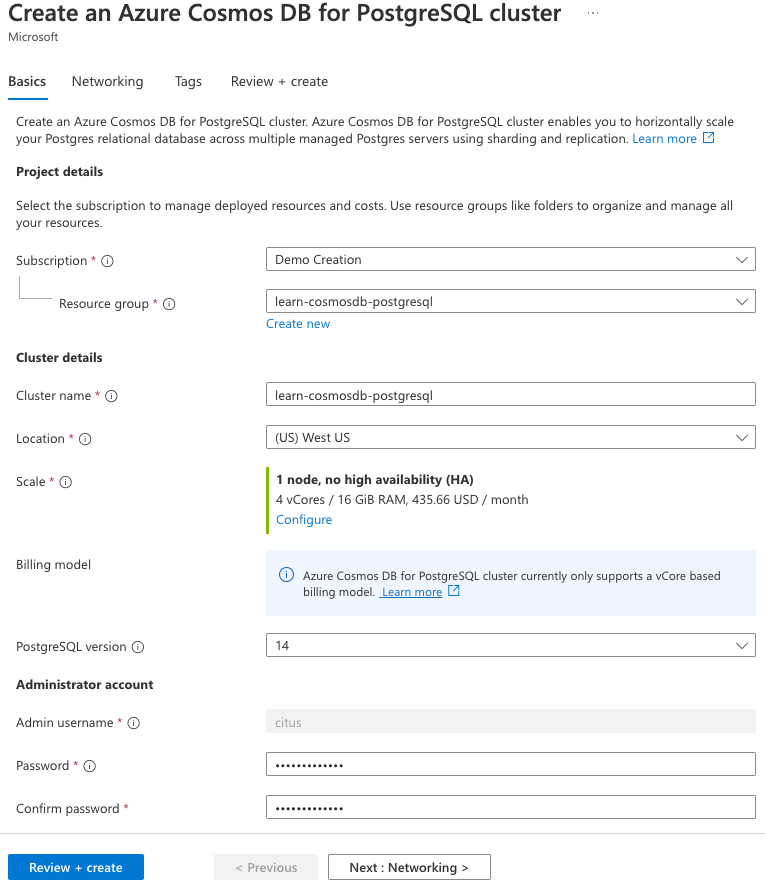
On the Basics tab, enter or select the following information:
Parameter Value Project details Subscription Leave as the default subscription for the sandbox environment. Resource group Select Create new and name your resource group learn-cosmosdb-postgresql.Cluster details Cluster name Enter a globally unique name, such as learn-cosmosdb-postgresql.Location Leave the default, or select a region close to you. Scale You'll configure scale settings in the next step. PostgreSQL version Leave the default version (14) selected. Administrator account Admin username This value is set to citusand can't be edited.Password Enter and confirm a strong password. Make a note of the password that you create. You need the password later to connect to the database.
For the Scale settings, select Configure. On the cluster configuration pane, set the following options.
Parameter Value Nodes Node count Select Single node. Compute per node Select 4 vCores, 16 GiB RAM. Storage per node Select 512 GiB. The high availability and automatic failover capabilities are out of scope for this exercise, so leave the High availability option cleared.
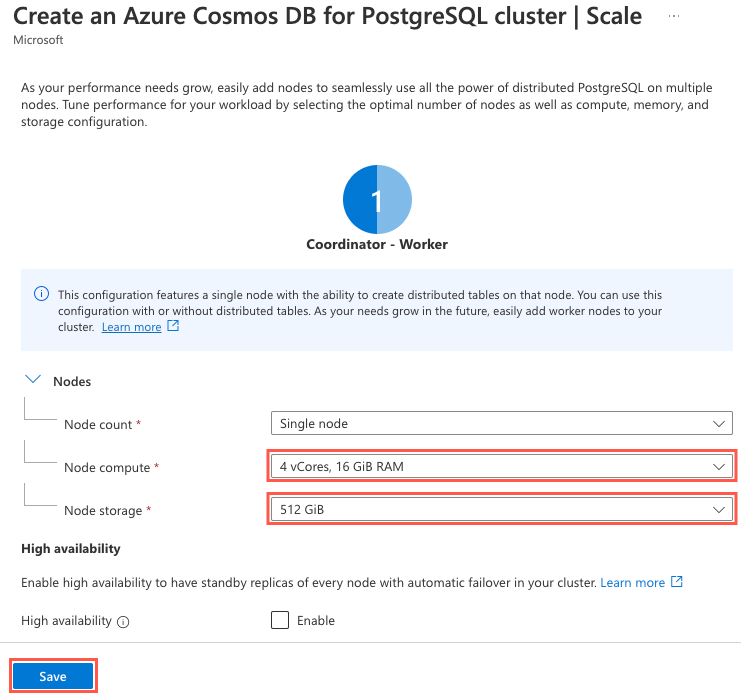
Select Save.
Select the Review + create button.
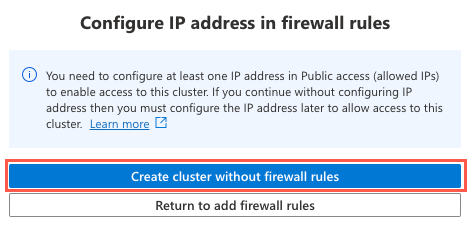
On the review pane, select Create to provision your cluster. If the Configure IP address in firewall rules message appears, select Create cluster without firewall rules.
It can take up to 15 minutes for your cluster to provision.
When your cluster is finished provisioning, go to the resource in the Azure portal.
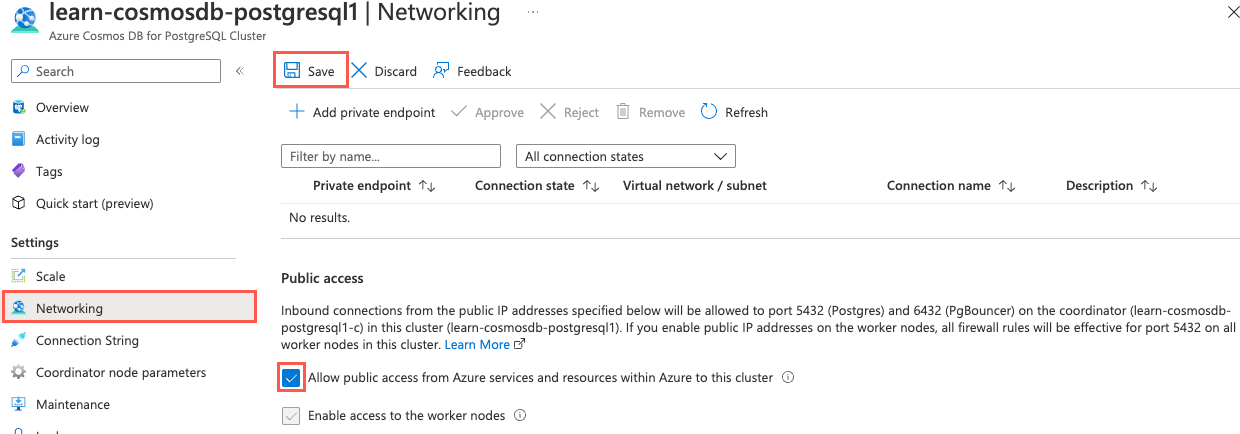
On the left menu under Settings, select Networking. On the Networking pane, select the Allow public access from Azure services and resources within Azure to this cluster checkbox, and then select Save on the command bar.
Connect to the database by using psql in Azure Cloud Shell
You use psql at the command prompt to make your database changes. psql is a command-line tool that allows you to interactively issue queries to a PostgreSQL database and view the query results.
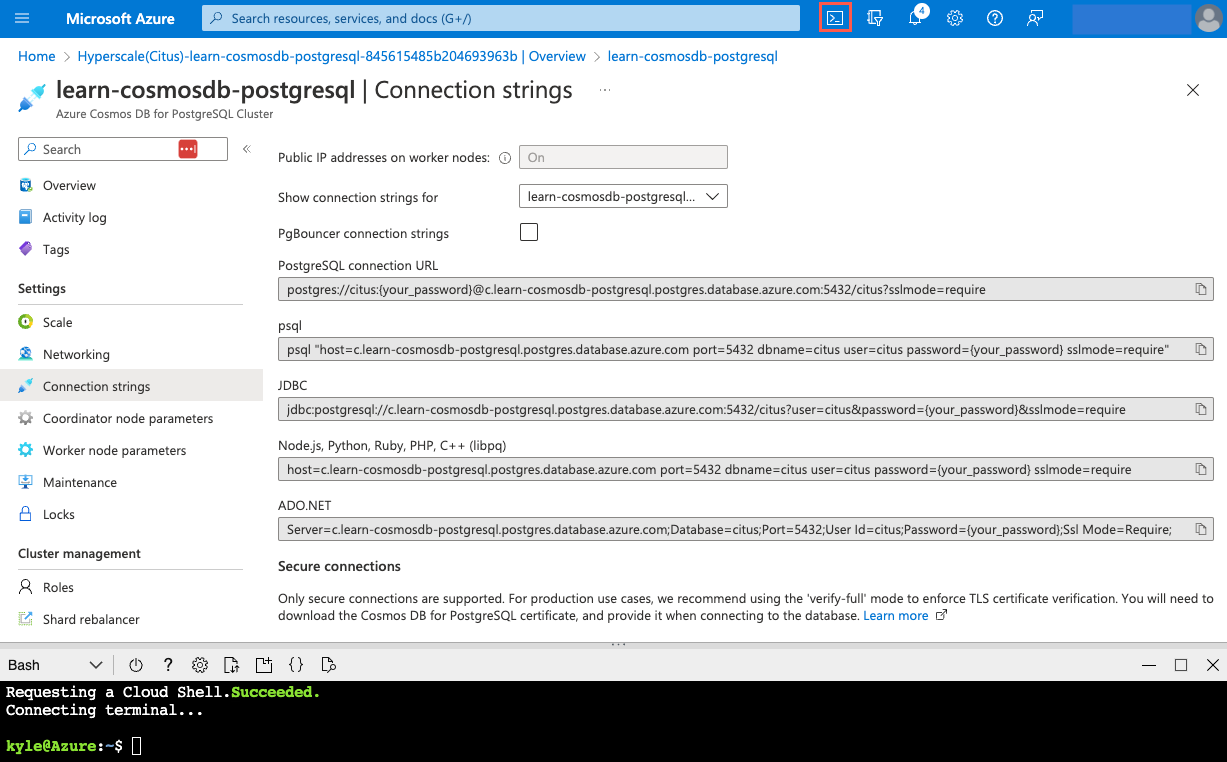
On your Azure Cosmos DB for PostgreSQL Cluster page in the Azure portal, on the left menu under Settings, select Connection strings. Then copy the connection string that's labeled psql.

Paste the connection string into a text editor like Notepad. Replace the
{your_password}token with the password that you created for thecitususer when you created your cluster. Copy the updated connection string to use later.On the Connection strings pane in the Azure portal, open an Azure Cloud Shell dialog by selecting the Cloud Shell icon on the global controls in the Azure portal.
Cloud Shell opens as an embedded pane at the bottom of your browser window. Alternatively, you can open Azure Cloud Shell in a different browser tab.
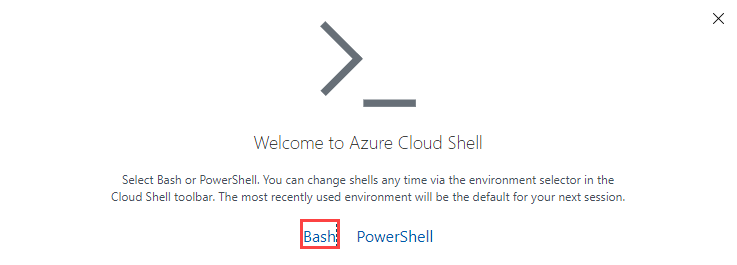
If you're prompted, select Bash as the environment in the Cloud Shell window.
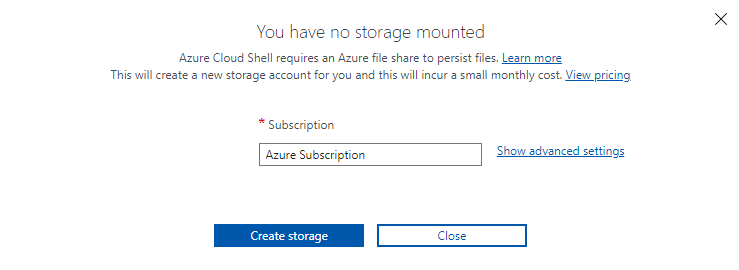
If you're opening Cloud Shell for the first time, you might be prompted to connect a storage account. Select the subscription that you used for your database account, and then select Create storage.
Now, use the psql command-line utility to connect to your database. Paste your connection string (updated with your correct password) at the command prompt in Cloud Shell, and then run the command. The command should look similar to the following example:
psql "host=c.learn-cosmosdb-postgresql.postgres.database.azure.com port=5432 dbname=citus user=citus password={your_password} sslmode=require"
Create tables in the database
Now that you're connected to your database, you can begin populating the database. You use psql to create the table schema that was provided by Tailspin Toys in your development database.
In Cloud Shell, run the following query to create the
stores,products,orders, andline_itemstables:CREATE TABLE stores ( store_id bigserial PRIMARY KEY, name text, category text ); CREATE TABLE products ( product_id bigserial PRIMARY KEY, store_id bigint REFERENCES stores (store_id), name text, description text, price numeric ); CREATE TABLE orders ( order_id bigserial PRIMARY KEY, store_id bigint REFERENCES stores (store_id), status text, billing_address text, shipping_address text, ordered_at timestamp ); CREATE TABLE line_items ( line_item_id bigserial PRIMARY KEY, product_id bigint REFERENCES products (product_id), order_id bigint REFERENCES orders (order_id), quantity bigint, line_amount numeric );
Ingest data by using the COPY command
Tailspin Toys has provided links to .csv files that contain sample data that's representative of its production system data. You can use these files to populate your development database. The files are available via publicly accessible URLs. You decide to load the tables by performing a one-time bulk load into the new database.
You can use the PostgreSQL COPY command to accomplish this task. It allows you to load data from files in bulk.
Set the database encoding before you load data from the .csv files to ensure that the files are read correctly:
SET CLIENT_ENCODING TO 'utf8';Download the .zip file that contains the provided data files:
\! curl -L -O 'https://github.com/MicrosoftDocs/mslearn-design-multitenant-saas-apps-with-azure-cosmos-db-for-postgresql-data/raw/main/data/data.zip'Unzip the file to extract the .csv files that contain the data that Tailspin Toys provided:
\! unzip data.zipThe .zip file contains multiple .csv files that contain stores, orders, products, and line item information. You can view the extracted files by running
\! lsat the command prompt.The following
COPYcommand loads data from the downloaded stores.csv file into thestorestable that you created earlier. Then it updates the sequence for thestore_idcolumn.BEGIN; \COPY stores FROM stores.csv WITH CSV HEADER; SELECT setval('stores_store_id_seq', MAX(store_id)) FROM stores; COMMIT;The
WITH CSV HEADERoption provides information about the format of the file being ingested. The option specifies that it's a .csv file and that the first row is a header row.Execute the following command to populate the
productstable. The products.csv file doesn't contain a header row, so you remove theHEADERoption.BEGIN; \COPY products FROM products.csv WITH CSV; SELECT setval('products_product_id_seq', MAX(product_id)) FROM products; COMMIT;For orders and line items, there are multiple .csv files. The
COPYcommand can read only a single file at a time. To avoid making numerous calls, you can use theFROM PROGRAMclause to inform the coordinator node to retrieve the data files from an application that's running on the coordinator node. You can then use thecatcommand on the coordinator, which combines multiple files. Thecatcommand output is passed to theCOPYcommand so that it acts as a single file for data ingestion. Run the two followingCOPYcommands to load theordersandline_itemstables with data from the files:BEGIN; \COPY orders FROM PROGRAM 'cat orders*.csv' WITH CSV; SELECT setval('orders_order_id_seq', MAX(order_id)) FROM orders; COMMIT;BEGIN; \COPY line_items FROM PROGRAM 'cat line_items*.csv' WITH CSV; SELECT setval('line_items_line_item_id_seq', MAX(line_item_id)) FROM line_items; COMMIT;You can query the count of each table to verify that data was loaded correctly:
SELECT COUNT(*) FROM stores;      -- Count should be 442
SELECT COUNT(*) FROM products;    -- Count should be 10002
SELECT COUNT(*) FROM orders;      -- Count should be 1999680
SELECT COUNT(*) FROM line_items;  -- Count should be 4002959
Verify that the pg_cron extension is installed
In the following tasks, you use the pg_cron extension for PostgreSQL to run scheduled jobs in the database. Before you install any new supported extensions in your database, it's a good idea to view the complete list of installed extensions to avoid potential conflicts. Many popular PostgreSQL extensions are preinstalled on every Azure Cosmos DB for PostgreSQL instance.
You can view the list of preinstalled extensions in your Azure Cosmos DB for PostgreSQL database by running the following code:
SELECT oid, extname, extversion FROM pg_extension;If you see
--More--at the bottom of the output, select the Spacebar to display more results.Inspect the output of the query. Look for a row in which the
extnamevalue ispg_cronto determine whether the extension is preinstalled.oid | extname | extversion -------+--------------------+------------ 19371 | pg_cron | 1.4-1The query output reveals that pg_cron is preinstalled, so there's nothing more you need to do to use this extension. You can query the pg_extension view to retrieve details that are associated with the installed extensions. Alternatively, you can run
\dxat the command prompt. This command is a shortcut that provides a list of the extensions that are installed in your database.
Create and run a function to add orders to the database
To correctly measure the impact that transitioning to a multi-node database will have on the Tailspin Toys SaaS application, you can use a function and scheduled job to simulate customer load on the database as you go through the remainder of the exercises in this module. Placing an artificial workload on the database during the migration process can help you identify potential problems or resource constraints as you migrate the database.
You can use a function that accepts the batch size of orders to insert into the database. This function generates orders that have one to three line items. It inserts records in the
ordersandline_itemstables. Execute the following command to create the function:CREATE OR REPLACE FUNCTION create_orders(batch_size int) RETURNS void LANGUAGE plpgsql AS $$ DECLARE ord_id bigint; st_id bigint; prod_id bigint; prod_price numeric; quantity int; line_amt numeric; store_count bigint := (SELECT COUNT(*) FROM stores); product_count bigint; BEGIN FOR j IN 1..batch_size LOOP -- Retrieve a random store, skewing to store_id 5. IF j % 3 = 0 THEN st_id := 5; ELSE st_id := floor(random() * store_count + 1); END IF; ord_id := (SELECT nextval('orders_order_id_seq')); -- Insert a new order INSERT INTO orders (order_id, store_id, status, billing_address, shipping_address, ordered_at) VALUES(ord_id, st_id, 'Pending', '123 Main St.', null, NOW()::date); -- Insert 1-3 line items for the order FOR i IN 1..floor(random() * (3) + 1) LOOP -- Retrieve a random product associated with the selected store. product_count := (SELECT count(*) FROM products WHERE store_id = st_id); prod_id = (SELECT product_id FROM products WHERE store_id = st_id OFFSET floor(random() * product_count) LIMIT 1); prod_price = (SELECT price FROM products WHERE store_id = st_id AND product_id = prod_id); quantity = floor(random() * (4) + 1); line_amt = prod_price * quantity; -- Insert a new line_item row INSERT INTO line_items (line_item_id, product_id, order_id, quantity, line_amount) VALUES(DEFAULT, prod_id, ord_id, quantity, line_amt); END LOOP; END LOOP; END; $$;To view how long it takes queries to run in psql, you can enable query execution time output by running the following command at the Citus command prompt:
\timingTo simulate database load from customer traffic on various stores' websites, you want to use the function you created to send a representative load of 20,000 orders per minute into the database. Manually run the
create_orders()function two or three times after you enable\timingso that you can understand how long it takes to insert 20,000 orders.SELECT create_orders(20000);Note the time it takes. You'll use this information for comparison at the end of this exercise.
Next, you want the function to execute every minute to automatically add orders to the database. You can use pg_cron to schedule the function. Run the following
cron.schedulecommand to set up a scheduled task namedcreate_ordersthat executes every minute and inserts 20,000 new orders into the database:SELECT cron.schedule('create_orders', '*/1 * * * *', 'SELECT create_orders(20000);');
Add distribution key and backfill missing values
The store_id column is the internal identifier for tenants in the Tailspin Toys database, so it's the logical choice as the distribution column on the tables that are being distributed. In the schemas that you used to create the database tables, all the tables except line_items contain the store_id column.
To properly distribute and colocate the line_items table data with stores, orders, and products, you need to add the store_id column to the line_items table and backfill the field for each row. Backfilling tables involves denormalizing the table to add the distribution column, and then populating the column with the appropriate value.
Run the following SQL command at the psql prompt to denormalize the
line_itemstable and add thestore_iddistribution column:ALTER TABLE line_items ADD COLUMN store_id bigint;With the
line_itemstable now denormalized, the next step is to backfill the newly createdstore_idcolumn. However, performing this operation against large tables can cause a significant load on the database and disrupt other queries. To meet the Tailspin Toys request to horizontally scale the database with minimal disruption, you've decided again to use the pg_cron extension and a function to update theline_itemstable in small batches.Run the following command to create a function that backfills the
line_itemstable in batches:CREATE OR REPLACE FUNCTION backfill_batch(batch_size bigint) RETURNS void LANGUAGE PLPGSQL AS $$ BEGIN WITH batch AS ( SELECT line_item_id, order_id FROM line_items WHERE store_id IS NULL LIMIT batch_size FOR UPDATE SKIP LOCKED ) UPDATE line_items AS li SET store_id = orders.store_id FROM batch, orders WHERE batch.line_item_id = li.line_item_id AND batch.order_id = orders.order_id; END; $$;Next, use pg_cron to create a scheduled job named
backfillthat runs the function every minute and backfills 1 million records simultaneously:SELECT cron.schedule('backfill', '*/1 * * * *', 'SELECT backfill_batch(1000000);');In this example, you're updating 1 million records at a time in the
backfillscheduled job. In a production system, you would typically use smaller batch sizes and backfill tables over a more extended period to reduce performance impacts on the system. The example for this exercise uses a large batch size so that the table is backfilled in a short amount of time. There are approximately 4 million records in theline_itemstable, so it takes up to five minutes for the existing records to be backfilled with the appropriatestore_idvalue. You can move on to the next task while you wait for the table to be backfilled.
Update application queries
With the distribution column added to each distributed table and the backfilling processes started, one of the next steps of the preparation phase is to update queries that are issued by the SaaS application to ensure that the distribution column is included in all queries that come from the application. Earlier, you created a function to continually add new orders to the database to simulate the application sending in transactions. However, the function isn't inserting the store_id value into the line_items table that are being added.
The denormalized line_items table now includes the store_id column, so you need to update the function to ensure that the application is populating that column.
Replace the
create_orders()function with the following code. The two lines after-- Insert a new line_item roware updated to include thestore_idvalue when inserting new line items into the database.CREATE OR REPLACE FUNCTION create_orders(batch_size int) RETURNS void LANGUAGE plpgsql AS $$ DECLARE ord_id bigint; st_id bigint; prod_id bigint; prod_price numeric; quantity int; line_amt numeric; store_count bigint := (SELECT COUNT(*) FROM stores); product_count bigint; BEGIN FOR j IN 1..batch_size LOOP -- Retrieve a random store, skewing to store_id 5. IF j % 3 = 0 THEN st_id := 5; ELSE st_id := floor(random() * store_count + 1); END IF; ord_id := (SELECT nextval('orders_order_id_seq')); -- Insert a new order INSERT INTO orders (order_id, store_id, status, billing_address, shipping_address, ordered_at) VALUES(ord_id, st_id, 'Pending', '123 Main St.', null, NOW()::date); -- Insert 1-3 line items for the order FOR i IN 1..floor(random() * (3) + 1) LOOP -- Retrieve a random product associated with the selected store. product_count := (SELECT count(*) FROM products WHERE store_id = st_id); prod_id = (SELECT product_id FROM products WHERE store_id = st_id OFFSET floor(random() * product_count) LIMIT 1); prod_price = (SELECT price FROM products WHERE store_id = st_id AND product_id = prod_id); quantity = floor(random() * (4) + 1); line_amt = prod_price * quantity; -- Insert a new line_item row INSERT INTO line_items (line_item_id, product_id, order_id, quantity, line_amount, store_id) VALUES(DEFAULT, prod_id, ord_id, quantity, line_amt, st_id); END LOOP; END LOOP; END; $$;Copy the updated function code to the command prompt and execute it. The next time your pg_cron job runs, the function runs with the updated code and populates the
store_idcolumn for each new line item.
Verify backfill and stop the scheduled job
There are approximately 4 million records in the line_items table, plus the new rows that are inserted by the create_orders() function. It takes up to five minutes to backfill the line_items table.
To verify that the
store_idcolumn has been backfilled on all records in theline_itemstable, run this query:SELECT count(*) FROM line_items WHERE store_id IS NULL;Continue to execute the query every minute or two until the count returned is zero. At that point, the table has been successfully backfilled.
After all the
line_itemsrecords are backfilled, you can disable the pg_cron job. To disable the job, you need either thejobidof thecron.schedulejob that you created earlier or thejobnamethat you assigned. You can retrieve those values from thecron.jobtable by running the following query:SELECT * FROM cron.job;In the output of the query, locate the job by using the command that contains the
backfill_batch()function. You can copy thejobidorjobnamevalues to disable the job. The output should look similar to the following example:jobid | schedule | command | nodename | nodeport | database | username | active | jobname -------+-------------+-----------------------------+----------+----------+----------+----------+--------+--------------- 6 | */3 * * * * | SELECT create_orders(2500); | /tmp | 5432 | citus | citus | t | create_orders 7 | */1 * * * * | SELECT backfill_batch(); | /tmp | 5432 | citus | citus | t | backfillStop the job by using the following command, which uses the
jobnamevalue from the query to disable it:SELECT cron.unschedule('backfill');
Update table keys to include the distribution column
Azure Cosmos DB for PostgreSQL can't enforce uniqueness constraints on tables unless the tables contain the distribution column. The single-node schema that Tailspin Toys provided includes primary keys and foreign keys on tables. You need to update these tables to have the store_id distribution column while you continue to minimize application disruption.
The first step you must take is to create new unique indexes on each table that includes the distribution column. To prevent locks on the tables you update, use the
CONCURRENTLYoption when you create new indexes. Execute the followingCREATE INDEXcommands to create unique indexes that include the table's original primary key and thestore_idcolumn:CREATE UNIQUE INDEX CONCURRENTLY orders_tmp_idx ON orders (store_id, order_id); CREATE UNIQUE INDEX CONCURRENTLY products_tmp_idx ON products (store_id, product_id); CREATE UNIQUE INDEX CONCURRENTLY line_items_tmp_idx ON line_items (store_id, line_item_id);With the new unique indexes created, you can now swap out the primary key on each table. Executing these operations in an order that considers the foreign key relationships between tables is best. Run the following command to drop and then re-create the constraints on the
orderstable. The foreign key doesn't need to be updated because it already correctly references thestore_idcolumn in thestorestable.BEGIN; -- Swap out the primary key for the unique index ALTER TABLE orders DROP CONSTRAINT orders_pkey CASCADE, ADD CONSTRAINT orders_pkey PRIMARY KEY USING INDEX orders_tmp_idx; -- Re-create the foreign key on the line_items table (dropped by CASCADE) ALTER TABLE line_items ADD CONSTRAINT line_items_orders_fkey FOREIGN KEY (store_id, order_id) REFERENCES orders (store_id, order_id); COMMIT;The
DROP CONSTRAINTstatement includes theCASCADEoption, which results in the foreign key constraint on theline_itemstable also being dropped. As a result, the transaction includes anALTER TABLEstatement on theline_itemstable to re-create the foreign key. Including these statements in the same transaction ensures that there's no time when the constraints aren't enforced.Next, repeat the process for the
productstable:BEGIN; -- Swap out the primary key for the unique index ALTER TABLE products DROP CONSTRAINT products_pkey CASCADE, ADD CONSTRAINT products_pkey PRIMARY KEY USING INDEX products_tmp_idx; -- Re-create the foreign key on the line_items table (dropped by CASCADE) ALTER TABLE line_items ADD CONSTRAINT line_items_products_fkey FOREIGN KEY (store_id, product_id) REFERENCES products (store_id, product_id); COMMIT;Finally, execute the commands against the
line_itemstable. This query takes longer to run due to the table size.BEGIN; -- Swap out the primary key for the unique index ALTER TABLE line_items DROP CONSTRAINT line_items_pkey, ADD CONSTRAINT line_items_pkey PRIMARY KEY USING INDEX line_items_tmp_idx; -- Create a foreign key to the stores table (this did not exist previously) ALTER TABLE line_items ADD CONSTRAINT line_items_store_id_fkey FOREIGN KEY (store_id) REFERENCES stores (store_id); COMMIT;With the table keys swapped out, manually run the
create_orders()function again to observe any effect that the changes you made had on query execution time. Enable query timing by running\timingfirst, if necessary.SELECT create_orders(20000);Compare the time it took to run the query after you updated the table keys to the time you observed earlier. You should see that the new composite keys that include the distribution column provide a significant (more than tenfold) performance improvement in the time it takes to insert 20,000 orders. This improvement results from how the new indices help your queries function and is unrelated to distributed processing.
Disconnect from the database
Congratulations! You've successfully prepared the Tailspin Toys tables for migration to a multi-node distributed database. In the next exercise, you'll partition the table data across worker nodes.
In Cloud Shell, run the following command to disconnect from your database:
\q
You can keep Cloud Shell open and move on to the next unit.