Exercise - Game logic
In this exercise, we add game logic to our app to ensure we end up with a fully functioning game.
To help keep this tutorial on-topic with teaching about Blazor, we're providing a class called GameState that contains the logic for managing the game.
Adding Game state
Let's add the GameState class to your project and then make it available to components as a singleton service through dependency injection.
Copy the GameState.cs file into the root of your project.
Open the Program.cs file at the root of the project and add this statement that configures
GameStateas a singleton service in your app:builder.Services.AddSingleton<GameState>();We can now inject an instance of the
GameStateclass into ourBoardcomponent.Add the following
@injectdirective at the top of the Board.razor file. the directive injects the current state of the game into the component:@inject GameState StateWe can now start connecting our
Boardcomponent to the state of the game.
Reset state
Let's begin by resetting the state of the game when the Board component is first painted on screen. Add some code to reset the state of the game when the component is initialized.
Add an
OnInitializedmethod with a call toResetBoard, inside the@codeblock at the bottom of the Board.razor file, like so:@code { protected override void OnInitialized() { State.ResetBoard(); } }When the board is first shown to a user, the state is reset to the beginning of a game.
Create game pieces
Next, let's allocate the possible 42 game pieces that could be played. We can represent the game pieces as an array referenced by 42 HTML elements on the board. We can move and place those pieces by assigning a set of CSS classes with column and row positions.
To hold our game pieces, we define a string array field in the code block:
private string[] pieces = new string[42];Add code to the HTML section that creates 42
spantags, one for each game piece, in the same component:@for (var i = 0; i < 42; i++) { <span class="@pieces[i]"></span> }Your full code should look like so:
<div>
    <div class="board">
    @for (var i = 0; i < 42; i++)
    {
        <span class="container">
            <span></span>
        </span>
    }
    </div>
    @for (var i = 0; i < 42; i++)
    {
       <span class="@pieces[i]"></span>
    }
</div>
@code {
    private string[] pieces = new string[42];

    protected override void OnInitialized()
    {
        State.ResetBoard();
    }
}
This assigns an empty string to the CSS class of each game piece span. An empty string for a CSS class prevents the game pieces from appearing on screen as no style is applied to them.
Handle game piece placement
Let's add a method to handle when a player places a piece in a column. The GameState class knows how to assign the correct row for the game piece, and reports back the row that it lands in. We can use this information to assign CSS classes representing the player's color, the final location of the piece, and a CSS drop animation.
We call this method PlayPiece, and it accepts an input parameter that specifies the column the player chooses.
Add this code below the
piecesarray we defined in the previous step.private void PlayPiece(byte col) { var player = State.PlayerTurn; var turn = State.CurrentTurn; var landingRow = State.PlayPiece(col); pieces[turn] = $"player{player} col{col} drop{landingRow}"; }
Here's what the PlayPiece code does:
- We tell the game state to play a piece in the submitted column called
coland capture the row the piece landed in. - We can then define the three CSS classes to assign to the game piece to identify which player is currently acting, the column the piece was placed in, and the landing row.
- The last line of the method assigns these classes to that game piece in the
piecesarray.
If you look in the supplied Board.razor.css, you find the CSS classes matching column, row, and player turn.
The resultant effect is that the game piece is placed in the column and animated to drop into the bottom-most row when this method is called.
Choosing a column
We next need to place some controls that allow players to choose a column and call our new PlayPiece method. We use the "🔽" character to indicate that you can drop a piece in this column.
Above the starting
<div>tag, add a row of clickable buttons:<nav> @for (byte i = 0; i < 7; i++) { var col = i; <span title="Click to play a piece" @onclick="() => PlayPiece(col)">🔽</span> } </nav>The
@onclickattribute specifies an event handler for the click event. But to handle UI events, a Blazor component needs to be rendered using an interactive render mode. By default, Blazor components are rendered statically from the server. We can apply an interactive render mode to a component using the@rendermodeattribute.Update the
Boardcomponent on theHomepage so that it uses theInteractiveServerrender mode.<Board @rendermode="InteractiveServer" />The
InteractiveServerrender mode handles UI events for your components from the server over a WebSocket connection with the browser.Run the app with these changes. It should look like this now:
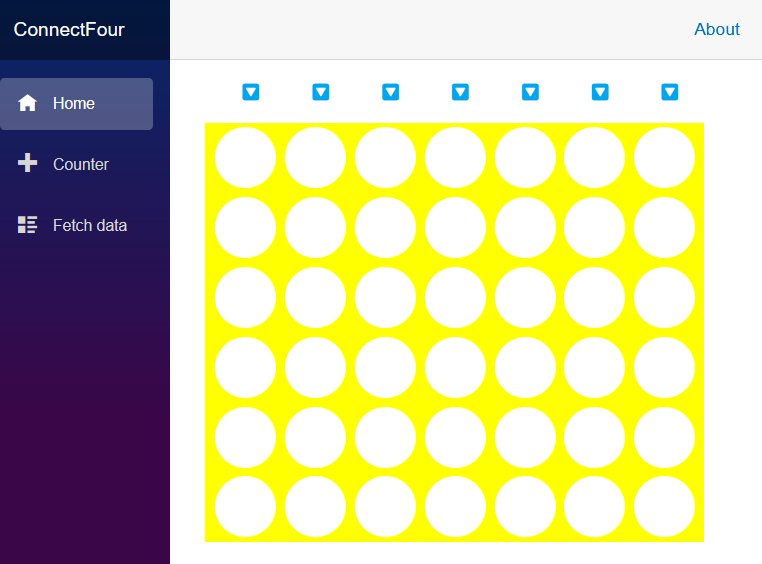
Even better, when we select one of the drop buttons at the top, the following behavior can be observed:
Great progress! We can now add pieces to the board. The GameState object is smart enough to pivot back and forth between the two players. Go ahead and select more drop buttons and watch the results.
Winning and error handling
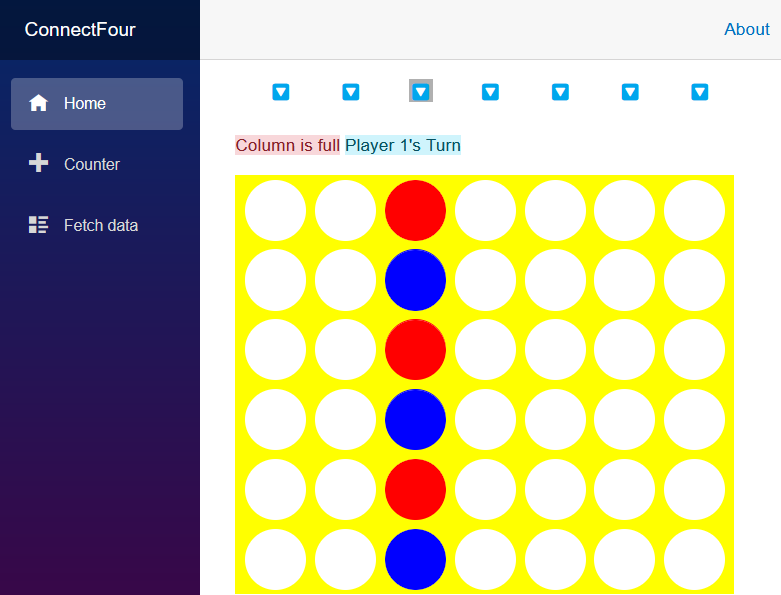
If you play the game in its current configuration, you find that it raises errors when you try to put too many pieces in the same column and when one player wins the game.
Let's make the current state of our game clear by adding some error handling and indicators to our board. Add a status area above the board and below the drop buttons.
Insert the following markup after the
navelement:<article> @winnerMessage <button style="@ResetStyle" @onclick="ResetGame">Reset the game</button> <br /> <span class="alert-danger">@errorMessage</span> <span class="alert-info">@CurrentTurn</span> </article>This markup allows us to display indicators for:
- Announcing a game winner
- A button that allows us to restart the game
- Error messages
- The current player's turn
Now let's fill in some logic that sets these values.
Add the following code after the pieces array:
private string[] pieces = new string[42]; private string winnerMessage = string.Empty; private string errorMessage = string.Empty; private string CurrentTurn => (winnerMessage == string.Empty) ? $"Player {State.PlayerTurn}'s Turn" : ""; private string ResetStyle => (winnerMessage == string.Empty) ? "display: none;" : "";- The
CurrentTurnproperty is automatically calculated based on the state of thewinnerMessageand thePlayerTurnproperty of theGameState. - The
ResetStyleis calculated based on contents of theWinnerMessage. If there's awinnerMessage, we make the reset button appear on screen.
- The
Let's handle the error message when a piece is played. Add a line to clear the error message and then wrap the code in the
PlayPiecemethod with atry...catchblock to set theerrorMessageif an exception occurred:errorMessage = string.Empty; try { var player = State.PlayerTurn; var turn = State.CurrentTurn; var landingRow = State.PlayPiece(col); pieces[turn] = $"player{player} col{col} drop{landingRow}"; } catch (ArgumentException ex) { errorMessage = ex.Message; }Our error handler indicator is simple and uses the Bootstrap CSS framework to display an error in danger mode.
Next, let's add the
ResetGamemethod that our button triggers to restart a game. Currently, the only way to restart a game is to refresh the page. This code allows us to stay on the same page.void ResetGame() { State.ResetBoard(); winnerMessage = string.Empty; errorMessage = string.Empty; pieces = new string[42]; }Now our
ResetGamemethod has the following logic:- Reset the state of the board.
- Hide our indicators.
- Reset the pieces array to an empty array of 42 strings.
This update should allow us to play the game again, and now we see an indicator just above the board declaring the player's turn and eventually the completion of the game.
We still have a situation where we can't select the reset button. Let's add some logic in the
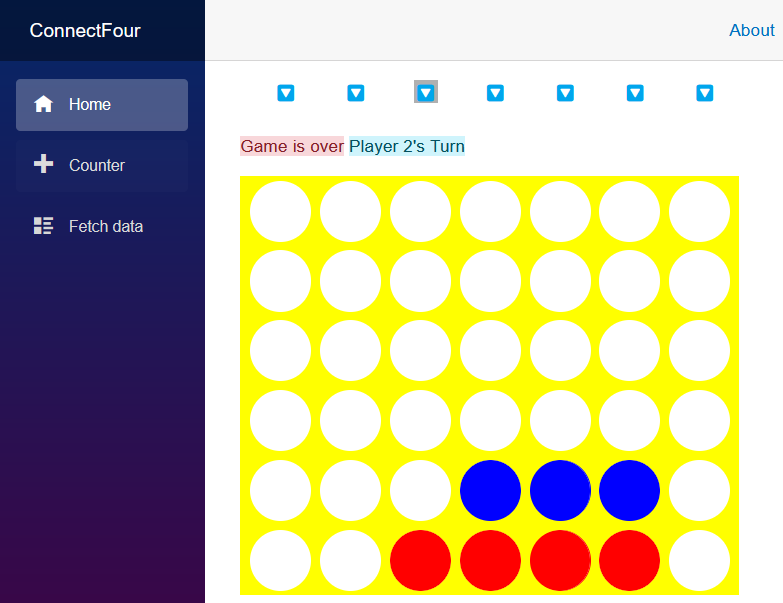
PlayPiecemethod that detects the end of the game.Let's detect if there's a winner to the game by adding a switch expression after our
try...catchblock inPlayPiece.winnerMessage = State.CheckForWin() switch { GameState.WinState.Player1_Wins => "Player 1 Wins!", GameState.WinState.Player2_Wins => "Player 2 Wins!", GameState.WinState.Tie => "It's a tie!", _ => "" };The
CheckForWinmethod returns an enum that reports which player, if any has won the game or if the game is a tie. This switch expression will set thewinnerMessagefield appropriately if a game over state occurs.Now when we play and reach a game-ending scenario, these indicators appear:

Summary
We learned a lot about Blazor and built a neat little game. Here are some of the skills we learned:
- Created a component
- Added that component to our home page
- Used dependency injection to manage the state of a game
- Made the game interactive with event handlers to place pieces and reset the game
- Wrote an error handler to report the state of the game
- Added parameters to our component
The project we built, is a simple game, and there's so much more you could do with it. Looking for some challenges to improve it?
Challenges
Consider the following challenges:
- To make the app smaller, remove the default layout and extra pages.
- Improve the parameters to the
Boardcomponent so that you can pass any valid CSS color value. - Improve the indicators appearance with some CSS and HTML layout.
- Introduce sound effects.
- Add a visual indicator and prevent a drop button from being used when the column is full.
- Add networking capabilities so that you can play a friend in their browser.
- Insert the game into a .NET MAUI with Blazor application and play it on your phone or tablet.
Happy coding, and have fun!