Explore the available features of Azure AI Language
Here you'll explore the features Azure AI Language offers and then use the demo-like environment to test a preconfigured sentiment model. You'll then see the steps to create, train and deploy a custom model for conversational language understanding.
Azure AI Language features
Azure AI Language groups its features into the following areas:
- Classify text
- Understand questions and conversational language
- Extract information
- Summarize text
- Translate text
Classify text

Understand questions and conversational language

Extract information

Summarize text

Translate text

Features can be either preconfigured or customizable. Preconfigured features can be tested straight away with a demo-like environment directly inside Language Studio. You can use them straight out of the box.
The other features with * and green cogs in their logo need user customization. They require you to train their models so they fit your data better. After you have train them, you deploy and can then use them to power your apps or use the same demo-like testing environment.
Test and use preconfigured language features
Go to the Language Studio and sign in with your Azure account.
If you haven't got a language resource, create one.
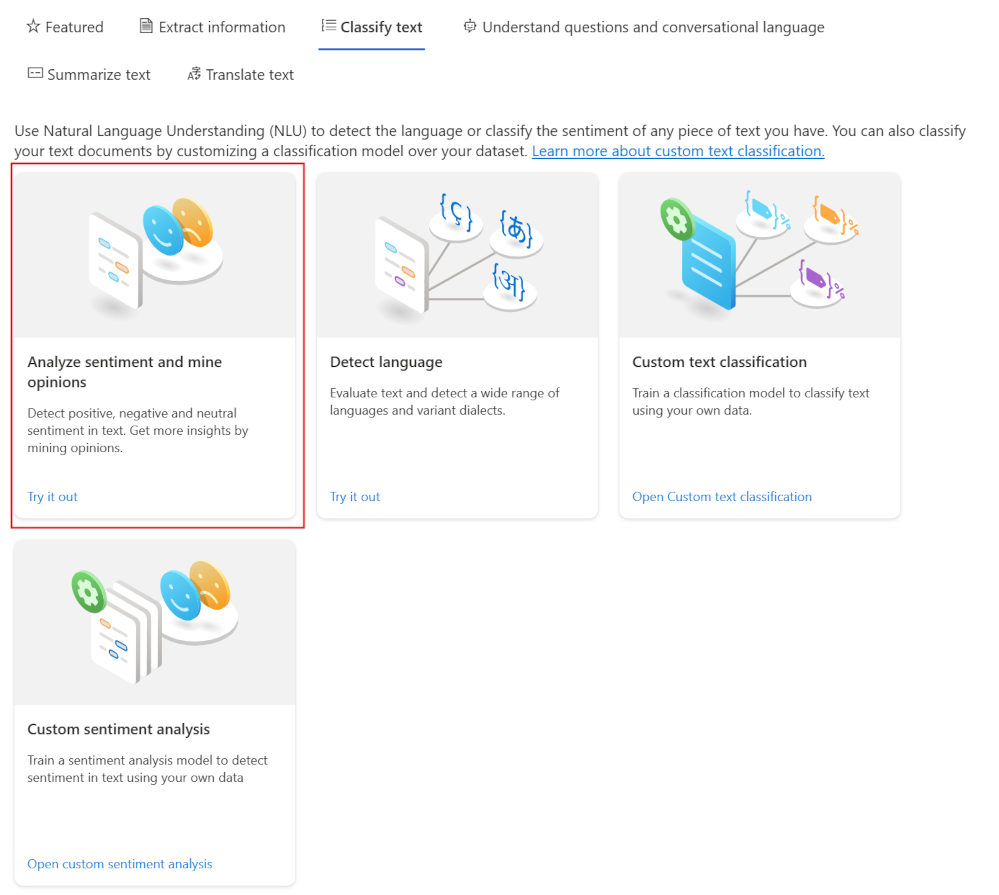
Scroll down to the classify text section, then select Analyze sentiment and mine options.
Scroll down, then select Service Review (long).
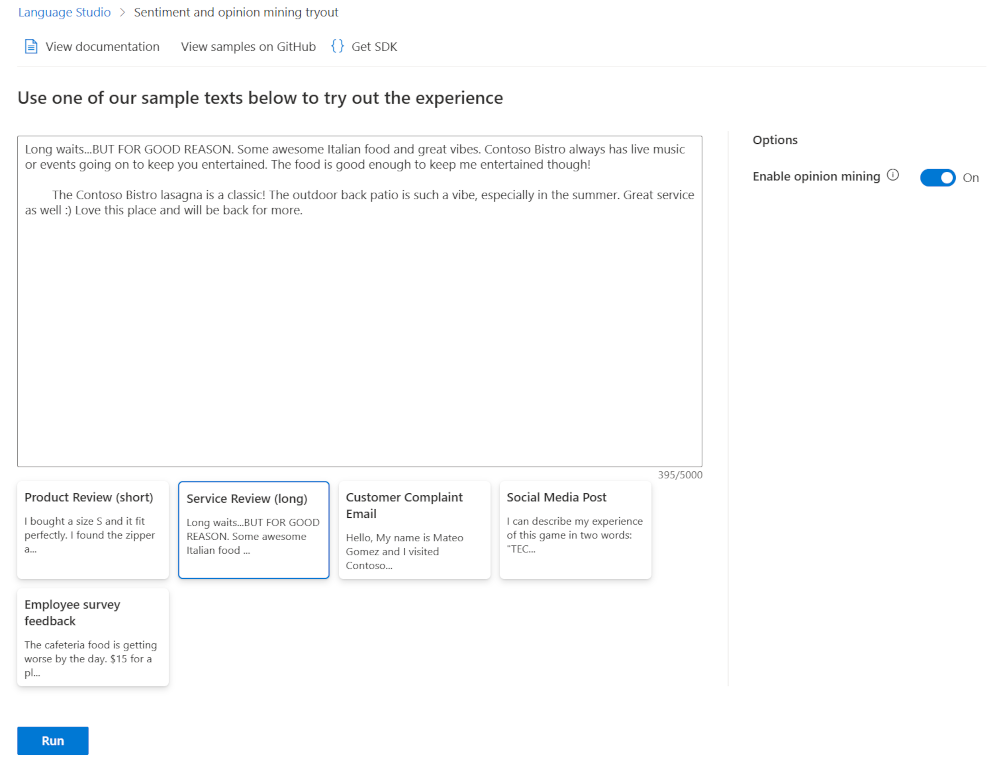
Read the review text, how positive do you think it is?
Select Run.
Examine the results.
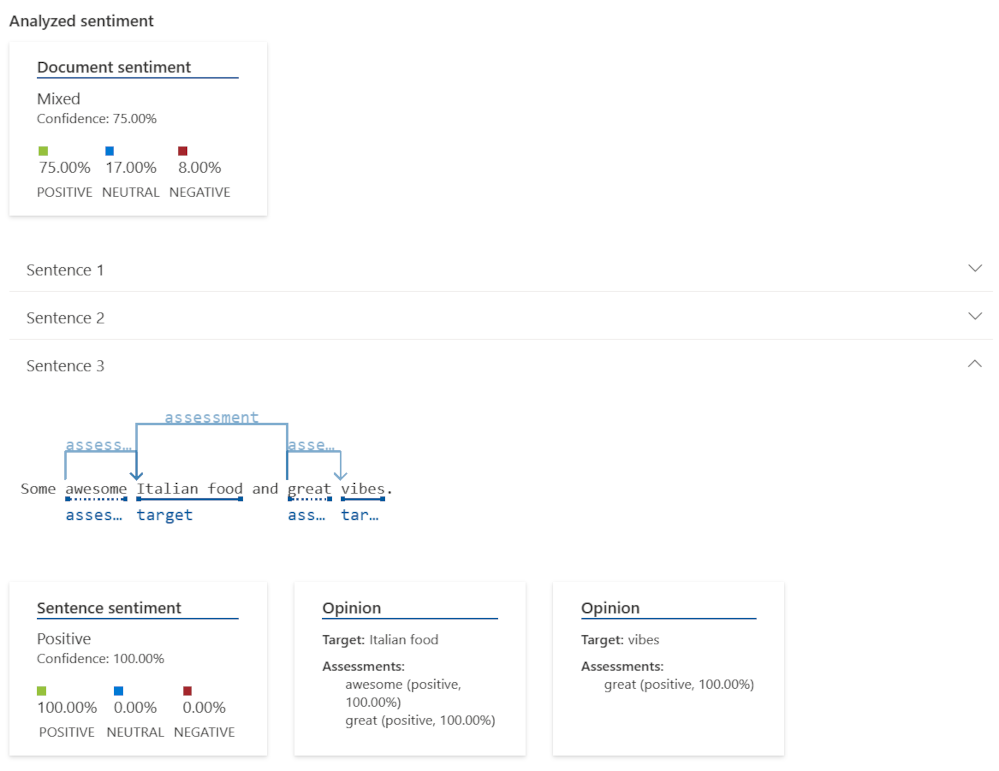


You can see how the sentiment model has identified words that help it calculate an overall positive score. In the sample text, the model returns an 75% positive result for the whole document.
You can also drill down into individual sentences for more detail. Azure AI Language then gives you guidance for how to use the model in your own apps.
For example, you can get the same JSON response from the model by using this curl statement in your development environment:
curl -v -X POST "https://<YOUR_ENDPOINT_HERE>/language/:analyze-text?api-version=2022-05-01" -H "Content-Type: application/json" -H "Ocp-Apim-Subscription-Key: subscription key" --data-ascii "{\"kind\":\"SentimentAnalysis\",\"analysisInput\":{\"documents\":[{\"id\":\"documentId\",\"text\":\"Long waits...BUT FOR GOOD REASON. Some awesome Italian food and great vibes. Contoso Bistro always has live music or events going on to keep you entertained. The food is good enough to keep me entertained though!\n\n The Contoso Bistro lasagna is a classic! The outdoor back patio is such a vibe, especially in the summer. Great service as well :) Love this place and will be back for more.\",\"language\":\"en\"}]},\"parameters\":{\"opinionMining\":true}}"
Create, train, and deploy a conversation language understanding model
Each of the customizable features in Azure AI Language needs different steps to create the models. In this example, you'll see how to create a conversation language understanding model.
Conversational language understanding aims to build a model that predicts intention from conversational text. For example, imagine an email app that you can chat with to send email messages or flag emails. You train the model on sentences like "please add a flag to that email" or "okay, ready to send". These sentences would be translated to intents for flag email and send email.
To use language understanding you'll need to have an Azure AI Language resource already created in Azure, then you can carry out the following steps in Language Studio:
From the home page, you select Conversational Language Understanding in the Understand questions and conversational language tab.
Select + Create new project.
Enter a name for the new project.
Select your language.
Enter a description, then select Next.
Select Create.


Language Studio guides you through the remaining steps. Follow the left navigation from top to bottom to:
Create your schema definition. This involves adding all the intents and entities that your app is interested in.
Label data. You provide example chats and utterances along with how they map to entities and intents.
Train your model. Once you've added the data labeling information, you can start training your model. You can either split all your data with 80% for training and 20% for testing. Or you can create your own manual split.
Review the performance of your model.
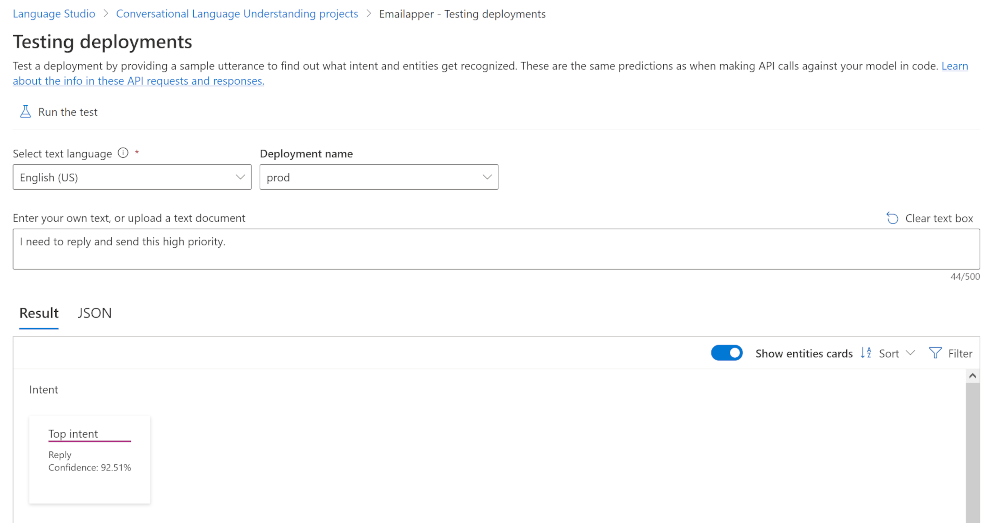
Deploy your model. When you're happy with the performance of your model, you deploy it. This makes it available to be called as an API from your app and test it.
Test your deployment. This option allows you to test your model in the same way as preconfigured models.

Whichever feature your use you end up with a model that you can use in apps to add language understanding.
In the context of Azure AI Search, these models can help us enrich our search indexes to create better search experiences. Or provide answers when users ask questions.