Exercise - Create a cycle counting plan
In this exercise, you'll create an automatic cycle counting plan in warehouse operations.
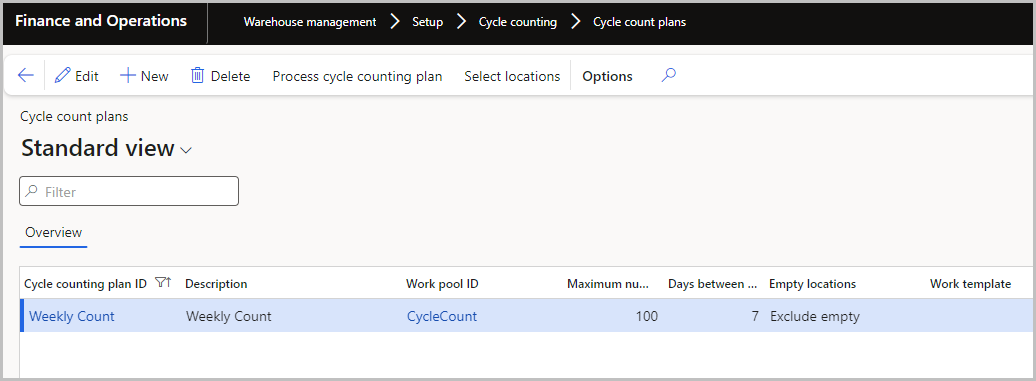
Go to Warehouse management > Setup > Cycle counting > Cycle counting plans.
Select New.
In the Cycle counting plan ID field, enter a value. For this example, enter Weekly Count.
In the Description field, enter a value. For this example, enter Weekly Count.
In the Work pool ID field, select CycleCount.
In the Maximum number of cycle counts field, enter 100.
In the Days between cycle counting field, enter 7.
Setting these parameters means that cycle counting work will be created every seven days. However, if cycle counting work is processed on day three, the next cycle counting work will be created seven days after the last cycle counting was processed, on day 10.
In the Empty locations field, select Exclude empty.
Select Save.
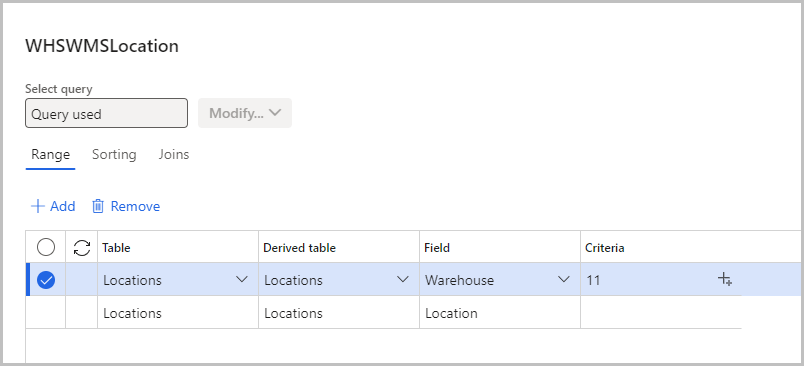
Select the Select locations option.
In the list, select the checkbox next to the row that you want.
Make sure that Field is set to Warehouse.
In the Criteria field, select a value.
Select OK.
Select Save.
Select the cycle counting plan that you created.
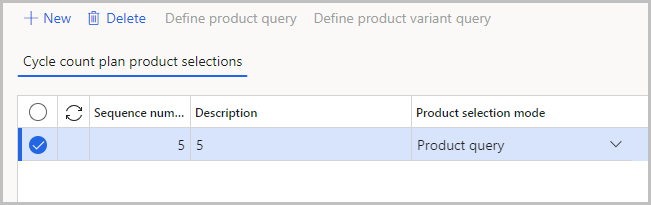
Above the Cycle count plan product selections heading, select New.
In the Sequence number field, enter a number. The sort is from the smallest number to the largest number. The value must be more than zero.
In the Description field, enter a value.
In the list, select the checkbox next to the row that you want.
Select Save.
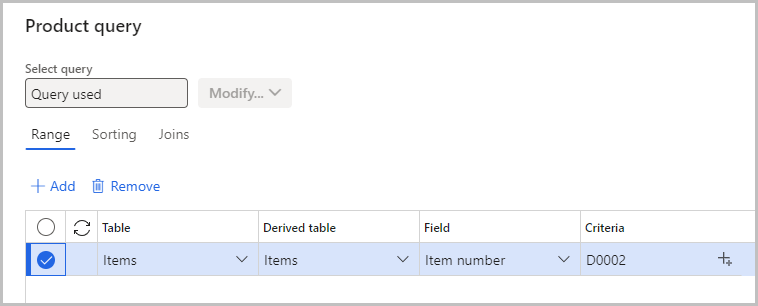
Select the Define product query.
In the list, select the checkbox next to the row that you want.
In the Criteria field, enter or select a value.
Select OK.
Close the page.