Evaluate, deploy, and test a fine-tuned foundation model
When you have fine-tuned a foundation model from the model catalog in Azure Machine Learning, you can evaluate the model and deploy it to easily test and consume the model.
Evaluate your fine-tuned model
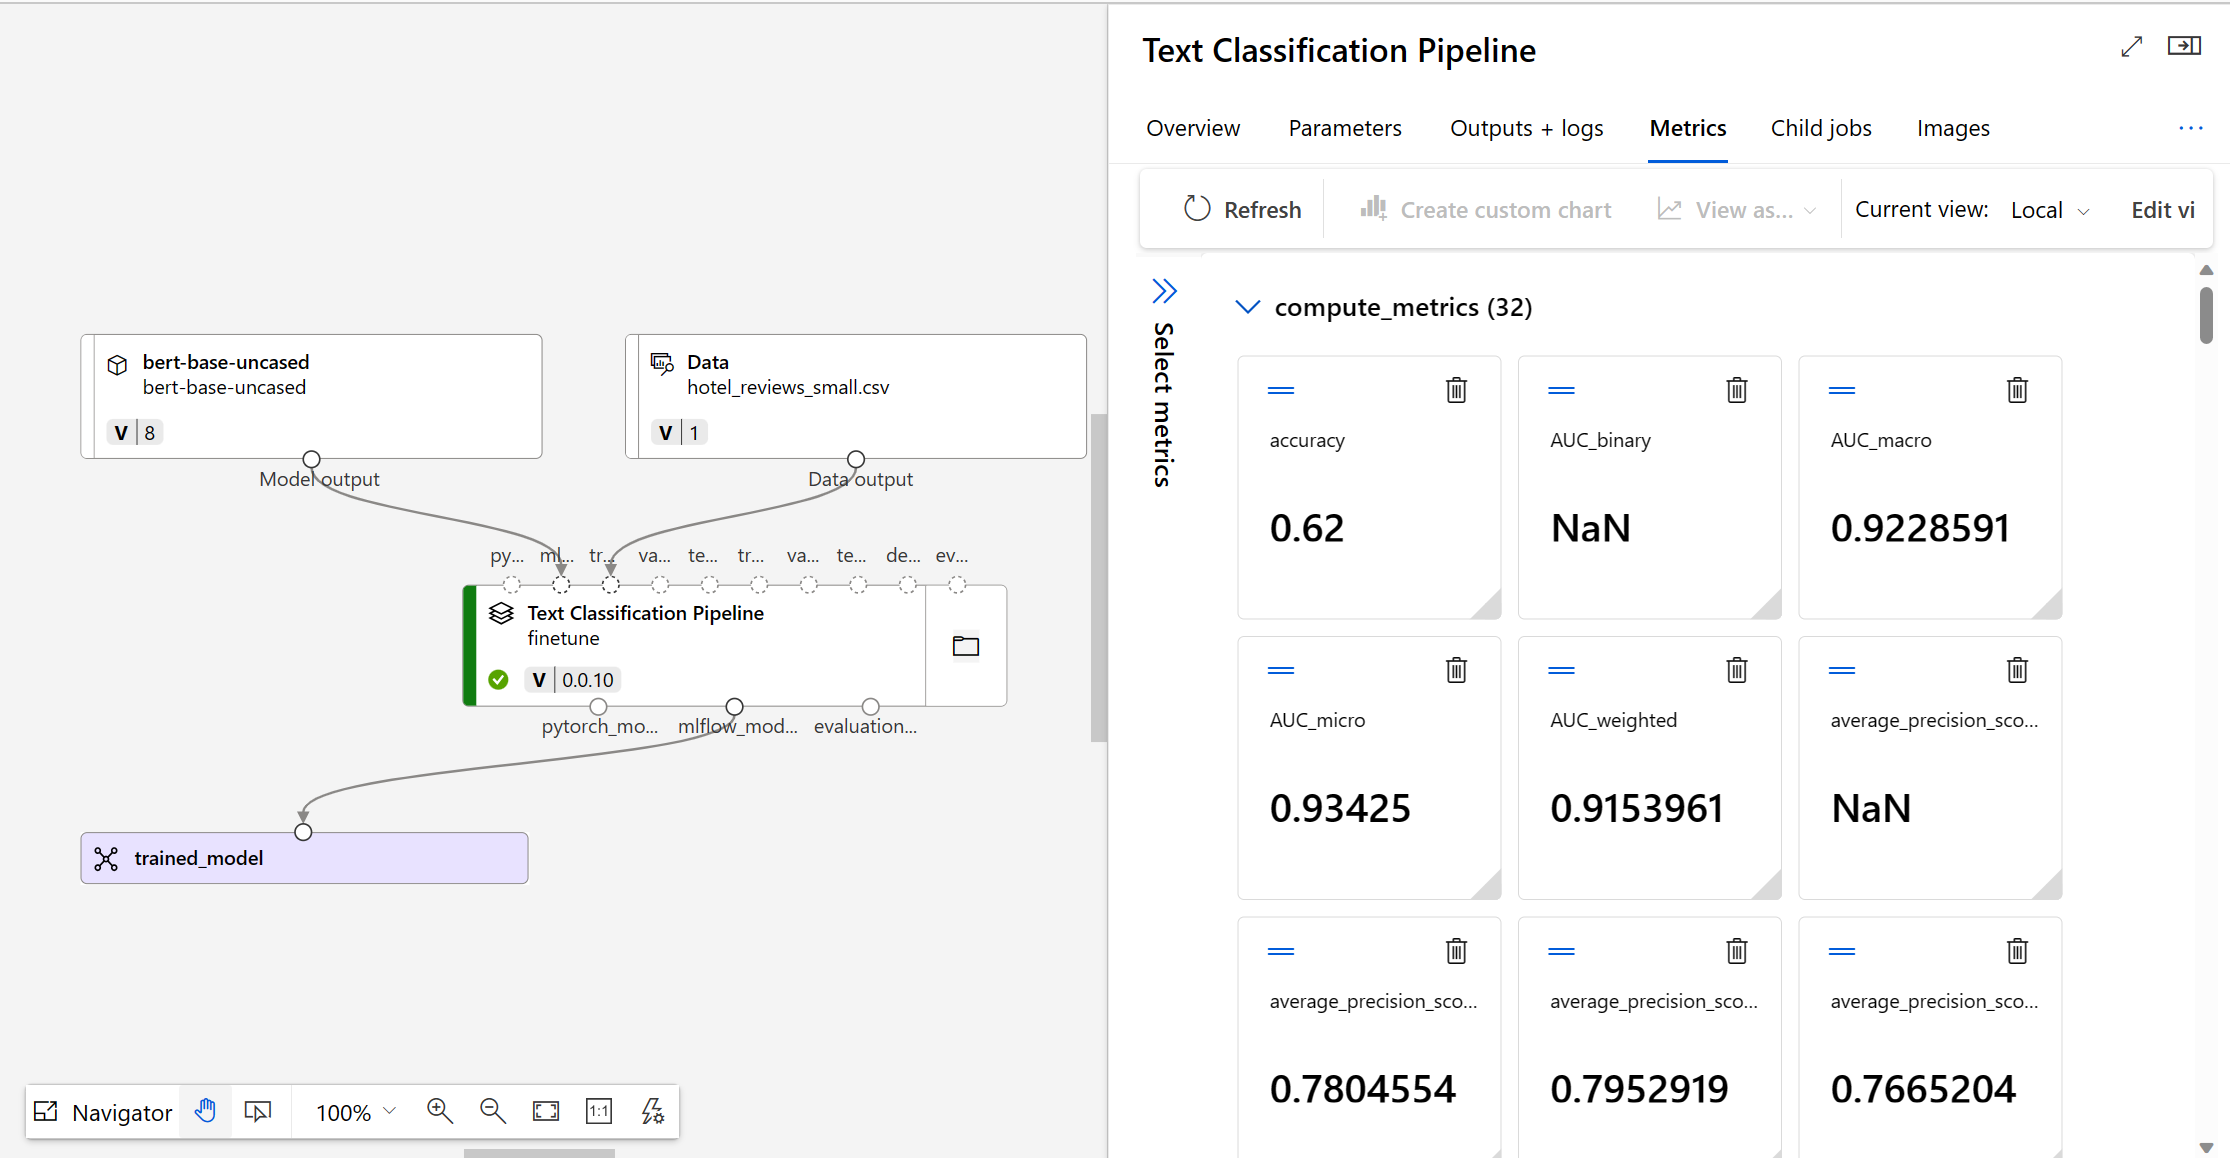
To decide whether your fine-tuned model performs as expected, you can review the training and evaluation metrics.
When you submit a model to be fine-tuned, Azure Machine Learning creates a new pipeline job within an experiment. The pipeline job includes a component that represents the fine-tuning of the model. You can analyze logs, metrics and outputs of the job by selecting the completed pipeline job, and explore more by selecting the specific fine-tuning component.
Tip
In Azure Machine Learning, model metrics are tracked with MLflow. If you want to access and review metrics programmatically, you can use MLflow in a Jupyter notebook.
Deploy your fine-tuned model
To test and consume your fine-tuned model, you can deploy the model to an endpoint.
An endpoint in Azure Machine Learning is an Application Programming Interface (API) that exposes the trained or fine-tuned model, allowing users or applications to make predictions based on new data.
There are two types of endpoint in Azure Machine Learning:
- Real-time endpoints: Designed to handle immediate or on-the-fly predictions.
- Batch endpoints: Optimized for handling a large volume of data at once.
Since real-time endpoints allow you to get immediate predictions, these endpoints are also ideal to test a model's predictions.
Register your model using the Azure Machine Learning studio
To deploy your fine-tuned model using the Azure Machine Learning studio, you can use the output of the fine-tuning job.
Azure Machine Learning uses MLflow to track jobs and log metrics and model files. As MLflow is integrated with the Azure Machine Learning studio, you can deploy a model from a job with minimal effort.
First, you need to register the model from the job output. Navigate to the job overview to find the + Register model option.
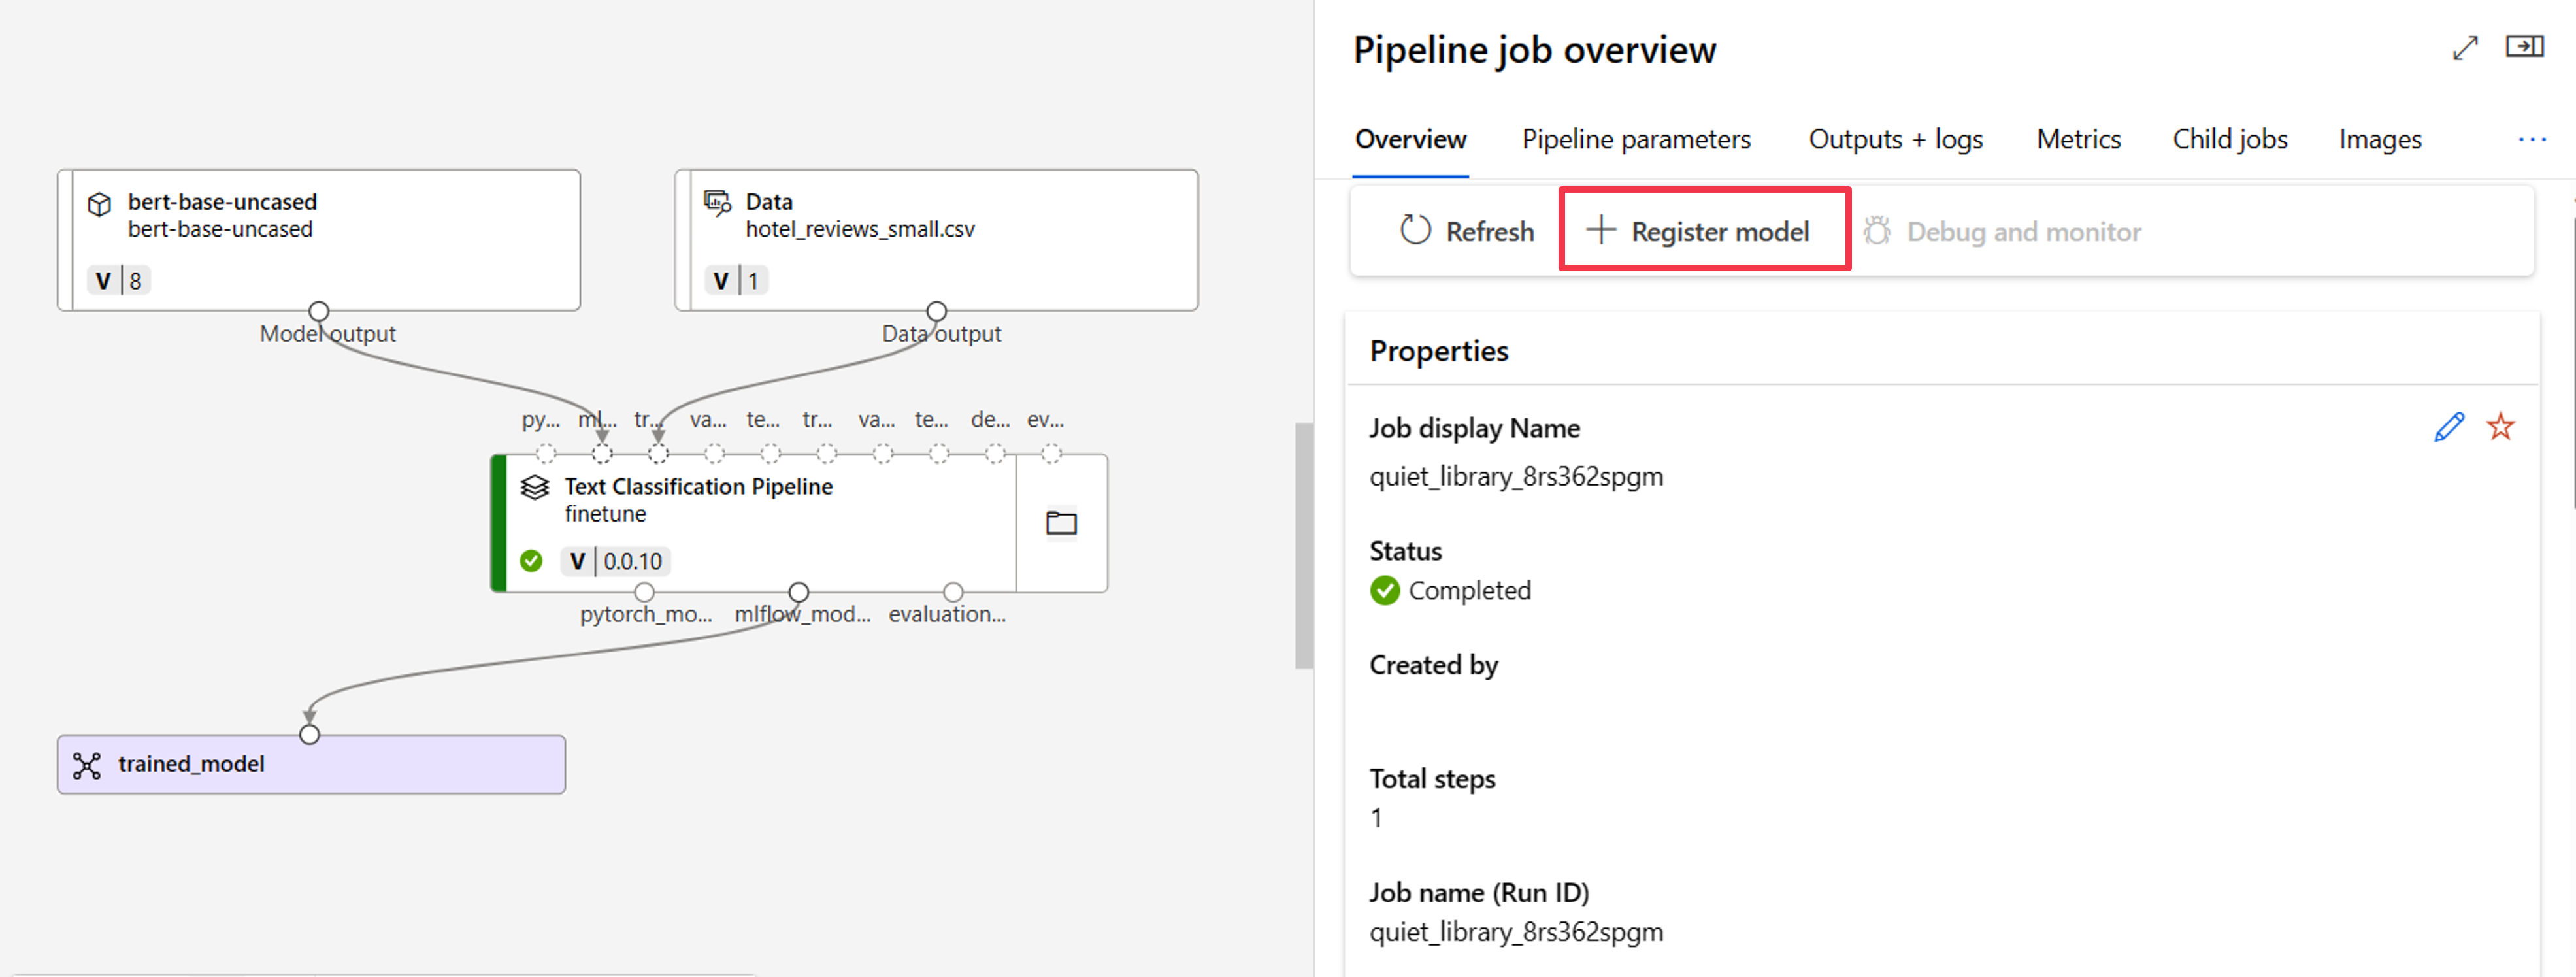
The registered model type is MLflow and Azure Machine Learning automatically fills in the folder containing the model files. You need to provide a name for the registered model and optionally a version.
Deploy your model using the Azure Machine Learning studio
Once the model is registered in the Azure Machine Learning workspace, you can navigate to the model overview and deploy it to a real-time or batch endpoint.
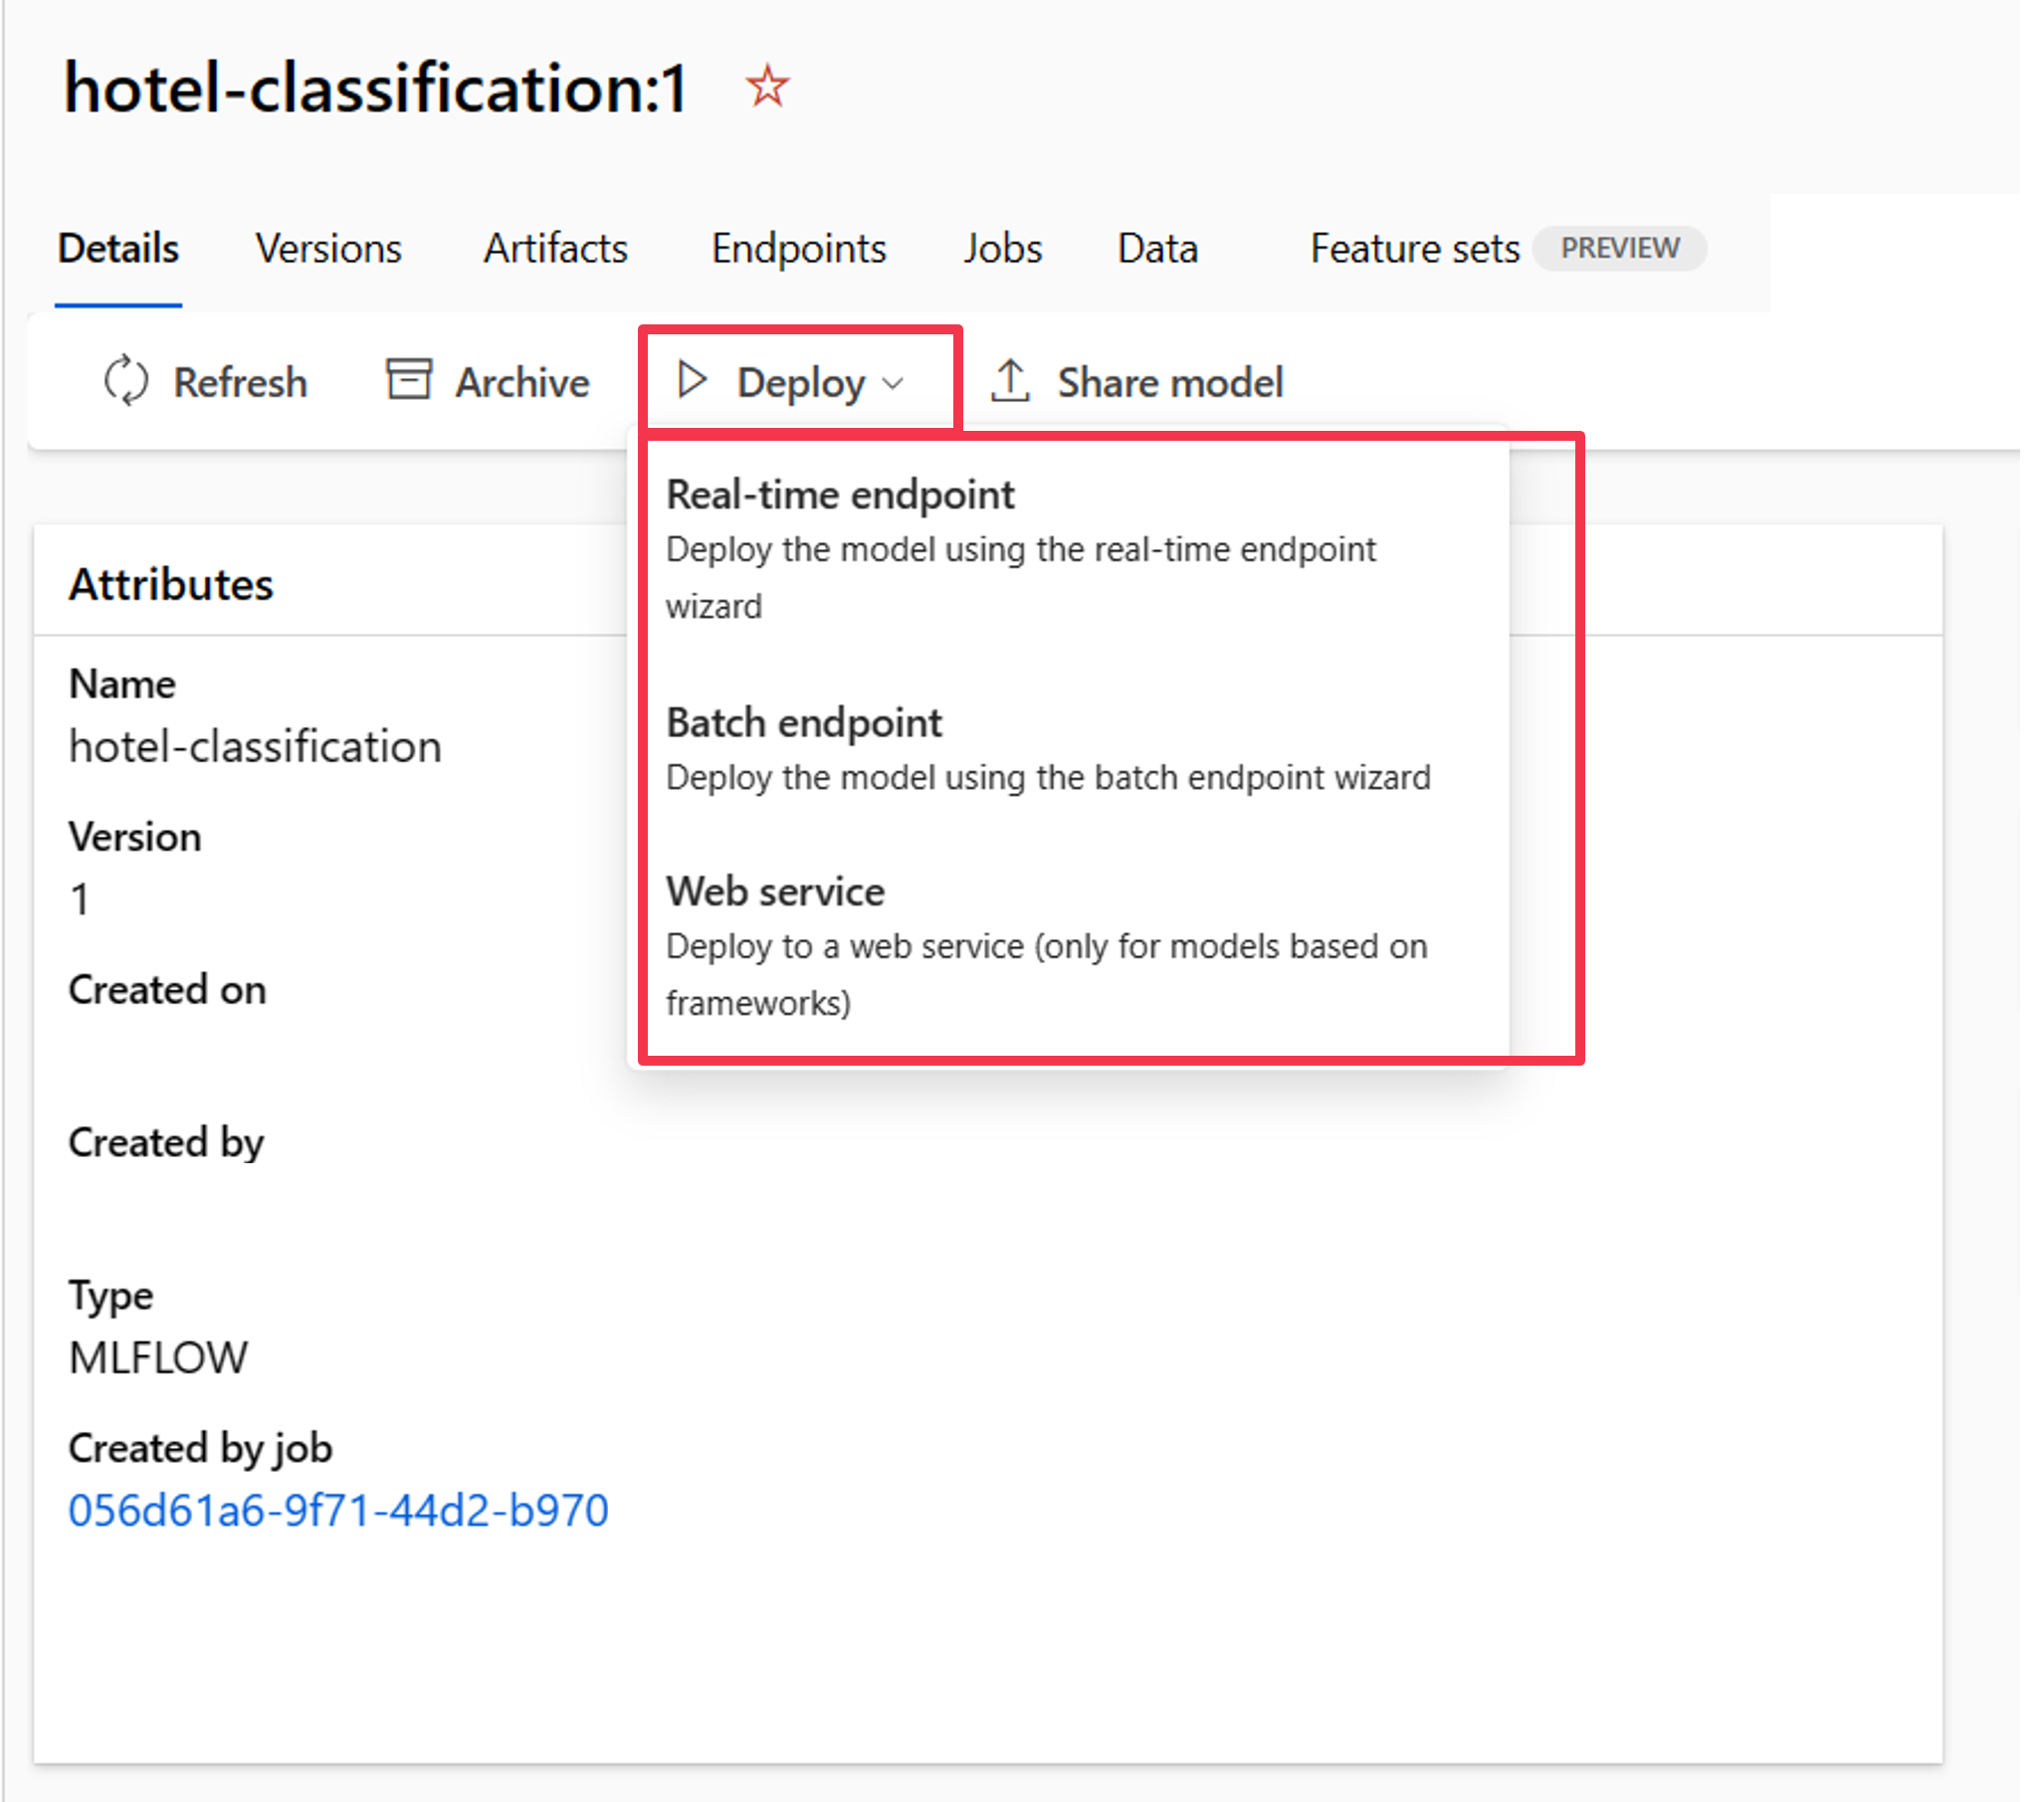
For example, you can deploy your model to a real-time endpoint by providing:
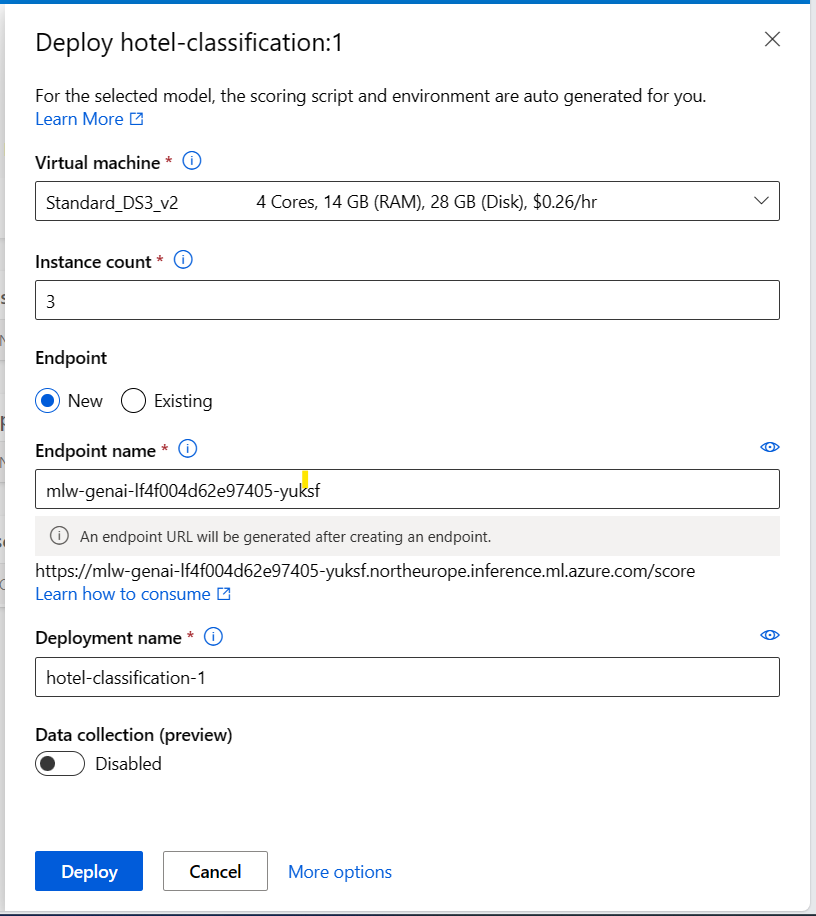
- Virtual machine: The compute used by the endpoint.
- Instance count: The number of instances to use for the deployment.
- Endpoint: Deploy your model to a new or an existing endpoint.
- Endpoint name: Used to generate the endpoint URL.
- Deployment name: Name of the deployed model to the endpoint.
Note
You can deploy multiple models to the same endpoint. The creation of the endpoint and the deployment of a model to an endpoint will take some time. Wait until both the endpoint and deployment are ready before trying to test or consume the deployed model.
Test the model in the Azure Machine Learning studio
When your model is deployed to a real-time endpoint, you can quickly test the model in the Azure Machine Learning studio.
Navigate to the endpoint and explore the Test tab.
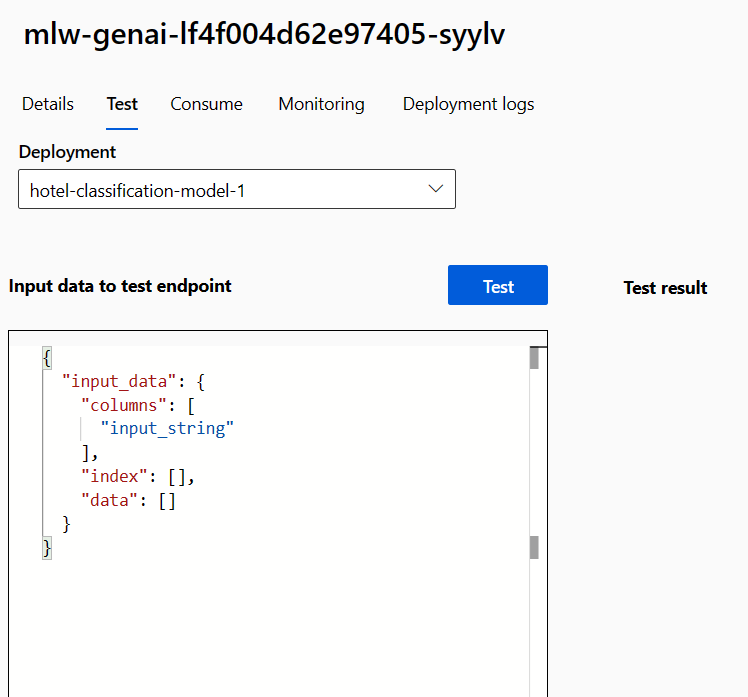
As the real-time endpoint works as an API, it expects the input data in JSON format. An example of the expected output is provided in the Test tab:
{
  "input_data": {
    "columns": [
      "input_string"
    ],
    "index": [],
    "data": []
  }
}
The format of the test data should be similar to the training data, excluding the label column. For example, when you want to test a model fine-tuned for text classification, you need to provide one column to the endpoint: the sentence to be classified:
{
  "input_data": {
    "columns": [
      "input_string"
    ],
    "index": [0, 1],
    "data": [["This would be the first sentence you want to classify."], ["This would be the second sentence you want to classify."]]
  }
}
You can enter any test data in the studio, and select Test to send the data to the endpoint. The result appears under Test result almost immediately.
Tip
If you don't find the expected response under Test result, the most likely cause is that the format of the input data is incorrect. The scoring script is autogenerated for you when deploying an MLflow model, which means the format of the input data should be similar to the training data (excluding the label column).