Exercise: Navigate the finance and operations apps
Read this first - before you start the lab!
Important
For this lab, you CANNOT sign in with your own credentials. Use the following steps to sign in to your lab environment with the correct credentials.
Select Launch VM mode or Sign in to launch VM mode in this unit.
In the Resources tab on the lab side bar, select the T icon next to Password in the MININT box, to have the administrator password for the Virtual Machine entered for you.
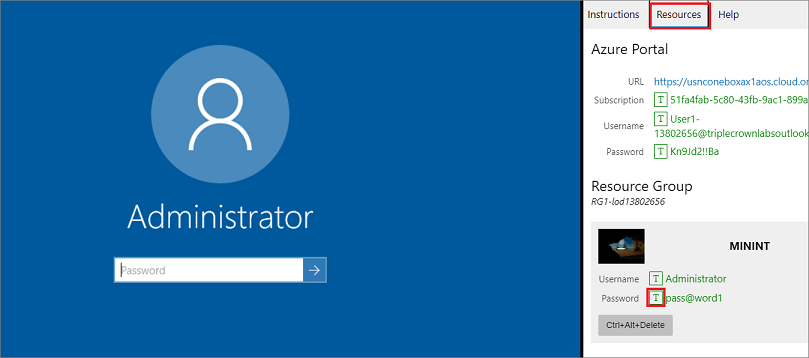
Press Enter.
In the Networks window that opens, select No to not allow your PC to be discoverable.
You'll see a PowerShell window and a Windows Command window appear. After about two to three minutes, they'll close and Microsoft Edge will open automatically. Wait for it to navigate to the Sign in page for finance and operations.
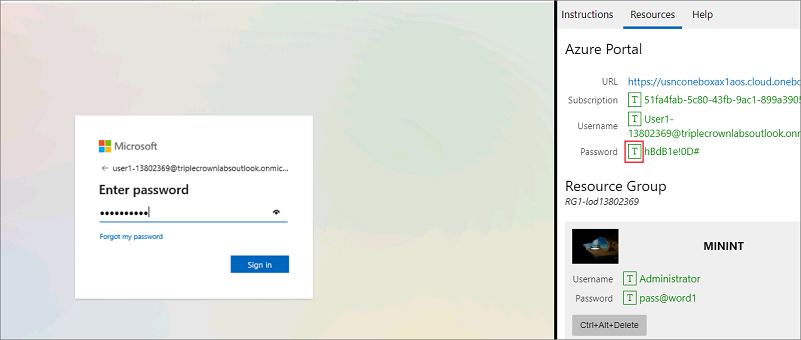
On the Microsoft Sign in page in finance and operations, insert your mouse cursor into the Username field.
On the Resources tab of the lab side bar, below the Azure portal heading, select the T icon next to Username, then press Enter.

Your mouse cursor will now be in the Password page.
On the Resources tab of the lab side bar, below the Azure portal heading, select the T icon next to select Password, then press Enter.
Don't stay signed in, or store the password on the virtual machine.
To see the lab instructions, select the Instructions tab on the lab side bar.
You can now begin your work on this lab.
Objective
In this lab, you navigate through the user interfaces of finance and operations apps. You see how to access the individual forms from menus. You also find out how to add a new record in finance and operations apps.
Lab steps
Now that you have become familiar with finance and operations apps, take some time to explore the interfaces.
On the Finance and Operations Home page, if configured, you find:
The navigation menu on the left that is collapsed by default.
Your company's logo.
Workspace tiles available to you based on your role in the organization.
A calendar and work items assigned to you.
The Search bar that is useful to quickly find what you need.
In the top right, you have the company you're currently working with, notifications, settings, and help links. Verify the company listed is USMF.
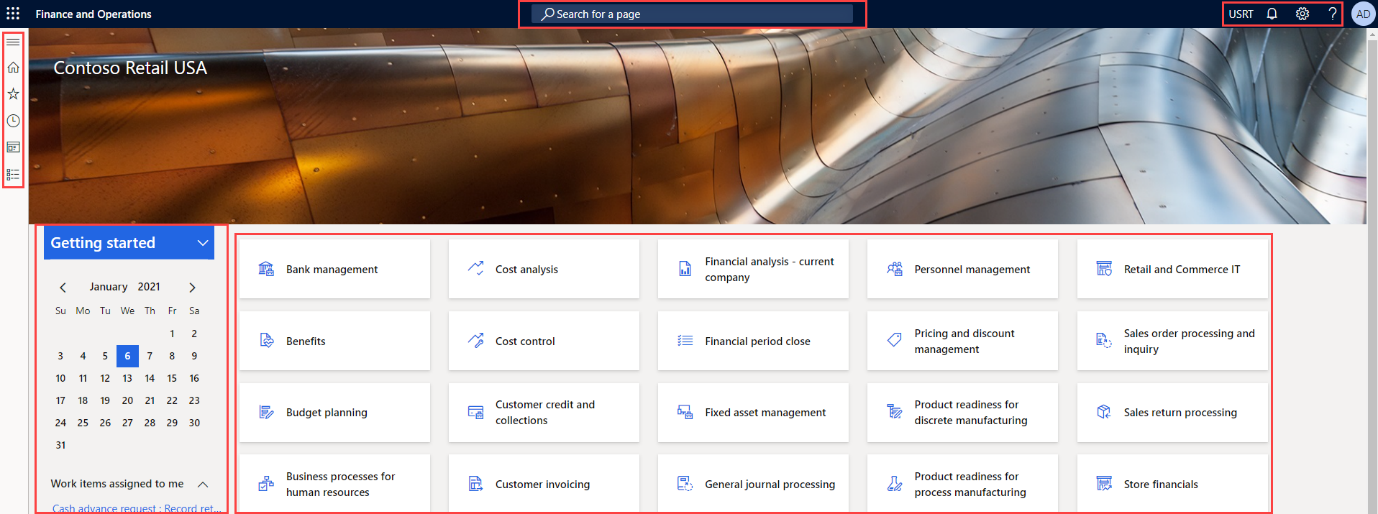
In the top left, select the Expand the navigation pane hamburger menu.
The navigation pane is where you find collections for your Favorites, Recent items, Workspaces, and Modules.
In the navigation pane, select Modules > System administration.
Review the areas available in the System administration module.
Under Setup, select Client performance options.
In the Client performance options pane, under Feature callouts enabled, select the toggle switch and ensure that it's set to Yes.
Review the other available options, scroll to the bottom of the pane, and then select OK.
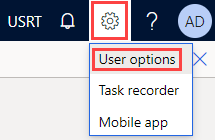
On the Home page, in the top right, select the Settings icon, and then select User options.
On the Options page, use the tabs to configure different settings that apply to your account.
Select the Preferences tab.
Review the available preferences. Notice you can change the default company and initial page view when you sign in.
Select and review the Account and Workflow tabs.
In the left navigation menu, select the Home icon.
On the Home page, in the top center of the page, select the Search for a page box.
In the search box, search for All vendors.
Select All vendors Accounts payable > Vendors
You may need to wait the first time you search for a page. There's a small spinning circle to the right of the search box while the search is processing.
The All vendors page is an example of a list page. The list page contains master data that can be read, created, deleted, and updated. There are more features using the ribbon above the list.

Highlight one of the vendors from the list and, on the right, select the Related information menu, and review the additional information that is provided.
In the vendor list, select Acme Office Supplies.
Select the Group menu, and then select the Vendor group column title.
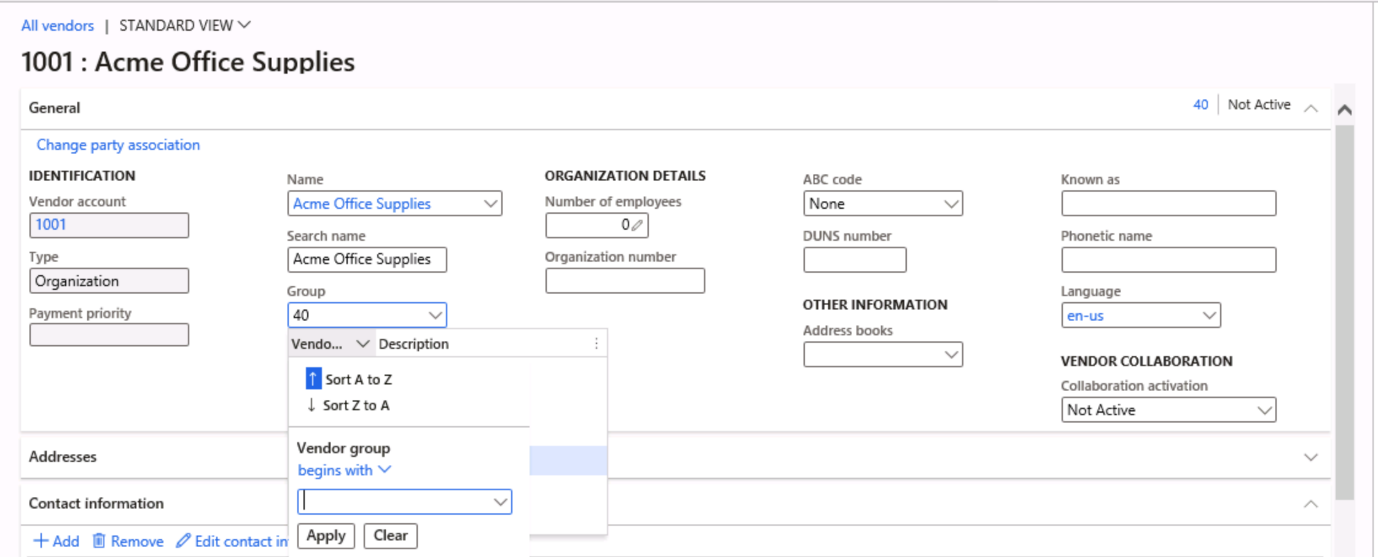
Many menus have sorting and filtering available. Use the filters to quickly locate the field content you're looking for.
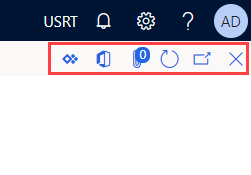
In the top right, notice the extra functionality. Move your mouse to each item, and review the feature callout. When complete, select the Close icon to close the page and return to the Home page.
In the upper-right, select the Help question mark icon, and then select Help.
Notice the help information is related to the current page.
Try selecting a workspace tile, and then review the help information for that workspace. When complete, return to the Home page.
Close the lab environment
- Select Done in the Instructions pane in the lab side bar.
- In the Lab is complete window, select Continue, and then select Leave to return to the next unit in the module.