Set up push notifications
Throughout the day, as field sellers meet with customers, certain situations might occur that they should be aware of. For example, a seller might be assigned to a new lead that they should engage with immediately. Another scenario could occur where a customer meeting was created and assigned to them. If they're not alerted of the change, it's possible that they might miss the lead or not notice that they have a meeting assigned to them. In the Dynamics 365 Sales mobile app, push notifications let you send updates to users through their mobile phones or tablets.
You can use push notifications to:
Alert the user about status changes in records that are assigned to them.
Remind field sellers to enter important business data.
Important
Setting up push notifications requires an understanding of how to create cloud flows in Microsoft Power Automate and how to use the Microsoft Dataverse connector. For more information, see the Overview of cloud flows and the Microsoft Dataverse documentation.
Get started creating a push notification
The Dynamics 365 Sales mobile app is powered by Microsoft Power Platform. Essentially, it's a model-driven application that's being consumed on mobile devices. Push notifications are delivered by using flows that are created in Power Automate. They can be triggered based on a series of different events such as a lead or opportunity record being created.
Each scenario that organizations use push notifications for differs. At a high level, the process resembles the following steps:
Create and define when the flow should be triggered.
Identify the user to whom the record is assigned.
Get extra information (optional).
Call the Push Notification action.
View in the mobile app.
Create and define when the flow should be triggered
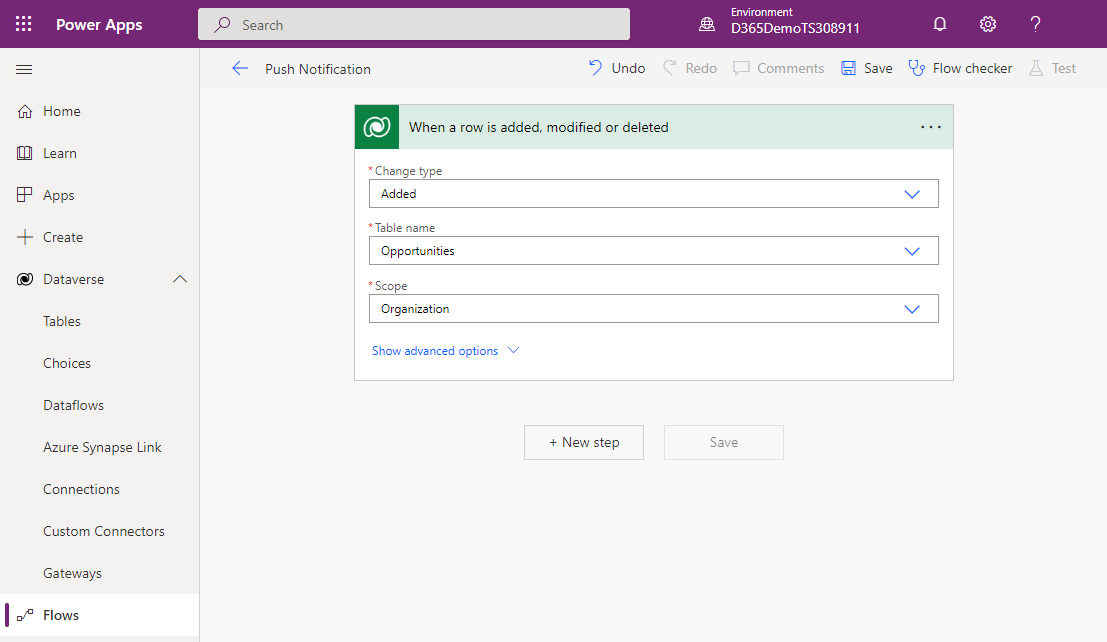
The first step is to create the flow and specify how to trigger it. For this example, you want the flow to be triggered when an opportunity record is created. This approach ensures that the field seller is notified when a new opportunity is assigned to them.
Because all Dynamics 365 Sales information related to leads is stored in Dataverse, the easiest way to trigger this flow is to apply the Dataverse connector. This approach provides different triggers and actions that can be applied against a Dataverse instance. In this case, because you want to trigger the flow when an opportunity is created for anyone in the organization, you set up the trigger as displayed in the following image.
For more information, see Microsoft Dataverse - Triggers.
Identify the user who's assigned as owner of the opportunity
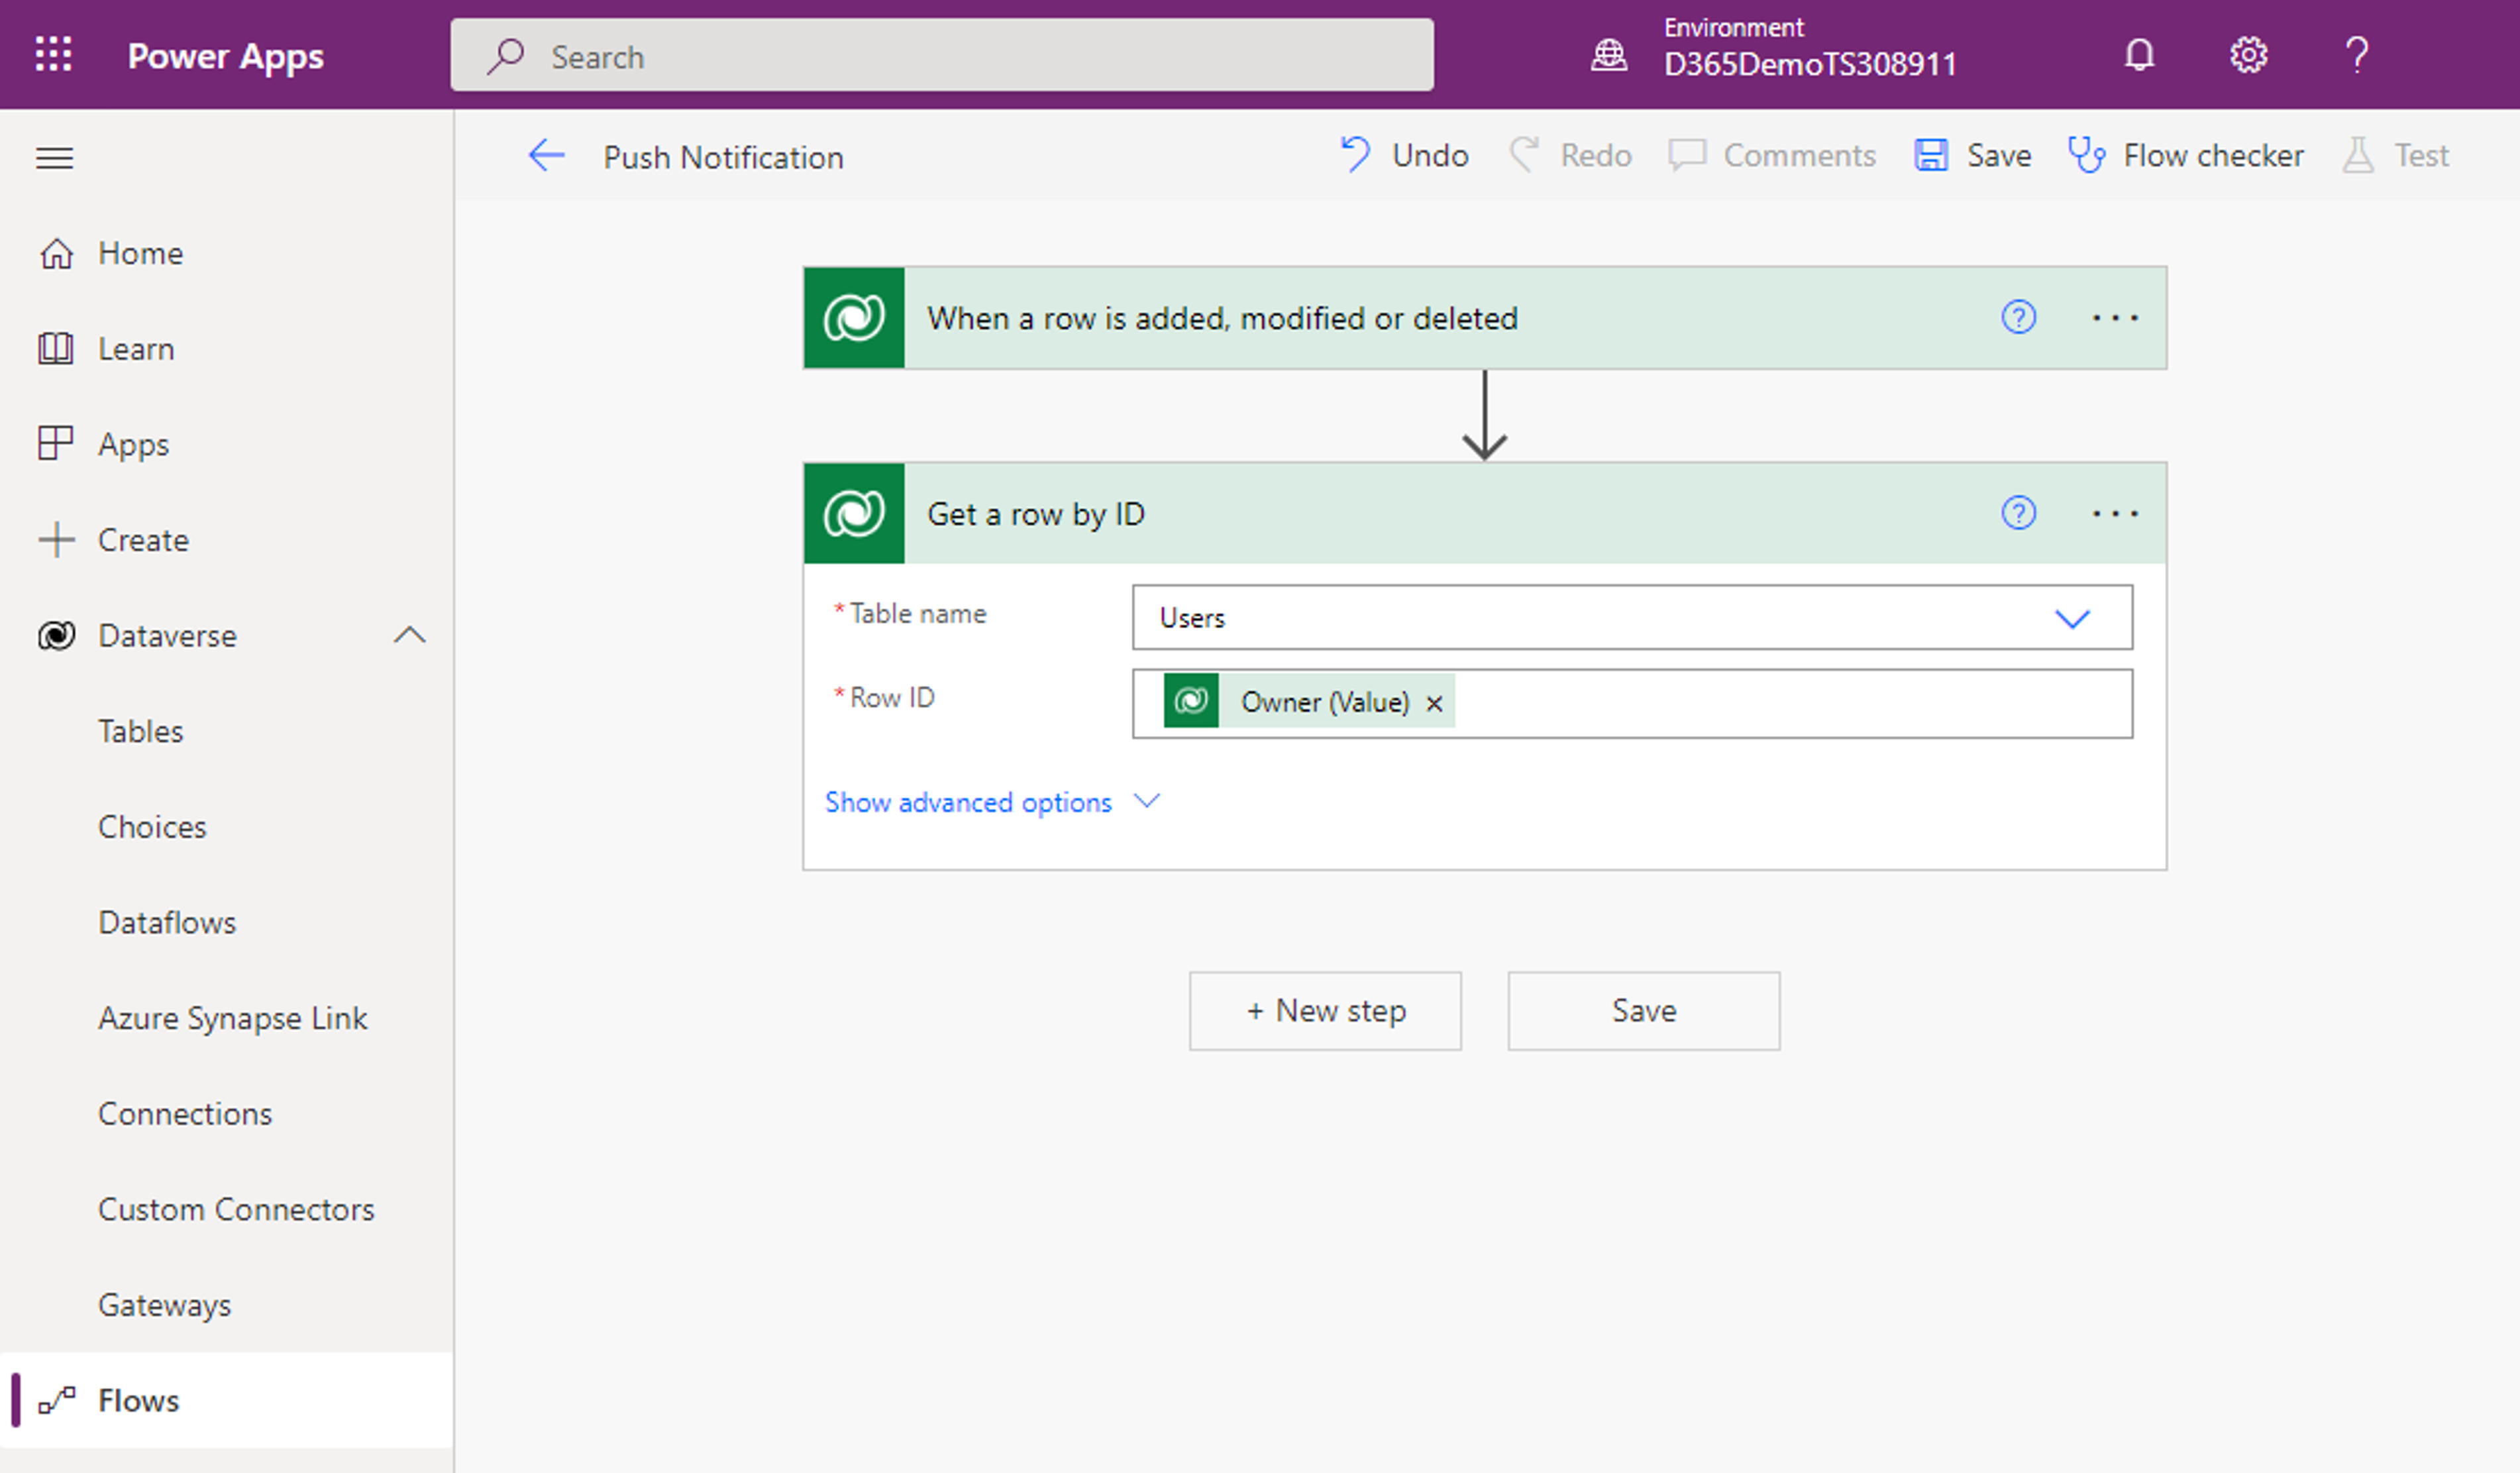
When opportunities are created, they're assigned to the user or team that is responsible for it. You can complete this task in the Owner field. To ensure that the push notifications are sent to the correct person, you need to identify the user who's designated as the owner of the opportunity record. The Dataverse connector includes an action called Get a row by ID. You can use this action to reference a specific record. In this case, you select the Owner field on the opportunity because it defines the user who's responsible for the opportunity.
For more information, see Get a row by ID.
Get extra information
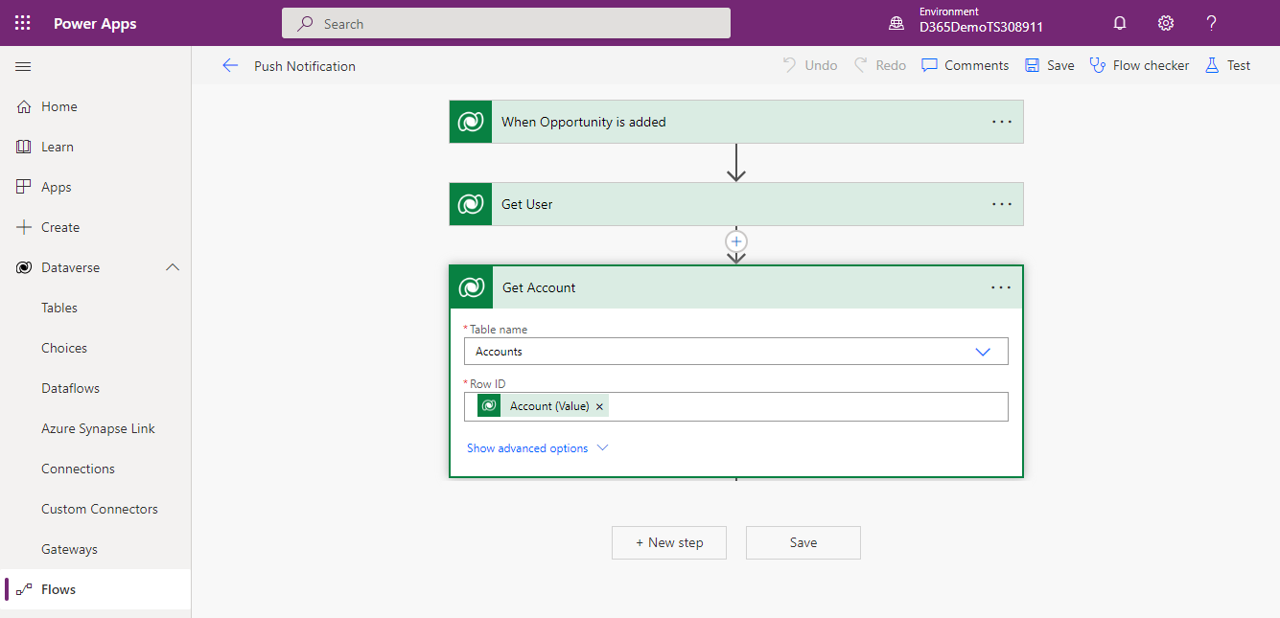
You might want to include extra information in your push notification that you send to the user. For example, you might want to include information about the account or contact that the opportunity is associated with. If you plan to include more details from related records, such as accounts, you need to get that information the same way that you did for the user. The following image shows the account details being retrieved for the account that's associated with the opportunity.
Call the push notification action
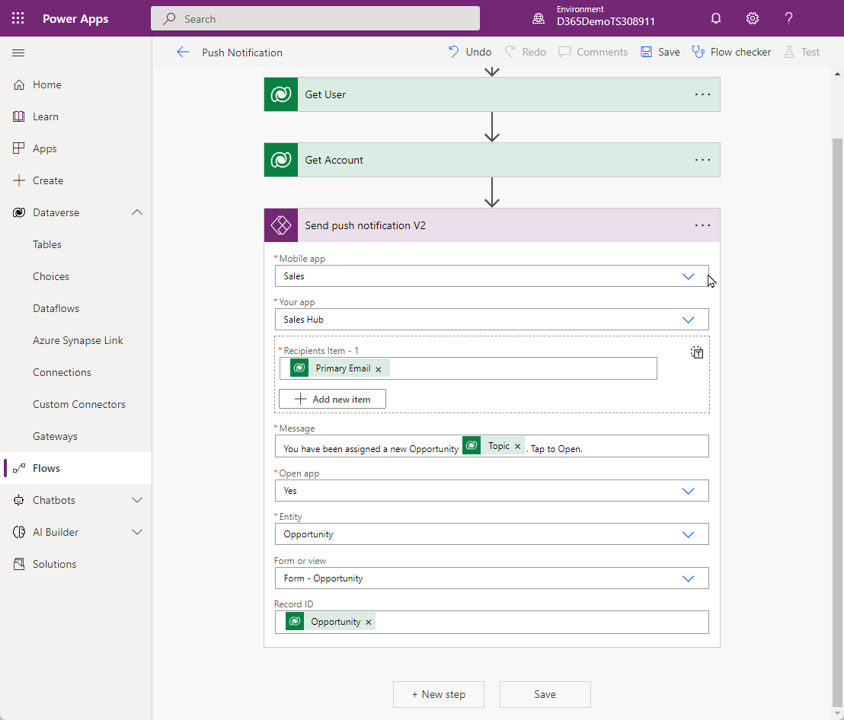
Now that you identified the user to send the notification to and the data you want to include, the final step is to create and define the details of the notification. The Microsoft Power Apps Notifications V2 connector includes the Send a push notification V2 action. You can use this action to send push notifications to canvas and model-driven applications. As previously mentioned, the Sales mobile application is a model-driven app.
To ensure that push notifications work as intended and are pushed to the correct application, you need to define the following information:
Mobile app - Defines the type of application it is, such as an app from Power Apps or Sales. In this instance, you select Sales.
Your app - Defines the specific app that you want to set up the notification for.
View in the Sales mobile app
For sellers to receive push notifications, they need to ensure that they enable notifications in the application. They can do so when the app is launched or from the settings area of the application.
After notifications are enabled, the Power Automate flow is triggered when an opportunity is created, and any push notifications are shown to the seller who's using the mobile phone or tablet. Sellers don't need to be in the app or using their device to receive push notifications.


