Register a device
Exercise 1: Configure the simulator
In this exercise, you are configuring the simulator to work with your Field Service Application.
Each exercise consists of a scenario and learning objectives, the scenario describes the purpose of the exercises, while the objectives are listed and have bullet points.
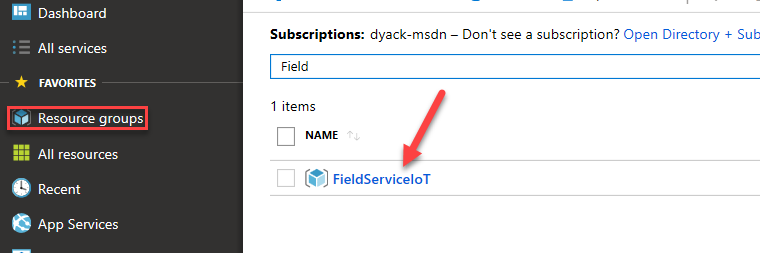
Go to your Azure portal, select Resource Groups, and open the resource group you created when you deployed the Connected Field Service.
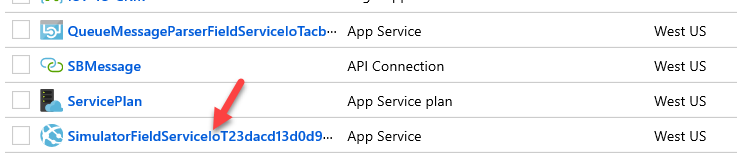
Locate and click on the SimulatorFieldServiceIoTXXXX of resource type App Service.
Click on the URL.

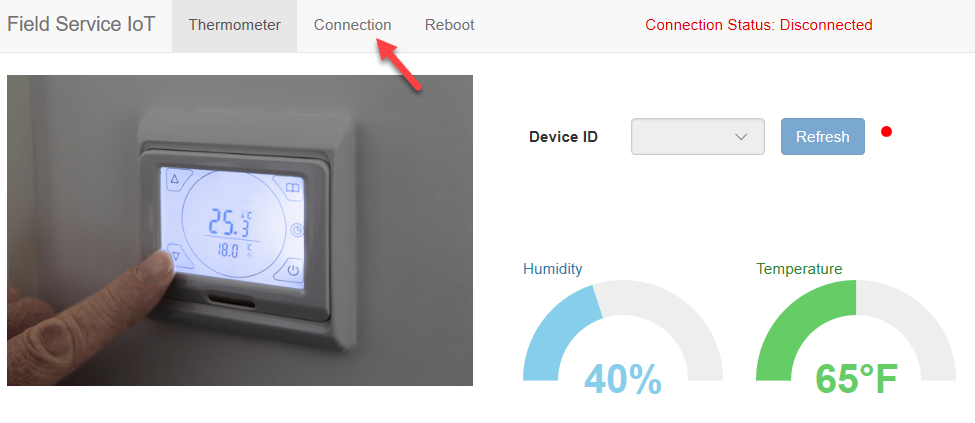
Select Connection.
Go back to Azure portal. Select the Resource Group you created and click on the IoT Hub resource type.
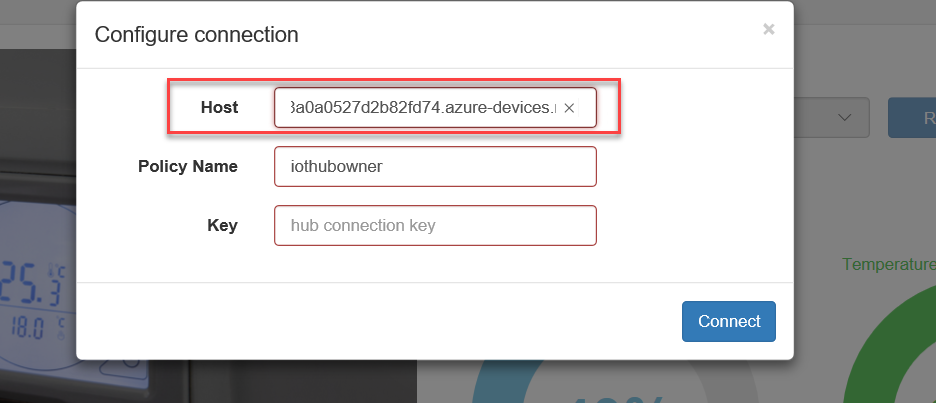
Copy the Hostname.

Go back to the simulator and paste the Hostname into the Host field.
Go back to Azure portal and make sure you still have the IoT Hub selected.
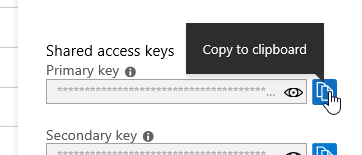
Select Shared Access Policies.
Click on the IoT Hub Owner.
Copy the Primary Key.
Go back to the simulator, paste the Primary Key in the Key field, and click Connect.
Click on the Device ID dropdown. You will notice that no device is registered currently, you will register a device in the next exercise. Do not close this browser window.
Exercise 2: Register a device
In this exercise, you are creating a customer asset, and then you are registering a device with Azure IoT Hub. You then manipulate the device to cause the creation of an IoT Alert into Dynamics 365. By completing this, you verify that your deployment of Connected Field Service is working.
Each exercise consists of a scenario and learning objectives, the scenario describes the purpose of the exercises, while the objectives are listed and have bullet points.
Go to Power Apps and make sure you are in the correct environment.
Select Apps and click to open the Connected Field Service application.
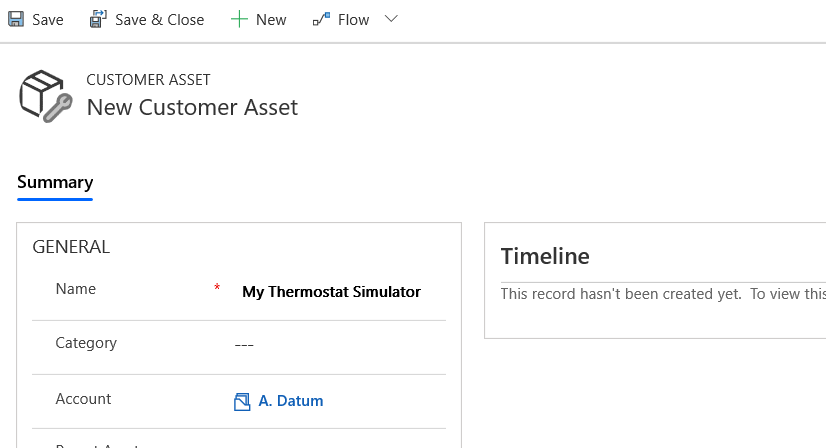
Select Customer Assets and click New.
Enter My Thermostat Simulator for Name and select A. Datum for Account, and click Save.
After you saved the record, you should be able to see more sections of the form. Scroll down to the Connected Device Attributes section.
Enter MyThermSim1 for Device ID and click Save. It is okay if the Device ID disappears after saving the data. You will be able to see the expected results after you register the device.
Click Register Devices.
Click OK.
In the Connected Devices section and click Refresh.
You should see the device registration progress. Initially, the Registration Status comes as 'In Progress'.
Refresh until the device is registered.
Go back to the simulator and click Refresh. You should now be able to see a Device in the dropdown Menu.
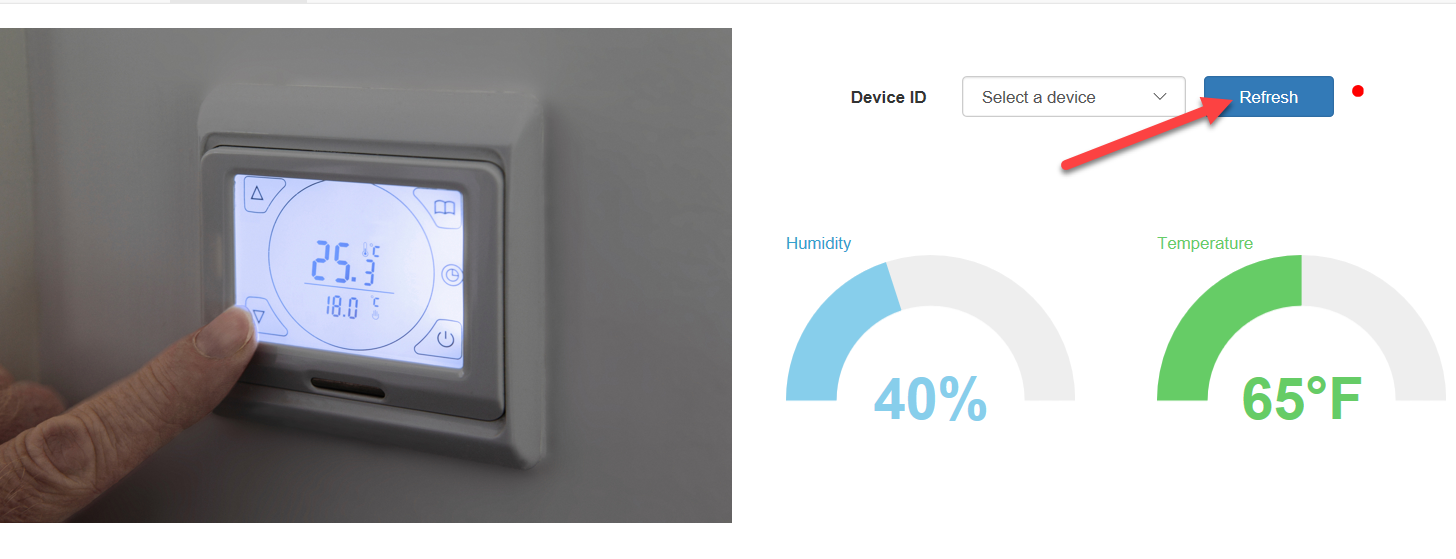
Click on the dropdown and select the device you registered.

Change the temperature to 86.
The Message Sent contains the temperature and humidity.
Go back to your Connected Field Service application and open the customer asset you created.
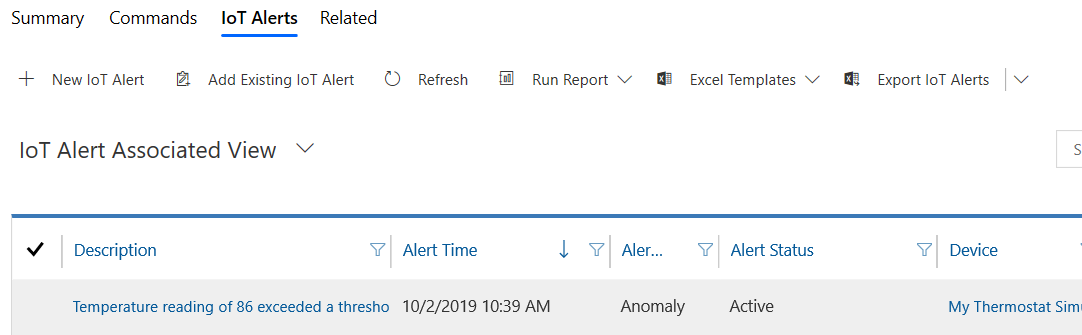
Click Related and select IoT Alerts.
You should see an alert generated by the simulator regarding exceeded Temperature Threshold.