Exercise - Panel of buttons and dynamic menus
There are several ways to provide inputs. Inputs trigger certain events and perform some changes. UI components assist users in interacting with the holograms on the scene.
Create a static panel of buttons
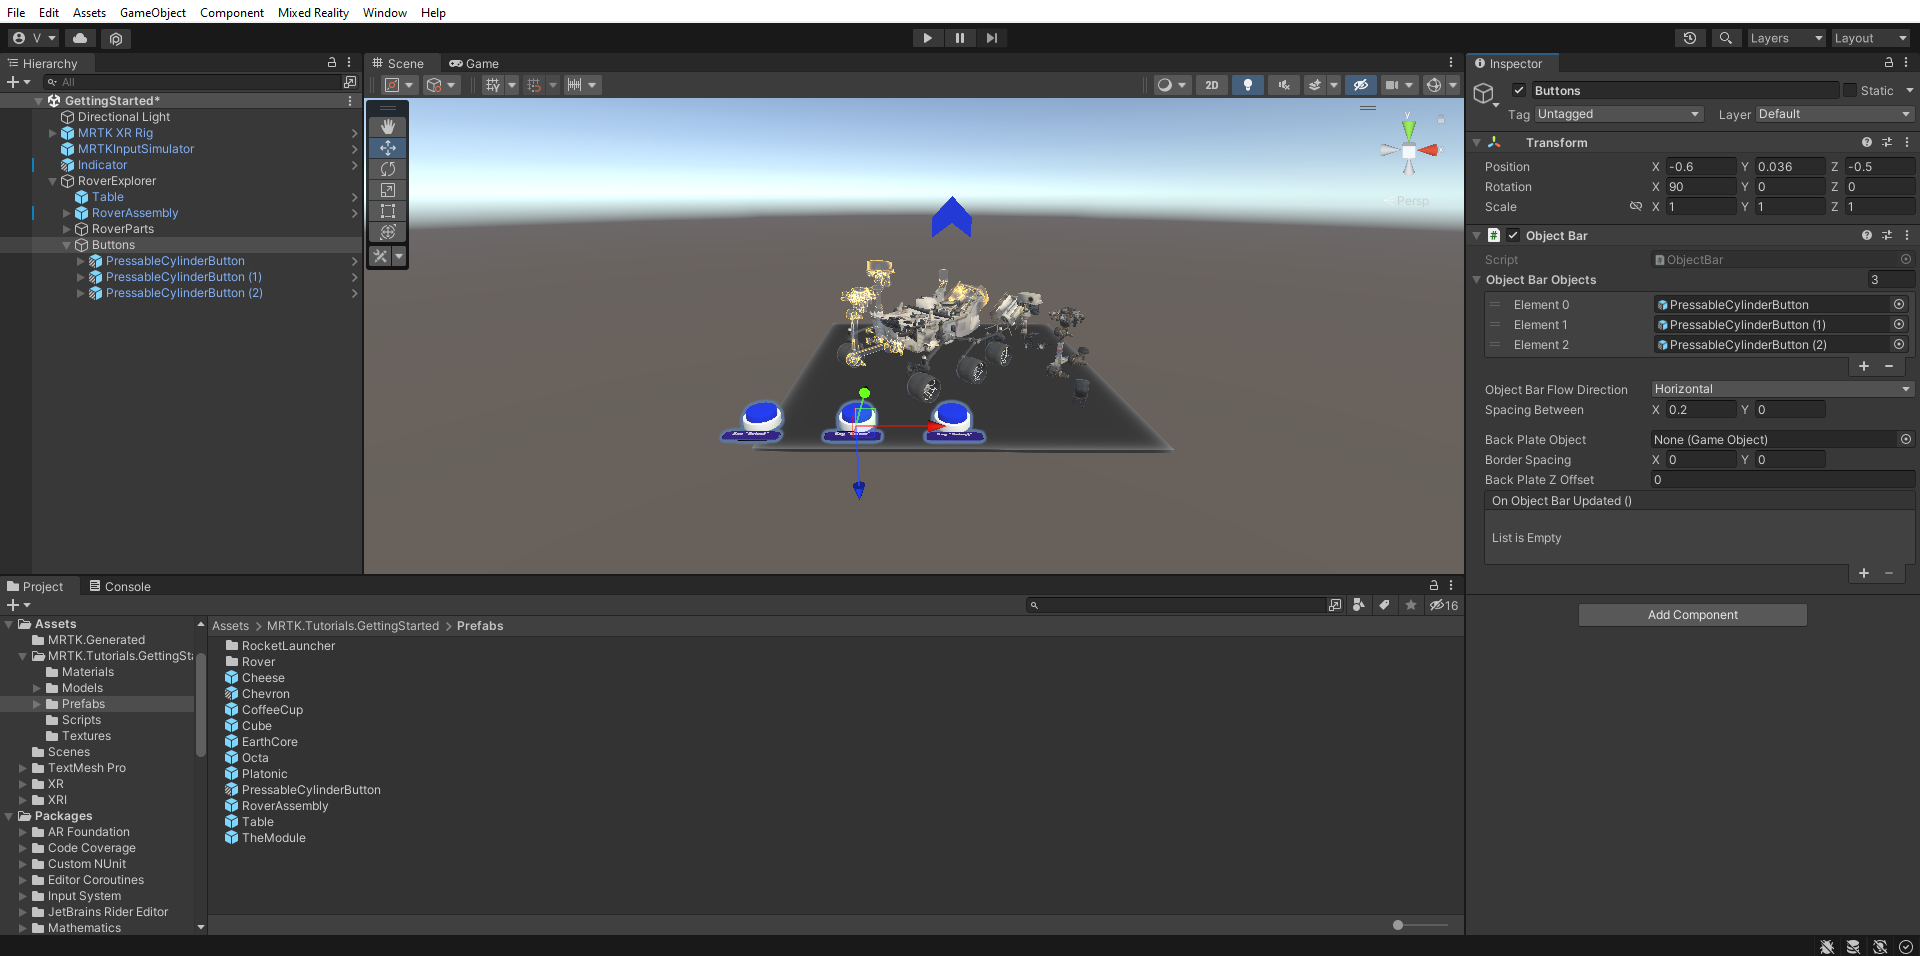
In the Hierarchy window, right-click the RoverExplorer object and select Create Empty to add an empty object as a child of the RoverExplorer. Name the object Buttons, and configure the Transform component as follows:
- Position: X = -0.6, Y = 0.036, Z = -0.5
- Rotation: X = 90, Y = 0, Z = 0
- Scale: X = 1, Y = 1, Z = 1

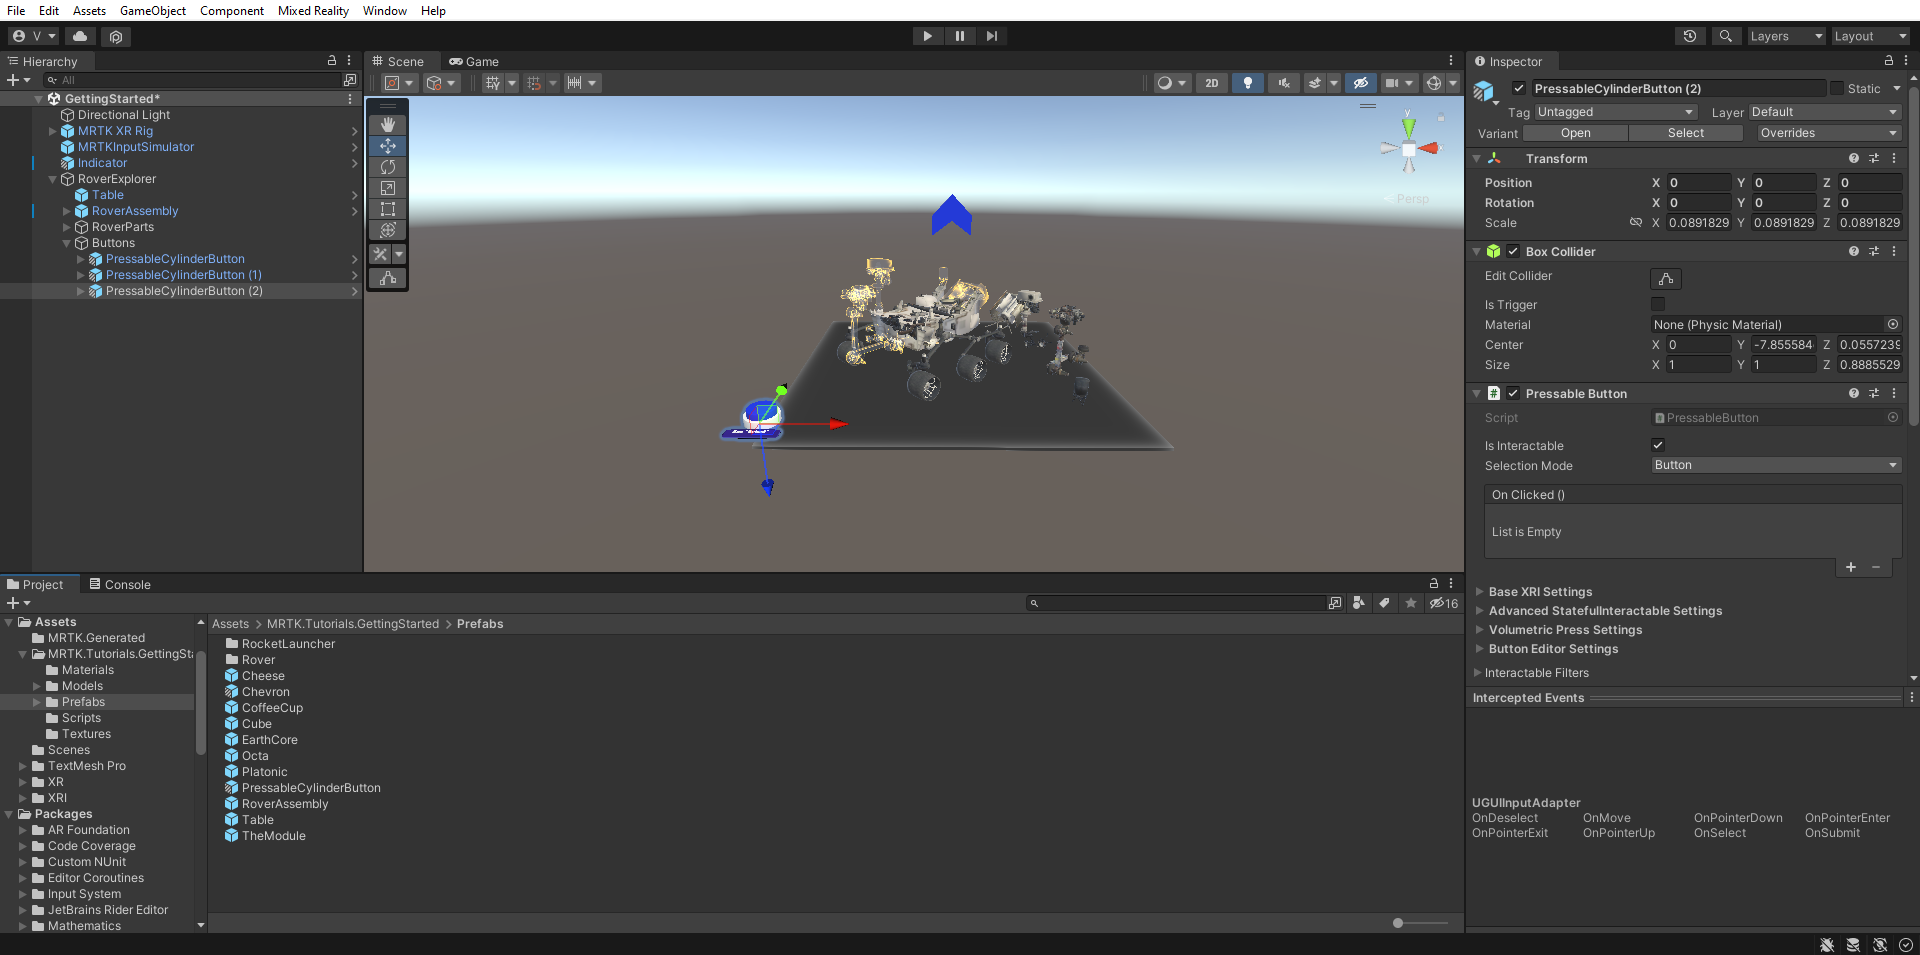
In the Project window, navigate to the Assets > MRTK.Tutorials.GettingStarted > Prefabs folder, click-and-drag the PressableCylinderButton prefab onto the Buttons object, then right-click the PressableCylinderButton and select Duplicate to create a copy, repeat until you've a total of three PressableCylinderButton objects under Buttons:
A window will prompt you to import TextMesh Pro. Select the first option to 'Import TMP Essentials'.
In the Hierarchy pane, select the Buttons object, and then in the Inspector pane, select Add Component to add the Object Bar component. Configure it as follows:
- Object Bar Flow Direction: Horizontal
- Spacing Between: X = 0.2, Y = 0
Assign each object under Buttons to Object Bar Objects list on the Object Bar component:
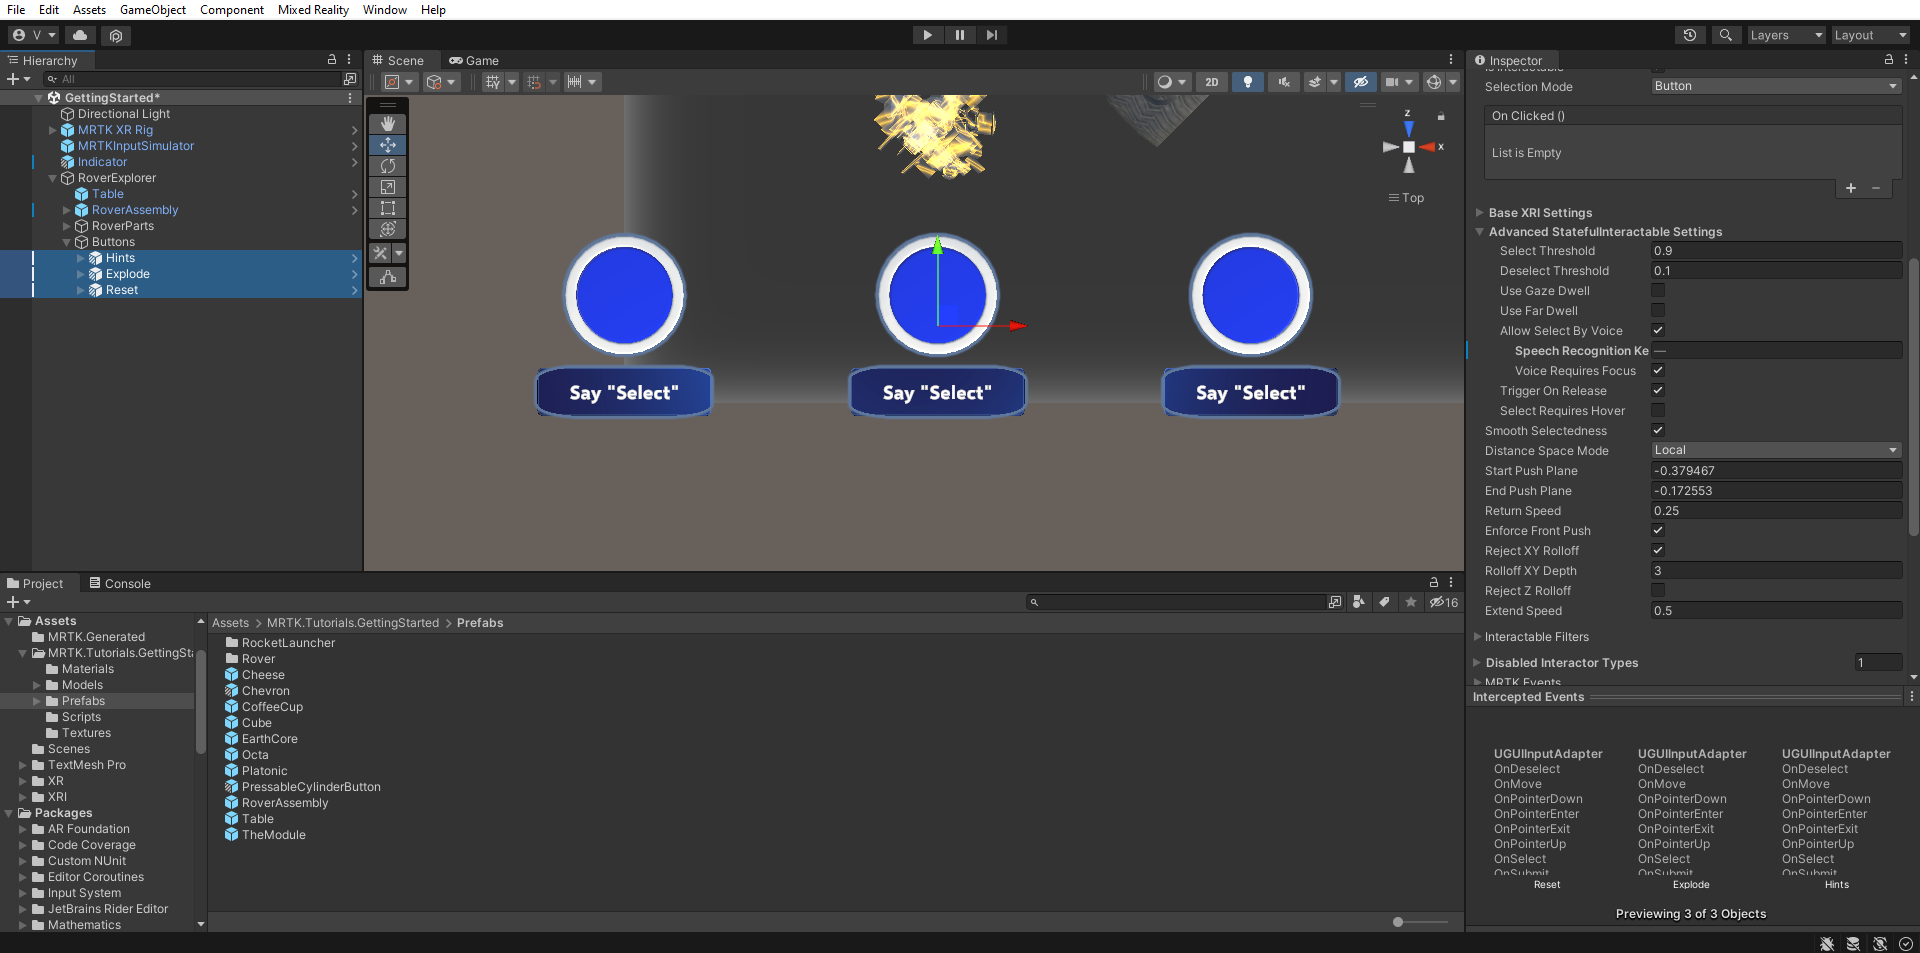
In the Hierarchy pane, name the buttons Hints, Explode, and Reset. For each button, change the SpeechRecognitionKeyword property under Advanced StatefulInteractable Settings in the Pressable Button component to match the button names::
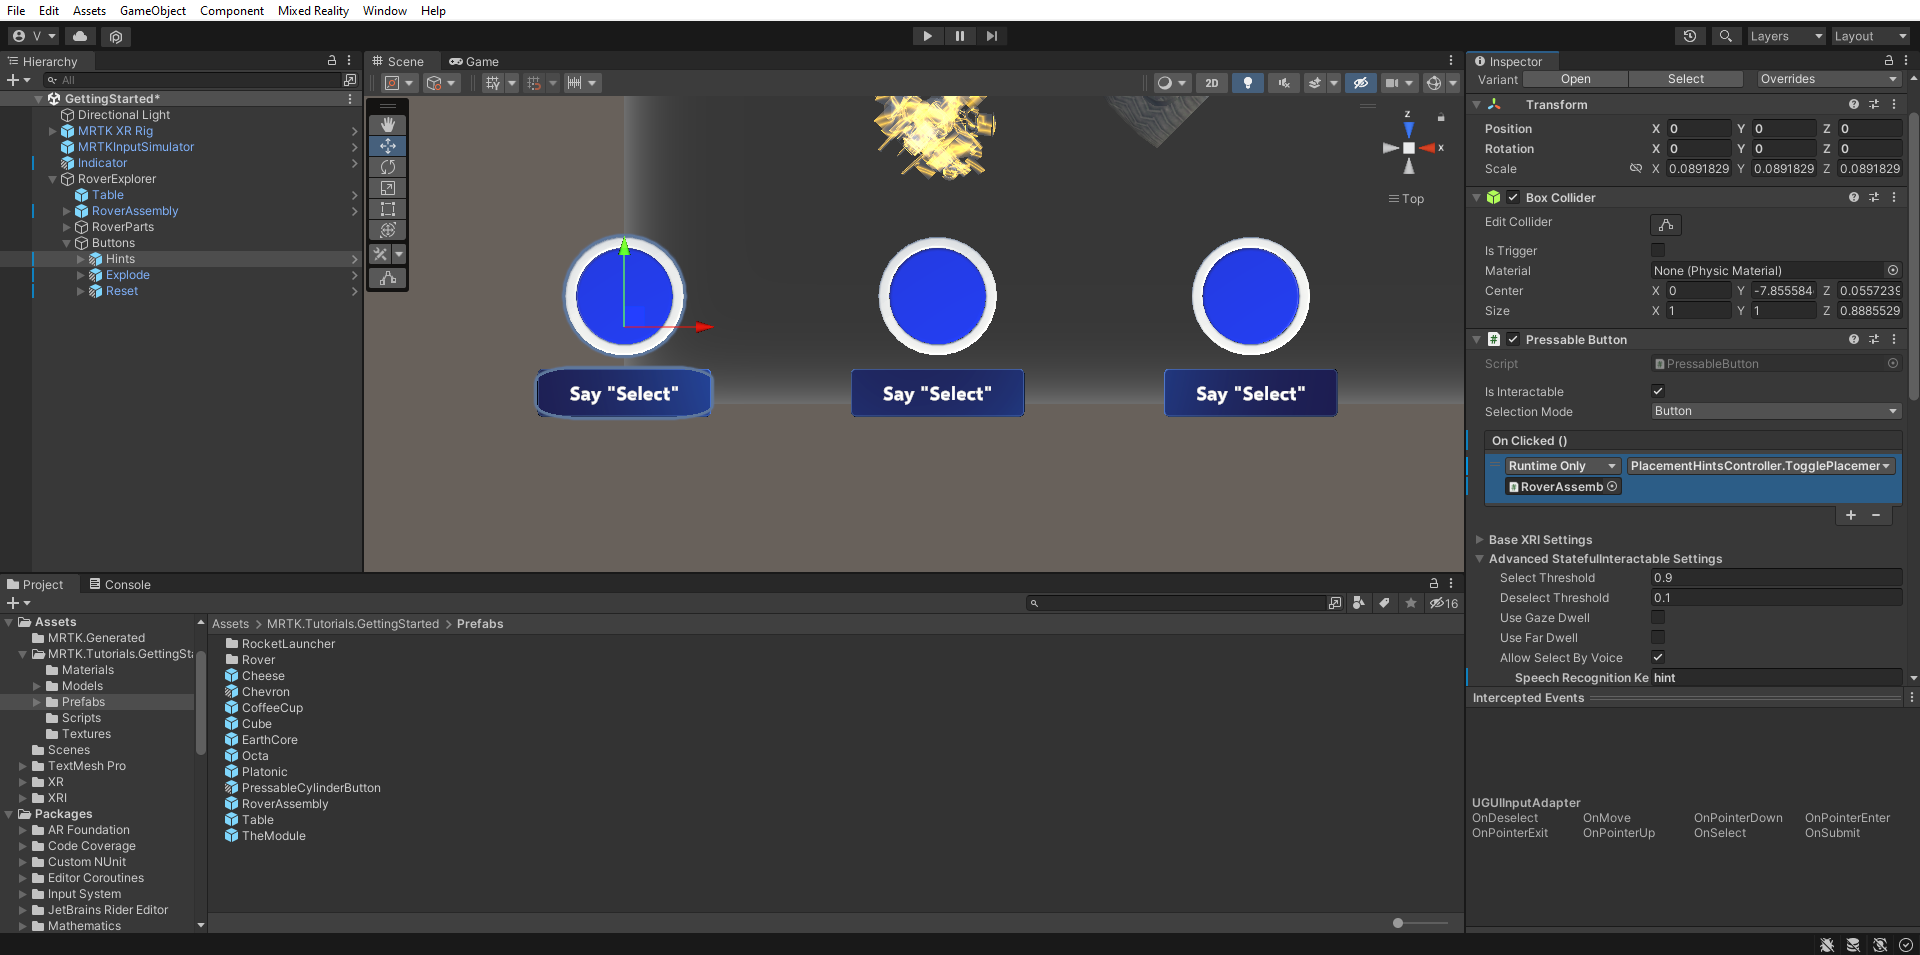
In the Hierarchy pane, select the Hints button object, and then in the Inspector window, configure the PressableButton.OnClicked () event as follows:
- Assign the RoverAssembly object to the None (Object) field
- From the No Function dropdown list, select PlacementHintsController > TogglePlacementHints () to set this function as the action to be run when the event is triggered
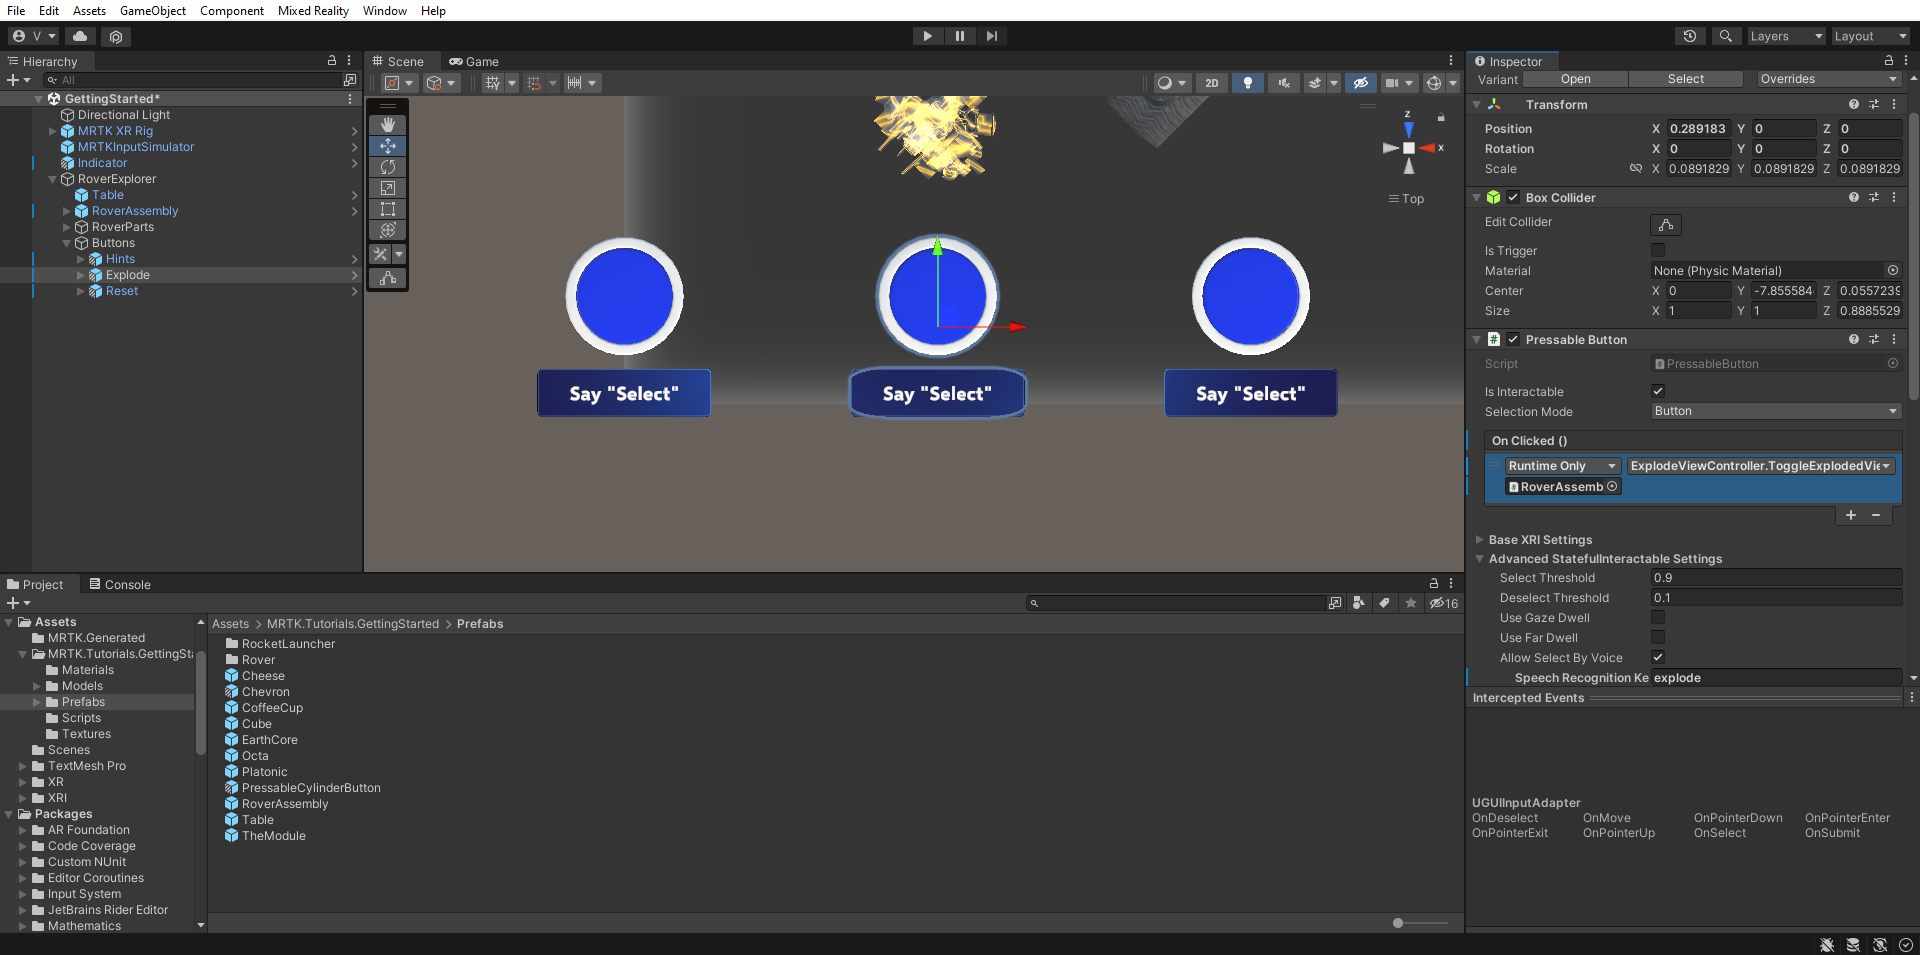
In the Hierarchy pane, select the Explode button object, then in the Inspector window, configure the PressableButton.OnClicked () event as follows:
- Assign the RoverAssembly object to the None (Object) field
- From the No Function dropdown, select ExplodedViewController > ToggleExplodedView() to set this function as the action to be executed when the event is triggered
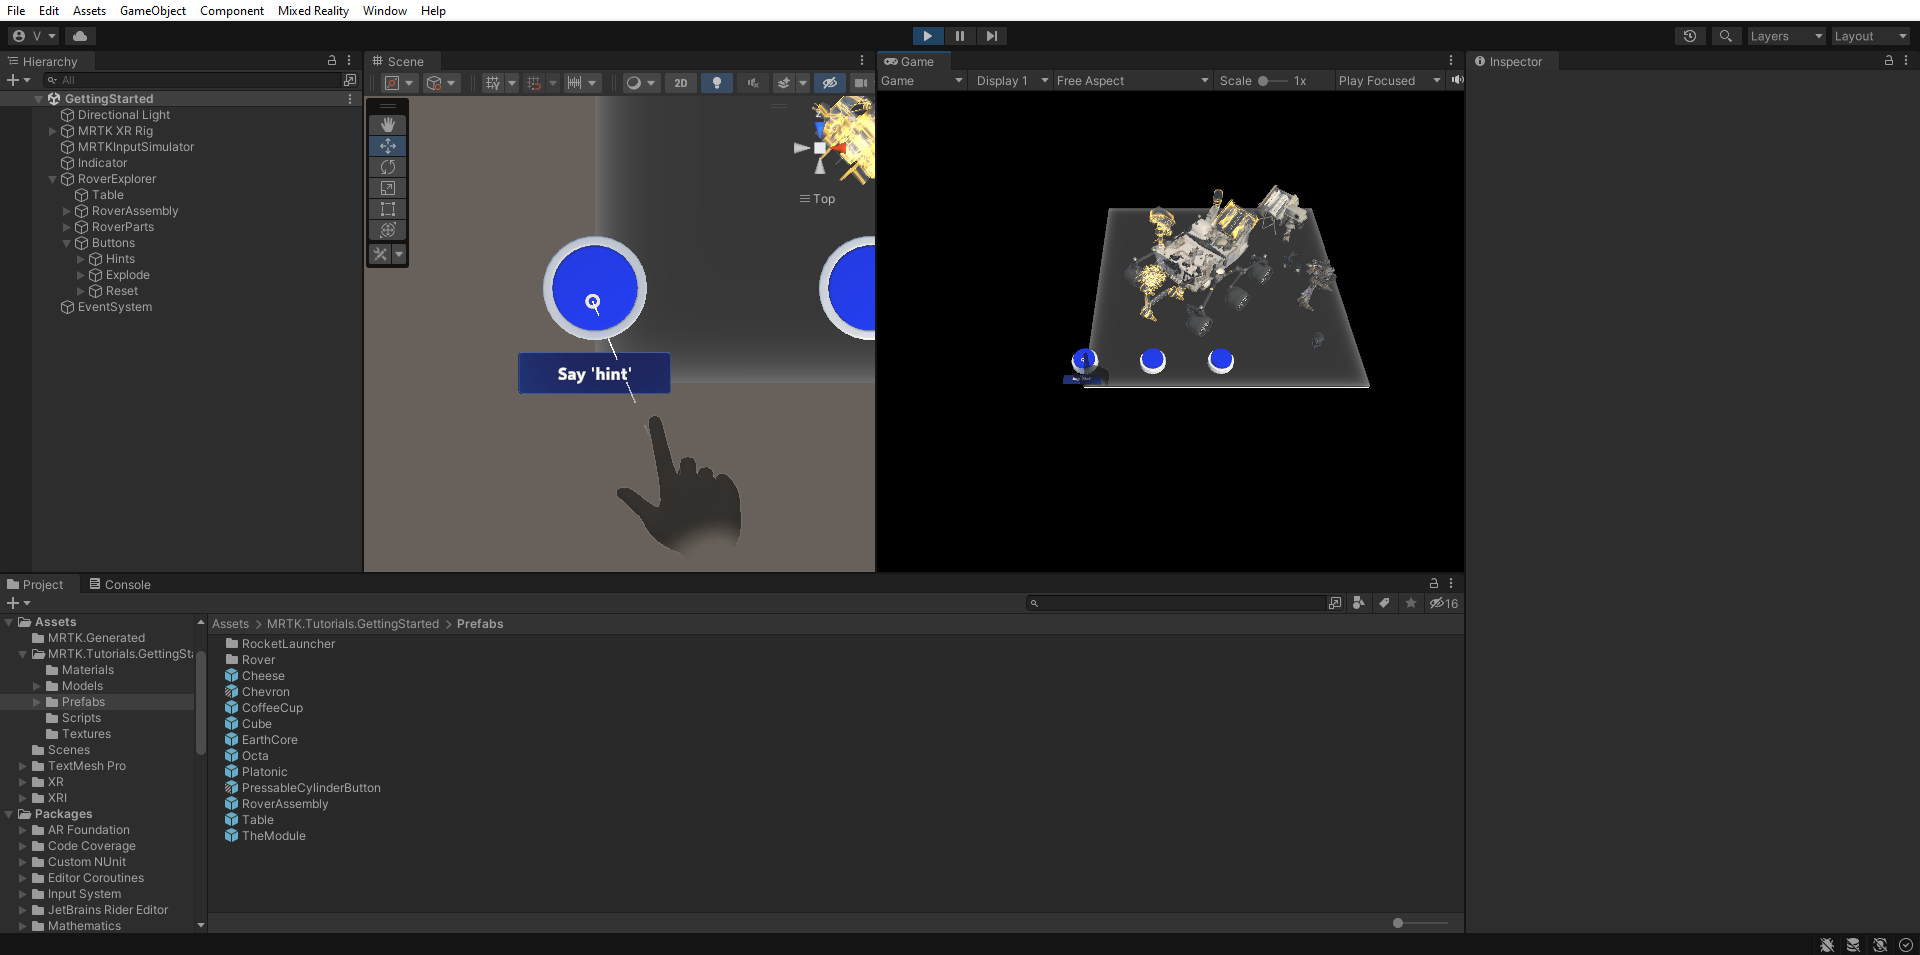
Press the Play button to enter Game mode. Press-and-hold the space bar to activate the hand and use the mouse to press the Hints button to toggle the visibility of the placement hint objects:
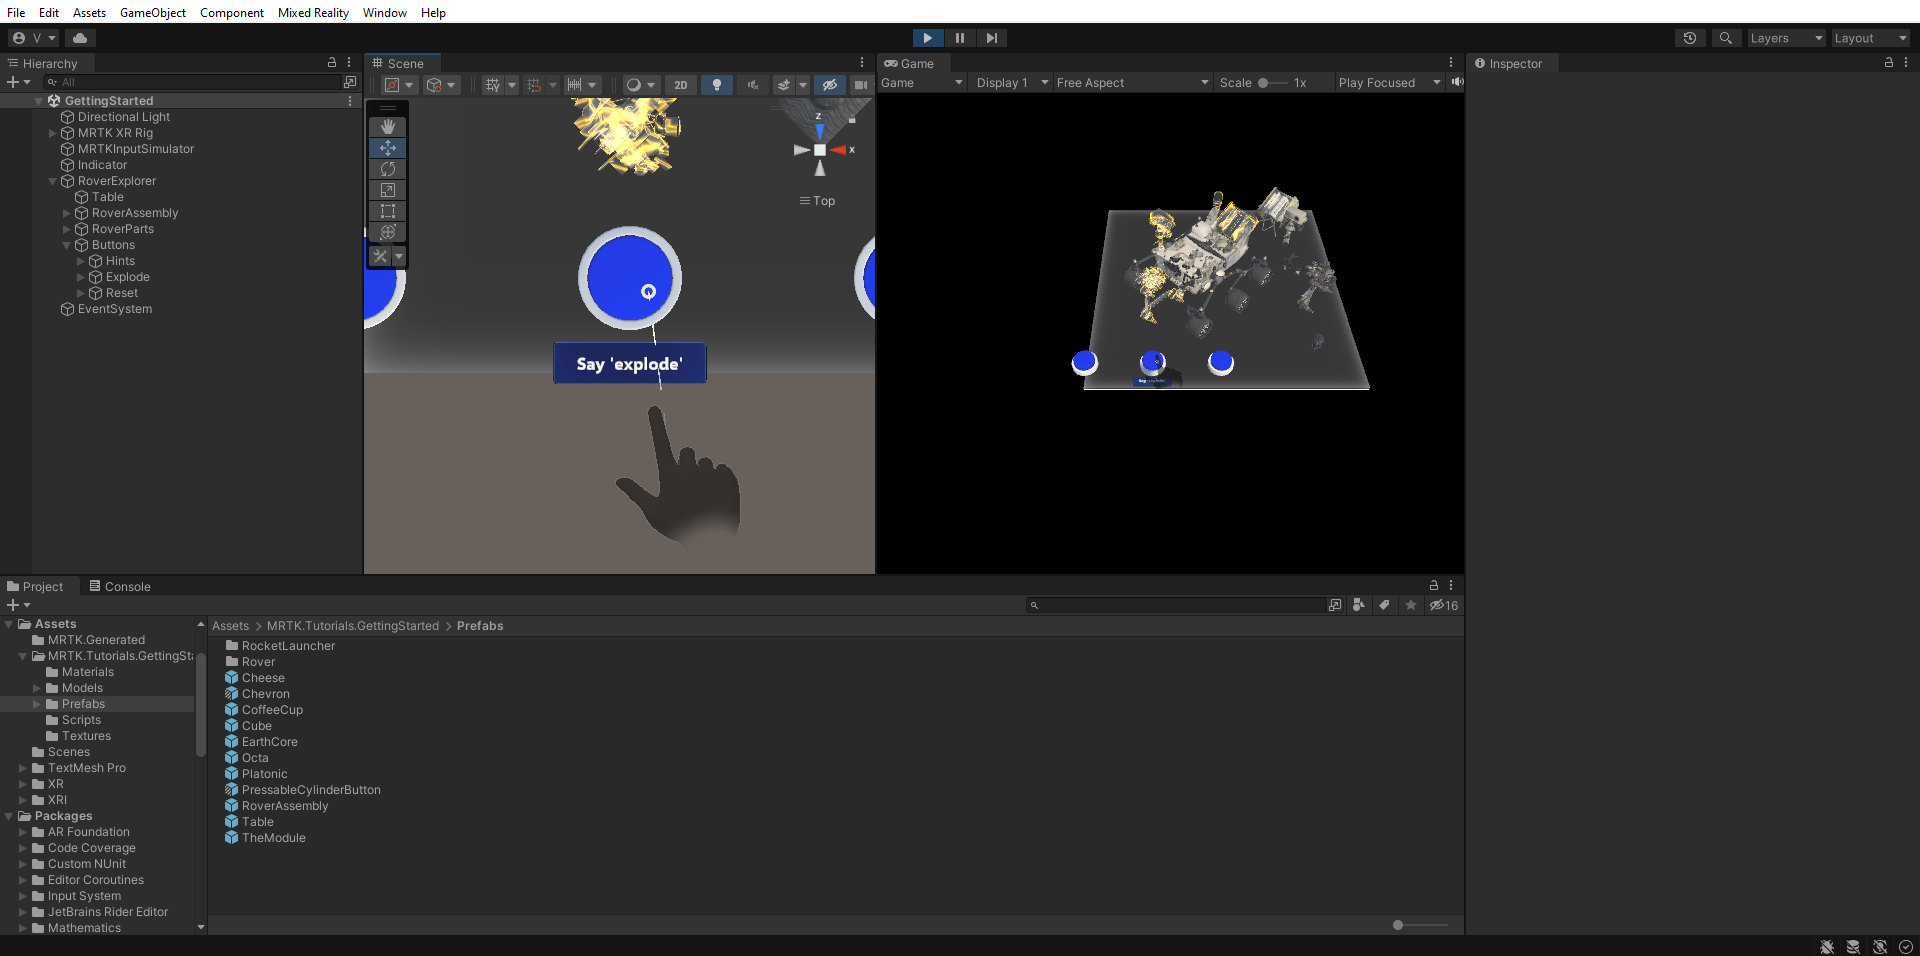
Explode button will toggle the exploded view on and off:
We will implement the Reset button later in the module.


Create a dynamic menu that follows the user
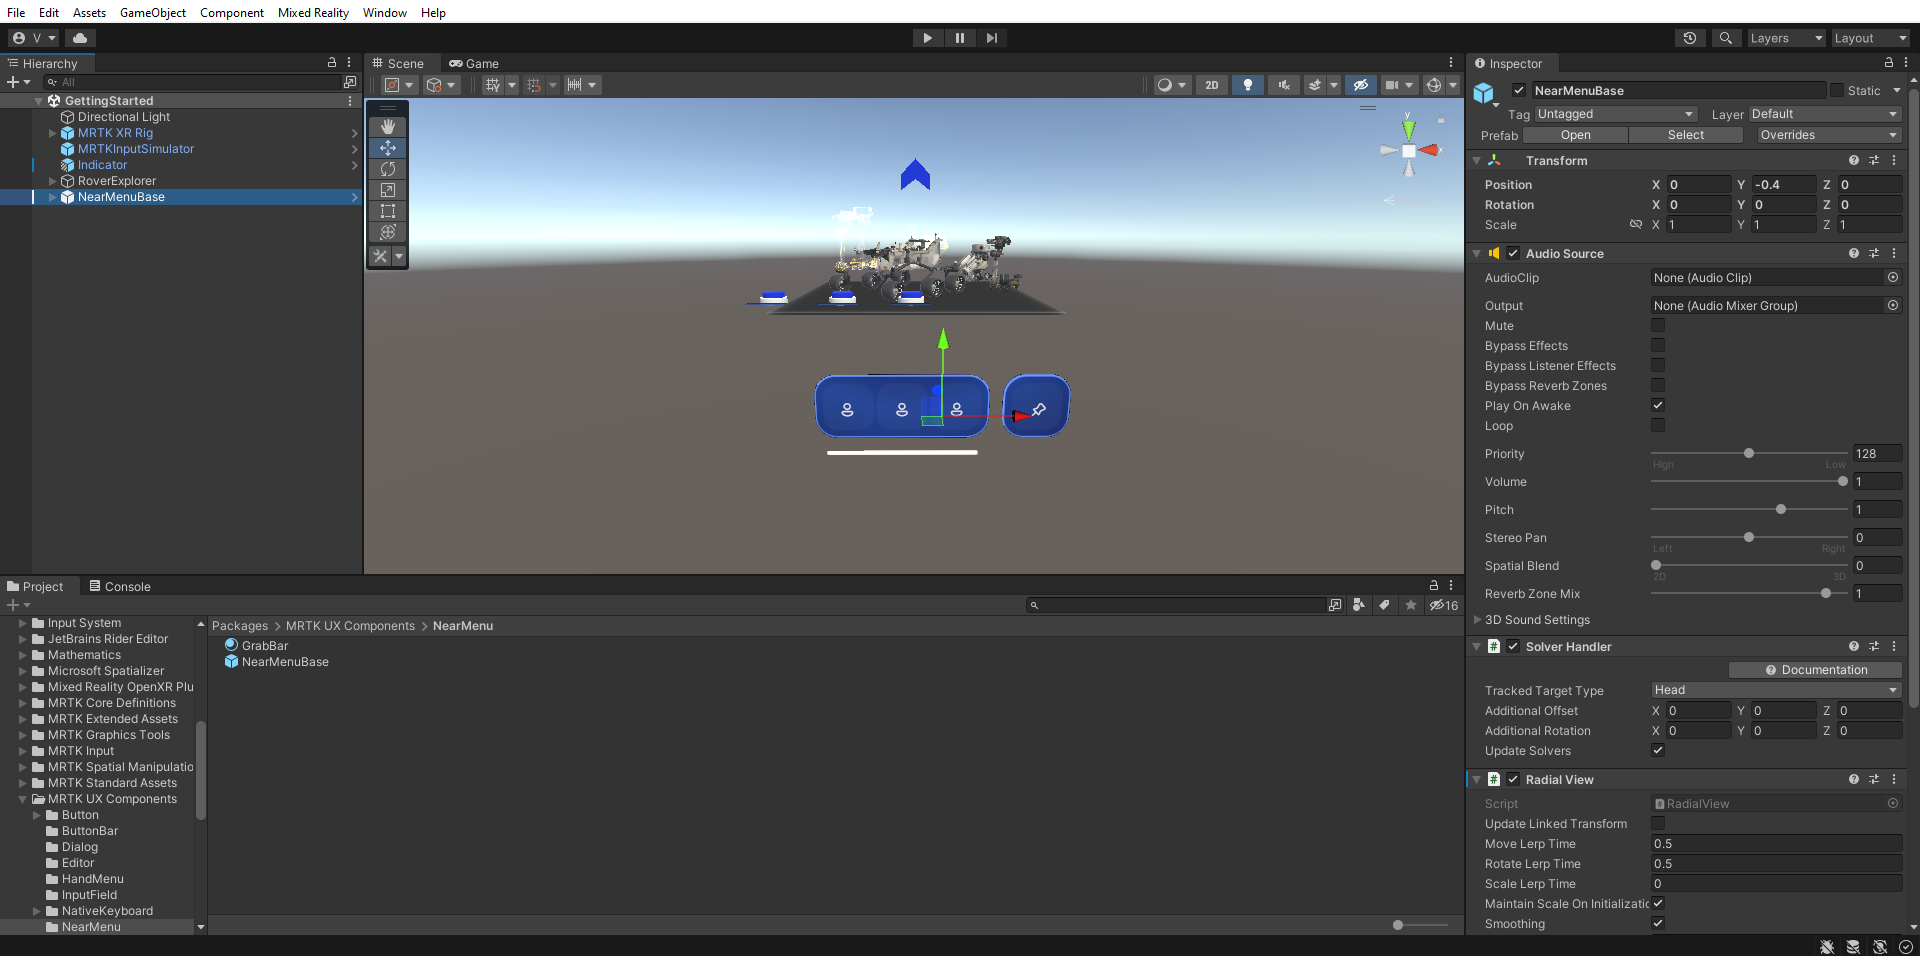
In the Project pane, navigate to the Packages > MRTK UX Components > Near Menu folder, click-and-drag the NearMenuBase prefab into the Hierarchy window, set its Transform Position to X = 0, Y = -0.4, Z = 0 and configure it as follows:
- Verify that the SolverHandler component's Tracked Target Type is set to Head
- Check the checkbox next to the RadialView Solver component so it's enabled by default
In the Hierarchy window, rename the object to Menu, then expand its MenuContent-HorizontalLayout (Menu and Pin) > Buttons-GridLayout (Buttons) child object to reveal the three buttons:
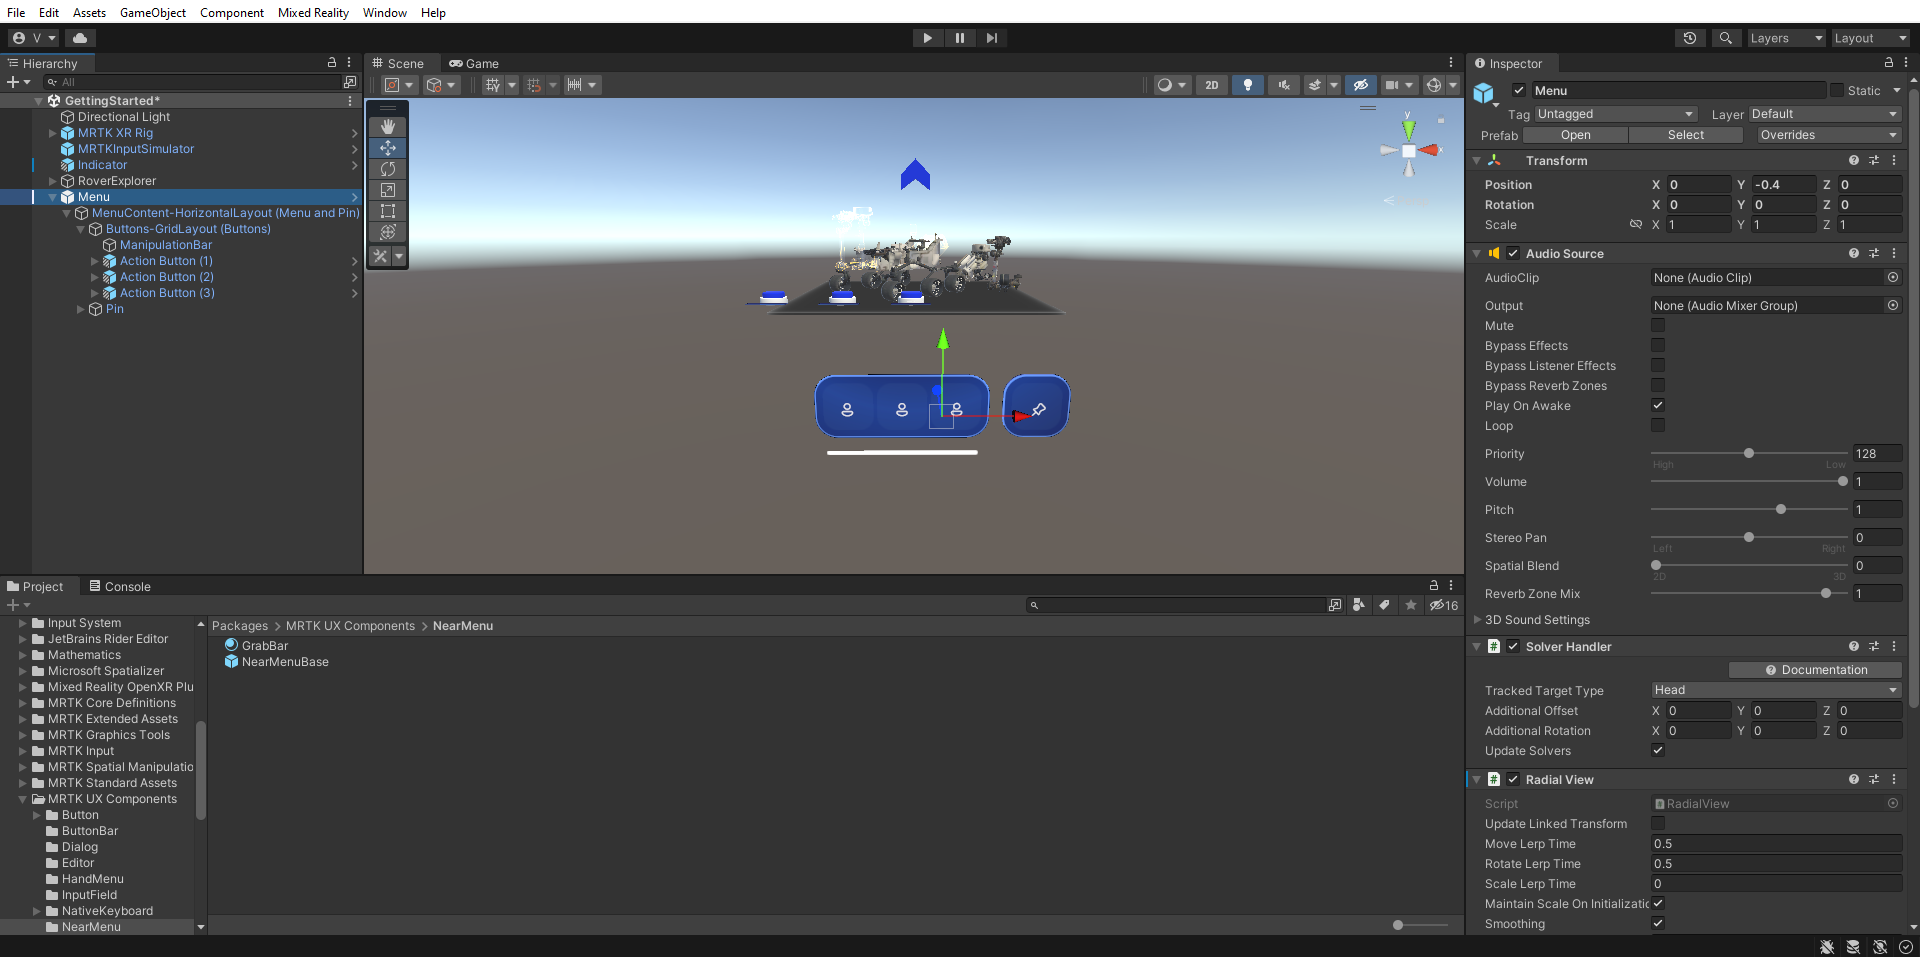
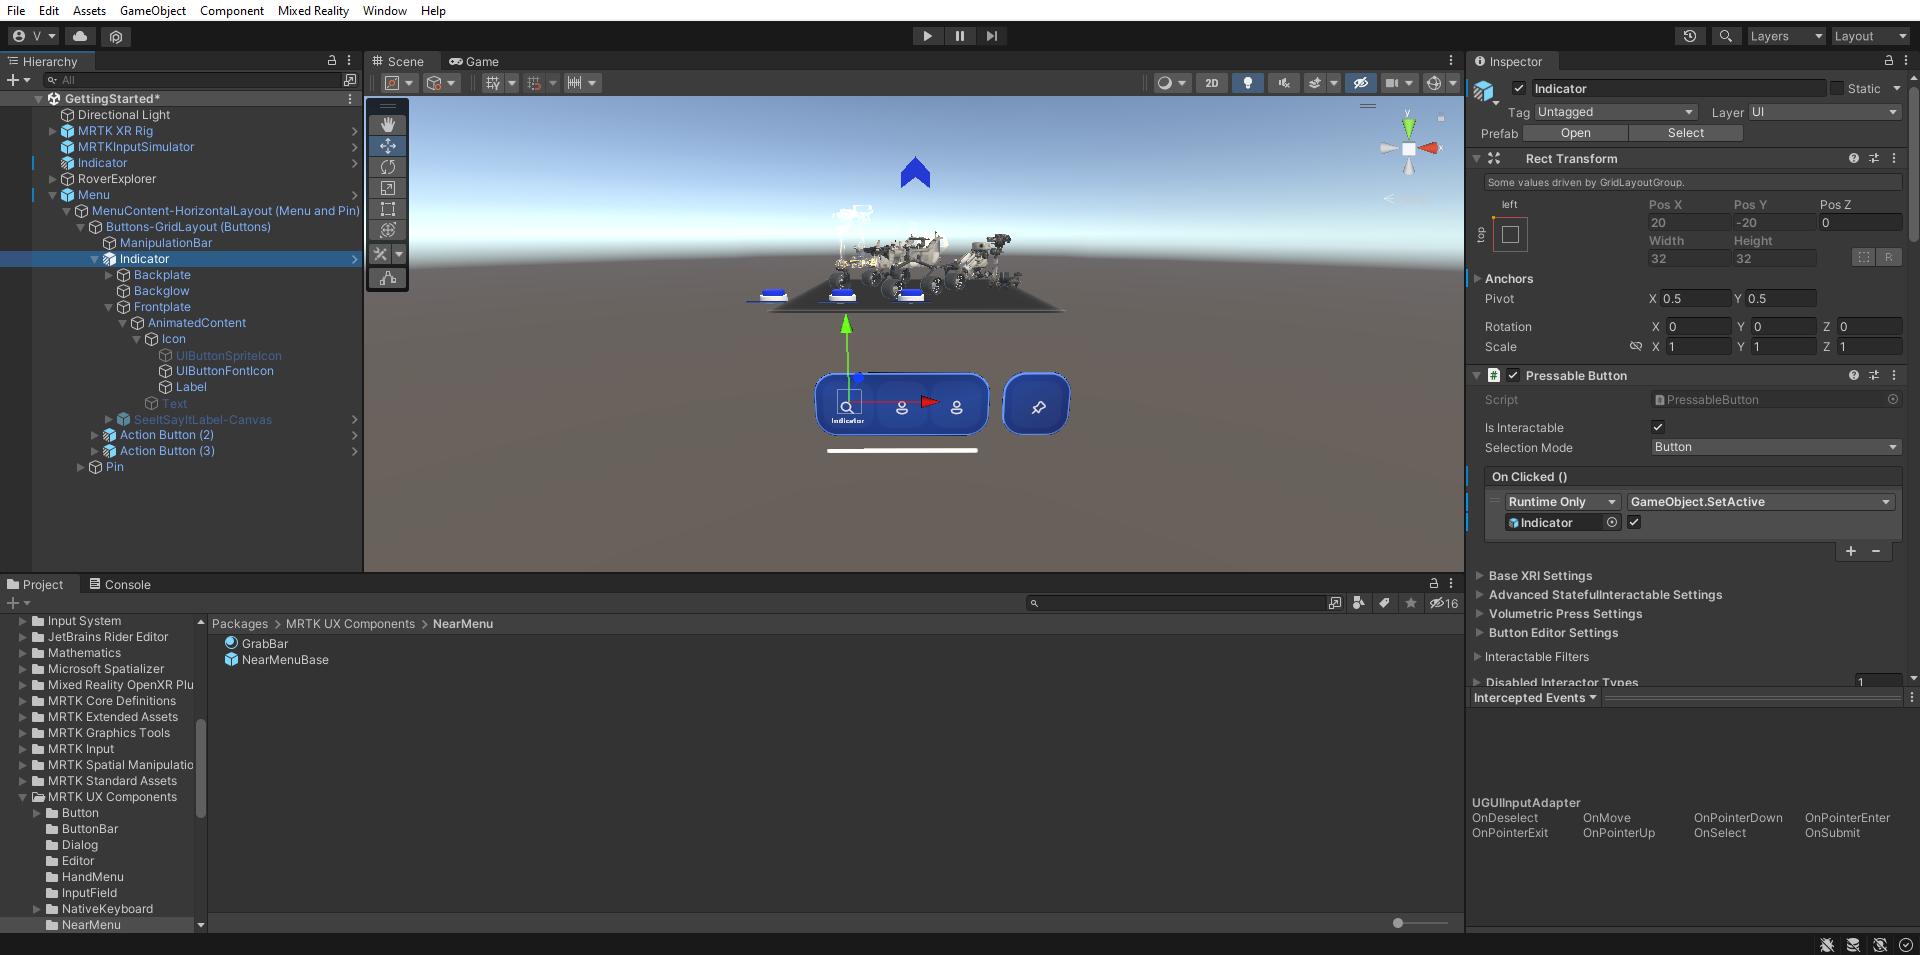
Rename the first button in the Buttons-GridLayout (Buttons) to Indicator, then in the Hierarchy window, configure the Indicator game object as follows:
- Select the Frontplate > AnimatedContent > Icon > Label object and change the TextMesh Pro component to match the name of the button. Make sure the Label object is activated in the hierarchy
- Configure the PressableButton.OnClicked() event by assigning the Indicator object that looks like a chevron, to the None (Object) field and selecting GameObject > SetActive (bool) from the No Function dropdown (verify that the argument checkbox is checked)
- Select the Frontplate > AnimatedContent > Icon > UIButtonFontIcon object and change the icon to the search icon on the Font Icon Selector component. You can find this in the list of icons, or set Current Icon Name to 'Icon 130'
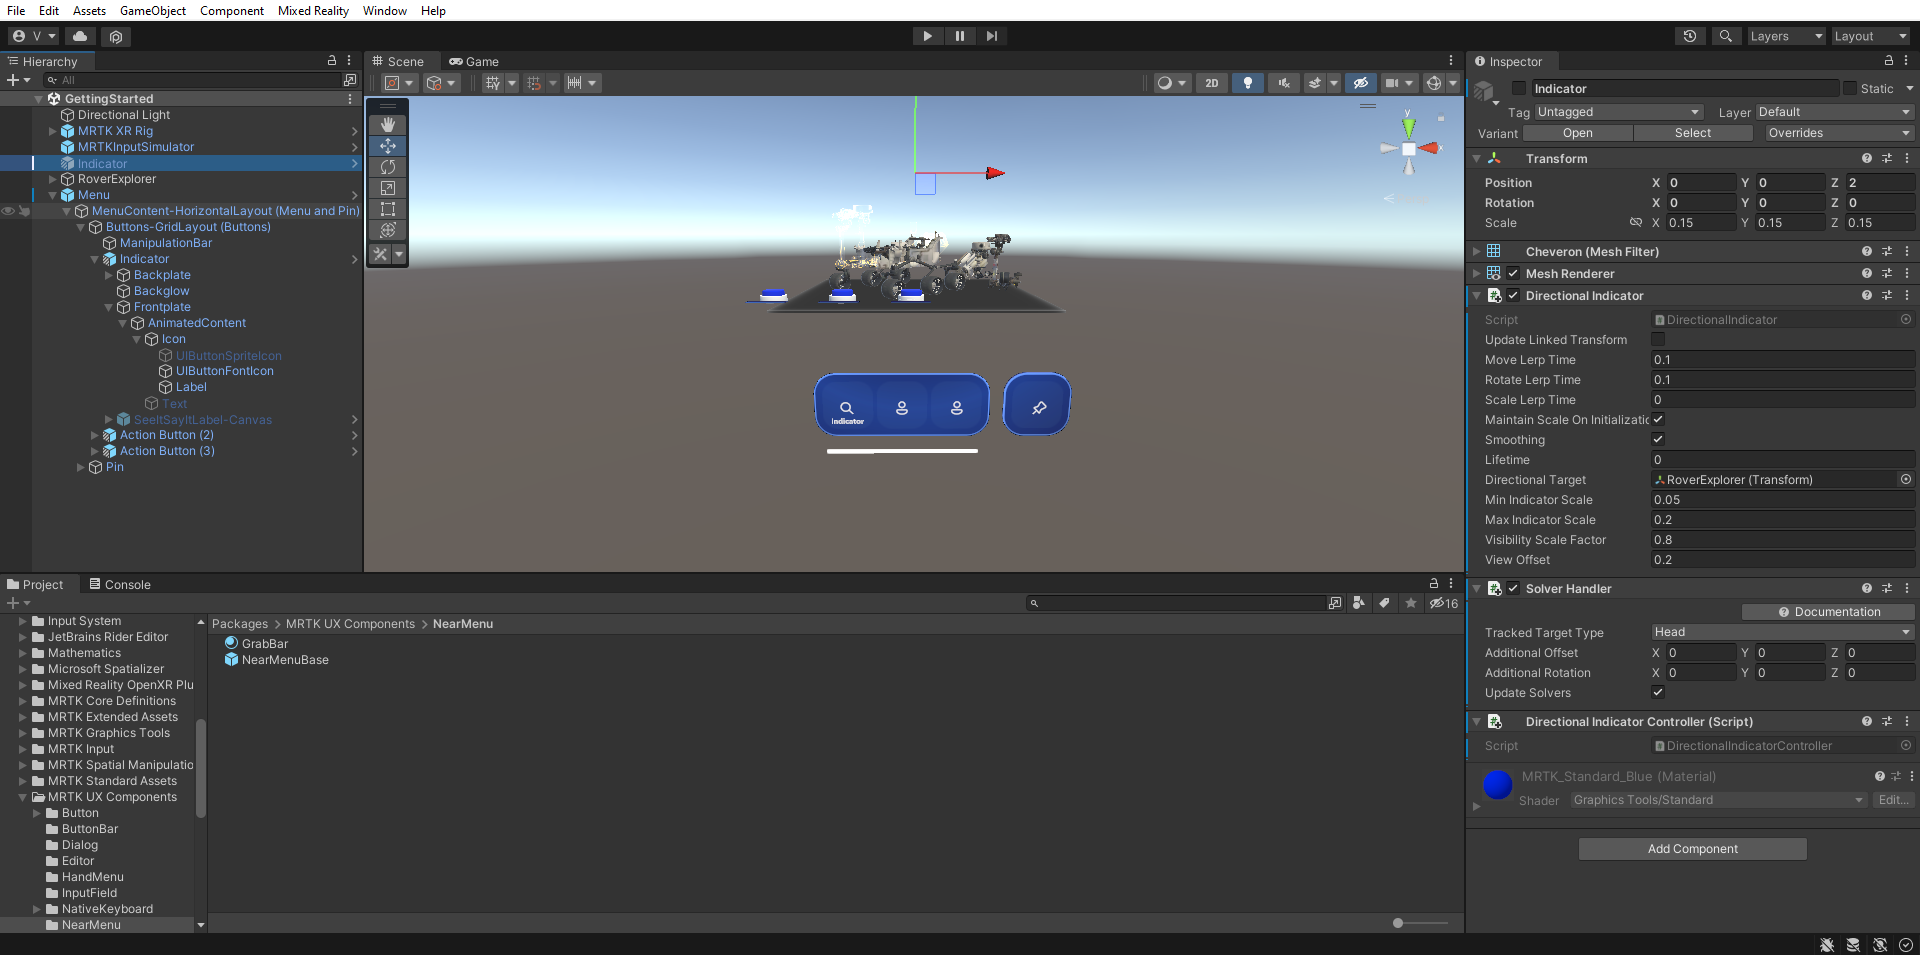
To disable the chevron Indicator object, in the Hierarchy pane, select the Indicator object that looks like a chevron, then in the Inspector pane:
- Clear the checkbox next to its name to make it inactive by default
- Use the Add Component button to add the Directional Indicator Controller (Script) component
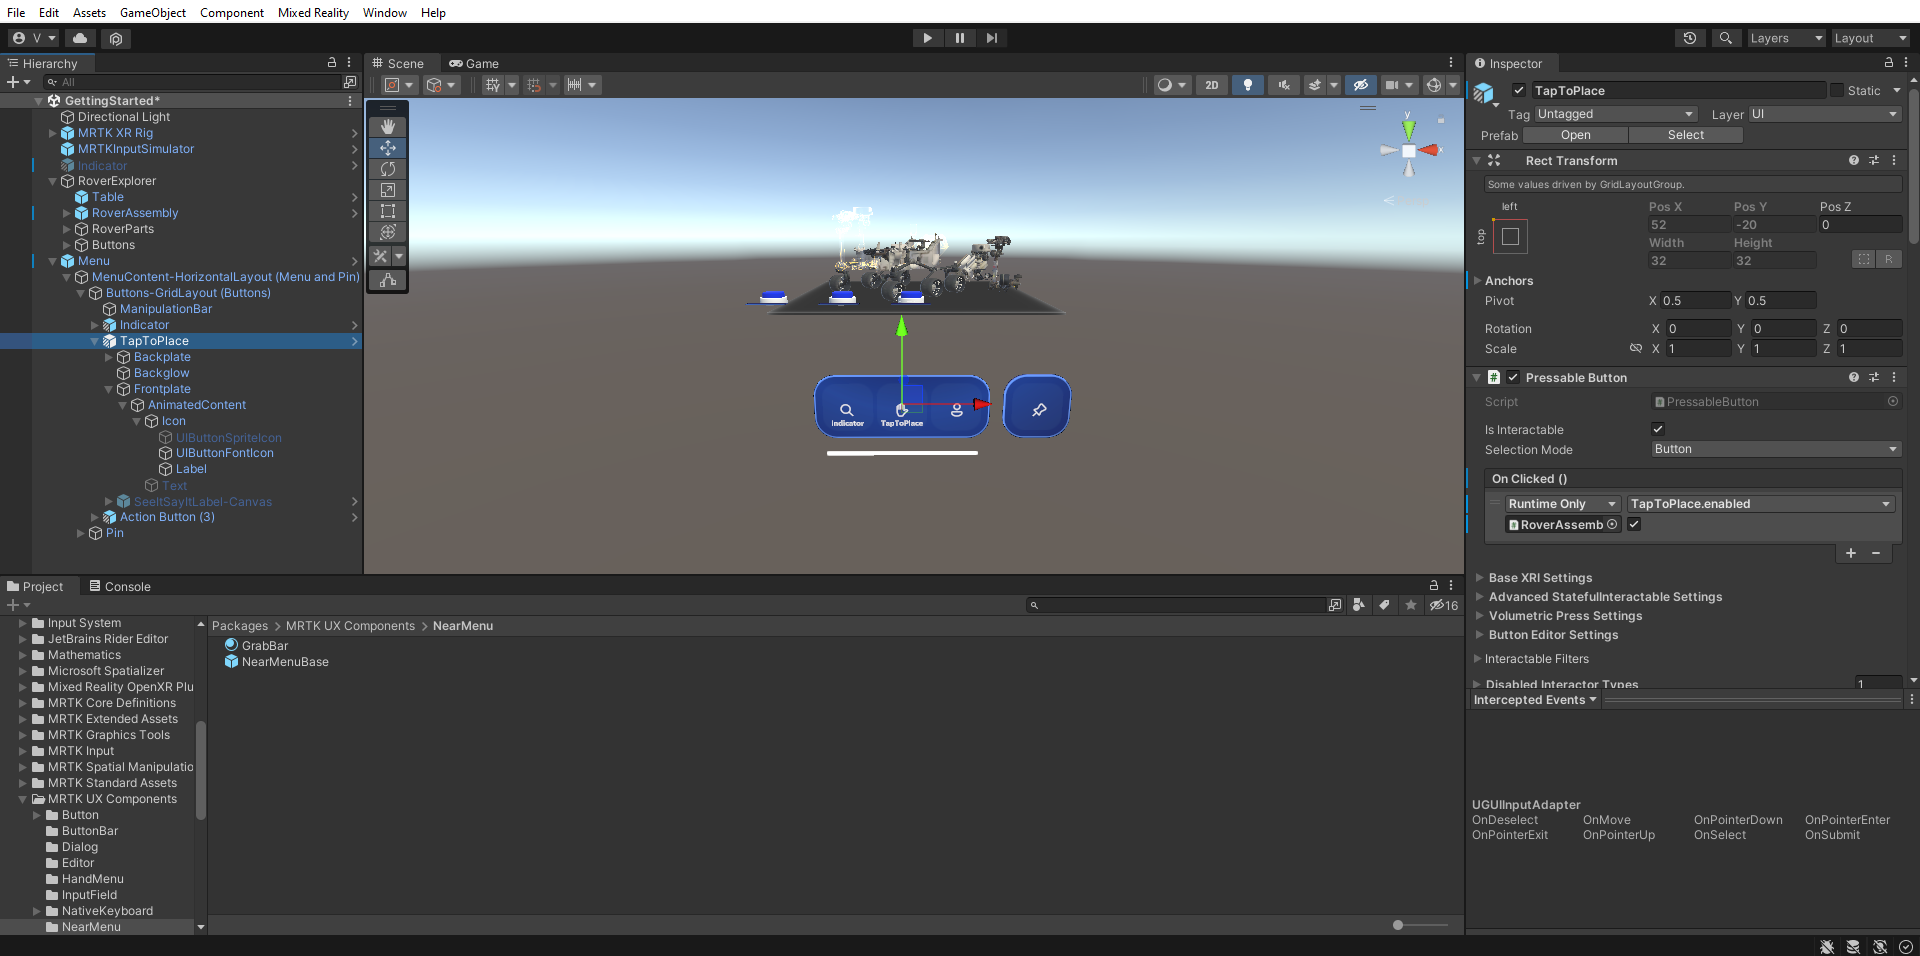
Rename the second button to TapToPlace, then in the Hierarchy window, configure the TapToPlace game object as follows:
- Select the Frontplate > AnimatedContent > Icon > Label object and change the TextMesh Pro component to match the name of the button. Make sure the Label object is activated in the hierarchy
- Configure the PressableButton.OnClicked() event by assigning the RoverExplorer > RoverAssembly object to the None (Object) field and selecting TapToPlace > bool Enabled from the No Function dropdown (verify that the argument checkbox is checked)
- Select the Frontplate > AnimatedContent > Icon > UIButtonFontIcon object and change the icon to the hand icon on the Font Icon Selector component. You can find this in the list of icons, or set Current Icon Name to 'Icon 13'
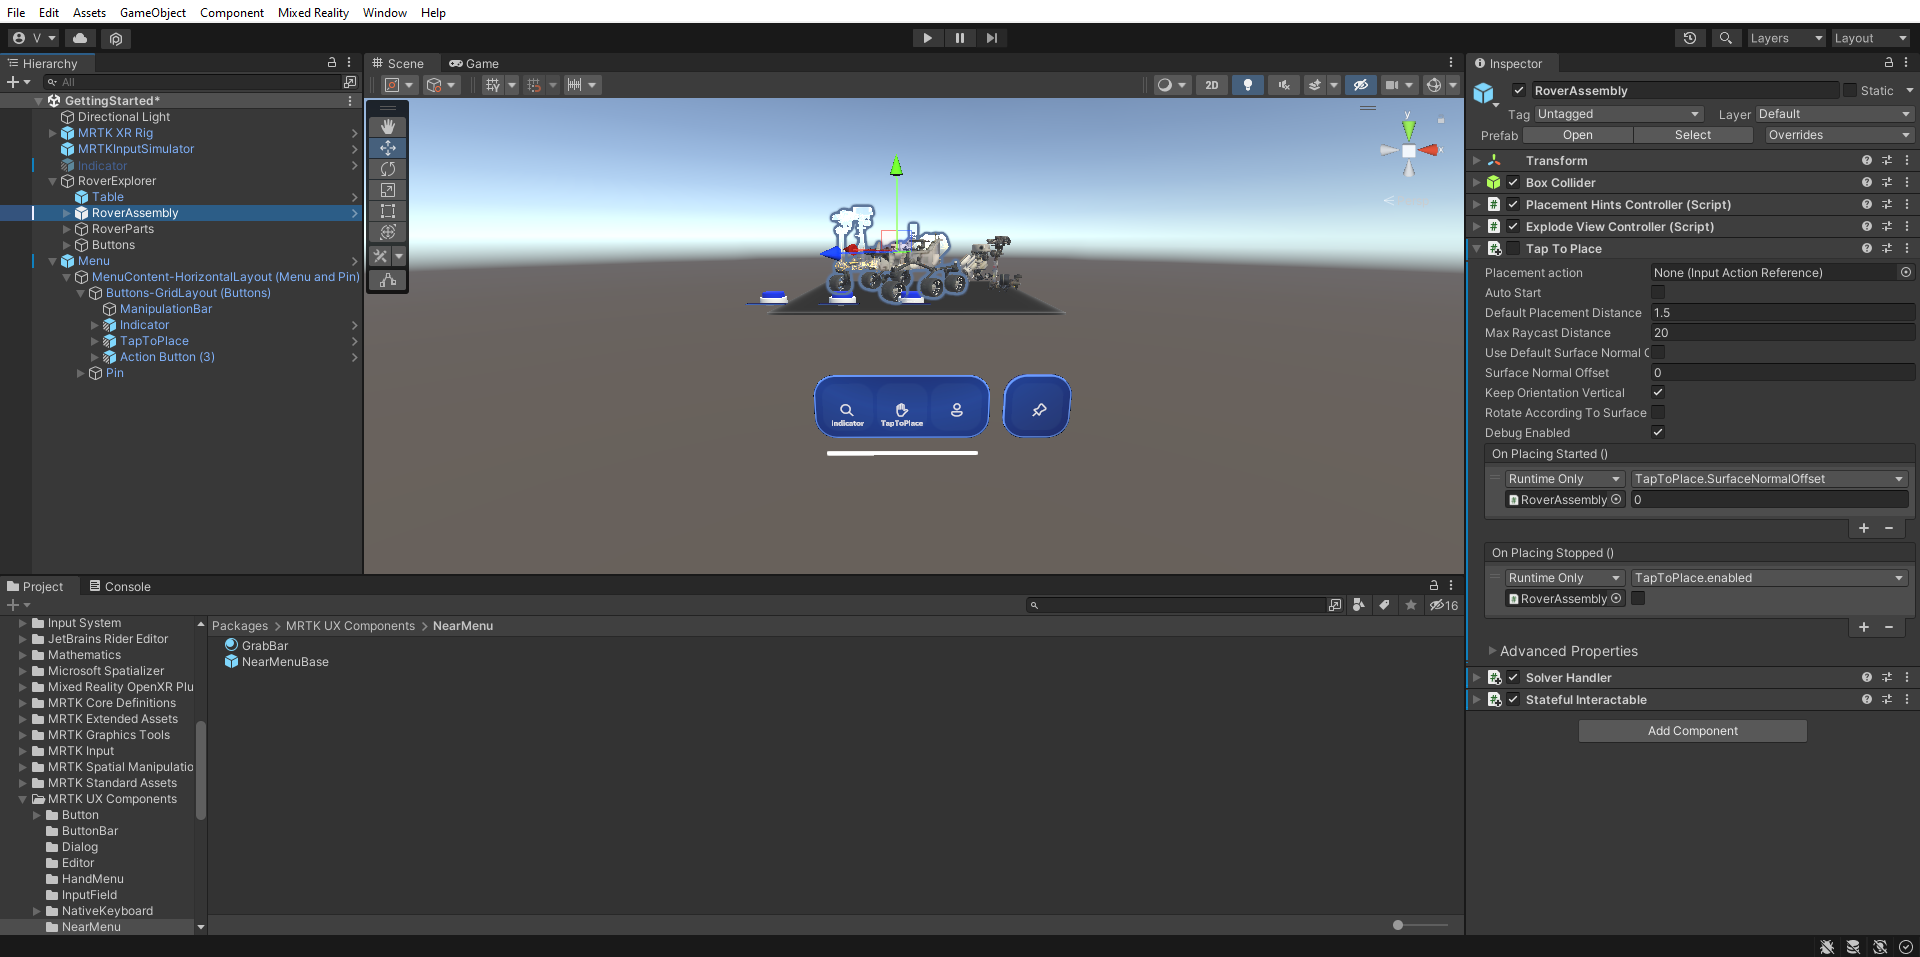
In the Hierarchy window, select the RoverAssembly object, then in the Inspector window, configure the Tap To Place (Script) component as follows:
- Uncheck the checkbox next to its name to make it inactive by default
- In the On Placing Stopped () event section, select the + icon to add a new event:
- Assign the RoverExplorer > RoverAssembly object to the None (Object) field
- From the No Function dropdown, select TapToPlace > bool Enabled to update this property value when the event is triggered
- Verify that the argument checkbox is unchecked