Install Dynamics 365 Guides
After getting the subscription and assigning licenses, you must create an environment where you can install the Dynamics 365 Guides solution.
The type of environment that you create depends on whether you purchased a Dynamics 365 Guides license.
- If you bought a license for Dynamics 365 Guides, a Production environment provides you with backup and restore capabilities.
- If you haven't purchased a license yet (you have a trial subscription), set up a Default environment.
Note
If you already have an environment that you want to use (for example, an instance in your company's Dynamics 365 tenant), you can skip ahead to the Change the maximum upload file size section below.
Set up a production environment (for purchased licenses only)
To set up a production environment you must complete the following steps.
In the Microsoft Power Platform admin center, select Environments if it isn't already selected, and then select New. The New environment dialog box appears on the right side of the page.
In the New environment dialog box, follow these steps:
- Enter a name for the environment.
- In the Type field, select Production.
- In the Region field, keep the default setting.
- Set the Create a database for this environment? option to Yes.
- Select Next.
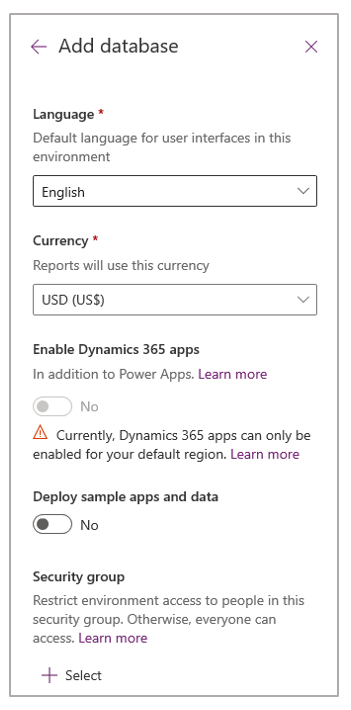
In the Add database dialog box that appears, select your language and currency, keep the default settings for the other fields, and then select Save.
A message is shown that explains that the production environment is being prepared.
For information about security groups, see Restrict access to an instance in Dynamics 365 Guides by using security groups.
After the new environment is active (that is, when Ready appears in the State field for the environment), go to the "Change the maximum upload file size" section below.
Note
If you set up a production environment instead of a default environment, in the remaining procedures, use the production environment instead of the default environment shown in the illustrations.
Set up a default environment (for trial environments only)
To set up a default environment you must complete the following steps.
Open the Microsoft Power Platform admin center, and sign in by using the administrator user credentials.
In the left pane, select Environments.
Select the default environment (for example, Contoso).
Important
The Dynamics 365 Guides solution can also be installed on a trial environment. We don't recommend that you use a trial environment, because that environment, together with all your content, is automatically disabled after the 30-day trial period expires. You have a seven-day grace period to upgrade to a production environment or migrate your content to another environment.
Select Add database.
In the Add database pane that appears on the right side of the screen, select your language and currency, keep the default settings for the other fields, and then select Add.
Note
If you see a warning that says, "You do not have the required Dynamics 365 licenses to create databases with Dynamics apps," ignore it.
Change the maximum upload file size
In the Dynamics 365 Guides PC app, you can upload your own 3D files in addition to videos and 2D images. Because many of these files will be larger than 5 megabytes (MB), you must increase the maximum file size for uploaded files by changing the setting for the size of email attachments.
In the Microsoft Power Platform admin center, on the Environments page, select the newly created environment, select the More environment actions (...) button, and then select Settings.
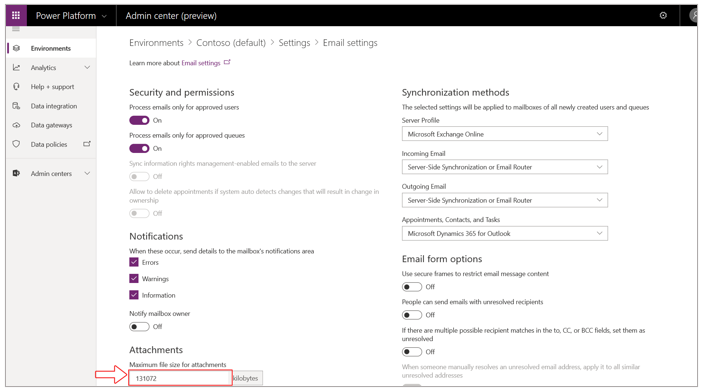
On the Settings page, under Email, select Email settings.
Scroll to the bottom of the page, and then, under Attachments, set the Maximum file size for attachments field to 131072. When you've finished, select Save.
Install and configure the solution
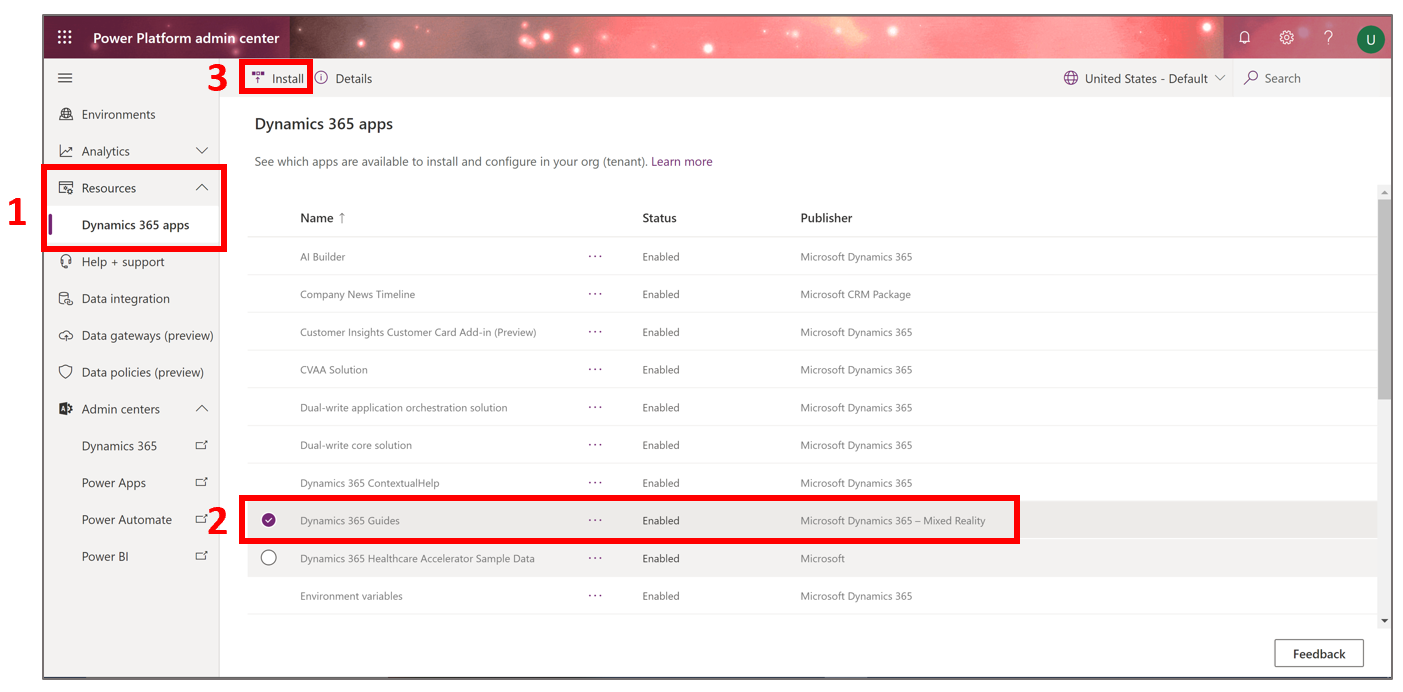
In the Microsoft Power Platform admin center, in the left pane, select Resources > Dynamics 365 apps (1), select Dynamics 365 Guides (2) in the list, and then select Install (3).
Note
It might take a few minutes for Dynamics 365 Guides to appear in the list.
In the Install Dynamics 365 Guides dialog box, select an environment, select the I agree to the terms of service check box, and then select Install.
While the solution is being installed, Installing appears in the Status field for the app. After the app has been installed, the Status field is updated to Installed.
Note
The installation process can take up to one hour. The amount of time varies, depending on the time of day and the region. If the status hasn't changed after an hour, refresh the page. If the installation is unsuccessful, the message "Installation failed" appears To try to install again, in the Error details dialog box, under How to troubleshoot, select the retry installation link.

Important
Dynamics 365 Guides data will be stored in the Dataverse solution. However, before anyone can create and use guides you must assign appropriate user roles. See the Assign user roles unit in this module.
Troubleshoot solution installation
If you have trouble installing and configuring the solution as described above, try the following steps instead.
In the Microsoft Power Platform admin center, select Admin centers, and then select Dynamics 365.
In the Dynamics 365 Administration Center, select an environment, and then select Solutions.
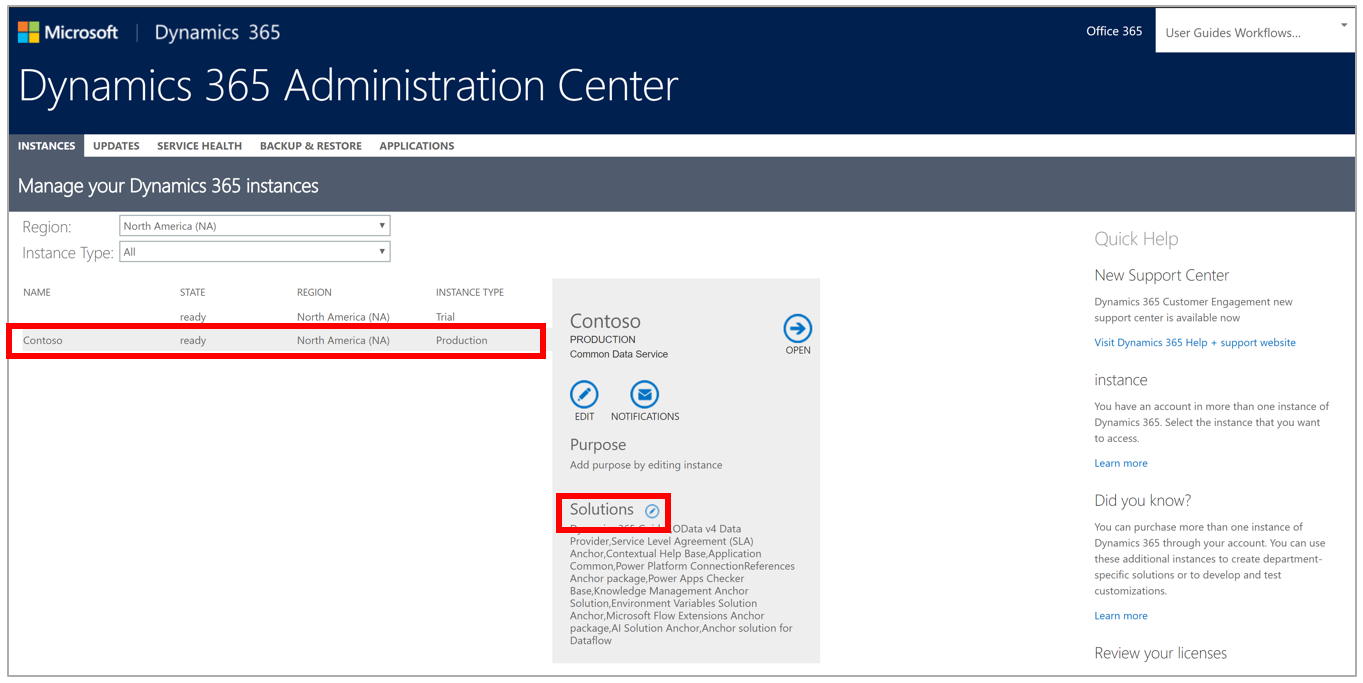
Select the Dynamics 365 Guides solution in the list, and then select Install.
In the Terms of Service dialog box, review the terms, and then select Install. In the Dynamics 365 Administration Center, the following message is shown to indicate that the solution is about to be installed: "Please wait while installation starts. This may take a few minutes."

While the solution is being installed, Installation pending appears in the Status field. After the solution has been installed, the Status field is updated to Installed.
Note
The installation process can take up to one hour. If the status hasn't changed after an hour, refresh the page.