Exercise - Detect transient errors in code
Now, let's add code to detect transient errors in your team's chat app. You can choose to change the C#, Java, or Node.js app. To get started, let's set up the chat app.
Set up the database
The first thing to do is configure the app's back end. It uses an Azure Cosmos DB with a Mongo API. Use the following set of instructions to set up the database through the Azure CLI.
Run the following command in the Cloud Shell to set a variable called COSMOS_DB_NAME with a random name for our database.
COSMOS_DB_NAME=learn-cosmos-db-$RANDOMTip
You can use the Copy button to copy commands to the clipboard. To paste, right-click on a new line in the Cloud Shell terminal and select Paste, or use the Shift+Insert keyboard shortcut (⌘+V on macOS).
Run the following
az cosmosdb createcommand to create a new Azure Cosmos DB database account.COSMOS_DB_ENDPOINT=$(az cosmosdb create \ --resource-group <rgn>[sandbox resource group name]</rgn> \ --name $COSMOS_DB_NAME \ --kind MongoDB \ --query documentEndpoint \ --output tsv)The option
--kind MongoDBsets up a Cosmos DB with a MongoAPI.Note
Setting up the database account can take a while, so please wait for it to complete.
Once the creation of our database account has finished, we can create a database in that account.
az cosmosdb database create --name $COSMOS_DB_NAME \
  --resource-group-name <rgn>[sandbox resource group name]</rgn> \
  --db-name chat-app
The option
--db-name chat-appcreates a database named chat-app to store your chat documents in.Finally, run the following command in the Azure Cloud Shell to retrieve the connection strings for our new database.
az cosmosdb keys list --type connection-strings \
  --resource-group <rgn>[sandbox resource group name]</rgn> \
  --name $COSMOS_DB_NAME  | sed -n -e '4 p' | sed -E -e 's/.*mongo(.*)true.*/mongo\1true/'
This command
az cosmosdb list-connection-stringsreturns a json object with connection information, piping|the JSON into twosedcommands to strip out just the MongoDB connection string.Save the connection string as it's needed for the rest of the module.
Clone the Chat App repository
Use the following steps to clone the Chat App GitHub repository with git. You can execute this right in the Cloud Shell.
The source files for the applications that you build in this unit are located in a GitHub repository. Use the following commands to make sure that you are in your home directory in Cloud Shell, and then to clone this repository:
cd ~
git clone https://github.com/MicrosoftDocs/mslearn-handle-transient-errors-in-your-app.git
The repository is cloned to your home folder.
Move into the C#
chatappfolder.cd ~/mslearn-handle-transient-errors-in-your-app/csharp/chatapp/Use the code editor to edit Program.cs.
code Program.csUpdate the
connectionStringvariable with the connection string value you saved earlier.private static IMongoDatabase database; private static IMongoCollection<ChatMessage> messages; private static string databaseName = "chat-app"; private static string collectionName = "messages"; private static string connectionString = @"<enter cosmos db connection string here>"; private static List<ChatMessage> allMessages = new List<ChatMessage>();Save the file, and close the editor. Use the commands in the ... menu in the top right corner of the editor, or use the accelerator keys Ctrl+S to save the file, and Ctrl+Q to close the editor.
Compile and run the .NET Core app.
dotnet build
dotnet run
The app displays the following interface in the Cloud Shell.
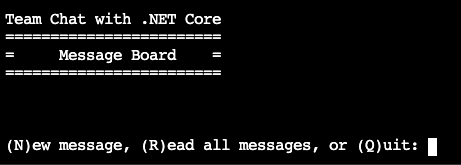
To test the app, type N and enter a name and message for a new message. Type R to read all messages posted to date. Type Q to quit the app. If you quit the app and then restart, notice that the messages you typed in the last session are available. The app is connecting to our Mongo DB in Azure Cosmos DB to retrieve all of this data.
Let's see what happens when we break the connection to the backend database.
Add code to detect errors
Use the code editor.
code Program.csScroll down to the getAllChats method. It should look the same as the following method.
private static void getAllChats()
{
    messages = database.GetCollection<ChatMessage>(collectionName);
    allMessages = messages.Find(new BsonDocument()).ToList();
    foreach (ChatMessage chat in allMessages)
    {
        Console.WriteLine($"{chat.Name}: {chat.Message}");
    }
    Console.WriteLine("\n");
}
The Find method queries all the documents in the Azure Cosmos DB. But, what if a transient error occurs while we try that operation? Let's start by catching that error.
Replace the
getAllChats()implementation with the code in the following block. Notice that we include a small helper method calleddiagnose()to print the exception message.private static void getAllChats() { messages = database.GetCollection<ChatMessage>(collectionName); try { allMessages = messages.Find(new BsonDocument()).ToList(); foreach (ChatMessage chat in allMessages) { Console.WriteLine(String.Format("{0}: {1}", chat.Name, chat.Message)); } Console.WriteLine("\n"); } catch (MongoDB.Driver.MongoConnectionException e) { diagnose(e); } catch (System.TimeoutException e) { diagnose(e); } catch (Exception e) { diagnose(e); } } private static void diagnose(Exception e) { Console.WriteLine($"Exception raised: {e.GetType()}\n"); }Let's save our changes and try them out. Save the file, and close the editor. Use the commands in the ... menu in the top right corner of the editor, or use the accelerator keys Ctrl+S to save the file, and Ctrl+Q to close the editor.
Build and run the app.
Compile and run the .NET Core app.
dotnet build
dotnet run
The example messages you created previously are listed.
Leave the app running, so we can demonstrate a transient error in the following section.
Clone the Chat App repository
Use the following steps to clone the Chat App GitHub repository with git. You can execute this right in the Cloud Shell.
The source files for the applications that you build in this unit are located in a GitHub repository. Use the following commands to make sure that you are in your home directory in Cloud Shell, and then to clone this repository:
cd ~
git clone https://github.com/MicrosoftDocs/mslearn-handle-transient-errors-in-your-app.git
The repository is cloned to your home folder.
Move into the Java app folder.
cd ~/mslearn-handle-transient-errors-in-your-app/java/chatapp/Use the code editor to edit javaChat.java.
code javaChat.javaChange line 26 to contain the connection string shown previously.
public class javaChat {

    /*
    * Replace connection string from the Azure Cosmos DB Portal
    */
    private static ConnectionString connectionString =
        new ConnectionString("Enter MongoDB String here");
Save the file, and close the editor. Use the commands in the ... menu in the top right corner of the editor, or use the accelerator keys Ctrl+S to save the file, and Ctrl+Q to close the editor.
Compile and run the Java app.
javac -cp .:lib/* javaChat.java
java -cp .:lib/* javaChat
Test the app, create a new message, or read all the messages. When finished, type Q to quit.
Add code to detect errors
Use the code editor.
code javaChat.javaReplace the method
printAllMessageswith the following update. This snippet adds a try-catch block to detect transient errors from our database.private static void printAllMessages (MongoDatabase db) { MongoCollection<Document> messages = db.getCollection(colName); Block<Document> printBlock = new Block<Document>() { @Override public void apply(final Document document) { System.out.printf("%s: %s\n", document.get("name"), document.get("message")); } }; try { // Return all messages messages.find().forEach(printBlock); } catch (com.mongodb.MongoCommandException e) { diagnose(e); } catch (com.mongodb.MongoSecurityException e) { diagnose(e); } catch (Exception e) { diagnose(e); } } private static void diagnose(Exception e) { System.out.printf("Exception raised: %s\n\n", e.toString()); e.printStackTrace(); }Save the file, and close the editor. Use the commands in the ... menu in the top right corner of the editor, or use the accelerator keys Ctrl+S to save the file, and Ctrl+Q to close the editor.
Build and run the app.
Compile and run the Java app.
javac -cp .:lib/* javaChat.java
java -cp .:lib/* javaChat
The example messages you created previously are listed. Quit the app.
Clone the Chat App repository
Use the following steps to clone the Chat App GitHub repository with git. You can execute this right in the Cloud Shell.
The source files for the applications that you build in this unit are located in a GitHub repository. Use the following commands to make sure that you are in your home directory in Cloud Shell, and then to clone this repository:
cd ~
git clone https://github.com/MicrosoftDocs/mslearn-handle-transient-errors-in-your-app.git
The repository is cloned to your home folder.
Run the following command in the Cloud Shell to move into the node
chatappfolder.cd ~/mslearn-handle-transient-errors-in-your-app/node/chatapp/Use the code editor to edit server.js.
code server.jsChange line 25 to contain the Mongo DB connection string returned after creating the database.
// Cosmos DB MongoDB connection string
var dbUrl = '<add connection string here>';

// Set networking timeouts
dbUrl = dbUrl + '&ServerSelectionTimeoutMS=5000';
Save the file, and close the editor. Use the commands in the ... menu in the top right corner of the editor, or use the accelerator keys Ctrl+S to save the file, and Ctrl+Q to close the editor.
To navigate to our Node.js app in the browser, we have to open port 8000 in the sandbox. To open port 8000, run the following
curlcommand in the Cloud Shell.curl -X POST http://localhost:8888/openPort/8000;When the port is opened successfully, you see a message similar to the following message.
{"message":"Port 8000 is open","url":"https://gateway03.westus.console.azure.com/n/cc-604c-74cb7fc3/cc-604c-74cb7fc3/proxy/8000/"}Make a note of the url value in the message that was returned from the curl command. It's the url of our app.
Compile and run the Node.js app.
npm install
npm start
Open the url you saved previously in your favorite browser. You should see a user interface similar to the following screenshot.
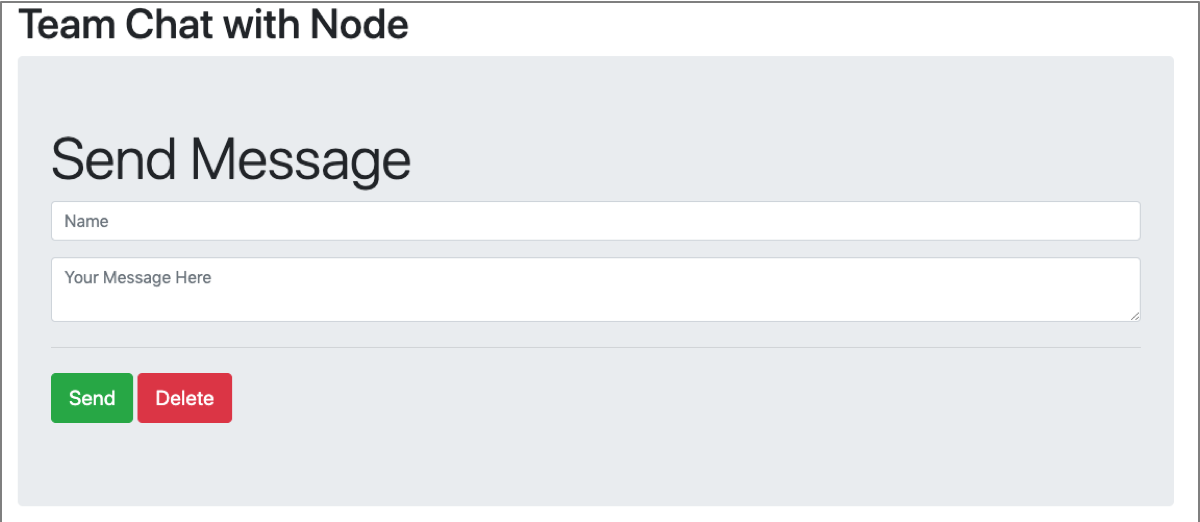
Test the app by adding messages to the chat board through the interface.
Stop the server by pressing Ctrl+S in the Cloud Shell window.
Add code to detect errors
Run the following command to edit server.js in the code editor of the Cloud Shell.
code server.jsScroll down to the code that connects to the database, starting at line 41.
// Set options
const options = {
  dbName: 'chat-app',
  useNewUrlParser: true,
  reconnectTries: Number.MAX_VALUE, // Never stop trying to reconnect
  reconnectInterval: 500, // Reconnect every 500ms
  connectTimeoutMS: 5000, // Give up initial connection after 5 seconds
  socketTimeoutMS: 5000 // Close sockets after 5 seconds of inactivity
}

// Connect to MongoDB
mongoose.connect( dbUrl, options )
  .then(() => console.log('Connection to MongoDB successful'));

// Get all messages from the database
When connecting to the database, you can handle any exceptions by adding a catch promise.
// Connect to MongoDB
mongoose.connect( dbUrl, options )
    .then(() => console.log('Connection to MongoDB successful'))
    .catch(function(e) {
      console.log(e); // "error connecting to the database"
    });
Add a catch to the save call to the database.
// Save a message
app.post('/messages', (req, res) => {
  let message = new Message(req.body);
  message.save()
    .then( () => {
      res.sendStatus(200);
      console.log('Message Posted');
    })
    .catch(function(e) {
      console.log(e); // "error connecting to the database"
    });
});
And the delete call.
// Delete all messages from the database
app.post('/deleteall', (req, res) => {
  Message.deleteMany({})
    .then( () => {
      res.sendStatus(200);
      console.log('Messages Deleted');
    })
    .catch(function(e) {
      console.log(e); // "error connecting to the database"
    });
});
Save the file, and close the editor. Use the commands in the ... menu in the top right corner of the editor, or use the accelerator keys Ctrl+S to save the file, and Ctrl+Q to close the editor.
Run the app.
npm startYou may need to refresh the browser. The example messages you created previously are still listed.
Create an error
Sign into the Azure portal using the same account you activated the sandbox with.
On the Azure portal menu or from the Home page, select Azure Cosmos DB.
You should see a database account with a name beginning with learn-cosmos-db-. Select that database account.
In the Azure Cosmos DB panel, select Firewall and virtual networks.
Select Selected networks.
Uncheck Allow access from Azure portal.
Select I understand that the current settings will block all VNets and IPs including Azure portal.
Select Save to save the firewall configuration updates. These changes have enabled a firewall for the Azure Cosmos DB account, which blocks access from the Cloud Shell, simulating a connection outage.
Note
It can take a while for these firewall updates to complete, so wait for them to finish before proceeding to the next step.
When the firewall configuration update has finished successfully, return to the chat app and select R to refresh all the messages. The refresh calls our
getAllChats()method. After a few seconds, the call to find all messages times out and you should see that the code handled a System.TimeoutException and printed that to the console. The app is still running. If you now try to add a new message, you get another System.TimeoutException. However, this time the app crashes. Why? If you look closely at the code in Program.cs,** you can see that we only handle the exception gracefully in thegetAllChats()method.Main()doesn't handle the exception so the app crashes instead.
To disable the firewall and let the app read and write to the Azure Cosmos DB database again, perform the following steps.
Visit the Azure portal for sandbox using the same account you activated the sandbox with.
On the Azure portal menu or from the Home page, select Azure Cosmos DB.
You should see a database account with a name beginning with learn-cosmos-db-. Select that database account.
In the Azure Cosmos DB panel, select Firewall and virtual networks.
Select All networks and then select Save at the bottom of the screen.
Wait for the firewall configuration updates to finish, which can take a few minutes
This exercise shows how to detect an error in your app. So far, we just notify that an error has occurred. In the following units, we see how to retry our calls so that our app can recover from these kinds of errors.
Create an error
Sign into the Azure portal using the same account you activated the sandbox with.
On the Azure portal menu or from the Home page, select Azure Cosmos DB.
You should see a database account with a name beginning with learn-cosmos-db-. Select that database account.
In the Azure Cosmos DB panel, select Firewall and virtual networks.
Select Selected networks.
Uncheck Allow access from Azure portal.
Select I understand that the current settings will block all VNets and IPs including Azure portal.
Select Save to save the firewall configuration updates. These changes have enabled a firewall for the Azure Cosmos DB account, which blocks access from the Cloud Shell, simulating a connection outage.
Note
It can take a while for these firewall updates to complete, so wait for them to finish before proceeding to the next step.
When the firewall configuration update has finished successfully, return to the browser and try sending more messages. Observe the messages displayed in the Cloud Shell. The app is still running, but we're catching transient errors caused by the lost connection to the database.
To disable the firewall and let the app read and write to the Azure Cosmos DB database again, perform the following steps.
Visit the Azure portal for sandbox using the same account you activated the sandbox with.
On the Azure portal menu or from the Home page, select Azure Cosmos DB.
You should see a database account with a name beginning with learn-cosmos-db-. Select that database account.
In the Azure Cosmos DB panel, select Firewall and virtual networks.
Select All networks and then select Save at the bottom of the screen.
Wait for the firewall configuration updates to finish, which can take a few minutes
This exercise shows how to detect an error in your app. So far, we just notify that an error has occurred. In the following units, we see how to retry our calls so that our app can recover from these kinds of errors.