Exercise - Display FHIR JSON data from FHIRlink
In this exercise, you extend and refactor your canvas app to display and interact with the Azure Health Data Services FHIR data. You retrieve this data from the FHIRlink connection calls, FHIRlink.ListResources and FHIRlink.GetResource, and then save it into the _patientListTable and _selectedPatient fields. Then, you use the TextInputSearch control to capture filter parameters for the FHIRlink.ListResources operation, bind the results to a gallery control on the screen, and then display details of a selected patient record in the gallery.
Bind the data by FHIR Patient name field
In the previous exercise, you used the Power Apps maker tools to view the results of the queries and variable values. In this task, you bind the table data saved in the _patientListTable variable to a Power Apps canvas app gallery control. This control presents the list of patients to the canvas app user.
Add a vertical gallery to display the list of patients
A gallery is a container for several child fields, and it’s available from the Gallery template. When you select a gallery row, you capture the OnSelect event and make a call to retrieve the full single patient record by using FHIRlink.GetResource, refactoring the code in the previous exercise.
Go to Power Apps.
Open your saved canvas app for editing.
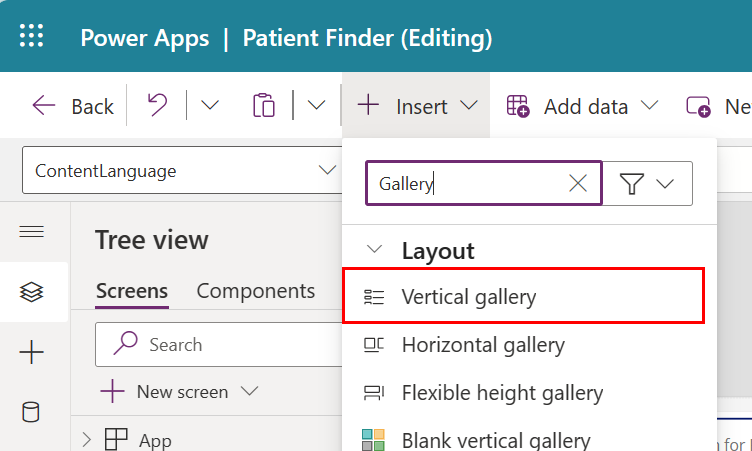
Insert a new Gallery into the container control named SidebarContainer1.
Name the control PatientListGallery.
Change the Layout to Title and Subtitle.
The PatientListGallery now includes child fields named something similar to Title1 and SubTitle1. You can rename these fields to suit your requirements.
In the Items property for the gallery, change the value from CustomGallerySample to _patientListTable.
Use the formula bar to set the following basic properties for the PatientListGallery control:
AlignInContainer - AlignInContainer.Center
FillPortions - 1
Width - SidebarContainer1.Width

The gallery is now bound to the _patientListTable, which contains the patient entry items.
Update the gallery template to display patient details
The gallery template displays the details for each item in the table, each being a FHIR Patient JSON object.
The Patient object is a complex structure that contains information about a patient and a large set of related data. The current call to FHIRlink.ListResources is:
FHIRlink.ListResources("Patient", {_elements:"id,name,birthDate,telecom"})
This entry means that only the listed fields are returned. The name element is an array of complex JSON objects. The following example shows a FHIR Patient name element:
"name": [{
    "use": "official",
    "family": "Grimes165",
    "given": [
        "Alysia661"
        ],
    "prefix": [
        "Mrs."
        ]
    },
    {
    "use": "maiden",
    "family": "Bins636",
    "given": [
        "Alysia661"
    ],
    "prefix": [
        "Mrs."
    ]
 }]
For example, first name and last name are represented by given and family. You can combine these and other nodes to display Patient details on the PatientListGallery gallery template. To display this and other Patient information, you need to use some Power Fx formulas.
Select the Gallery template for PatientListGallery.
Select the Title1 field and then select the Text property in the formula bar.
To access the currently selected item from the Gallery bound list, Power Fx provides the ThisItem object from within the gallery template.
Change the Text property as follows:
First(ThisItem.Value.resource.name).family & " (" & First(ThisItem.Value.resource.name).use & ")"This Power Fx formula:
Accesses the selected Patient object through
ThisItem.Value.Retrieves the first name element by position.
Retrieves the family element value from that name element.
Retrieves the first name element by position.
Retrieves the use element value from the name element.
Combines the values into a string for display in the Title1 text label.
Select the Subtitle1 field and then select the Text property in the formula bar.
Change the Text property as follows:
First(Filter(Table(ThisItem.Value.resource.telecom), Value.use="home", Value.system="phone")).Value.valueThis Power Fx formula:
Filters the telecom array for items that match the use and system values of 'home' and 'phone'.
Retrieves the first item that the filter returns.
Retrieves the value string for display in the Subtitle1 text label from that telecom element.

Note
Your results might differ if you have existing data in your FHIR service and not only the data that's included in the sample bundles.
The PatientListGallery control is bound to the FHIR bundle data that the system retrieves when you select the IconSearch control. The Title1 and Subtitle1 fields display Patient details.
You can experiment with the different display values from the Patient details, such as including First Name (given) or using different fields for the Subtitle1 text by retrieving other Patient resource elements.
Filter data in the patient record
The current call to FHIRlink.ListResources is as follows:
FHIRlink.ListResources("Patient", {_elements:"id,name,birthDate,telecom"})
You add the _elements parameter to filter the data in each patient record that's returned, but you can further filter the list of patients returned in the bundle.
When you add the new filter criteria to the _elements parameter, you can view a reduced number of the Patient records. The HL7 FHIR specification offers several search and filter options for the patient at the (Patient Search) criteria. For this example, you add the filter by name criteria.
Note
When you filter by using the name, you can match any string fields, including family, give, prefix, suffix, and/or text.
The name value to filter is captured in the TextInputSearch control Text property.
Select the IconSearch control and then select OnSelect in the formula bar.
Update the formula FHIRlink.ListResources statement to filter by the Patient name field. Add the following parameter following the
_elementsparameter value, delimited by a comma:additionalParameters:"name=" & *TextInputSearch*.TextThe updated line of the formula is as follows:
Set (_patientList, FHIRlink.ListResources("Patient", {_elements:"id,name,birthDate,telecom", additionalParameters:"name=" & *TextInputSearch*.Text }));Preview the application and then run the query as follows:
Press the F5 key to preview the application.
In the TextInputSearch box, enter a name. For example, use a name found in your sample bundles: FHIRlink.
Select the IconSearch control.
View the updated list that displays in the PatientListGallery.
Press the Esc key to leave the preview mode.

This search should only include patients whose names include FHIRlink in one of the fields.
The call to FHIRlink.ListResources is now filtering on the name field, matching against all name fields according to the FHIR specification.
Retrieve patient details for the selected gallery item
You can refactor the formula to retrieve information for a single patient. Instead of retrieving the first item from the _patientListTable, you can move the Power Fx code to retrieve the single patient to the event when you select an item in the gallery.
Update the formula to retrieve a patient by selected identifier
To update the formula to retrieve a patient by a selected identifier, follow these steps:
Select the IconSearch control and then select OnSelect in the formula bar.
Update the formula to remove the following lines:
Set (_selectedPatientId, First(_patientListTable).Value.resource.id);Set (_selectedPatient, FHIRlink.GetResource("Patient", _selectedPatientId));Select the Gallery template in the PatientListGallery control.
In the formula bar, select the OnSelect event.
Update the formula to include the following Power Fx statements:
Set (_selectedPatientId, Set (_selectedPatientId, ThisItem.Value.resource.id));Set (_selectedPatient, FHIRlink.GetResource("Patient", _selectedPatientId));
The _selectedPatientId is updated with the ID of the selected patient in the gallery.
Display patient details on the canvas app
The FHIRlink.GetResource operation retrieves the full Patient resource, so you can select any patient information to display in the canvas app. In this step, you display the following patient data elements:
Resource ID - id
Marital Status - maritalStatus
Birth date - birthDate
Gender - gender
The following steps outline how to add the controls for display and bind the correct patient elements.
Select the MainContainer1 control.
Insert a new container control and name it Container1 to help control the layout of your new controls.
Select the new Container1 control and then insert the following controls:
Type Name Text Text label LabelPatientID Patient Id:Text label LabelMaritalStatus Marital Status:Text label LabelBirthdate Birth Date:Text label LabelGender Gender:Text input TextPatientID selectedPatientIdText input TextMaritalStatus First(_selectedPatient.maritalStatus.coding).displayText input TextBirthdate _selectedPatient.birthDateText input TextGender _selectedPatient.genderAdd a vertical gallery to the form and then name it GalleryIdentifiers.
Change the Layout to Title, Subtitle, and Body.
Change the Items property to Table(_selectedPatient.identifier).
In the gallery item template, replace the existing Text label controls with the following name and text property value pairs. You can also make sure that the controls render clean in the item template by adjusting their size, position, and alignment.
Type Name Text Text label LabelCode Code:Text label LabelValue Value:Text label LabelType Type:Text label LabelSystem System:Text input TextCode ThisItem.Value.codeText input TextValue First(ThisItem.Value.type.coding).codeText input TextType ThisItem.Value.type.textText input TextSystem ThisItem.Value.systemA patient resource can include an array of names, so you can add a gallery to display a list of names. This approach helps you validate that the search is correct.
Add a vertical gallery to the form and then name it GalleryPatientNames.
Change the Layout to Blank.
Change the Items property to Table(_selectedPatient.name).
In the gallery item template, replace the existing Text label controls with the following name and text property value pairs. You can also make sure that the controls render clean in the item template by adjusting their size, position, and alignment.
Type Name Text Text label LabelNameUse Use:Text label LabelNameFamily Family:Text label LabelNameGiven Given:Text label LabelNamePeriod Period:Text input TextNameUse ThisItem.Value.useText input TextNameFamily ThisItem.Value.familyText input TextNameGiven Concat(Filter(Table(ThisItem.Value.given), Value), Value, ", ")Text input TextNamePeriod ThisItem.Value.period.endTest the updates. Retrieve the full Patient record by using the GetResource method and then bind the controls to Text labels and a child array property to a new gallery control.
Preview the application and then run the query to check the updates.
Press the F5 key to preview the application. After the application runs, select the IconSearch control.
In the TextInputSearch box, enter a name, such as Smith.
View the updated list that the PatientListGallery displays.
Select a row in the gallery and then view the Patient details that are bound to your new controls.
Press the Esc key to leave the preview mode.

Notice that the GalleryPatientNames now includes two names for Patient FHIRLink2.
The canvas app now displays data from two requests to your FHIR service through the FHIRlink connector calls FHIRlink.ListResources and FHIRlink.GetResource.
Retrieve and display related patient records
In addition to patients, the Azure Health Data Services FHIR service hosts related FHIR resources, such as Encounter, Observation, or Appointments. After you capture a selected patient identifier, you can use it to retrieve these related records. Because this data is FHIR data, you can treat it the same way.
The next step outlines how to retrieve related appointment records and display them on the form.
Select the Gallery template in the PatientListGallery control.
In the formula bar, select the OnSelect event.
Update the formula to include the following Power Fx statement:
ClearCollect(_appointmentList, Table(FHIRlink.ListResources("Appointment", {_elements:"id,status,serviceType,priority,subject,description,start,end,minutesDuration", additionalParameters:"patient=" & _selectedPatientId}).entry));This statement retrieves the list of appointment records that are related to the selected patient through the
_selectedPatientId, and then it casts the results into a table named_appointmentList.Select the MainContainer1 control.
In the space to the right of the patient controls, add the following controls:
Add a Vertical gallery to the form and then name it GalleryAppointments:
Change the Layout to Title, Subtitle, and Body.
Set the Items property to
_appointmentList.entry.
In the gallery item template, replace the existing Text label controls with the following name and text property value pairs. You can also make sure that the controls render clean in the item template by adjusting their size, position, and alignment.
Type Name Text Text label LabelApptSubjectEdit Subject:LabelApptType Type:LabelApptComment Comment:LabelApptStatus Status:LabelApptStart Start Date:LabelApptEnd End Date:LabelApptDuration Duration:Text input TextApptSubjectEdit ThisItem.Value.resource.descriptionTextApptType First(ThisItem.Value.resource.appointmentType.coding).displayTextApptComment ThisItem.Value.resource.commentTextApptStatus ThisItem.Value.resource.statusTextApptStart Text(DateTimeValue(Text(ThisItem.Value.resource.start)), DateTimeFormat.ShortDateTime)TextApptEnd Text(DateTimeValue(Text(ThisItem.Value.resource.end)), DateTimeFormat.ShortDateTime)TextApptDuration ThisItem.Value.resource.minutesDurationPreview the application and then run the query to check the updates.
Press the F5 key to preview the application. When it's running, select the IconSearch control.
In the TextInputSearch box, enter a name of a patient with related Appointment records. For example, search for a single patient named FHIRlink1.
View the updated list that the PatientListGallery displays.
Select a row in the gallery and then view the patient details that are bound to your new controls.
View the list of Appointments for the selected patient.
Press the Esc key to leave the preview mode.

The latest update combines the selection of the patient details with retrieving related appointment records. You can display the patient and appointment data in the canvas app by using common Power Fx formulas and expressions.
Useful links
For more information, see the following links:
For building canvas apps and Power Fx:
Another resource that you can review is Power Apps formula reference.
FHIR®, Google, and EPIC® are registered trademarks that are owned by Health Level Seven International and Epic Systems Corporation, respectively. Use of these trademarks on this page doesn't constitute endorsement by Health Level Seven International or Epic Systems.