Exercise - Create a CI pipeline for IoT Edge with Azure DevOps
Create Azure resources
Azure DevOps Projects creates a CI/CD pipeline in Azure DevOps. First, you'll need to create cloud services that will be used for the module.
Sign in to the Microsoft Azure portal.
Select the following Deploy to Azure button. The Custom deployment panel appears.
On the Basics tab, fill in the following values for each setting.
Setting Value Deployment scope Subscription Select your subscription Resource group Select a name from the dropdown, or select the Create New link, and in the Name text box, enter a name. Parameters Region Select the same region as your resource group Resource Name Suffix Enter a globally unique value Select Review + create, and then select Create to deploy your resources to Azure.
Note
If you encounter any issues in the deployment, we advise deleting the created resource group (if any), and retrying with a new value for the Resource Name Suffix parameter.
After deployment successfully completes, select Go to resource group to review your resources.
Create an Azure DevOps project
If you don't have an Azure DevOps organization, you should follow the steps to create one for free.
- Open Azure Pipelines and choose Start free.
- Sign in/up with Microsoft.
- Give a name to your organization, and create it.
From the Azure DevOps page, on the upper right corner, select New project. The Create new project pane appears.
In the Project name text box, enter a project name.
In the Description text box, enter descriptive text about your new project.
Under Visibility, select either private or public.
Select Create. The project's welcome page appears.
In the left menu pane, select Repos, and in the Import a repository box, select Import. The Import a Git repository pane appears.
In the Clone URL field, enter this URL, and select Import.
https://github.com/MicrosoftDocs/mslearn-oxford-implement-cicd-iot-edge.git
Create a CI pipeline
This repository contains an Azure DevOps build definition, which is preconfigured to build the included EdgeSolution in azure-pipelines.yml. This build definition relies on an external plugin called Replace Tokens.
Begin by installing the Replace Tokens task from the Visual Studio Marketplace by visiting this link and selecting Get it free. Then, select Install to install the token into the organization that contains your newly created Azure DevOps project.
After this task is successfully installed, return to the Azure DevOps project, and select Repos > Files. Select the edit icon to edit the
.azure-pipelines.ymlfile.Add the following comment to the top of the file, as shown below.
# This repository is built using Azure DevOps.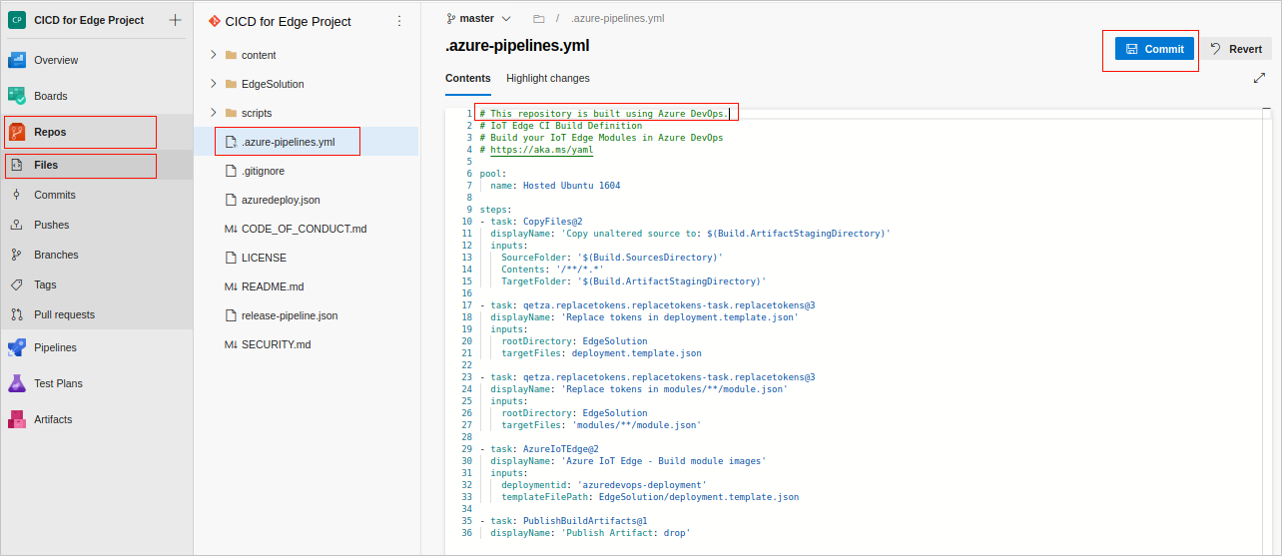
Select Commit to commit your change. The Commit pane appears. Select Commit.
Return to the Files panel.
In the upper right corner, select Set up build, and then select Run. You should see that a build has kicked off upon editing the build definition.
In the left menu pane, select Pipelines. You will see the build will fail. This is to be expected, as Azure DevOps will create the build definition with a name that contains spaces, which cause a conflict in the "Azure IoT Edge - Build module images" task.
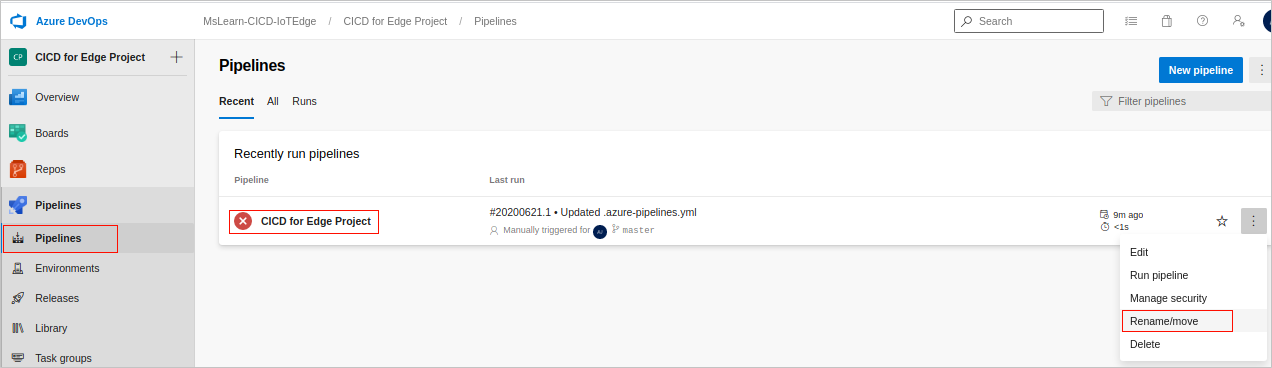
To fix this, select Pipelines. The Pipelines panel appears.
From the Recently run pipelines, at the far right, select the vertical ellipsis for your pipeline, and select Rename/move. The Rename/move pipeline dialog appears. In the Name text box, and rename the newly created build definition so that it does not contain spaces. Select Save.
Create build definition variables
Now you need to add build variables in order to run the build successfully. You'll need to obtain:
- Azure Container Registry login server name as
acr.host - Azure Container Registry username as
acr.user - Azure Container Registry password as
acr.password
- Azure Container Registry login server name as
Go to the Azure portal, and navigate to the resource group you created for this module.
Select the Container Registry resource.
From the left menu pane, under Settings, select Access keys.
Copy the registry name, Login server, Username, and password.

Obtain the Application Insights instrumentation key, which will be represented by
appinsights.instrumentationkey. Go to the Azure portal, and navigate to the resource group you created for this module.In the left menu pane, select Overview. Under the Resources tab, select the Application Insights resource.
In the Essentials section, copy the Instrumentation Key.

Go back to Azure DevOps project, and navigate to Pipelines.
In the pipeline you ran earlier, select the far right vertical ellipsis, and then select Edit.
In the upper right, select Variables. The New variable pane appears.

Add four variables
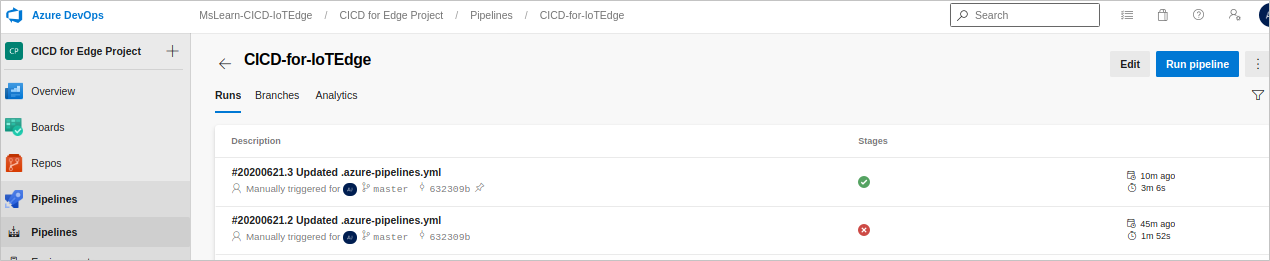
acr.host,acr.user,acr.password, andappinsights.instrumentationkeyusing the values you copied from the Azure portal. Select OK after each entry. When all four variables have been entered, select Save, and then select Run. The Run pipeline pane appears. Select Run.Review the status of the pipeline by going back to Pipelines. The build should finish successfully as follows.
Apply a branch policy
With a successful build definition in place, we can now enforce continuous integration by applying a branch policy to the master branch. In the left menu pane, select Repos, and again, in the left menu pane, select Branches. Select the vertical ellipsis at the far end of the row for the master branch, and from the dropdown, select Branch policies.
In the middle of the master panel, select Build Validation, and then select the + icon (Add new build policy), and select the newly created build pipeline. Keep everything with their default values, and then select Save.

While this policy is enabled, all commits to feature branches will kick off an execution of the newly created build pipeline. It must succeed in order for a pull request of those changes to be made to the master branch.