Create sensitivity labels
- 7 minutes
All Microsoft Purview Information Protection solutions are implemented by using sensitivity labels. To create and publish these labels, go to the Microsoft Purview compliance portal.
To implement sensitivity labels, an organization must first create and configure the labels that it wants to make available for apps and other services. For example, the labels it wants users to see and apply from Office apps.
Once an organization creates its sensitivity labels, it must create one or more label policies. In doing so, it assigns the appropriate sensitivity labels to each policy, and it configures policy settings.
Note
It's the label policy that publishes the labels and settings for an organization's chosen users and locations.
The global admin for an organization has full permissions to create and manage all aspects of sensitivity labels. If you aren't signing in as a global admin, see Permissions required to create and manage sensitivity labels.
Create and configure sensitivity labels
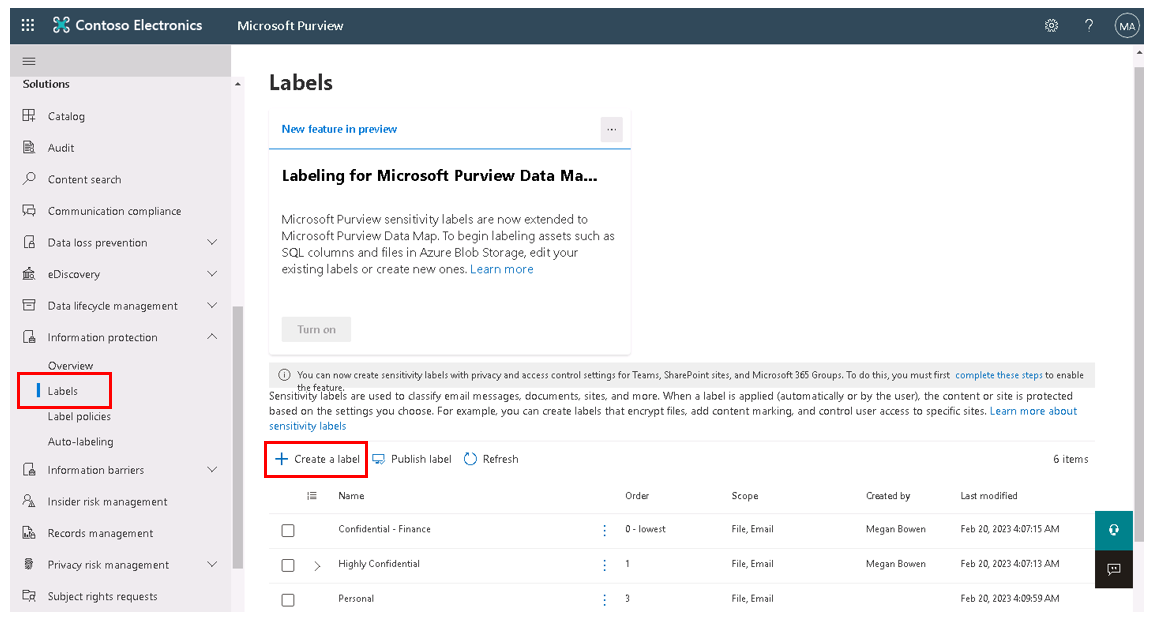
From the Microsoft Purview compliance portal, select Information protection in the navigation pane, and then select Labels.
On the Labels page, select + Create a label to start the New sensitivity label wizard.
Note
By default, tenants don't have any labels. Organizations must instead create them. The labels in the screenshot show default labels that an organization migrated from Microsoft Entra ID Protection.
In the New sensitivity label wizard, on the Name and create a tooltip for your label page, enter the label Name, Display name, Description for users, and optionally, the Description for admins.
On the Define the scope for this label page, the options selected determine the label's scope for the settings that you can configure. They also determine where the system displays the labels once you publish them.
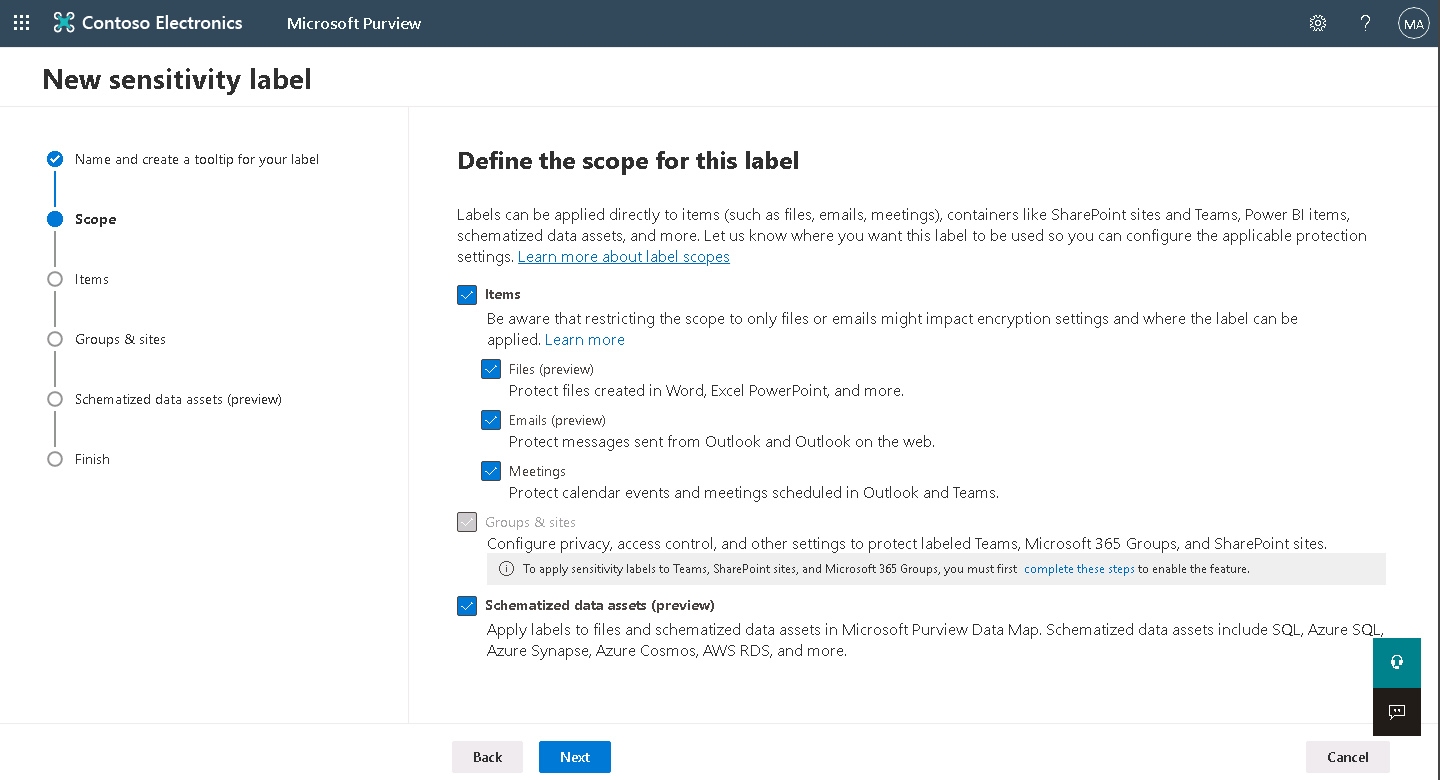
- If you select Files & emails, you can configure settings that apply to apps that support sensitivity labels, such as Office Word and Outlook. If you don't select this option, you still see the first page of these settings. However, you can't configure them, and users can't select the labels in these apps.
- If you select Groups & sites, you can configure settings that apply to Microsoft 365 groups, and sites for Teams and SharePoint. If you don't select this option, you still see the first page of these settings. However, you can't configure them, and users can't select the labels in the groups and site.
- For information about the Schematized data assets scope, see Automatically label your content in Microsoft Purview Data Map.
Follow the configuration prompts for the label settings. Several of the settings options trigger various settings pages. As such, it's difficult to describe all the settings pages that you may encounter, since they're dependent on which options you select. For more information about the label settings, see What sensitivity labels can do from the overview information and use the help in the UI for individual settings.
Repeat these steps to create more labels. However, if you want to create a sublabel, first select the parent label, then select the vertical ellipsis icon (Actions), and then select Add sub label in the menu that appears.
When you finish creating all the labels you need, review their order and if necessary, move them up or down. To change the order of a label, select the vertical ellipsis icon (Actions), and then select Move up or Move down in the menu that appears. For more information, see Label priority (order matters) from the overview information.
Edit a sensitivity label
To edit an existing label, select it in the list of labels in the Labels page. Doing so opens the detail pane for that label. The following screenshot shows the detail pane for the Confidential - Finance label. To edit the label, select the Edit label button.
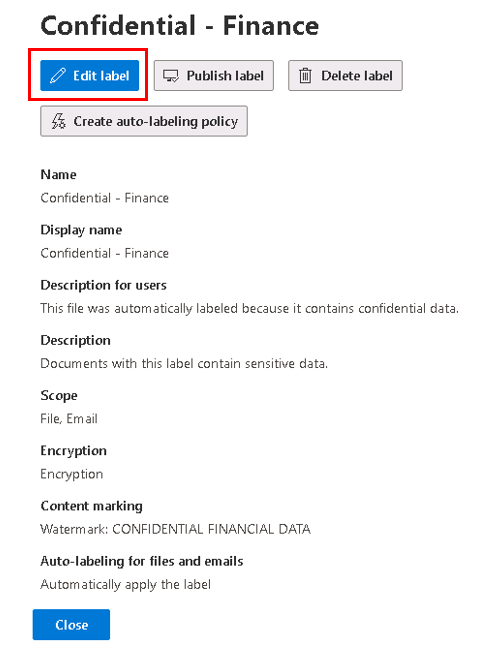
This button starts the Edit sensitivity label wizard, which lets you change all the label settings.
Caution
Don't delete a label unless you understand the effect on users. For more information, see Removing and deleting labels.
Let's assume you edit a label that you already published in a label policy. In that case, you don't need to complete any extra steps when you finish the configuration. For example, you don't need to add it to a new label policy for the changes to become available to the same users. However, you should allow up to 24 hours for the changes to replicate to all apps and services.
Until you publish your labels, you can't select them in apps or for services. The next training unit examines publishing labels.
Important
On the Labels tab of the Information protection page, don't select the Publish label option on the menu bar (or the Publish label button when you edit a label, as seen in the previous screenshot for the Confidential - Finance label) unless you need to create a new label policy. An organization only requires multiple label policies if its users need different labels or different policy settings. As a best practice, organizations should have as few label policies as possible. In fact, it's not uncommon for an organization to have just one label policy for the entire company.
Knowledge check
Choose the best response for the following question.