Exercise - Create a flow outside of a solution
In this exercise, you'll create a cloud flow outside of a Dataverse solution.
Important
Use a test environment with Dataverse.
Exercise 1: Create a cloud flow
In this task, you'll create a cloud flow that will send a daily weather notification for a certain city.
Go to Power Automate and make sure that you're in the correct environment.
Select My flows.
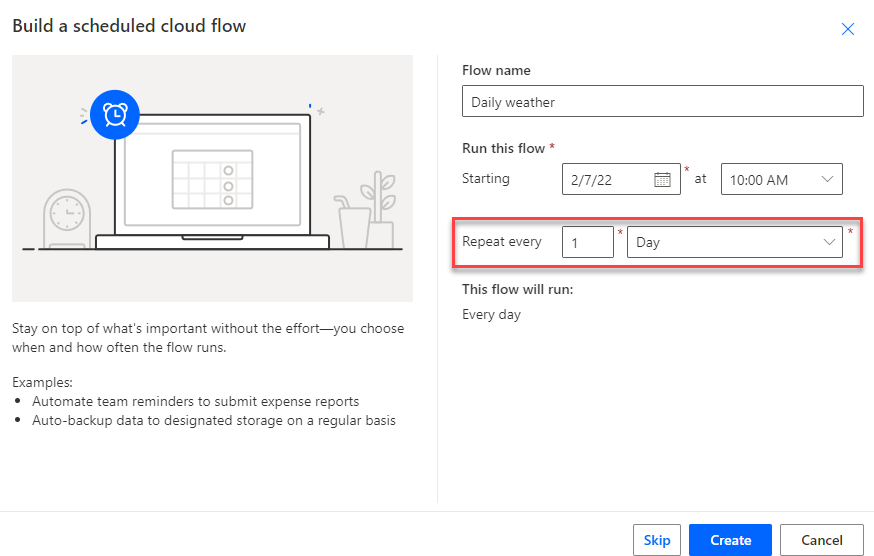
Select + New flow > Scheduled cloud flow.
Enter Daily weather in the Flow name field, and in the Repeat every section, select 1 Day. Select Create.
Select + New step.
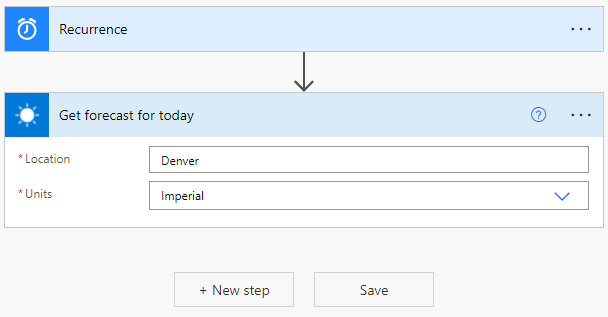
Search for weather and then select Get forecast for today (MSN Weather).
Enter Denver or any city that you want for Location, select Imperial for Units, and then select + New step.
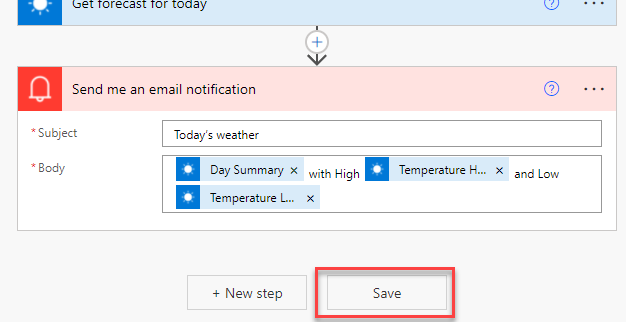
Search for send email and then select Send me an email notification.
Enter Today's weather for Subject, select in the Body field, and then select Day Summary from the Dynamic content pane.
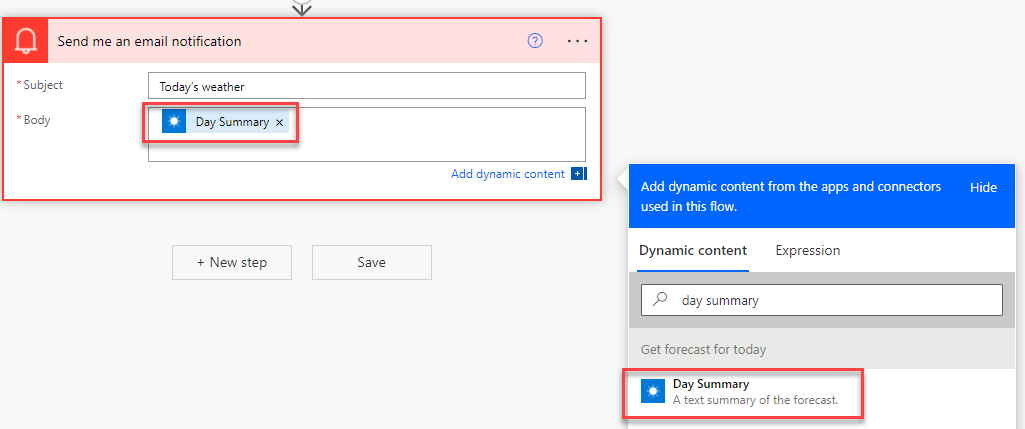
Type with High in the Body field and then select Temperature High from the Dynamic content pane.
Type and Low in the Body field and then select Temperature Low from the Dynamic content pane.
The Send me an email notification step should resemble the following image. Select Save and then wait for the flow to be saved.
Select the back button.
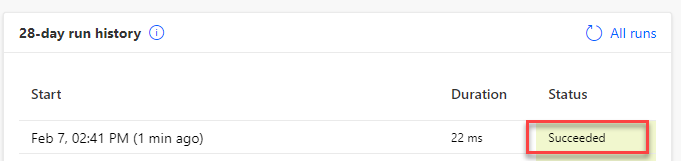
Select Run.
Select Run flow.
Select Done.
The flow run should succeed.
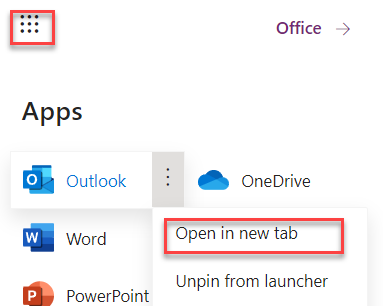
Select the App launcher, right-click Outlook, and then select Open in a new tab.
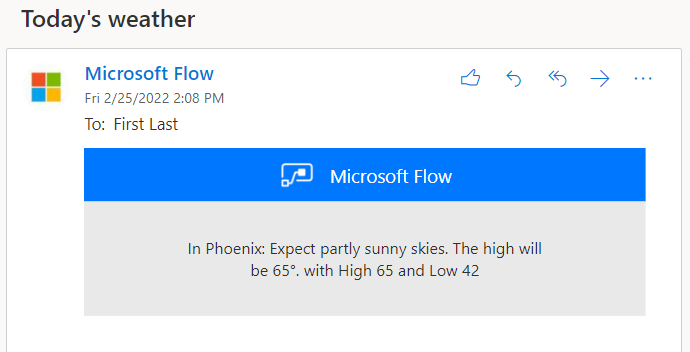
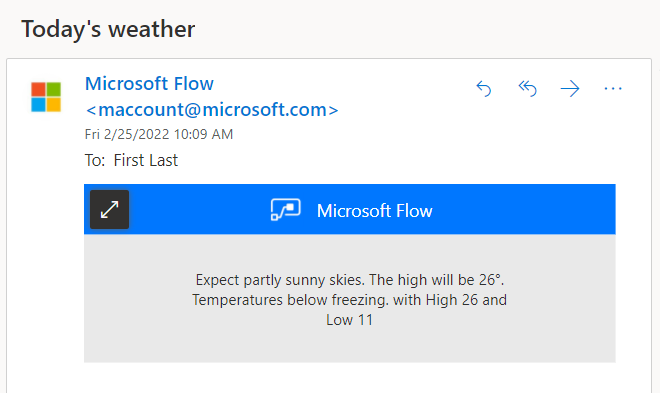
You should receive the email notification that's sent by the flow. Select to open the email.
The email should resemble the following image.
Exercise 2: Create a solution and a publisher
In this exercise, you'll create a solution and a publisher, and then you'll add the cloud flow that you created to the solution.
Task 1: Create a solution and a publisher
In this task, you'll create a solution and a publisher.
Go to Power Automate and make sure that you're in the correct environment.
Select Solutions > + New solution.
Enter My Automations for Display name, MyAutomations for Name, and then select the + New publisher button.
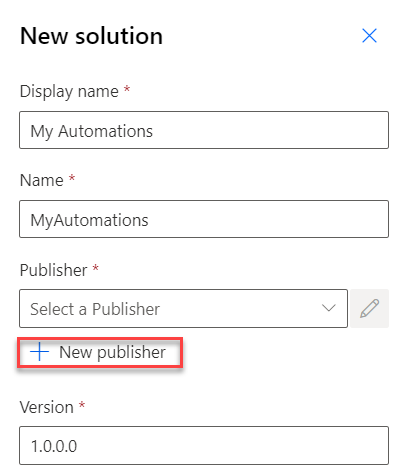
Enter Contoso for Display name, Contoso for Name, contoso for Prefix, and then select Save.
Select the Contoso publisher that you created, select Publisher, and then select Create.
Don't navigate away from this page.
Task 2: Add the cloud flow to your solution
In this task, you'll add the cloud flow to your solution.
Make sure that you still have Solutions selected.
Open the My Automations solution that you created.
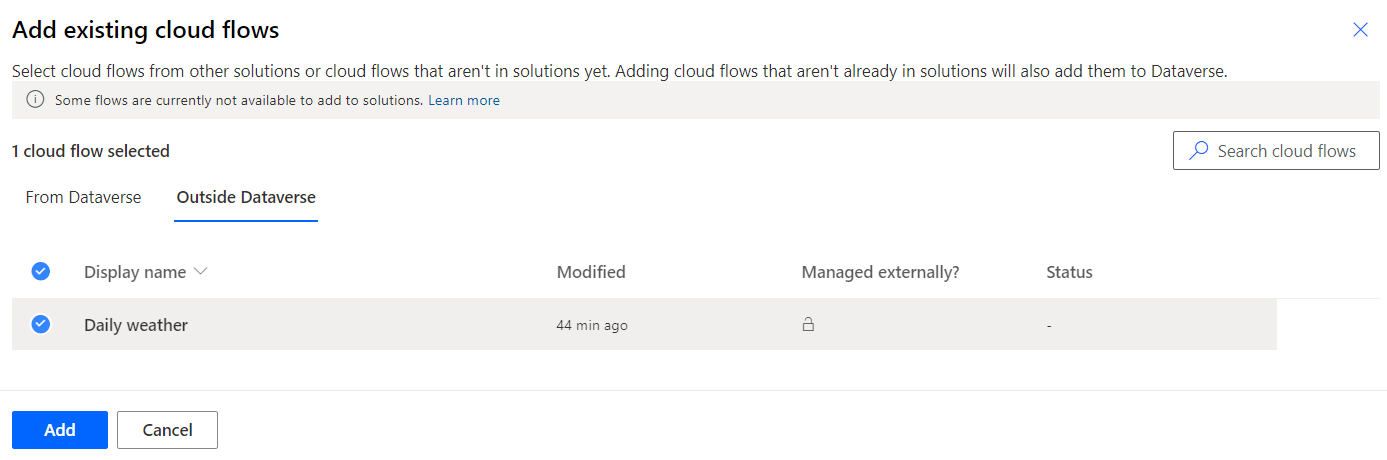
Select Add existing and then select Automation > Cloud flow.
Select the Outside Dataverse tab.
Select the Daily weather cloud flow that you created and then select Add.
Don't navigate away from this page.
Exercise 3: Use environment variables
In this exercise, you'll create an environment variable for the weather location and then use the location in the cloud flow.
Task 1: Create an environment variable
In this task, you'll create an environment variable.
Make sure that you still have the My Automations solution selected.
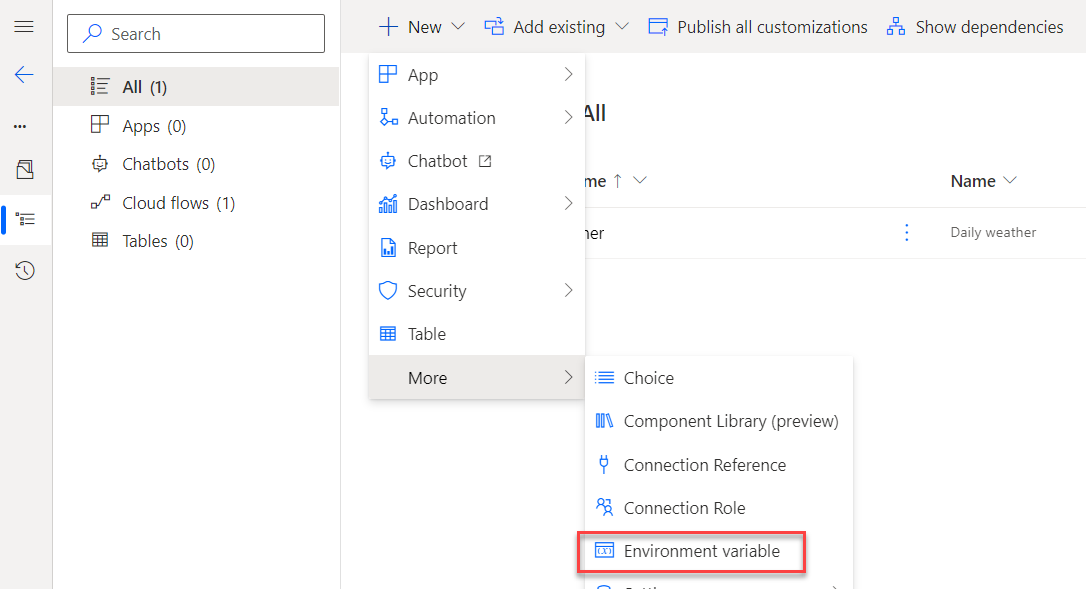
Select + New > More > Environment variable.
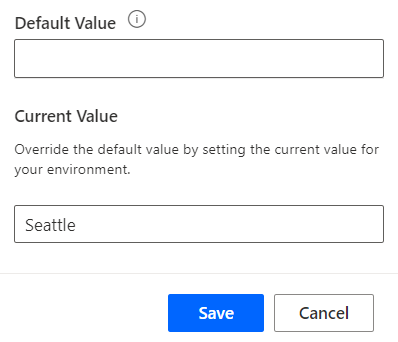
Enter Location for Display name, Location for Name, Text for Data type, and then select the + New value button.
Enter Seattle for Current Value and then select Save.
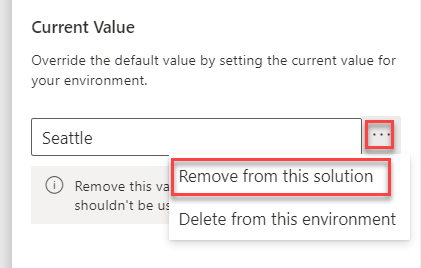
Select to open the Location environment variable that you created.
Select the ellipsis (...) button next to current value and then select Remove from this solution. You're removing the current value from the solution because you want other people who use this solution to provide their location.
Close the Edit location pane.
Don't navigate away from this page.
Task 2: Edit the flow
In this task, you'll edit the flow to use the environment location variable.
From the solution, open the Daily weather cloud flow that you added to the solution.
Select Edit.

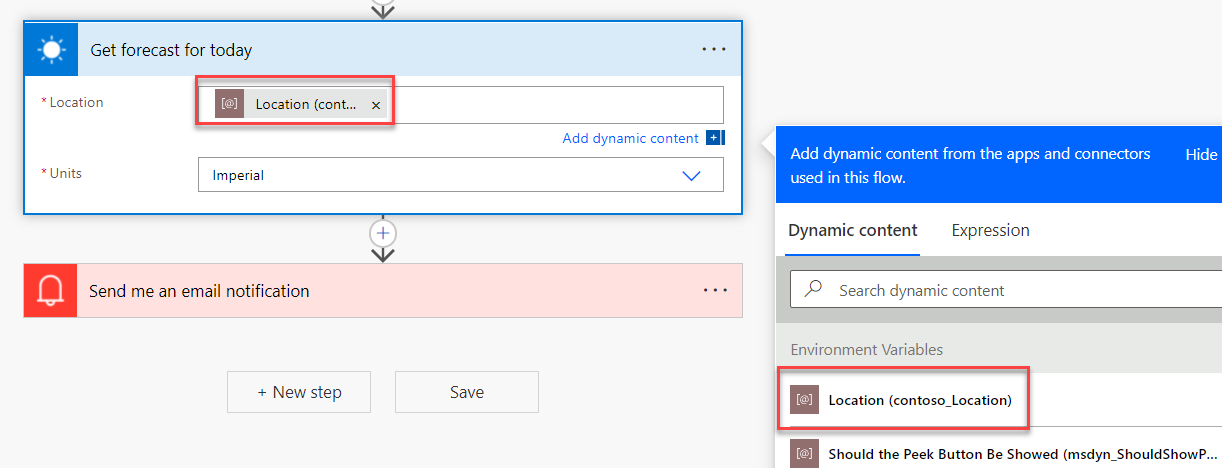
Expand the Get forecast for today step.
Remove the location text that currently reads Denver.
Select the Location field, go to the Dynamic content pane, and then select Location.
Expand the Send me an email notification step.
In front of the Body text, add In and then select Location from the Dynamic content pane.
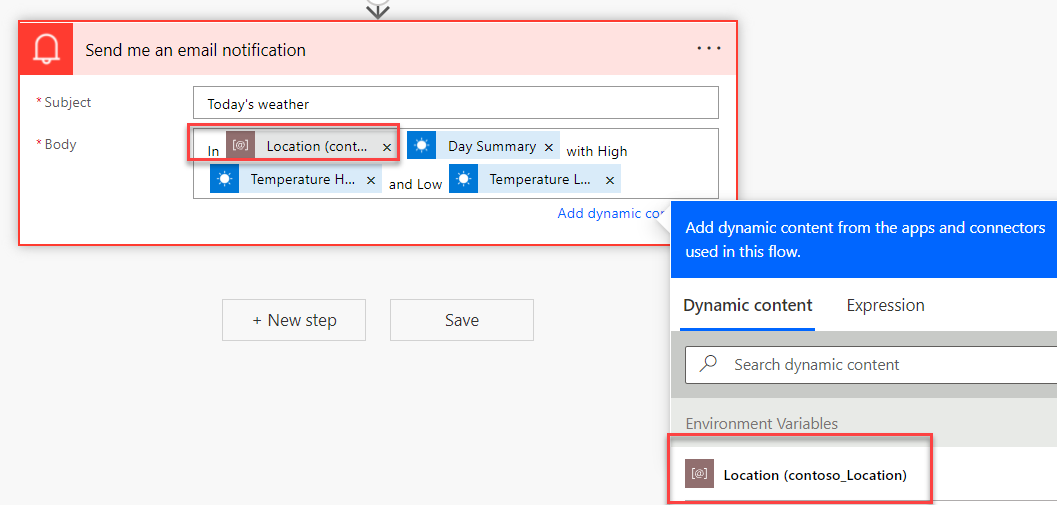
Add a colon (:) after the location and then select Save.
Wait for the flow to be saved.
Select Test.
Select Manually and then select Test.
Select Run flow.
Select Done.
The flow should run successfully.
Select the App launcher, right-click Outlook, and then select Open in new tab.
You should receive the email notification that's sent by the flow. Select to open the email.
The email should show the weather for Seattle.

Exercise 4: Export the solution
In this exercise, you'll export the solution that you created.
Go to Power Automate and make sure that you're in the correct environment.
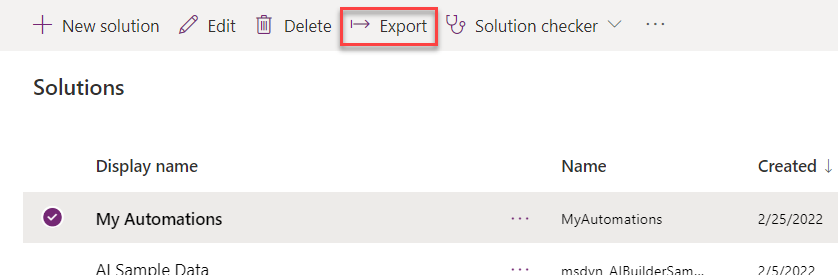
Select Solutions, select the My Automation solution that you created, and then select Export.
Select Publish and then wait for the publishing to complete.
Select Next.
Select Managed and then select Export.
Wait for the solution to be exported.
Save the exported solution on your machine.
Exercise 5: (Optional) Import the solution
In this exercise, you'll import the solution that you created into a new environment.
Important
You will need a second test environment.
Go to Power Automate and make sure that you're in the correct environment.
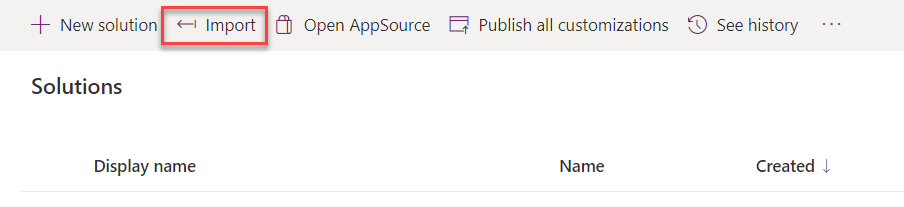
Select Solutions > Import.
Select Browse.
Select the MyAutomation_1_0_0_1_managed.zip solution that you exported and then select Open.
Select Next.
Select Next again.
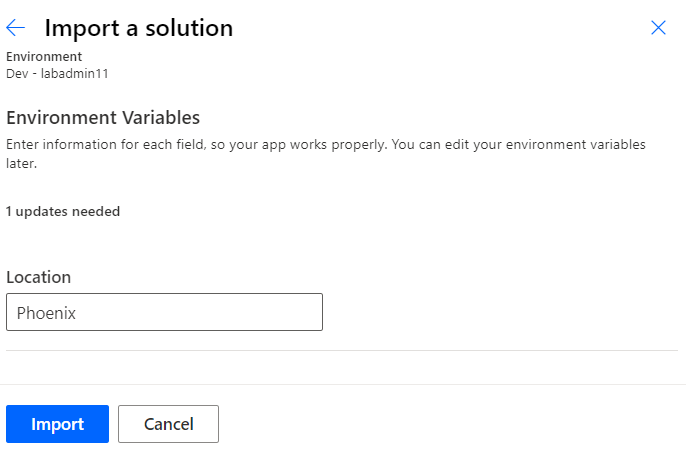
You should be asked to provide a Location. Enter Phoenix for Location and then select Import.
Wait for the import to complete.
Open the My Automations solution that you created.
Open the Daily weather cloud flow inside the solution.
Select Edit.
Expand the weather step and then select + Add new connection.
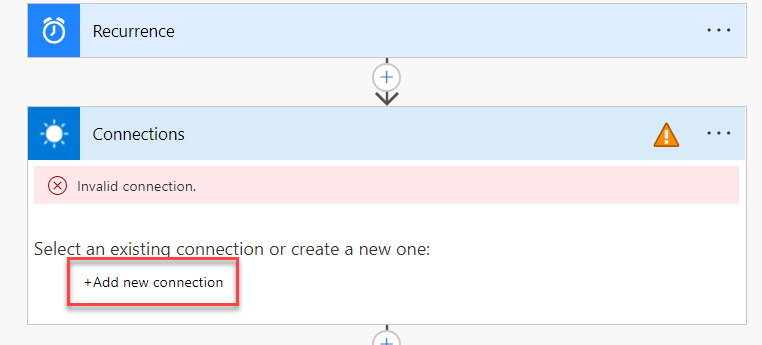
Expand the email step and then select + Add new connection.
Select Save to save the flow and then wait for the flow to be saved.
Select the back button next to the flow name.
Select the Turn on button to turn on the flow.
Select Run to run the flow.
Select Run flow.
Select Done.
Select the App launcher, right-click Outlook, and then select Open in new tab.
You should receive the email notification that's sent by the flow. Select to open the email.
The email should show the weather for Phoenix.