Evaluate migration considerations
In this unit, you’ll learn about the benefits of an ASP.NET migration to Azure.
Investigate the benefits of migration
The benefits of migrating your application to an Azure-hosted environment revolve around the key aspects of application performance and security. You could achieve these facets on par with, or exceeding, your on-premises environment. Otherwise, the cost and workload associated with the migration might not seem feasible.
Evaluate performance considerations
Your application's performance is a key consideration for customer satisfaction. Your application might experience peaks and troughs in a demand cycle. Holiday shopping or marketing campaigns can contribute to increased demand on your application and the servers hosting it.
In an on-premises world, increasing demand means your systems might become overloaded. Supporting increases in demand might require adding server hardware and the management that goes along with it. Management includes adding the hardware, installing and configuring software, and setting up the necessary traffic routing to help ensure that your systems remain available to customers. If demand decreases, you're then left with server hardware that's unused until the next peak in the cycle.
Evaluate scaling options
Azure provides scaling options for web apps and for your SQL databases. Scaling allows you to meet demand when required, and scale back when demand reduces. These scaling options also don't require you to make any changes to your existing code or redeploy your application. The two main scaling options are:
Scale up: Get more CPU, memory, disk space, and extra features such as dedicated VMs, custom domains and certificates, staging slots, and autoscaling. You can scale up by changing the App Service plan pricing tier to which your app belongs.
Scale out: Increase the number of VM instances that run your app. You can scale out to as many as 30 instances, depending on your pricing tier.
Note
The App Service won't automatically scale related resources, such as an Azure SQL Database. The App Service Plan doesn't manage those resources. However, it’s easy to configure scaling on these other resources as well.
Azure SQL Database and Azure SQL Managed Instance allow you to dynamically add more resources to your database with minimal downtime. By adding more resources, you can quickly react when your database reaches the current resource limits and needs more power to manage the incoming workload. Azure SQL Database also allows you to scale down the resources when they’re not needed to lower the cost. Single databases in Azure SQL Database support manual dynamic scalability, but not autoscaling. For a more automatic experience, consider using elastic pools, which allow databases to share resources in a pool based on individual database needs.
Evaluate security considerations for app and data
Securing your application and associated data is a critical consideration. Your web app might present a publicly accessible interface, but you don't want unauthorized users to access your database or administration pages of the web app. Key questions to consider are:
Who should have access to specific areas of the app?
Which areas require tighter security?
How do users authenticate with secure areas?
Assess your current environment-security configuration and use that assessment to map out your security needs for the hosted environment. Some aspects in an on-premises environment, such as firewall hardware, will be slightly different in Azure. For example, virtual networks on Azure will act as a firewall for apps and services.
Other areas are new, such as the Azure Key Vault for storing secrets that the application might need. A prime example is storing a SQL connection string in the Azure Key Vault rather than in application configuration files. This adds an extra security layer around database credentials.
Investigate networking requirements
Azure can help you mimic your on-premises networking environment by using services such as virtual networks and DNS. Understanding these options will help you configure a secure and operational networking environment that hosts your application.
Explore Azure networking options
Azure can help secure various aspects of your app and data by using virtual networks, which act in a similar fashion to firewalls. Setting up virtual networks is a simple process and provides control over the network security of your application. You can:
Configure subnets by using Classless Interdomain Routing (CIDR) notation.
Create perimeter networks to isolate traffic domains.
Control access by using network ports.
You can use an Azure virtual network to enable your applications to securely communicate with each other, to the internet, and to your on-premises networks. By default, apps are permitted to have outbound communication with the internet, but inbound connections are denied until you explicitly open the necessary application ports.
Communication between your Azure resources is accomplished through:
A virtual network: Deploying your VMs and other resources to a virtual network provides direct communication between these resources.
A service endpoint: You can use service endpoints to help secure your critical Azure service resources to only a virtual network.
Virtual network peering: You can use virtual network peering to connect virtual networks to each other, thereby enabling resources in either virtual network to communicate with each other.
Communication with your on-premises network is accomplished through:
Point-to-site VPN connection: Established between a virtual network and a single computer in your network. Each computer that wants to establish connectivity with a virtual network must configure its connection.
Site-to-site VPN connection: Established between your on-premises VPN device and an Azure VPN Gateway that's deployed in a virtual network. This connection type enables any on-premises resource that you authorize to access a virtual network.
ExpressRoute connection: Established between your network and Azure, through an ExpressRoute partner. This connection is private. Traffic does not go over the internet.
Explore Microsoft Entra ID for security
Microsoft Entra ID is a cloud-based identity- and access-management service that helps your employees sign in and access resources. It provides access to:
External resources, including Microsoft 365, the Azure portal, and many other SaaS applications.
Internal resources, such as applications on your corporate network or any cloud apps developed by your own organization.
Explore authentication and access control with Microsoft Entra ID
Microsoft Entra authentication can provide verification of a username and password, but it's also much more. To improve security and reduce the need for helpdesk assistance, Microsoft Entra authentication includes the following components:
Self-service password reset: Users can update or change their passwords by using a web browser from any device.
Microsoft Entra multifactor authentication: Users can choose an additional form of authentication during sign-in, such as a phone call or mobile-app notification.
Hybrid integration: When a user updates or resets their password by using self-service password reset, that password can also be written back to an on-premises Active Directory environment. Hybrid integration is also used to enforce password protection policies for an on-premises environment.
Password-less authentication: This option includes entering credentials that are provided by using methods such as biometrics with Windows Hello for Business or a FIDO2 security key.
You can use Microsoft Entra ID for access control to all your resources on Azure. The single sign-on capabilities also mean that your users won't need to remember multiple sign-on credentials.
Explore cost considerations
Cost is an important factor in helping you determine if migration is the right choice. You might already know the costs associated with hosting your application and database on-premises. To help you evaluate the costs that you might incur in a cloud-hosted environment, Azure provides cost-analysis tools.
Azure Pricing Calculator
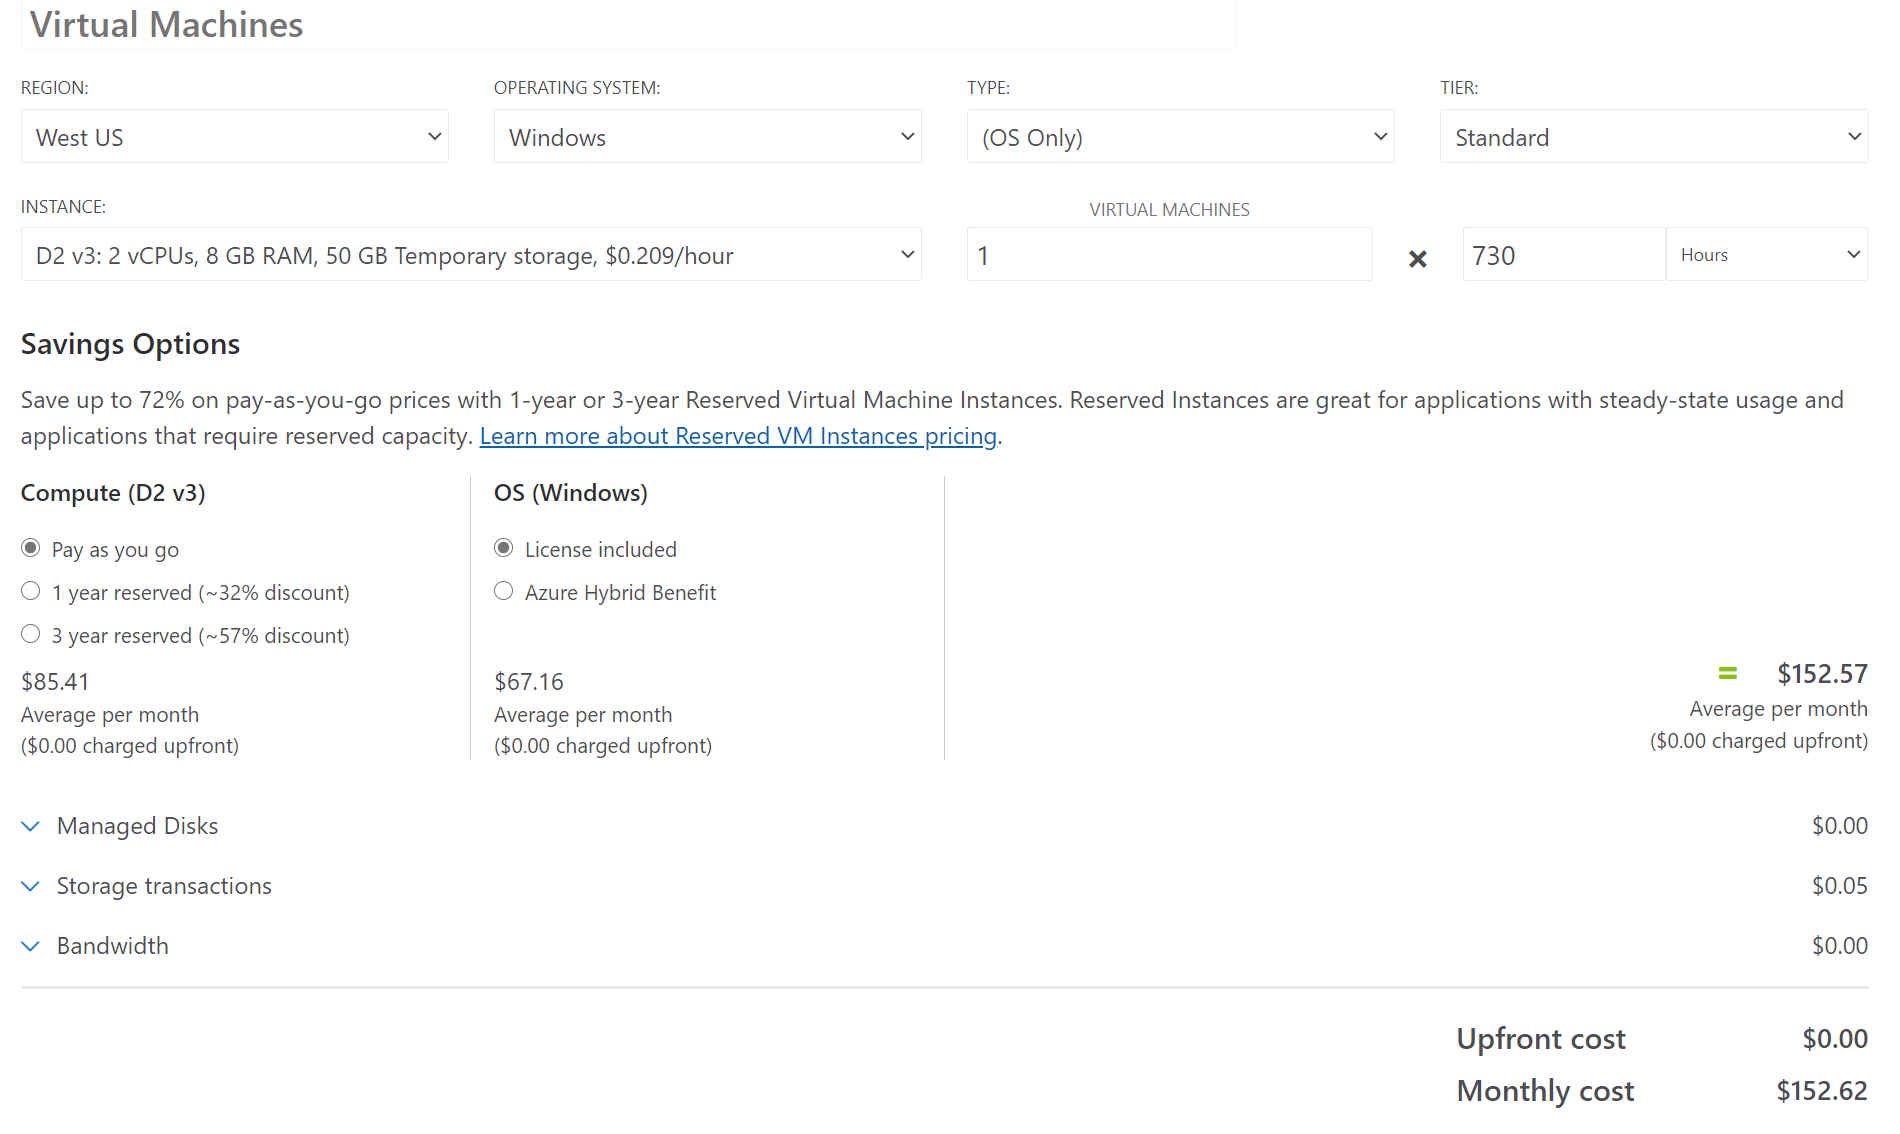
You can use the Azure Pricing Calculator to determine the cost of the resources you plan to use on Azure. In this tool, you can select from the various categories available that cover the Azure resources. You can then choose specific configurations that will display the estimated monthly costs for that service.
For example, if you want to evaluate the cost of using Azure VMs, you select the Virtual Machine category, then review the configuration options. As you make changes to the options, such as region, OS, pricing tier, and size, the charts will update to reflect the chosen options.
Determine App Service costs
You can use the pricing calculator to determine the costs of hosting your ASP.NET application on Azure by selecting the App Service category.
Adjusting the pricing tier option from the Tier drop-down menu will change the cost model. This will change the compute configuration by selecting specific configurations of CPU cores and memory options. You can select a tier that matches your on-premises environment to review the monthly hosting cost for that compute environment.
To get an idea of costs associated with scaling the app, you can increase the counter for the number of instances.

Continue to modify the options on this pane to evaluate the monthly costs associated with the Azure App Service.
The updated Premium v3 (Pv3) offering, which leverages the latest Azure Dv4 Virtual Machine (VM) hardware to deliver improved performance and scalability, is available for customers to use as well. A cost comparison of Premium v2 and Premium v3 depicts the App Service monthly cost comparisons.

Determine Azure SQL Database costs
You can evaluate your SQL Server costs by selecting the Databases category on the pricing calculator page. This presents you with the available database options on Azure. Selecting Azure SQL Database opens the estimator panel on the pricing calculator page. You can use this panel to modify the parameters to match your needs and review the monthly costs that you’d be billed.
There are various options on this estimator that impact the cost. The first option deals with the instance configuration.

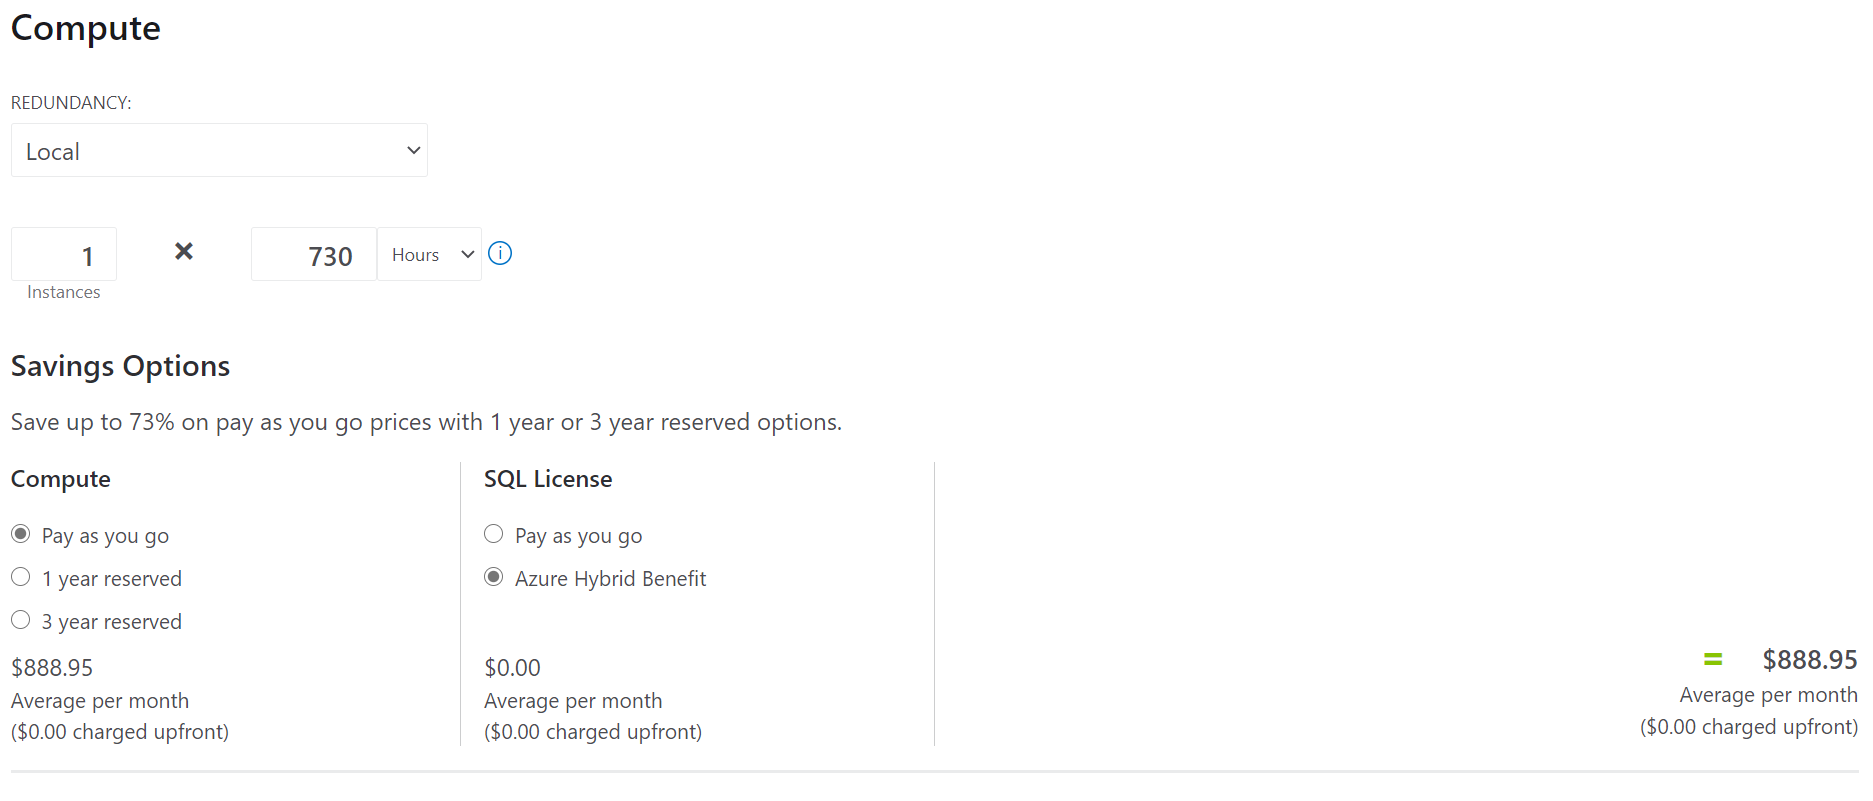
You'll also need to select the compute resource options to tailor your pricing model. For example, you might choose to use the hybrid model to reduce the licensing costs, as depicted in the following compute option screenshot.
The remaining options deal with the storage-account choices and any support that you might want to include as a part of your Azure SQL Database hosting.
Next unit: Investigate migration assistants
Having an issue? We can help!
- For issues related to this module, explore existing questions using the #azure training tag or Ask a question on Microsoft Q&A.
- For issues related to Certifications and Exams, post on Certifications Support Forums or visit our Credentials Help.