Exercise - Publish an NVIDIA DeepStream Graph Composer container to Azure Container Registry
Now that you've packaged your DeepStream Graph Composer application into a container, you're ready to publish this artifact into an instance of Azure Container Registry for secure distribution to other supported devices.
This preparation also sets the stage for potential deployment by using Azure IoT Edge, which we'll cover in more detail in the next module.
To begin, follow these instructions to "create a container registry." The document demonstrates how to instantiate the necessary Container Registry resources in Microsoft Azure and how to sign in and push images to this service. After you finish the steps in this section, you'll publish your DeepStream Graph Composer container artifact into this registry.
Follow the steps in Quickstart: Create an Azure container registry by using the Azure portal. You only need to follow the steps to create a container registry. The extra steps mentioned in the documentation are optional. After you finish this task, continue with the next steps.
Go to your newly deployed instance of Container Registry in the Azure portal:
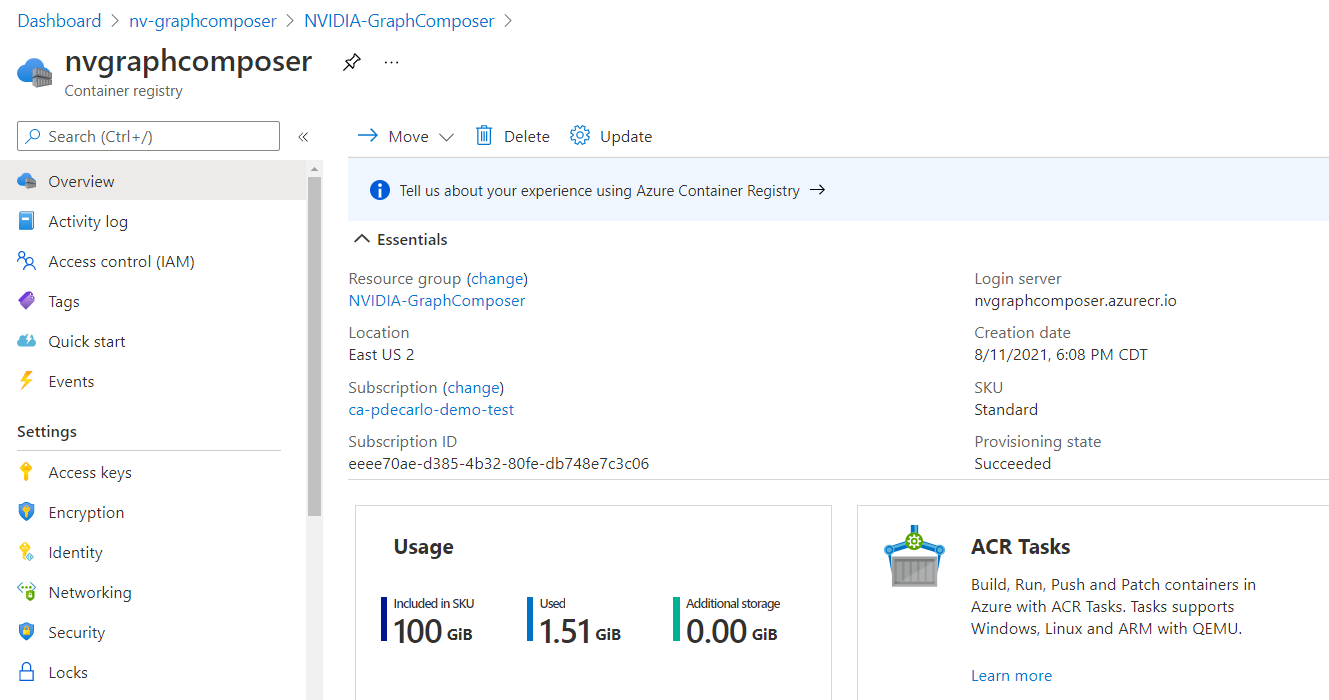
You'll notice your container registry has a Login server property that refers to the url for accessing your service remotely. This property ends in azurecr.io. Make a note of this value because you'll use it shortly.
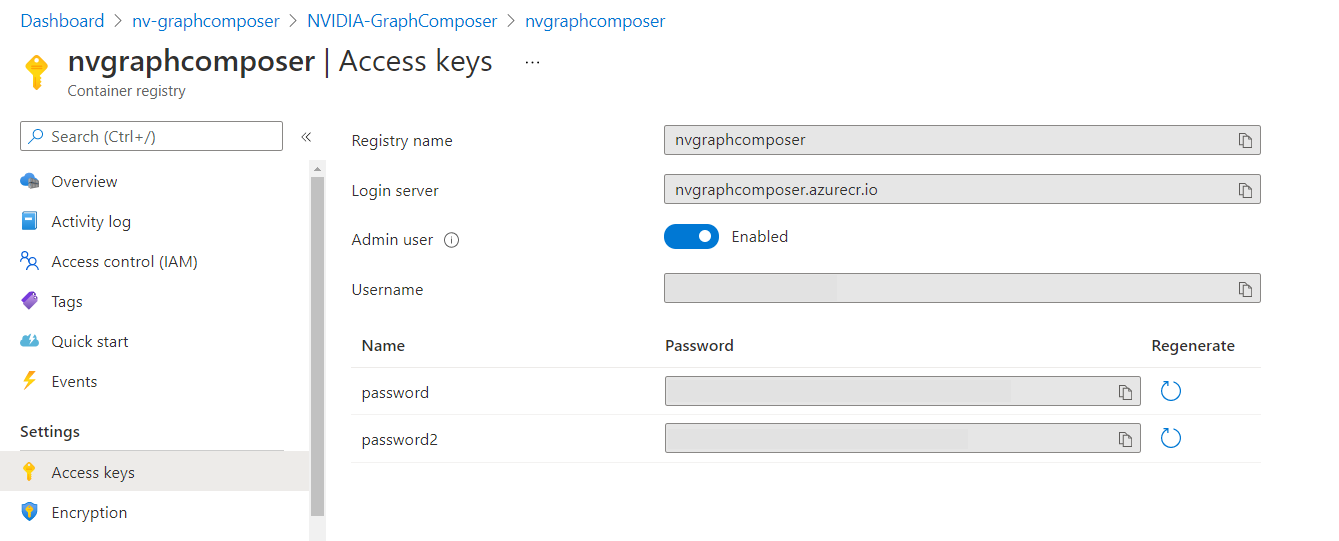
Next, select the Access keys section on the left side under Settings, and enable the option for Admin user. This operation grants you the ability to authenticate against your container registry to allow access from the Docker instance running on your host machine. Again, make a note of the values for Login server, Username, and Password because they're used in the next step.
Now you're ready to authenticate against your container registry and grant access to the host's Docker instance. To do this step, run the following commands in a terminal session on the host machine:
sudo docker login <Login server>When you're prompted for Username, enter the value provided in the Access keys section of your container registry in the Azure portal.
When you're prompted for Password, enter the value provided in the Access keys section of your container registry in the Azure portal.
You should see a message that indicates "Login Succeeded" after successful entry.
Before you can push your recently created Docker image into your container registry, you must tag your image to reference your container registry. Run the following command in a terminal on the host machine:
sudo docker tag deepstream_test1_dgpu <Login Server>/deepstream_test1_dgpu:v1Push your DeepStream Graph Composer container image into this repository by running this command:
sudo docker push <Login Server>/deepstream_test1_dgpu:v1Wait for the push to complete. Then go back to your container registry in the Azure portal and verify that the image was uploaded. To verify, select Repositories under the Services section on the left side of the overview page. You should see your freshly pushed
deepstream_test1_dgpu:v1image in the repository list as shown here: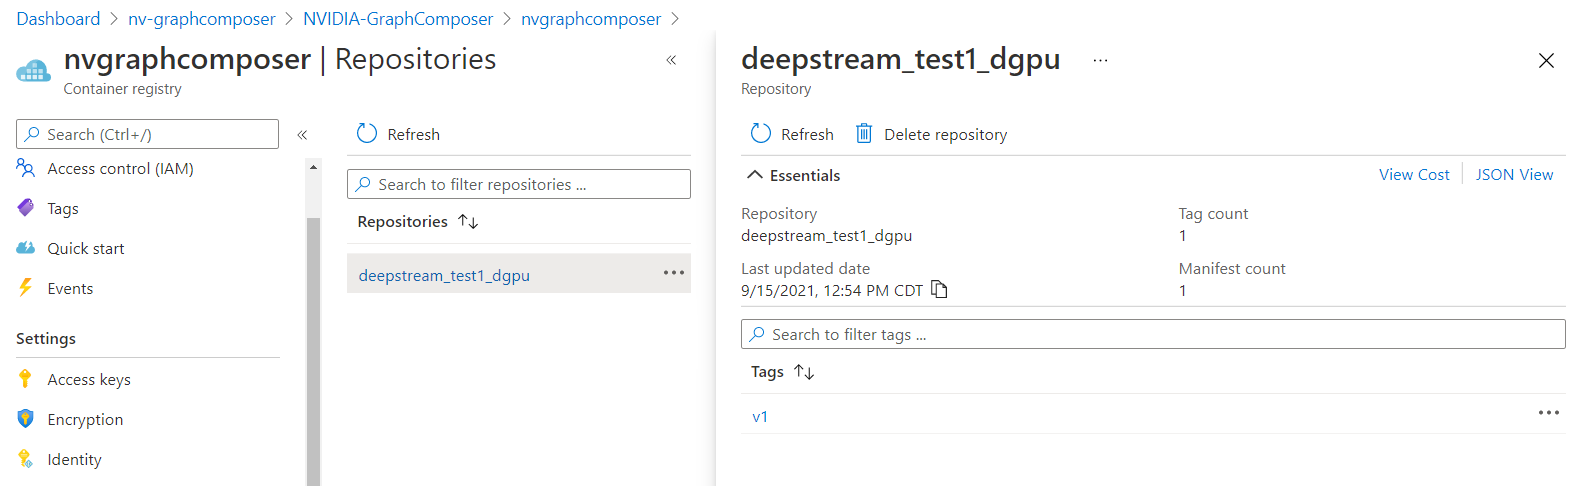
Finally, if you want to execute and run this image by using the image contained in your container registry, run the following commands in a terminal on a compatible host:
sudo docker run -it --rm --gpus all -v /tmp/.X11-unix/:/tmp/.X11-unix/ -e DISPLAY=:0
<Login server>/deepstream_test1_dgpu:v1
Note
If you intend to run this workload on a machine that isn't the current host that you've been working with, you need to enable access to X11 with
sudo xhost +and authenticate your Docker instance for access to your container registry.
Congratulations! You've successfully built and published your first DeepStream Graph Composer application into a secure container registry to enable distribution of your workload to various compatible hosts.
Try this
Imagine that you've been tasked to develop an IVA application to count the number of people who enter a restaurant. Your development team works closely with a testing team that validates the accuracy of the IVA solution before they deploy it into production. How could you distribute new builds of the IVA application to the test team in a way that doesn't require manual reconfiguration of test hardware?