API governance
API governance is defined as the practice of defining and applying standards, policies, and processes at scale across all organizational APIs. API Center enables you to do that with:
- Tracking API metadata, including API title, description, versions, definitions, and deployments. In addition, you can specify your own custom API metadata - such as live site information, source control repository, etc. - to track metadata that's important to your organization (shown in an earlier module).
- Ensuring all APIs are designed to conform to the organizational API design philosophies
- Ensuring timely detection of API versions with breaking changes for seamless roll outs and communication to API consumers
In this unit, we'll see how API Center enables you to configure API governance at-scale.
Prerequisites
To govern your APIs with API Center, you'll need to:
- Install the Azure CLI.
- Install the Azure Developer CLI (azd).
- Register the Event Grid resource provider in your subscription. If you need to register the Event Grid resource provider, see Subscribe to events published by a partner with Azure Event Grid.
API design conformance
API platform teams are often responsible for defining a set of guidelines for API producers. API Center enables you to codify API guidelines by defining rules with the Spectral open-source linting engine. By default, API Center comes with a provided Spectral rule, but you can always build your own or leverage the large community of open-source rulesets. Every time an API definition is uploaded, API Center runs the Spectral linter using the provided ruleset to check the API definition for conformance to the rule. A report of API compliance is generated that you can view in your API center.
To configure API design conformance for your organization:
Clone the GitHub repository and open it in Visual Studio Code.
Change directory to the
APICenter-Analyzerfolder in the repository.In the
resources/rulesetsfolder, you can find anoas.yamlfile. This file reflects your current API style guide and can be modified based on your organizational needs and requirements.Authenticate with the Azure Developer CLI and the Azure CLI using the following commands:
azd auth login

az login
Run the following command to deploy the linting infrastructure to your Azure subscription.
azd upFollow the prompts to provide the required deployment information and settings, such as the environment name and API center name. For details, see Running the sample using the Azure Developer CLI (azd).
Note
The deployment might take a few minutes.
After the deployment is complete, navigate to your API center in the Azure portal. In the left menu, select Events > Event subscriptions to view the event subscription that was created.
You can now upload an API definition file to your API center to trigger the event subscription and run the linting engine.

Shift-left API governance
The most successful governance initiatives always include developers themselves. By applying traditional shift-left principles, API platform teams can ensure that API producers know exactly what requirements they must meet to publish APIs early in the development cycle. This saves valuable development time by reducing the need to remediate noncomplaint APIs later in the development cycle.
The API Center extension for Visual Studio Code provides API producers an experience to run API design conformance checks directly in Visual Studio Code as the API is being built. Additionally, API producers can use the breaking change detection feature to detect when a change may result in a breaking chat for API consumers.
API design conformance in Visual Studio Code
API Center extension is integrated with Spectral, a JSON/ YAML linter that supports OpenAPI and custom ruleset. The extension allows developers to strictly follow the provided or recommended API style guide, ensuring consistency across all APIs being developed across different teams.
Note
You need to install the API Center and Spectral extensions to use this capability.
To activate,
- Use the Ctrl+Shift+P keyboard shortcut to open the Command Palette. Type Azure API Center: Set active API Style Guide and hit Enter.
- Select one of the default rules provided, or, if your organization has a style guide already available, use Select Local File or Input Remote URL to specify the active ruleset in Visual Studio Code. Hit Enter.

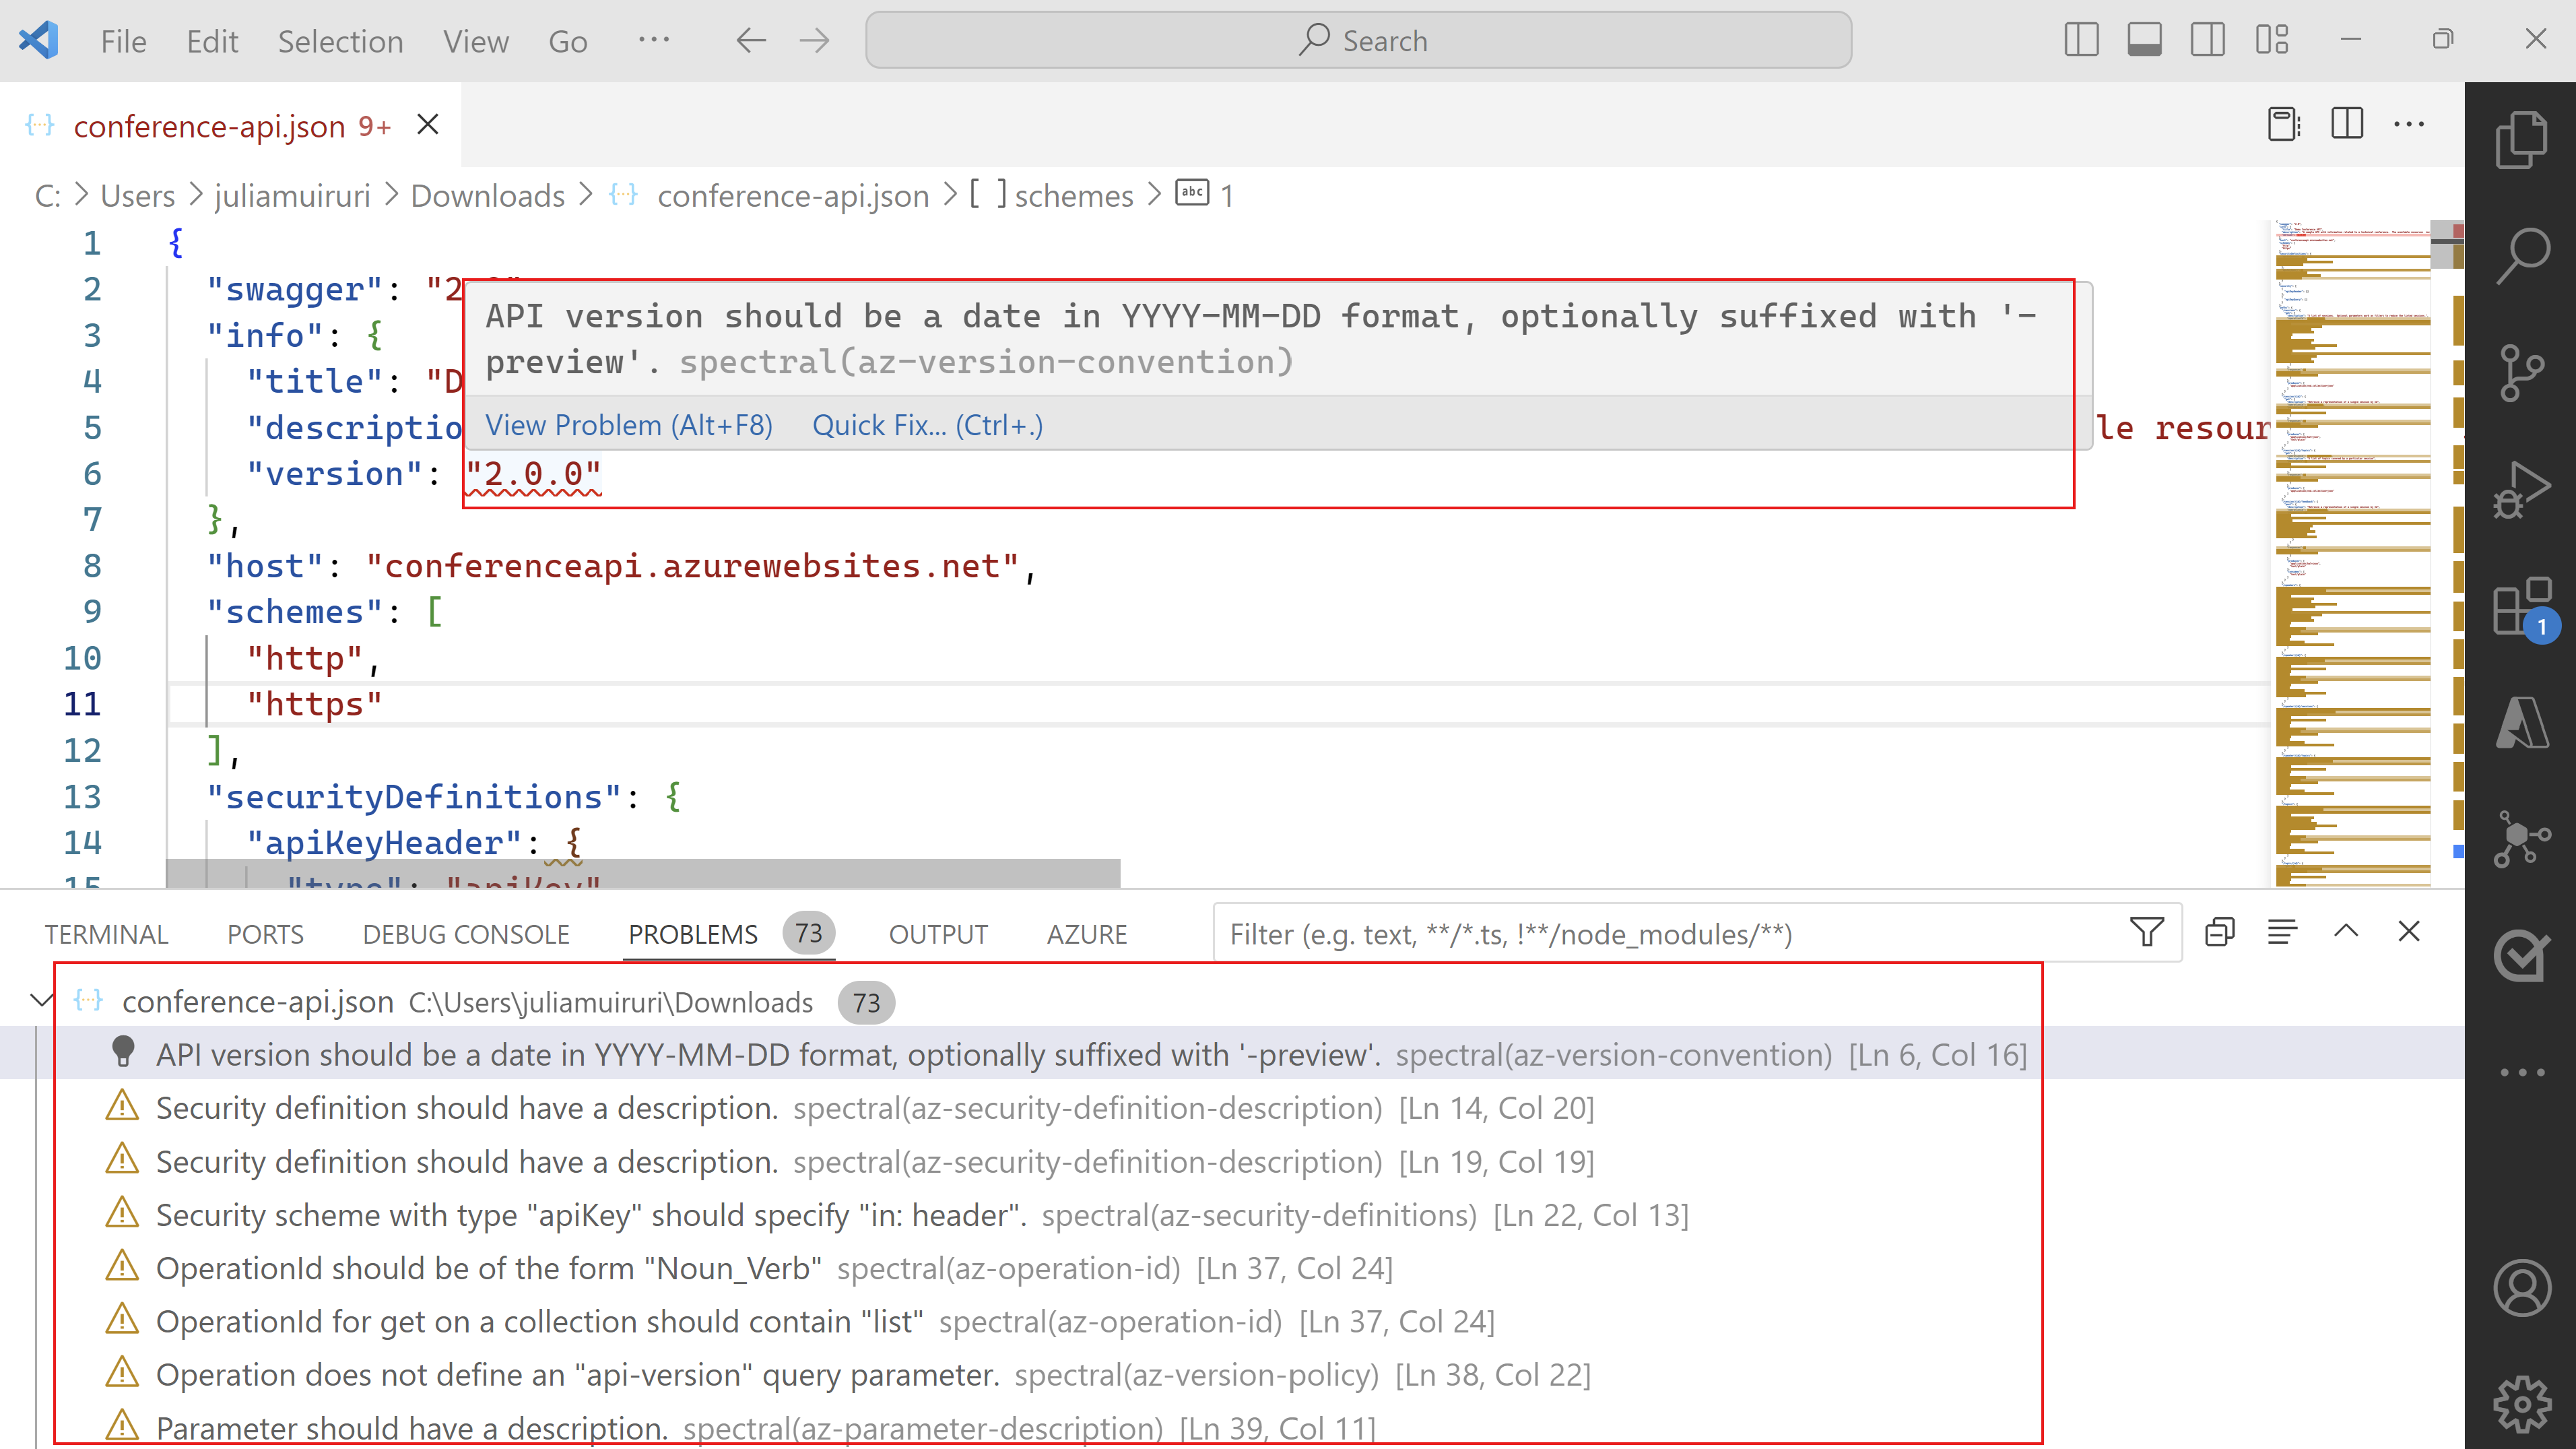
Once an active API style guide is set, opening any OpenAPI or AsyncAPI-based specification file triggers a local linting operation in Visual Studio Code. Results are displayed both inline in the editor, and in the Problems window (View > Problems or Ctrl+Shift+M).
Detecting breaking changes in Visual Studio Code
Shipping API versions that break consumer production workflows results in an unreliability and loss of trust. The API Center extension, using optic, allows developers to easily compare any two API versions and detect any breaking changes introduced to the API before deployment.
Note
You need to install Optic to use this capability. Install using the following command.
*npm install -g @useoptic/optic*
Then,
- Use the Ctrl+Shift+P keyboard shortcut to open the Command Palette. Type Azure API Center: Detect Breaking Change and hit Enter.
- Select the first API specification document to compare. Valid options include API specifications found in your API center, a local file, or the active editor in Visual Studio Code.
- Select the second API specification document to compare. Valid options include API specifications found in your API center, a local file, or the active editor in Visual Studio Code.
Visual Studio Code opens a diff view between the two API specifications. Any breaking changes are displayed both inline in the editor, and in the Problems window (View > Problems or Ctrl+Shift+M).
