Exercise: Schedule a contact and downlink data
Once you’ve registered a spacecraft, created a contact profile, and allowed enough time for the spacecraft to be authorized, you can schedule a contact to downlink the data.
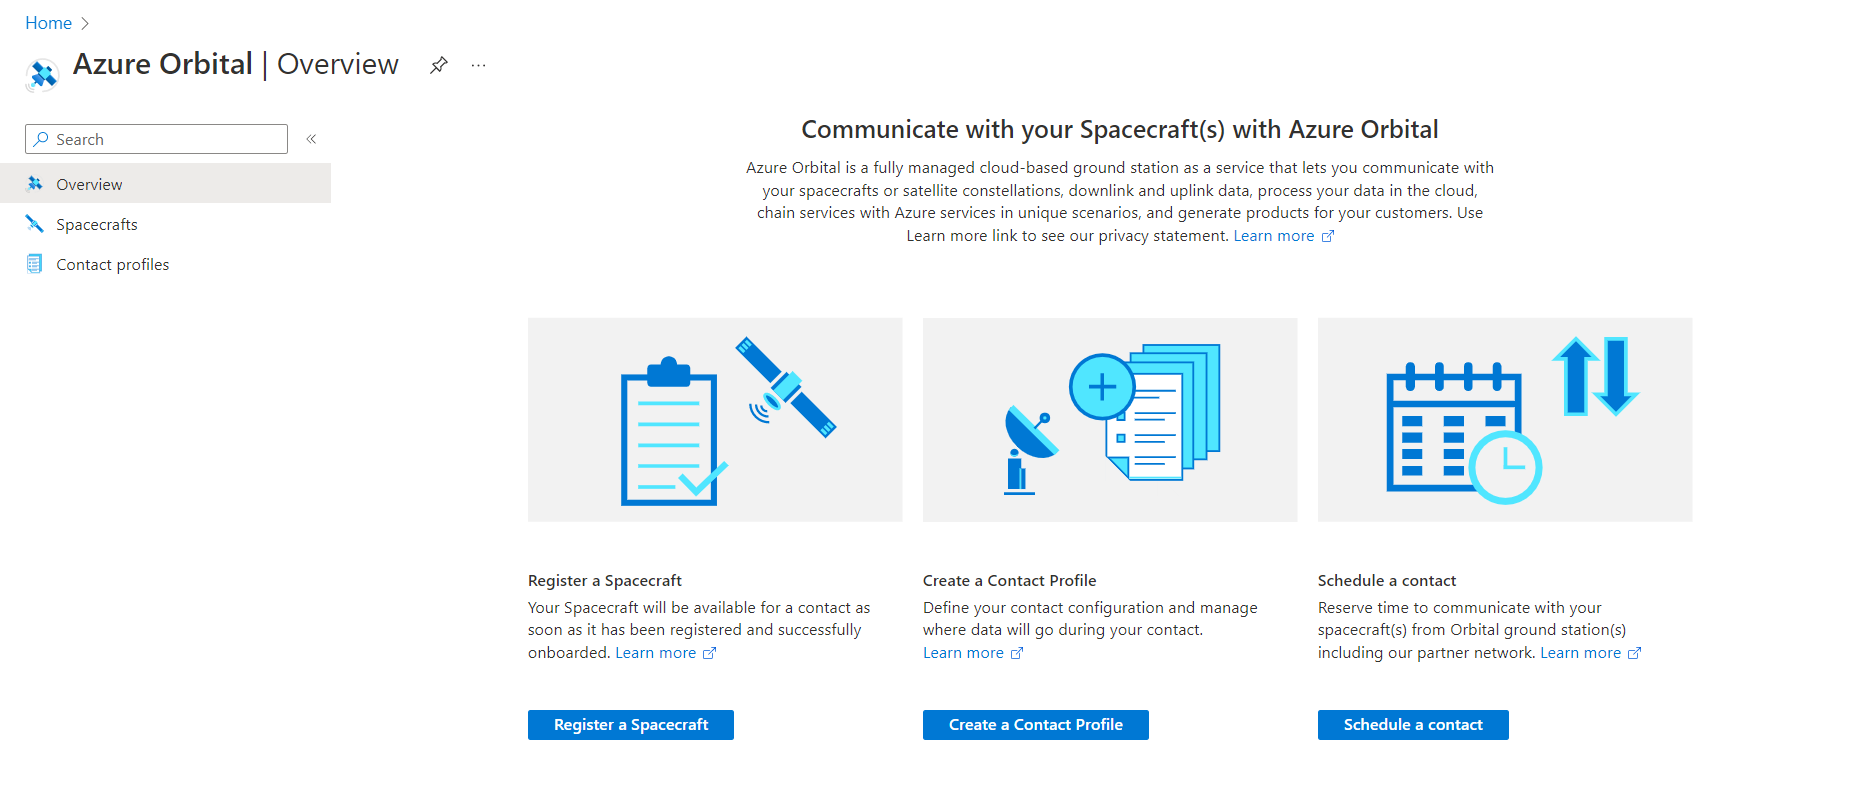
Getting started
Once your spacecraft has been authorized and your contact profile has been created, you’re ready to schedule a contact. Because you’ve already input all necessary information, you don’t need any more information on hand before continuing.
The same portal is used to access any ground station provided through Microsoft and our ground station partners: KSAT, USEI, and Viasat. When downlinking data, you have unmatched contact opportunities thanks to the global Azure Orbital Ground Station network, and you only pay for the time when your spacecraft and ground stations are in contact.
Scheduling a contact is simple, but once it’s scheduled, you have to wait for your data to appear in your endpoint, because the satellite needs to be in range of the ground station for the contact to be made and the data to be downlinked.
Schedule a contact
Now, you’re ready to schedule a contact. If you established an endpoint when creating the contact profile, continue to follow along in your account in the Azure portal.
First, go to the Azure Orbital homepage and select schedule a contact.
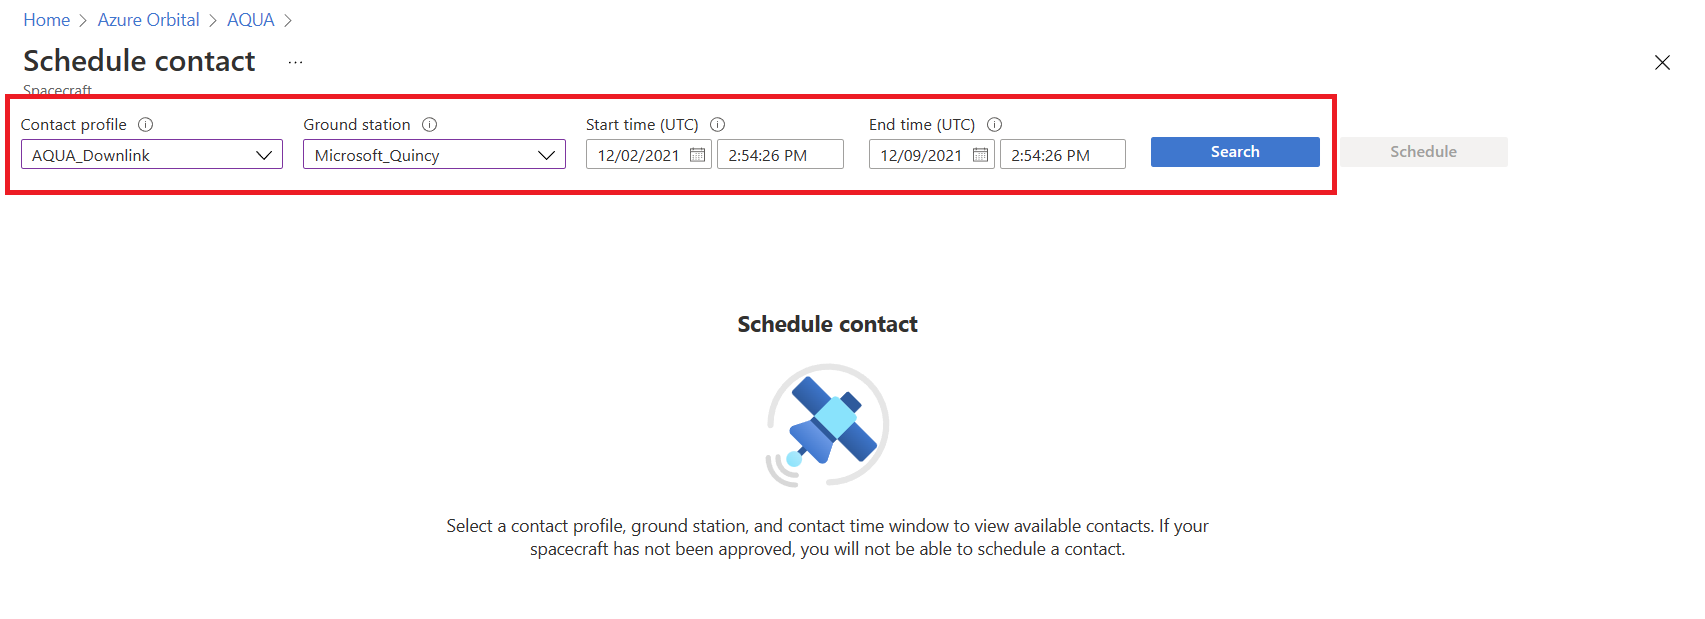
Once you're taken to your spacecrafts, select the AQUA satellite that you registered for this contact.
Then, you’ll see the following screen. Use the drop-downs to select a contact profile, ground station, and start and end times for the contact.
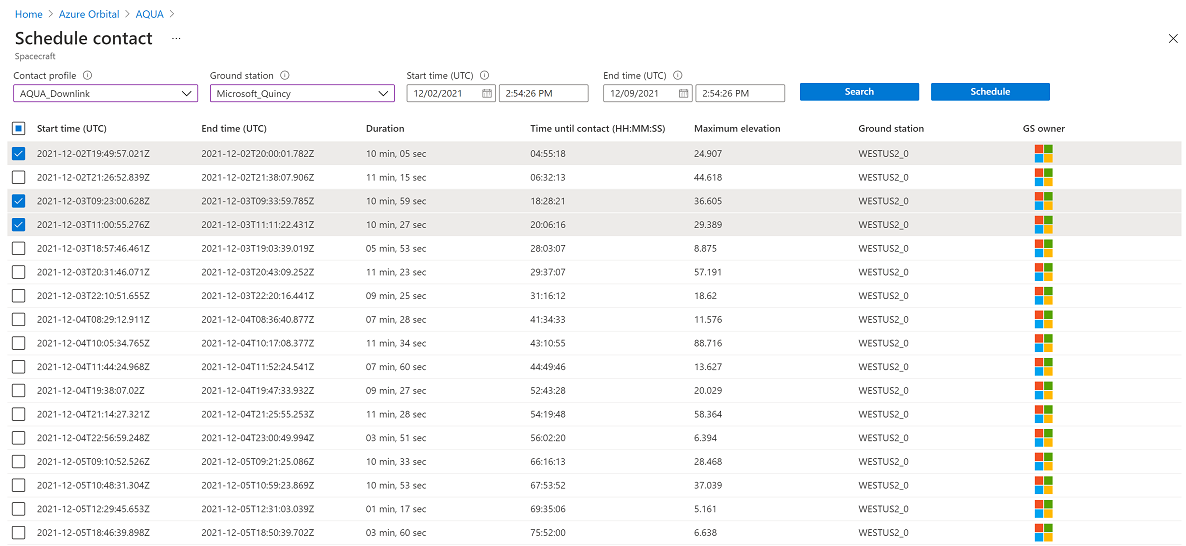
Then, you’ll see available contact times. Select which contacts you want to schedule. The times are listed in Zulu time, but you can look at the time until contact column to quickly see how long you'll wait until the contact can occur.
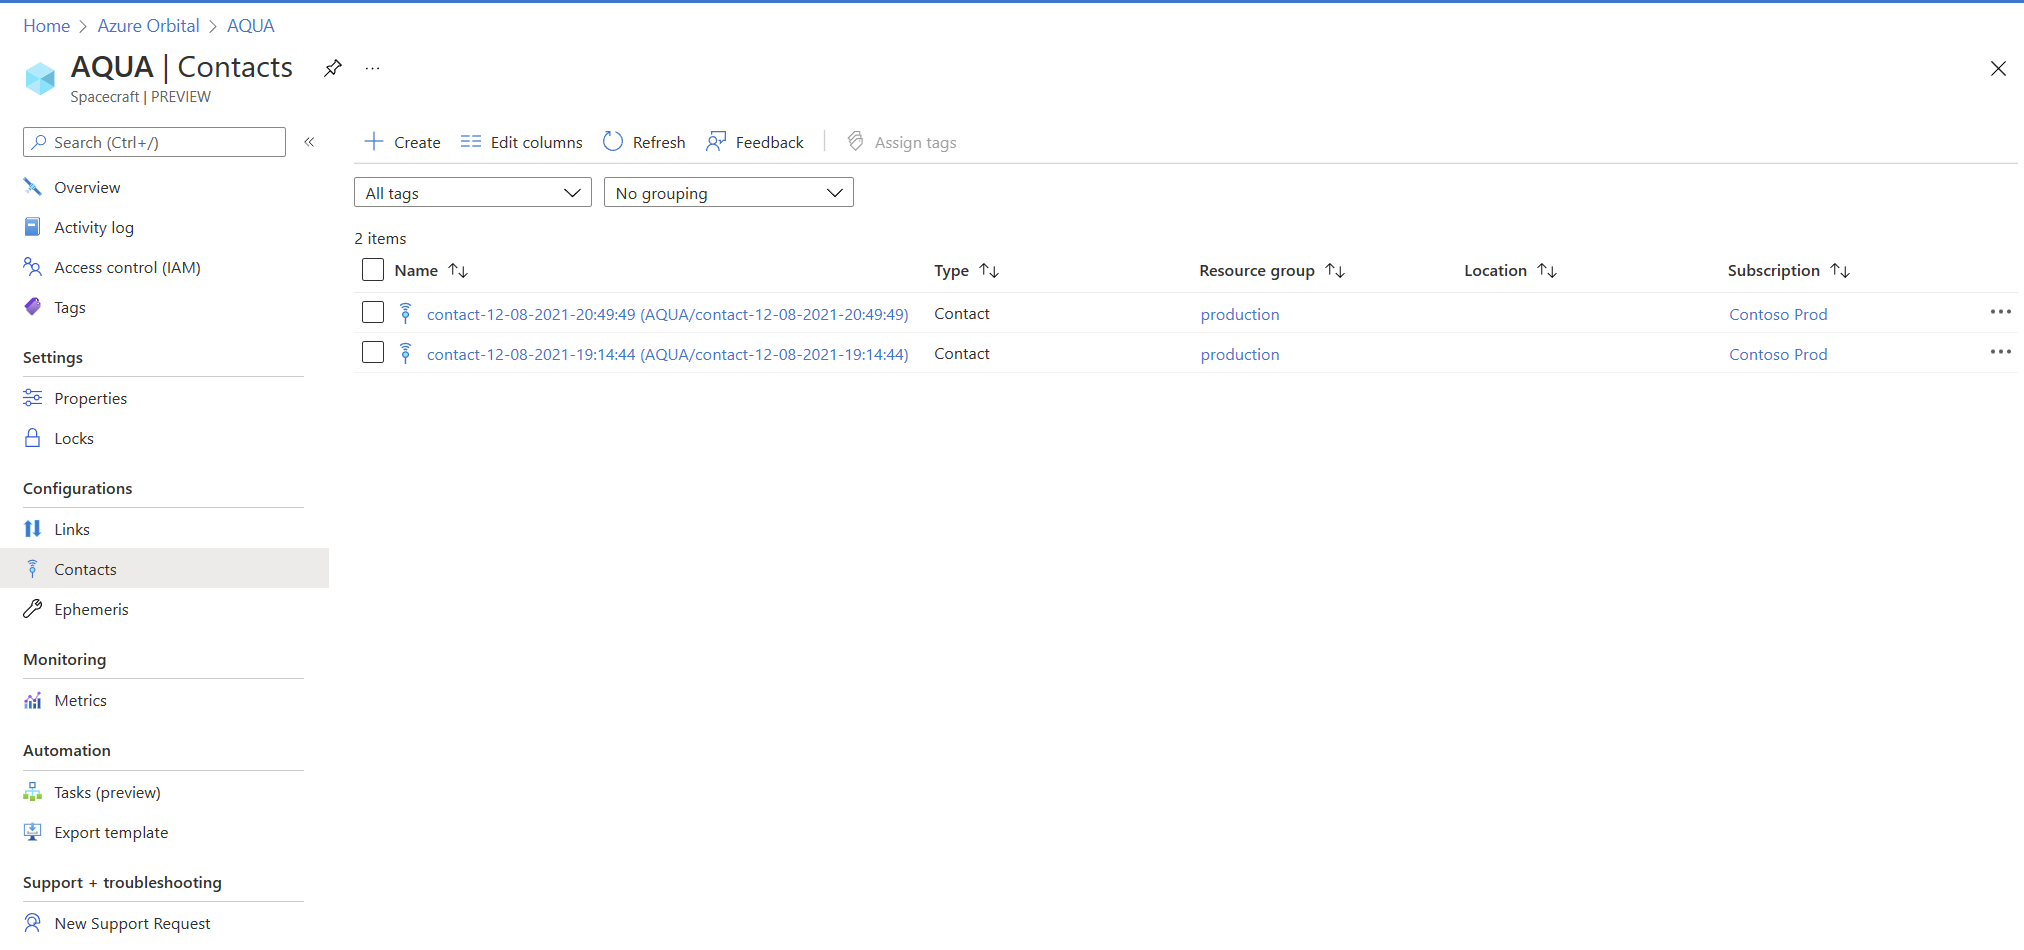
You can view scheduled contacts by selecting on the spacecraft page and navigating to Contacts.
Wait until AQUA can make contact with the ground station. The following visual illustrates what's happening in space when the ground station and satellite make contact.
Once the contact has occurred, a file will appear based on where you established the endpoint when setting up a contact profile.