Exercise - Use Update Management on a virtual machine
Your Public Information Officer (PIO) wants to set up a virtual machine to serve as a web resource for local media outlets. It's imperative that this virtual machine (VM) is as protected as it can be to prevent unauthorized access. As part of your security profile, you want to implement Update Management on this VM so that you can ensure that it's always up to date with the latest security patches.
You need an Azure subscription to complete the exercises. If you don't have an Azure subscription, create a free account and add a subscription before you begin. If you're a student, you can take advantage of the Azure for students offer.
Create a virtual machine
Here, you create a new virtual machine to serve as a web server for the local media.
Sign in to the Azure portal.
On the Azure portal menu or from the Home page, select Create a resource.
In the Search services and marketplace box, search for and select Virtual machine, then select Create
The Create a virtual machine pane appears.
On the Basics tab, enter the following values for each setting.
Setting Value Project details Subscription Select your Azure subscription Resource group Select Create new, then create a new resource group named mslearn-vmupdate Instance details Virtual machine name MediaWebServer Region Select the region nearest you Availability options Select No infrastructure redundancy required Security type Select Trusted launch virtual machines Image Select Windows Server 2019 Datacenter - x64 Gen2 VM architecture Leave as default (x64) Run with Azure Spot discount Leave unchecked Size Select B2s from the list. If you don't have the option, select the See all sizes link. Administrator account Username Create a username of your choice and note it for later Password Create a password of your choice and note it for later Inbound port rules Public inbound ports Select Allow selected ports Select inbound ports From the dropdown list, select HTTP, HTTPS, and RDP 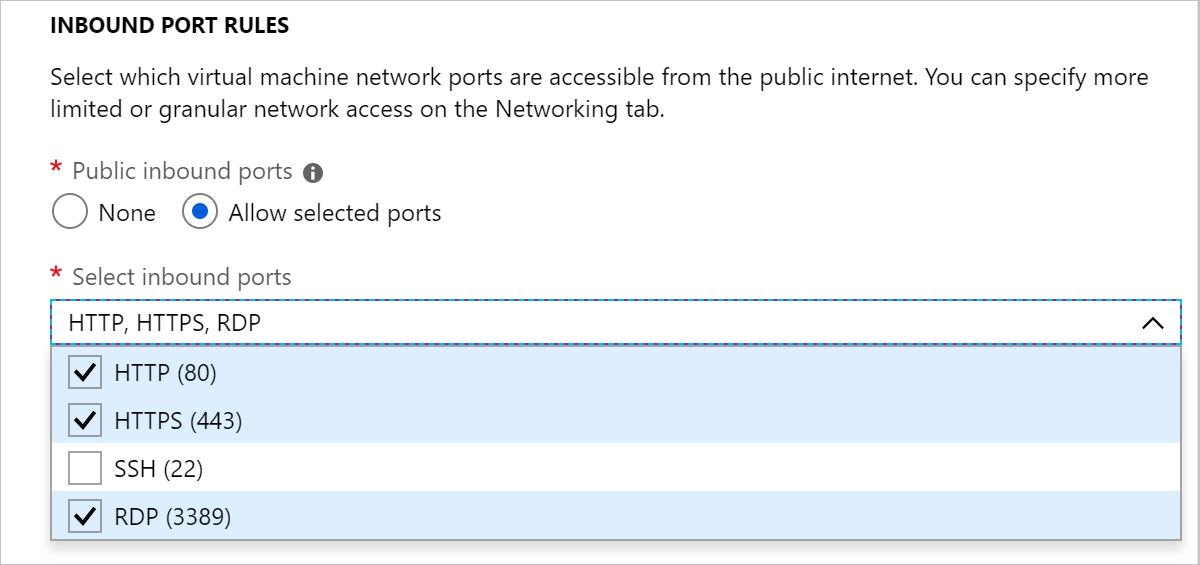
Select Review + create, then select Create.
Wait for the VM to be created. You can select the Notifications icon in the upper right corner of the portal to monitor the progress.
Onboard Update Manager to the VM
Here, you enable Update Manager on the virtual machine you created.
In the left pane, select Virtual machines.
Select MediaWebServer.
Scroll down the list to Operations, and select Updates.
In the Updates using automation section, select Go to Updates using automation.
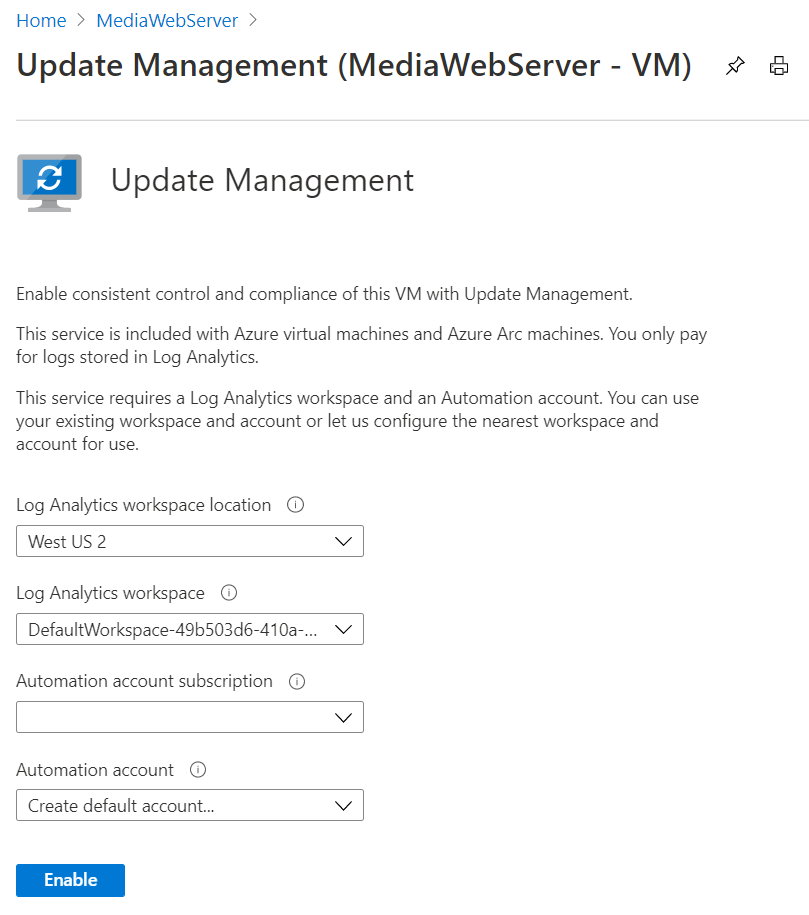
Accept the defaults and select Enable.
Wait for deployment to finish.
When update management deployment is complete, the Update Management page shows the status of the VM updates. You might need to refresh the page and select Go to Update management to get to this view.
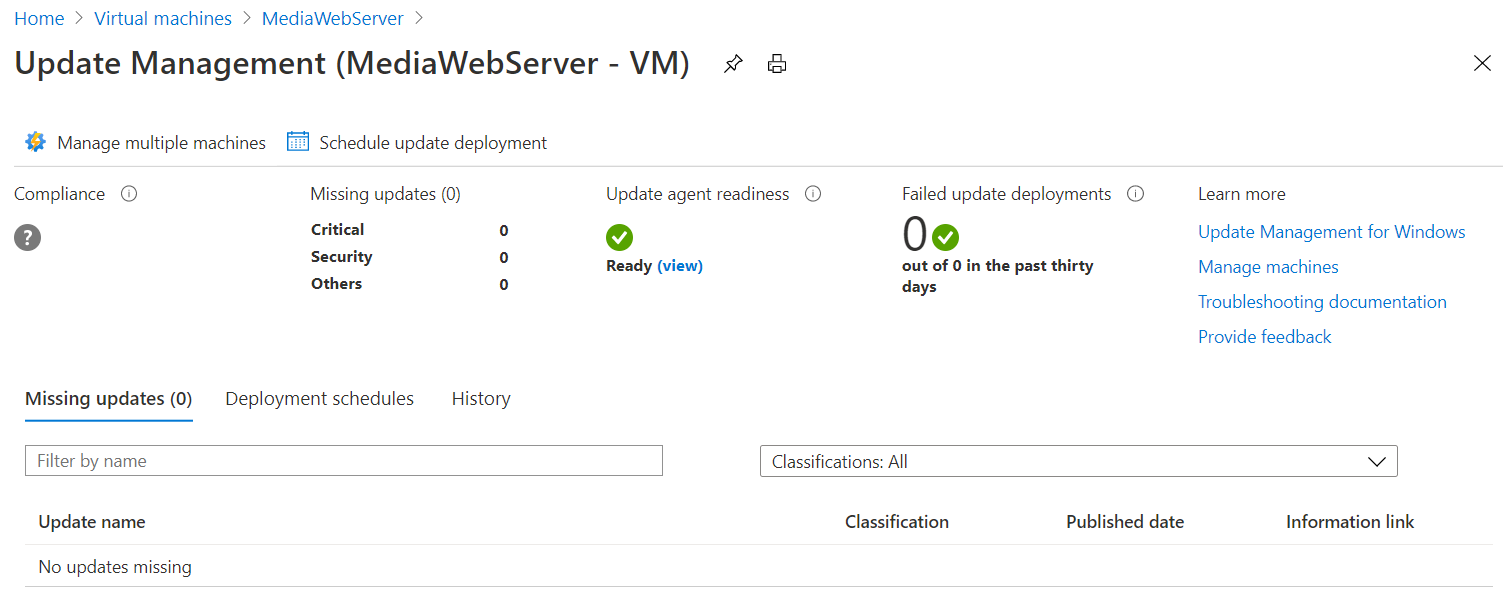
Wait for at least 15 minutes while Update Management configures the virtual machine.
When Update Management configuration is complete, notice that Compliance is complete and the Failed update deployments counter is configured.

Also, in this example, Update Management identified that there are updates for Windows Server available. In the Information link column, there's a link to the knowledge base article for update.
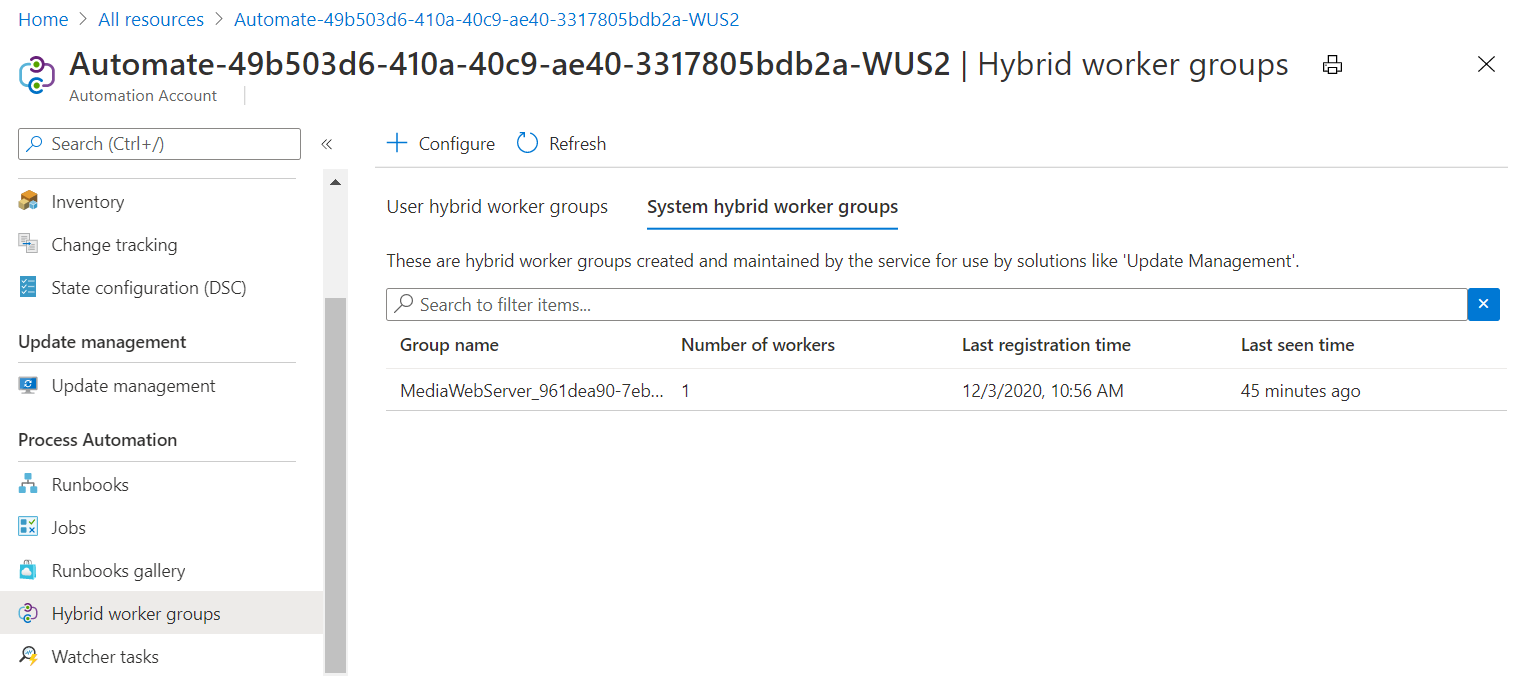
Examine Hybrid Worker Groups
On the Azure portal menu or from the Home page, select All resources.
Examine the Type column to find the resource type Automation Account, and select the Automation account.
In the Automation account pane, under the Process Automation section, select Hybrid worker groups.
Select the tab System hybrid worker groups.
Notice that the virtual machine you created is listed as a system hybrid worker group.