Exercise - Link Dataverse to Microsoft Fabric and access your data
The following exercise goes through the steps of establishing a link to Microsoft Fabric. When you're done, you can explore the steps to access the data to gain insights.
Note
To take full advantage of this exercise, you need to use an environment setup to include Dataverse tables, and you might need to sign up for a Power Apps license (or free trial) that includes Dataverse. You also need a Microsoft Fabric trial license with Fabric made available in your tenant. Refer to Link your Dataverse environment to Microsoft Fabric and unlock deep insights - Power Apps | Microsoft Learn to ensure that you meet the prerequisites.
Establish a link to Microsoft Fabric
To establish a link to Microsoft Fabric, follow these steps:
Go to the Power Apps maker portal and sign in.
Change to the environment that contains the data that you want to link to Fabric.
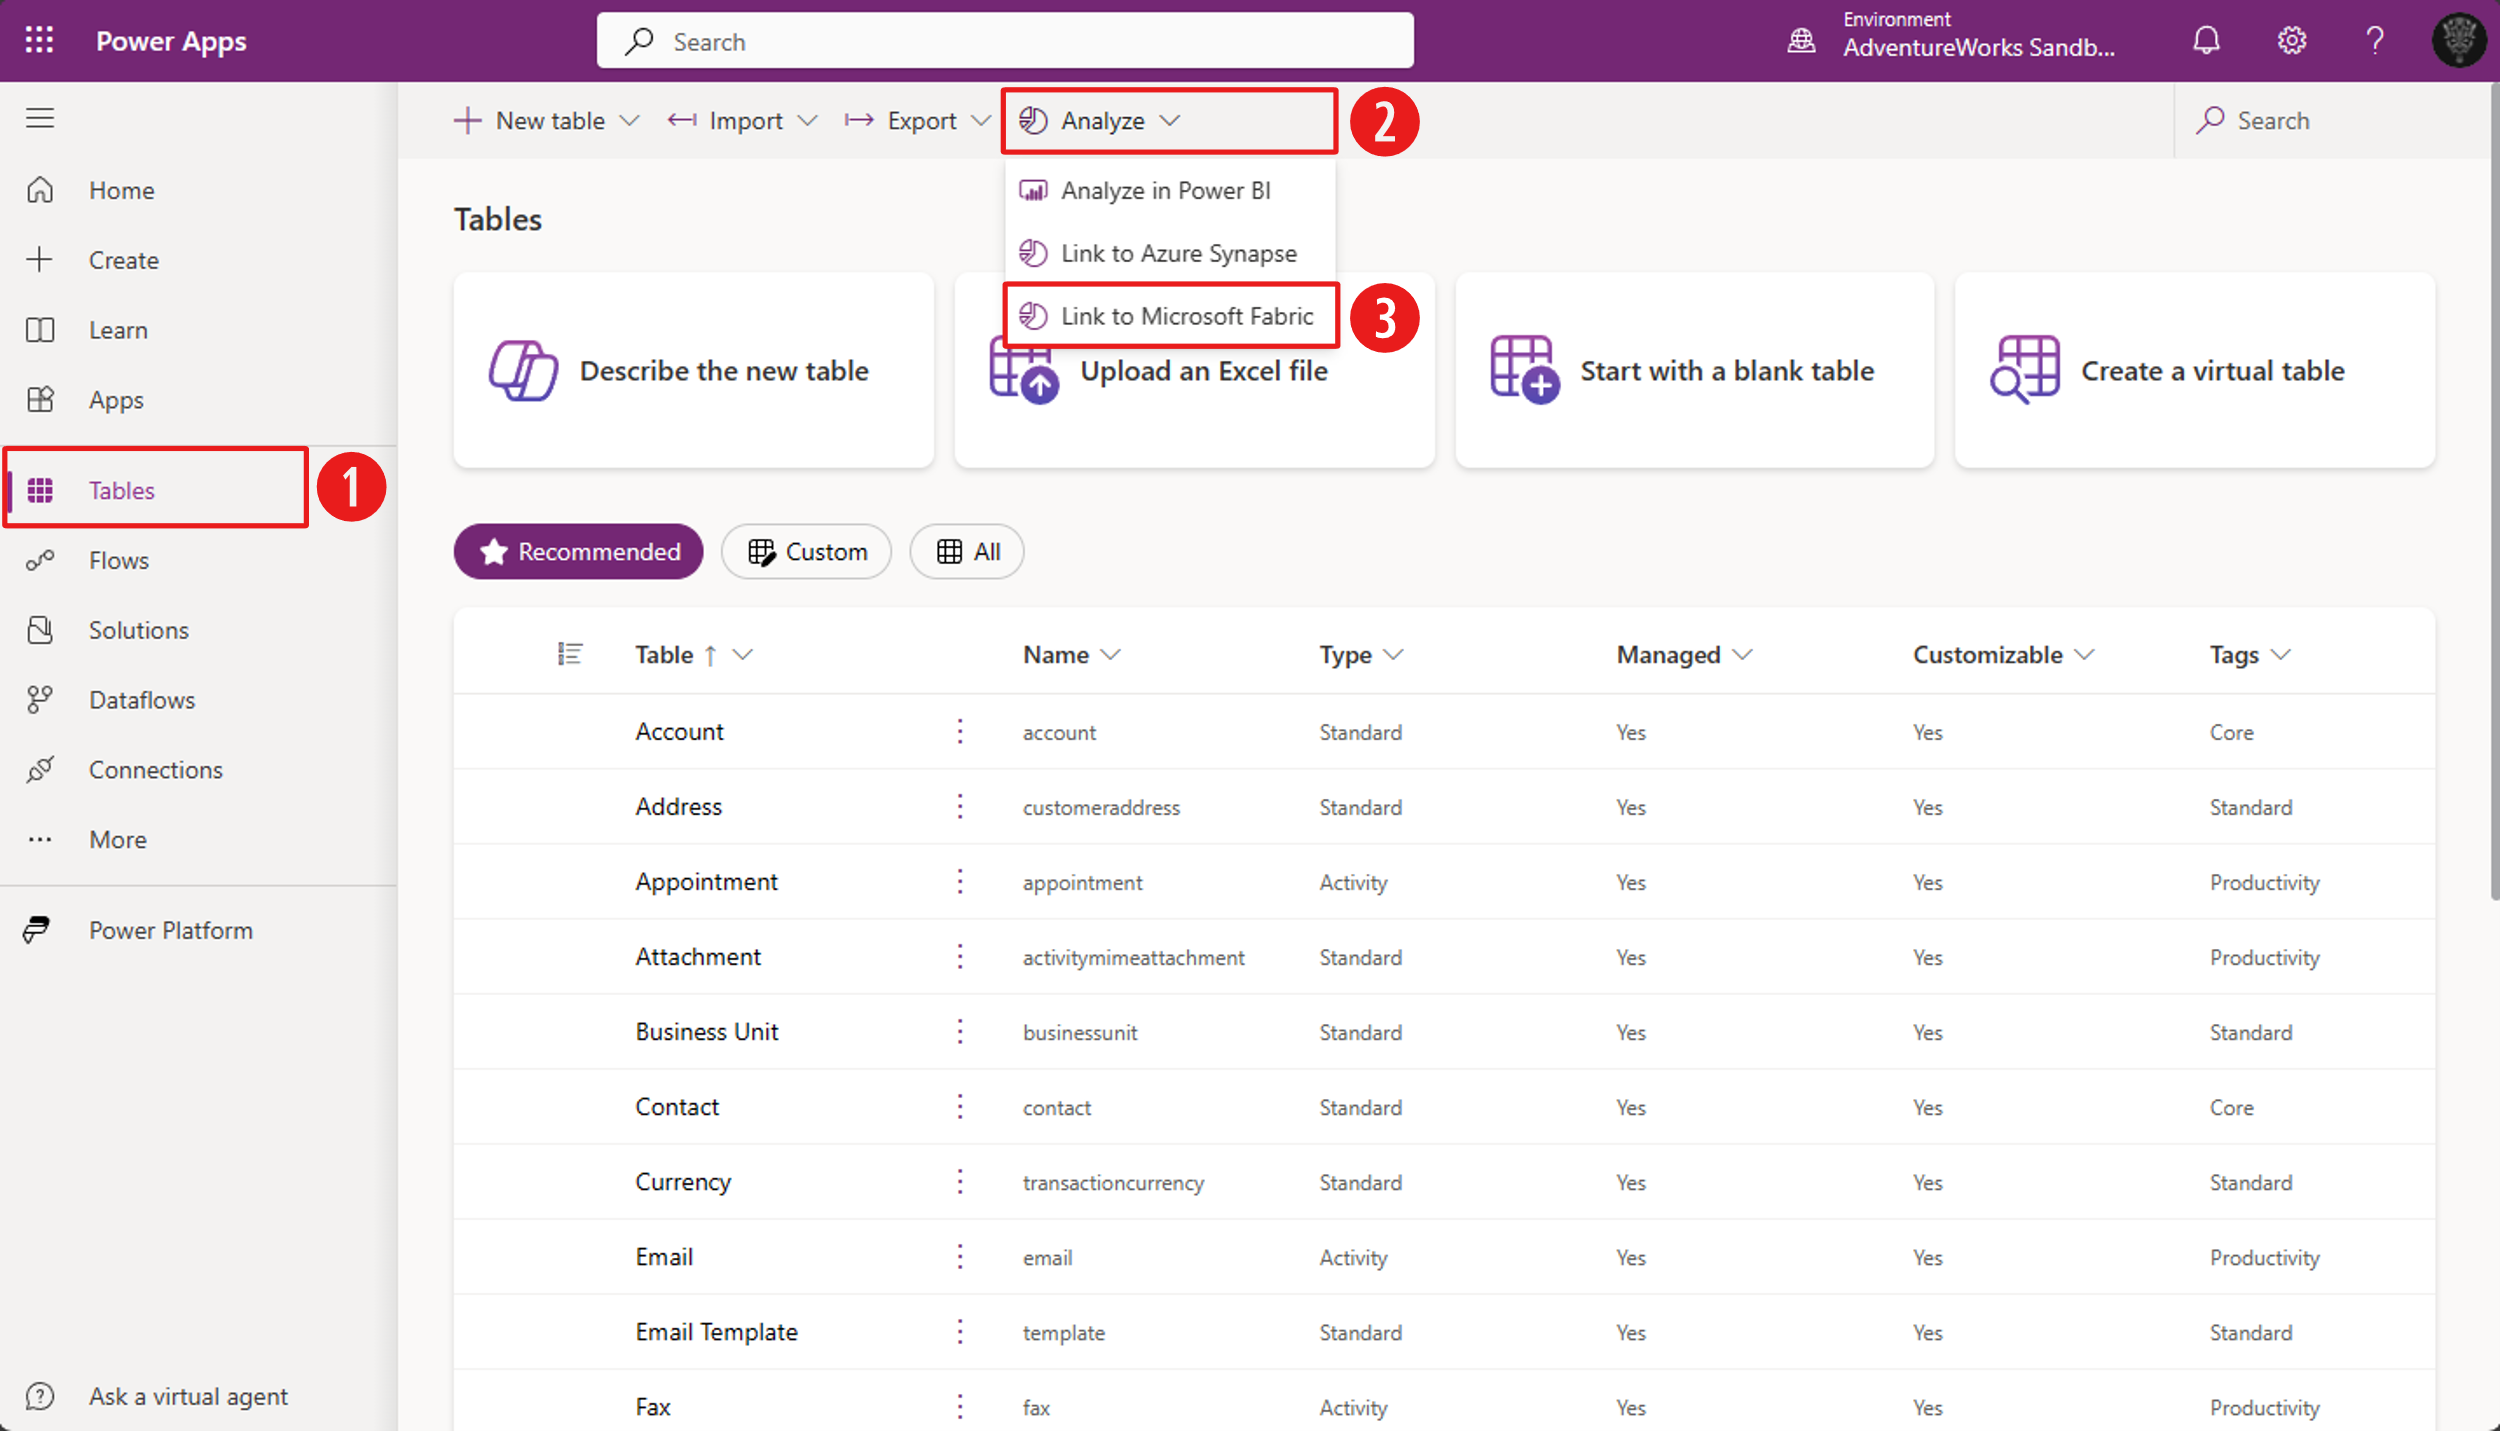
In the left navigation pane, select Tables.
On the upper command bar, select Analyze > Link to Microsoft Fabric.
In the wizard that appears, in the Validate Configuration step, your Fabric subscription settings are validated the first time.
When the wizard asks you to create a one-time connection to Microsoft Fabric and establish a connection to the Dataverse environment, use the default information, sign in, and then save the connection. Select Next.
In the Choose Workspace step, select a listed workspace or create a new workspace. Select Next.
Note
Only workspaces with a Fabric capacity in the same region as the Dataverse region are listed.
In the Review & Create step of the wizard, select Create to create the link. It takes several moments, up to an hour, for the process to complete. During this time, the system creates the lakehouse in the workspace, creates shortcuts to OneLake, and initializes the tables for the first time. After initialization starts, the system redirects you to the workspace on Fabric.
Go to the Power Apps maker portal and then go to the Azure Synapse Link page by selecting Analyze > Link to Azure Synapse.
Select Microsoft OneLake to display a list of tables and information that’s related to the link. Focus on the Sync status field until it indicates Active. This status means that the table is linked and is synced correctly.

After all tables show Active under the Sync status field, you can return to your workspace on Fabric. In the workspace, take time to review the lakehouse, its related SQL Analytics endpoint, and the default semantic model.


Access the data
To access the linked data, start by writing a query against the SQL Analytics endpoint. Then, use the auto create option to generate a report against the default semantic model.
In the workspace, select the SQL Analytics endpoint to access it.
Select New SQL query from the upper command bar.
Enter the following query and then select Run:
SELECT * FROM contactThe query returns the records from the contact table.
Return to the workspace and select the default semantic model to access it.
Select Explore this data > Auto-create a report.
Fabric automatically creates a Power BI report that uses data from the default semantic model.