Create and configure sensitivity labels and label policies
As we follow the global consulting firm's progress in solving their data management problem, we come to an essential step: creating sensitivity labels. These labels are key to safeguarding various types of data and meeting the firm's requirements for security, regulatory compliance, and smooth collaboration.
Sensitivity label workflow
Before creating and applying sensitivity labels with Microsoft Purview Information Protection, familiarize yourself with the deployment and application workflow:
- Administrators are responsible for creating and publishing sensitivity labels to specific users and groups within a label policy.
- End users interact with these labels by classifying their emails and documents accordingly.
- Applications and services then enforce the protection settings based on the labels applied by the end users.
Prerequisites
Next, ensure you meet the necessary subscription, licensing, and permission requirements:
| Prerequisite | Details |
|---|---|
| Licensing | Confirm your Microsoft 365 subscription covers sensitivity labels. |
| Permissions | Global administrators have access to assign one of the necessary roles: - Information Protection - Information Protection Admins - Information Protection Analysts - Information Protection Investigators - Information Protection Readers |
Create and configure sensitivity labels
From the Microsoft Purview compliance portal, navigate to the Solutions section, then select Information protection > Labels
On the Labels page, select + Create a label to start the New sensitivity label configuration.
On the Define the scope for this label page, select the options you want to define the label's scope. This option determines the settings you can configure and their visibility after label publication.
Follow the configuration prompts for the label settings.
Repeat these steps to create more labels. If you want to create a sublabel, first select the parent label and select ... for Actions, and then select Create sublabel.
When you create all the labels you need, review their order and if necessary, move them up or down. To change the order of a label, select ... for Actions, and then select one of the reordering options, such as Move up or Move down.
Editing sensitivity labels
Editing existing sensitivity labels allows for adjustments to the label's display name, description, protection settings, and more. All changes are automatically reflected on the label wherever the label is applied, ensuring consistency.
Publish sensitivity labels by creating a label policy
As part of the label policy, you select users and groups to have sensitivity labels and label policy settings. For lower administrative maintenance, groups are recommended rather than individual users. However, if a user is removed from a group you specify, the label policy is automatically removed for that user.
From the Microsoft Purview compliance portal, navigate to the Solutions section, then select Information protection > Label policies.
On the Label policies page, select Publish label to start the Create policy configuration.
On the Choose sensitivity labels to publish page, select the Choose sensitivity labels to publish link. Select the labels that you want to make available in apps and to services, and then select Add. If you select a sublabel, make sure you also select its parent label.
On the Assign admin units page, if your organization is using administrative units in Microsoft Entra ID, the label policy can be automatically restricted to specific users. If you don't want to restrict the policy by using administrative units, or your organization hasn't configured administrative units, keep the default of Full directory.
Complete the configuration by following the on-screen prompts. The available policy settings depend on the selected label scopes.
Repeat these steps if you need different policy settings for different users or scopes, tailoring labels and settings to each group's requirements.
Review and adjust the order of label policies to prevent conflicts, using ... > Actions to reorder policies.
Completing the Create policy configuration automatically publishes the label policy. To make changes to a published policy, you can edit it. There's no specific publish or republish action for you to select.
Edit label policy
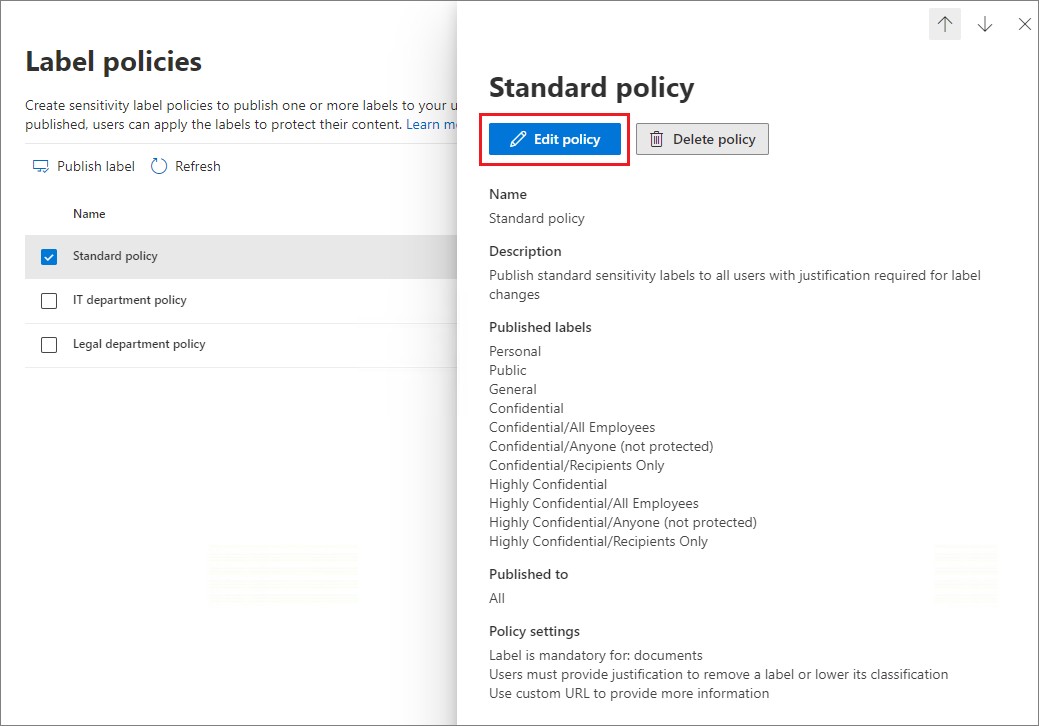
To modify a label policy, select it then select the Edit policy button to adjust labels and settings. Changes automatically sync with users and services, typically within 24 hours, but might vary with factors like group changes or network issues, extending up to 48 hours.
Removing and deleting labels
In managing sensitivity labels within an organization, there might come a time when a label is no longer relevant or needs to be updated to reflect changing security policies or regulatory requirements. Before removing or deleting sensitivity labels, it's important to understand the consequences and make sure that data remains secure and follows the organization's data governance policies.
Removing a label from a policy
Removing a label from a policy makes it unavailable for future use but doesn't affect content where the label is currently applied. This action is taken when a label needs to be updated or replaced with a more suitable one. It provides a transition period, allowing users to adapt to the new labeling approach without affecting existing data protection methods.
Deleting a label
Deleting a label is a more permanent action. Once deleted, the label is removed from the system, and its protection settings no longer apply to new content. However, content that was previously labeled retains its label but might not enforce the intended protections, leading to potential gaps in data security and compliance.
Create labels and label policies interactive guide
Use the interactive guide for a walkthrough on creating sensitivity labels and sensitivity label policies.
Knowledge check
Select the best response to the question, then Check your answers.


