Make a model-driven app
With the model-driven app interface, makers can observe the effects of the changes that they make while they're designing. Since the app is designed according to your data, there are very few customizations that you need to add with a model driven app to get it up and running.
We recommend that you create your model-driven app from a solution. A solution is a package that can contain Dataverse tables, forms, views, apps, flows, and other components. By building your model-driven app in a solution, you can move it to other environments or preserve a copy in your source control repository.
A well-designed model-driven app consists of several components that you select by using the designer to build the appearance and functionality of the finished app. The components and component properties that makers use to create an app become the metadata. These components are data, UI, logic, and visualization categories.
Recommended content
For more information, see the following articles:
Build a basic model-driven app
You can create a model-driven app by using standard tables that are available in Microsoft Dataverse as well as any of your custom tables added to your solution. The model-driven app we're going to build will allow salespeople to perform their sales duties in addition to checking in dive gear for service.
To create your app, you can follow the procedure that's detailed in Build your first model-driven app.
Let's build a basic app very quickly.
From the Dive Center App Solution page, select New > App > Model-driven app.
Name the app Dive Shop and select Create.
Once the app canvas appears, select + Add page and select Dataverse table.
In the Select a table window, select your tables (you can use the search field to find each one quickly) for the app including:
- Contact
- Dive Gear
- Service Request
Select Add. As soon as the tables are added, you'll see them appear in your app. Notice that as you select each table under the New Group menu item, your view will show your data, giving you the ability to interact with it without adding additional controls.
Let's customize the navigation. Select the New Group under Navigation. In the panel on the right change the title to
Sales. As soon as you do, your app automatically updates labels inside of your app.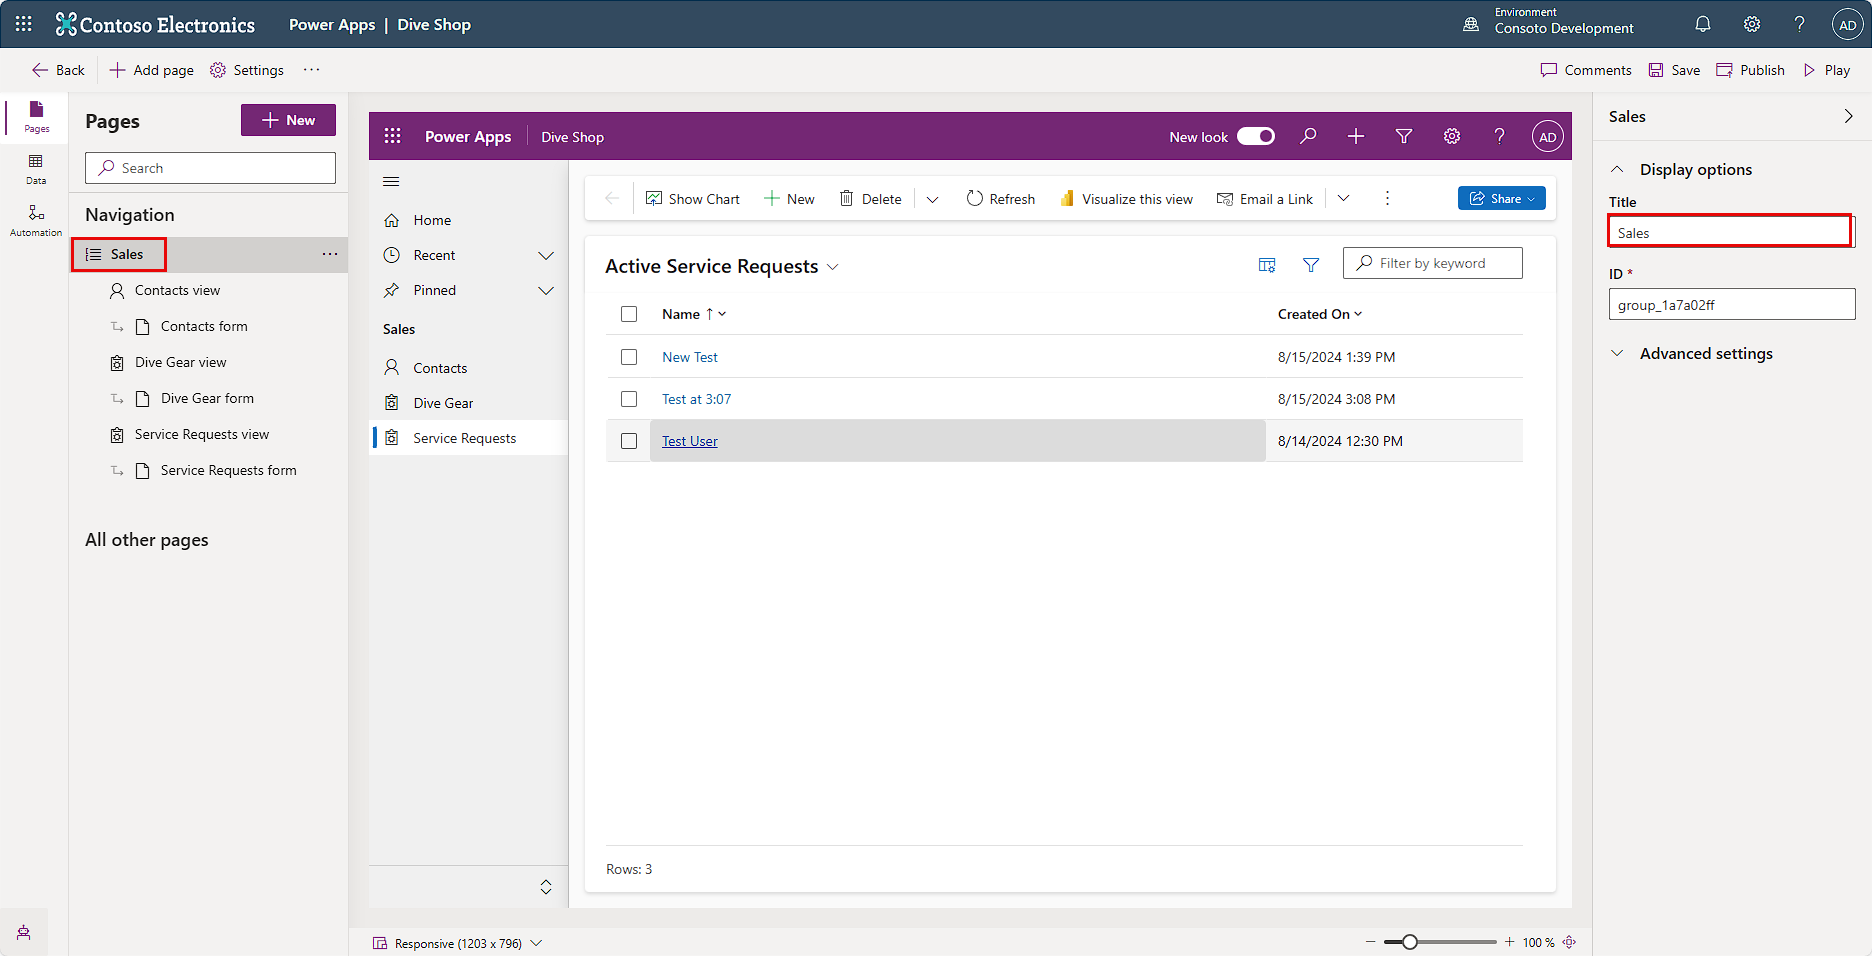
Publish your app. You now have a basic app you can use!
Select Play to view your app as a user would view it in a browser experience.

As you select the different service requests or try to create a new one, you'll notice that all of the fields are not depicted on the form. That's because model-driven apps depict forms and views that are modified/created using the Dataverse table editor. Though that's beyond the scope of this unit, you can return to your solution's tables to modify any view.
For example, the view in the image above shows Active Service Requests. You can find/modify the corresponding view in the Service Requests table, which you can find in your Dive Center App solution. As soon as you publish that view and come back to your app, you'll see your modified view. You can do the same with any form inside of the model-driven app.
Next, we'll take a look at how we can use Power Automate flows built in your solution.