Create and assign a custom role in Microsoft Entra ID
Custom roles can be created in the Roles and administrators page of the Microsoft Entra admin center.
Prerequisites
- Microsoft Entra ID P1 or P2 license
- Privileged Role Administrator or Global Administrator
- Microsoft Graph module when using PowerShell
- Admin consent when using Graph explorer for Microsoft Graph API
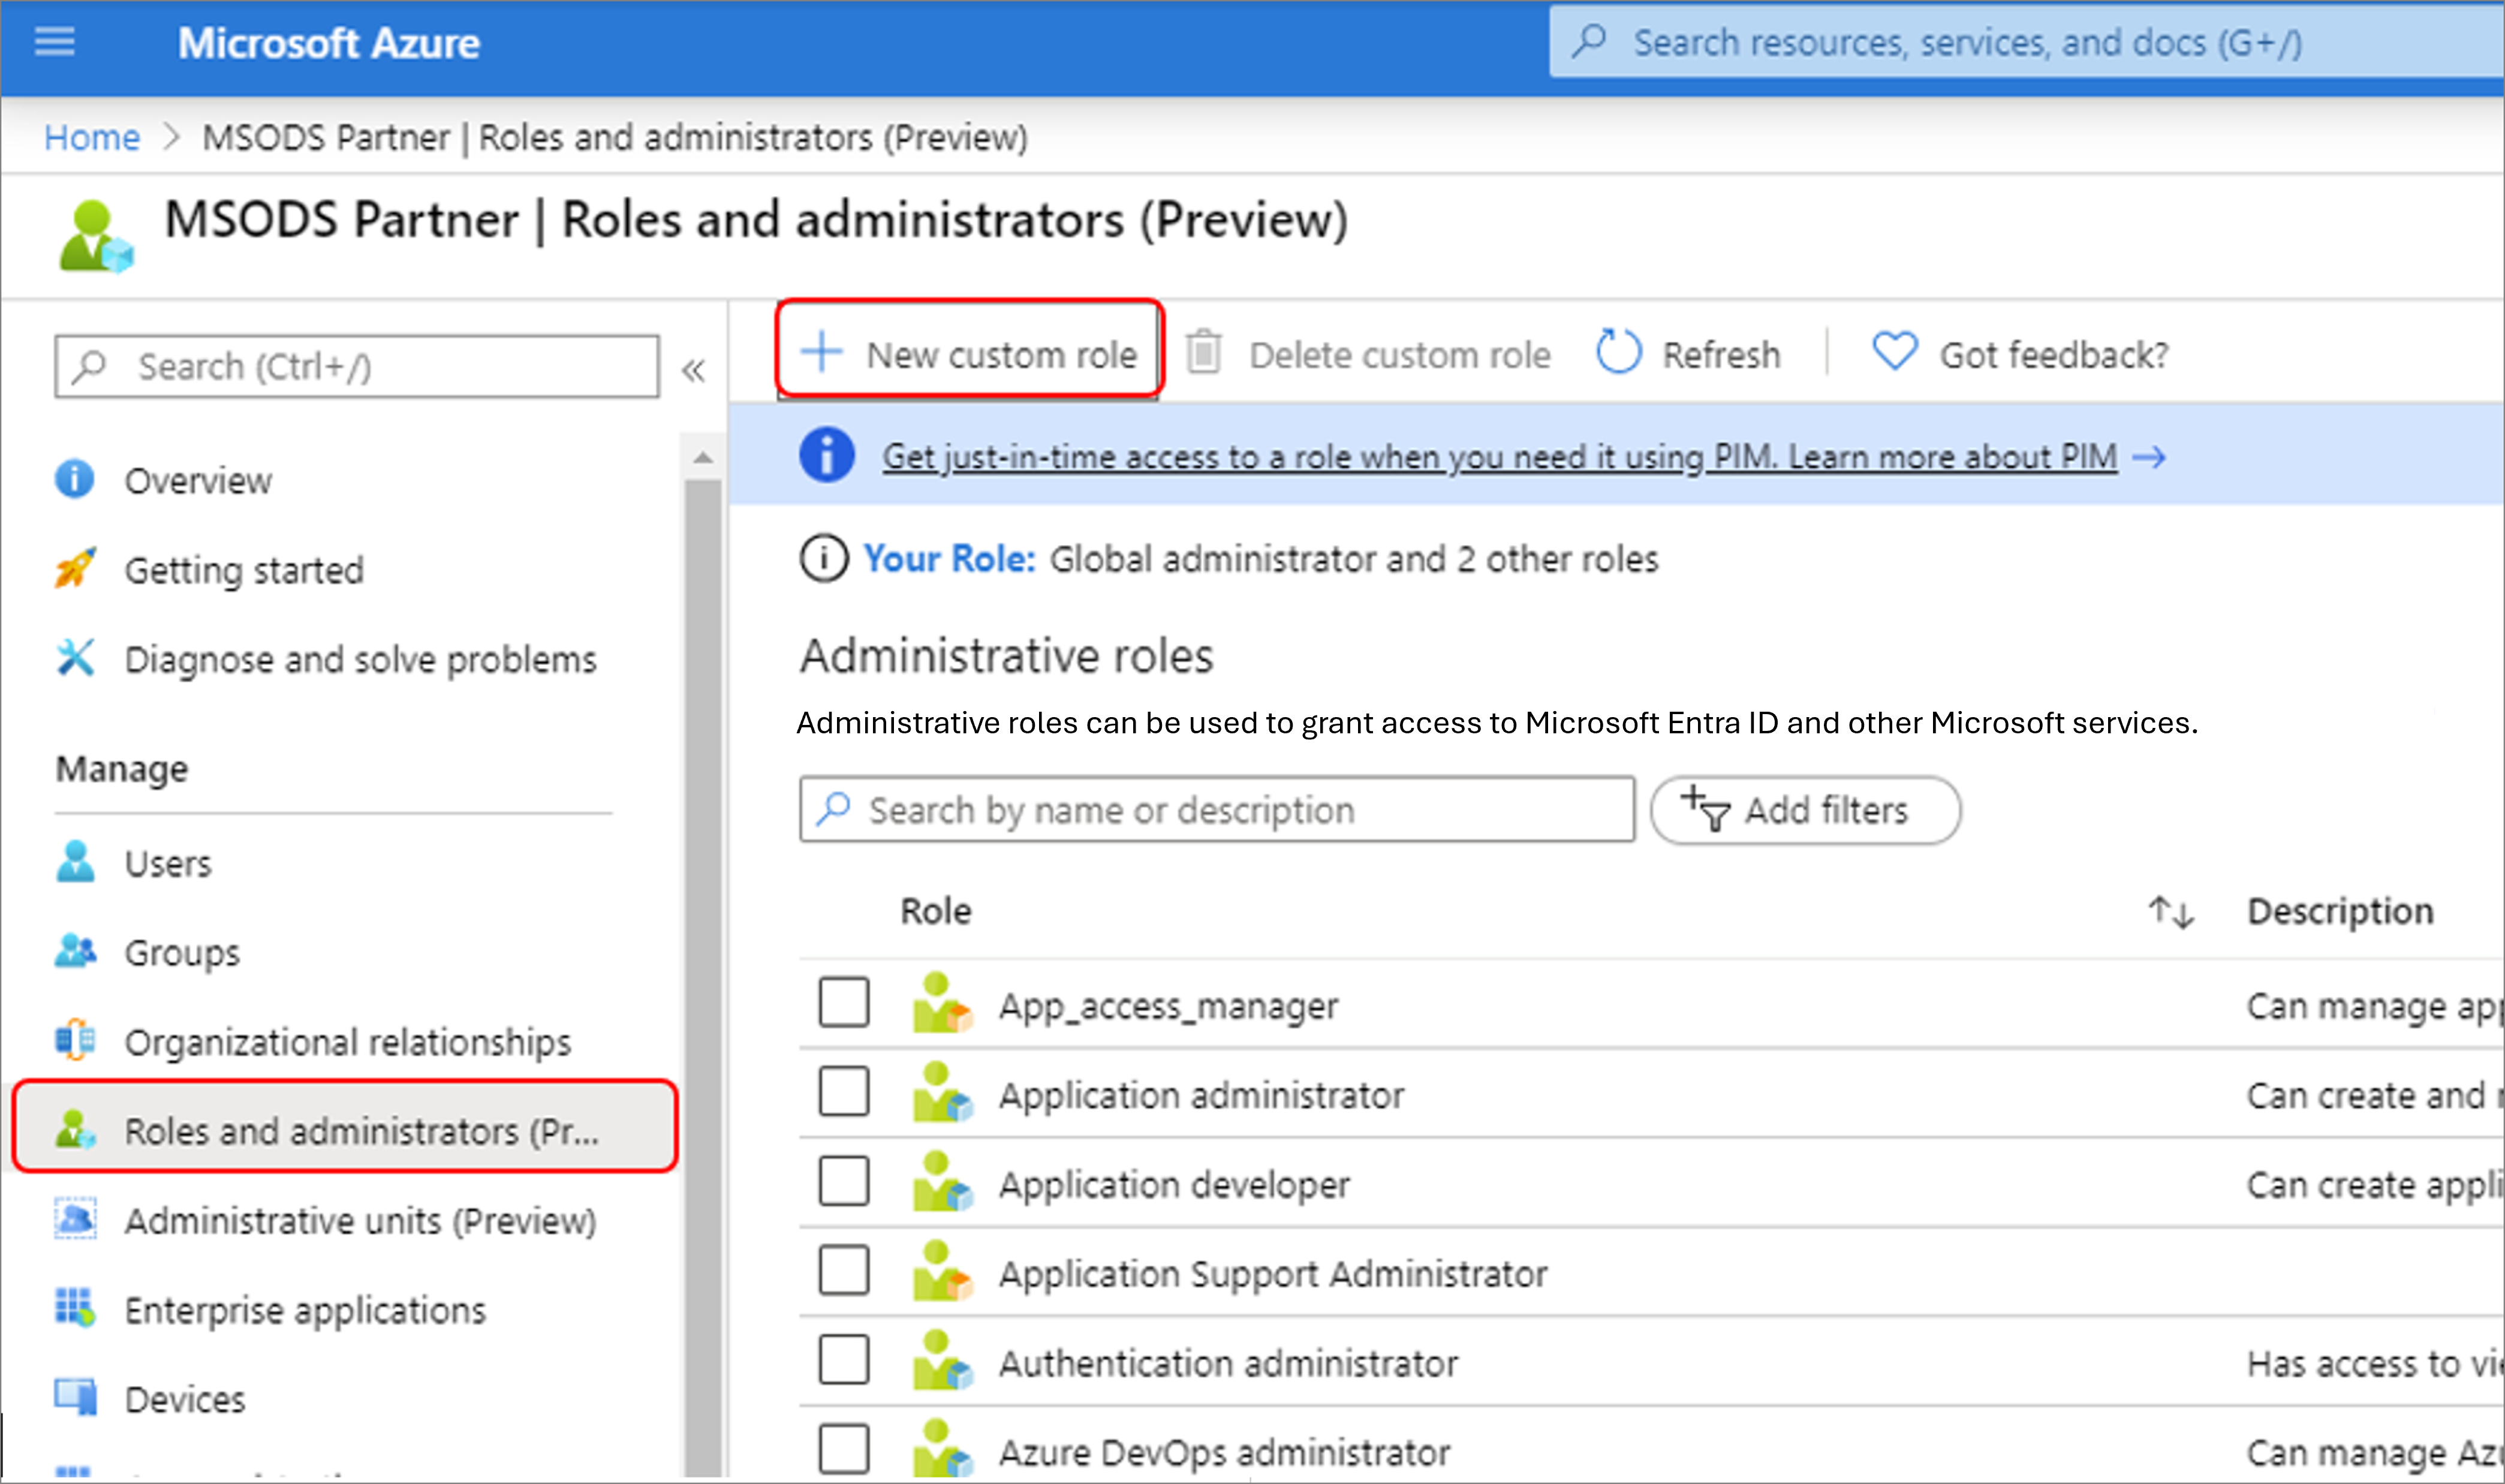
Create a role in the Microsoft Entra admin center
Create a new custom role to grant access to manage app registrations
- Sign in to the Microsoft Entra admin center as at least a Privileged Role Administrator.
- Browse to Identity, Roles & admins, Roles & admins.
- Select New custom role.
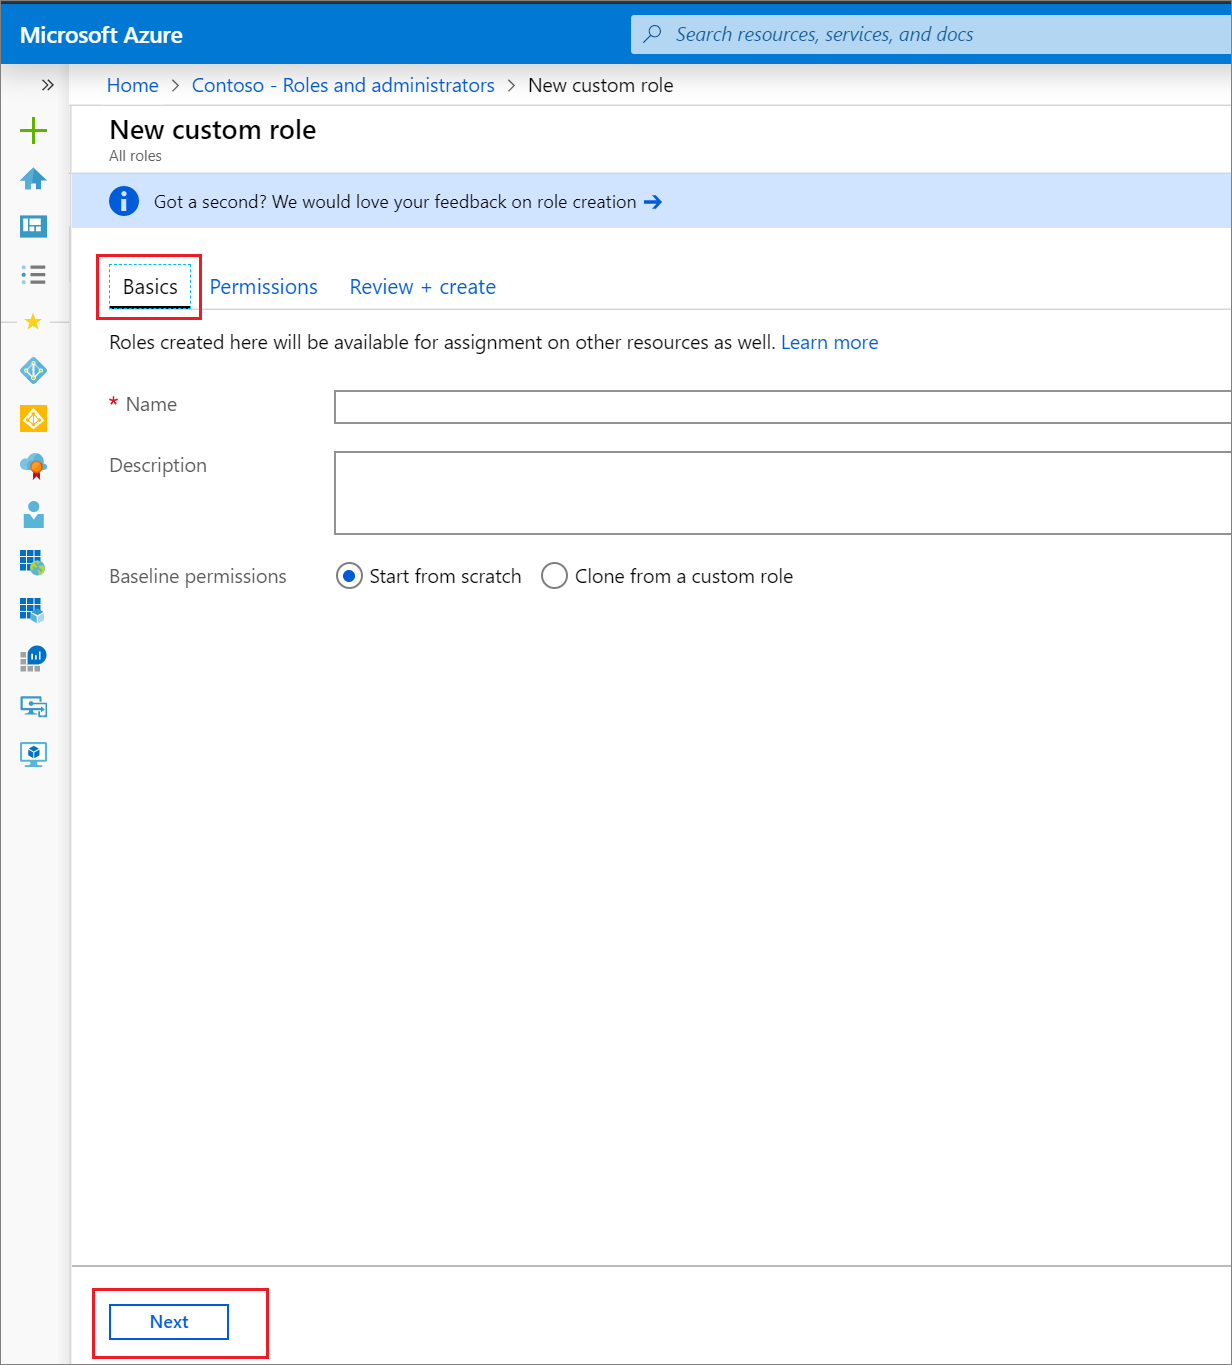
- On the Basics tab, provide a name and description for the role and then click Next.
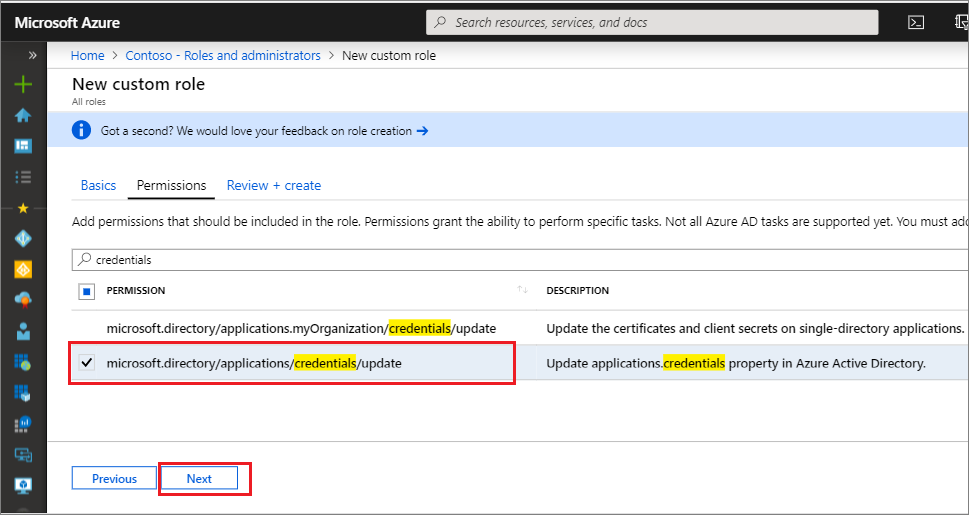
- On the Permissions tab, select the permissions necessary to manage basic properties and credential properties of app registrations.
- First, enter "credentials" in the search bar and select the
microsoft.directory/applications/credentials/update permission.
- Next, enter "basic" in the search bar, select the
microsoft.directory/applications/basic/update permission, and then click Next.
- On the Review + create tab, review the permissions and select Create.
Your custom role will show up in the list of available roles to assign.
Assign a custom role scoped to a resource
Like built-in roles, custom roles are assigned by default at the default organization-wide scope to grant access permissions over all app registrations in your organization. Additionally, custom roles and some relevant built-in roles (depending on the type of Microsoft Entra resource) can also be assigned at the scope of a single Microsoft Entra resource. This allows you to give the user the permission to update credentials and basic properties of a single app without having to create a second custom role.
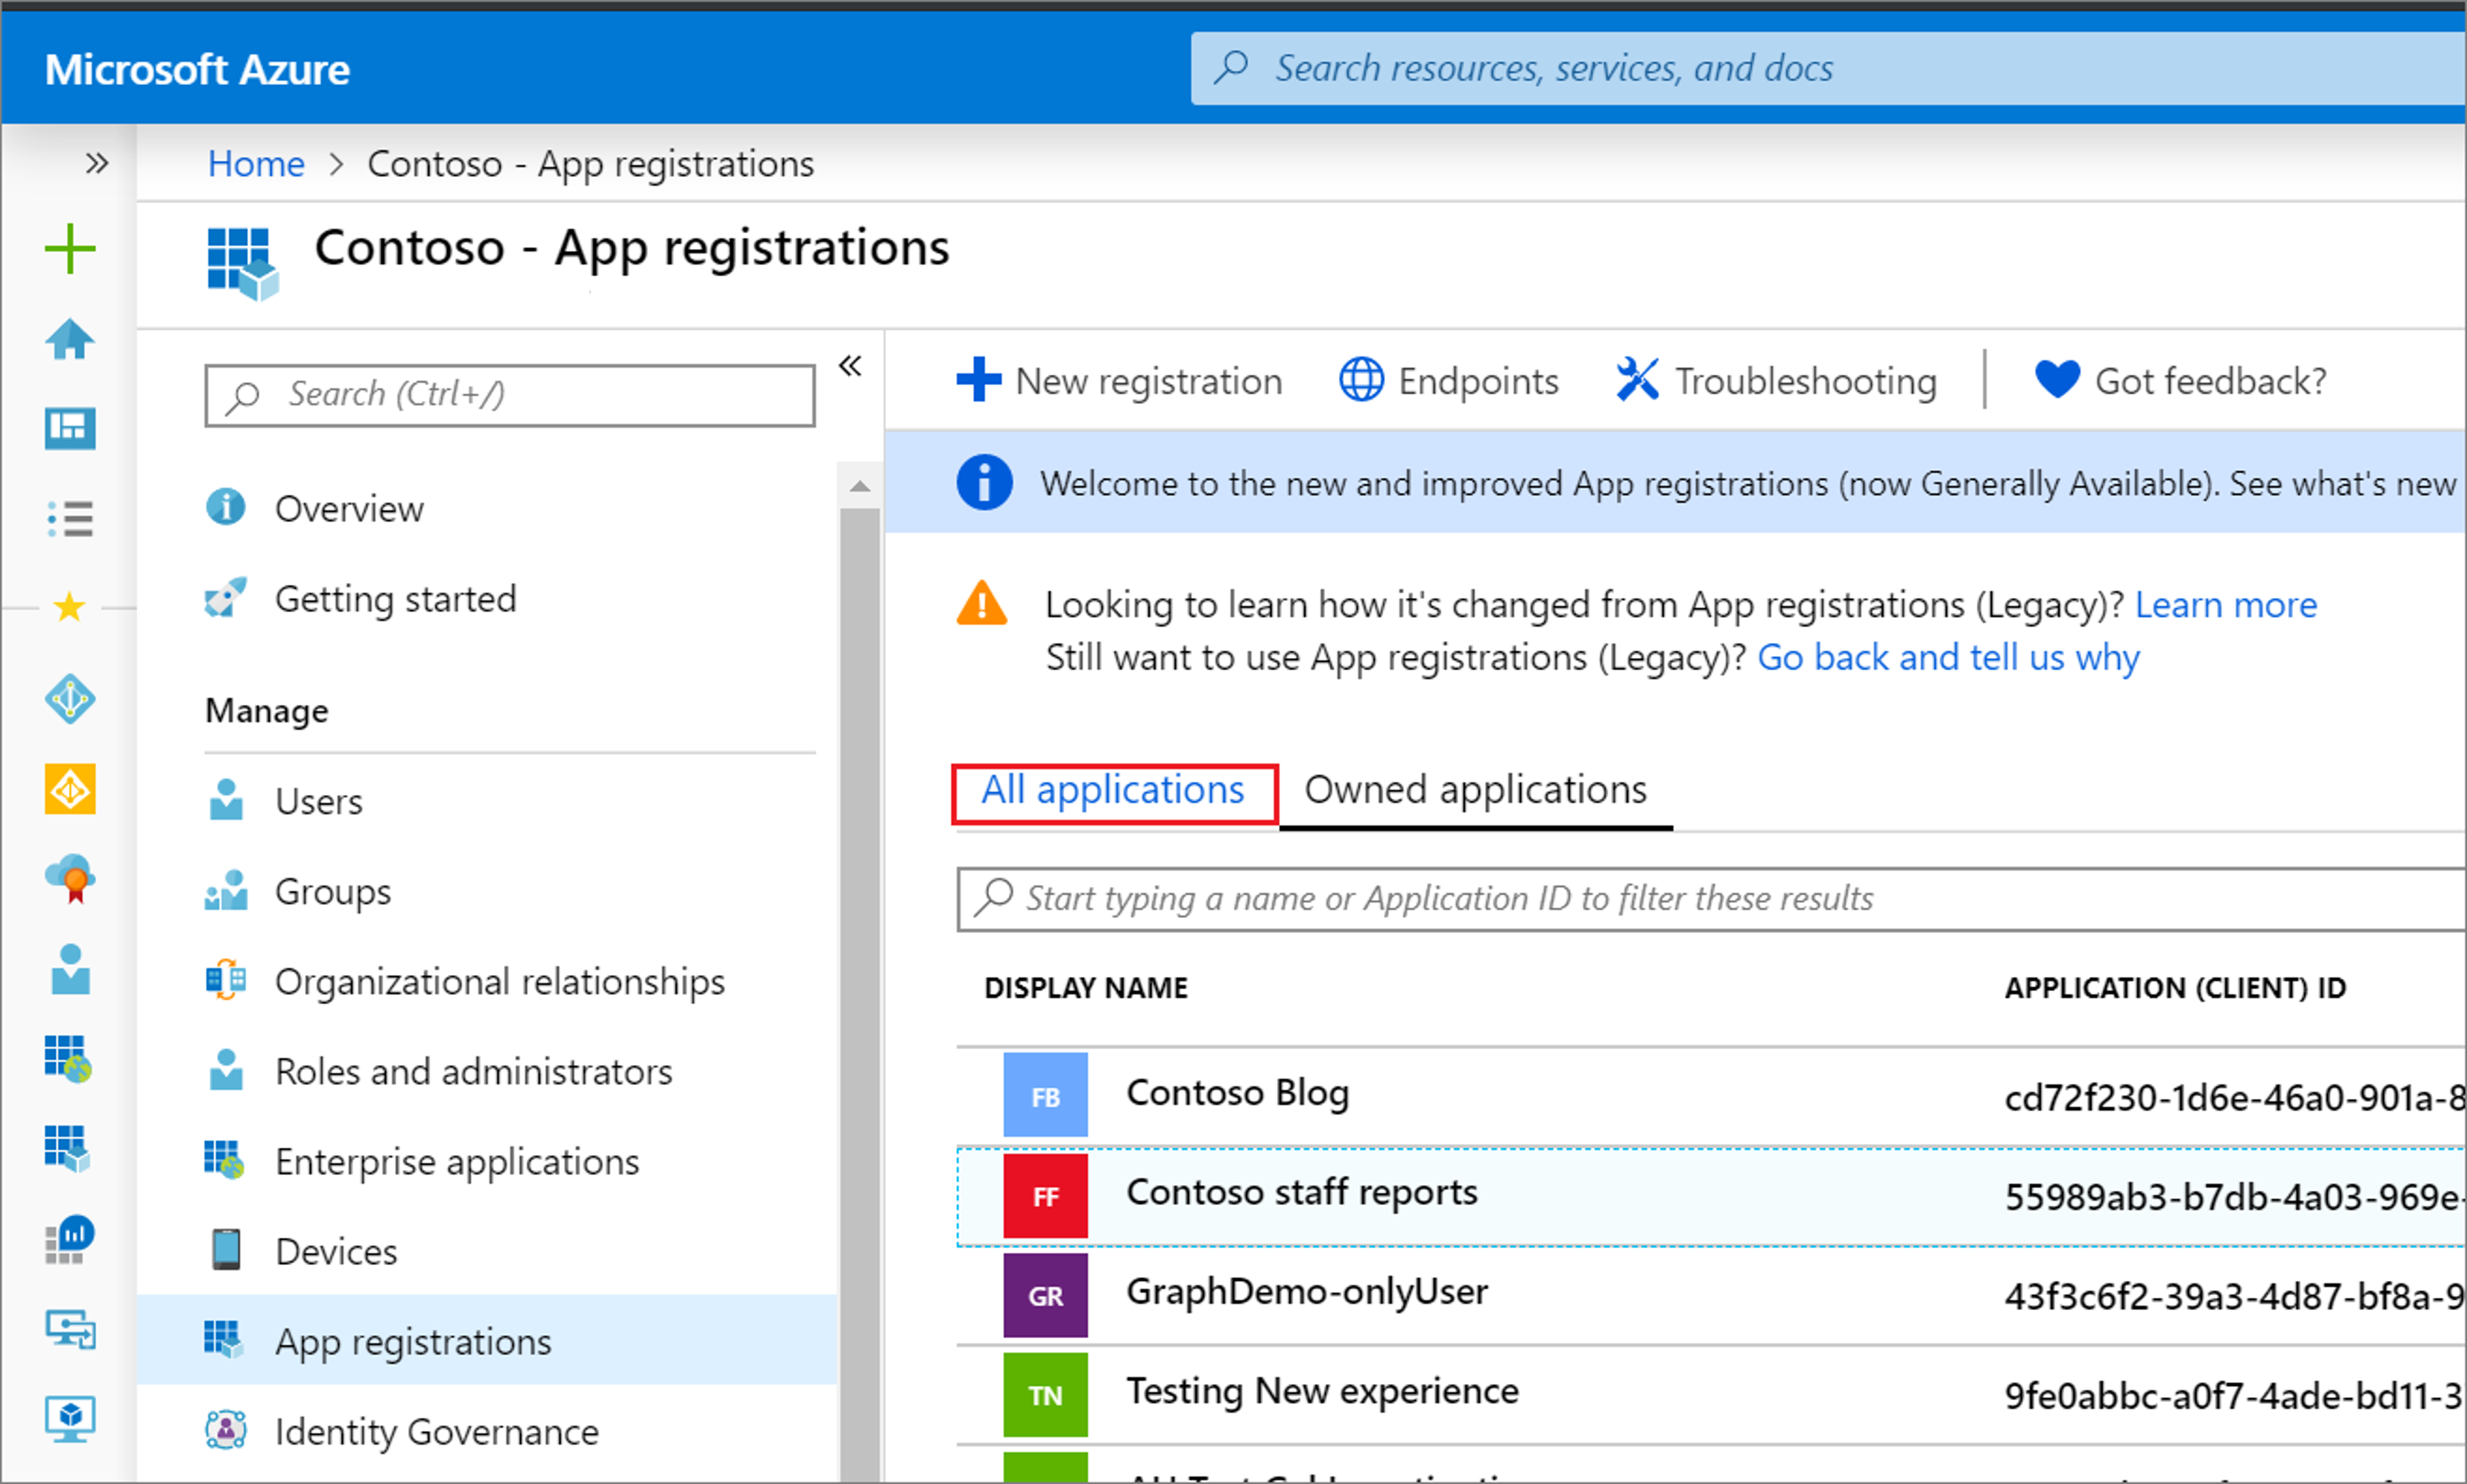
- Sign in to the Microsoft Entra admin center as at least a Application Developer.
- Browse to Identity, Applications, App registrations.
- Select the app registration to which you are granting access to manage. You might have to select All applications to see the complete list of app registrations in your Microsoft Entra organization.
- In the app registration, select Roles and administrators. If you haven't already created one, instructions are in the preceding procedure.
- Select the role to open the Assignments page.
- Select Add assignment to add a user. The user will be granted any permissions over only the selected app registration.