Assign Azure role permissions for management groups, subscriptions, resource groups, and resources
Azure role-based access control (Azure RBAC) is the authorization system you use to manage access to Azure resources. To grant access, you assign roles to users, groups, service principals, or managed identities at a particular scope.
Prerequisites
To assign Azure roles, you must have:
Microsoft.Authorization/roleAssignments/write permissions, such as Role Based Access Control Administrator or User Access Administrator.
Step 1: Identify the needed scope
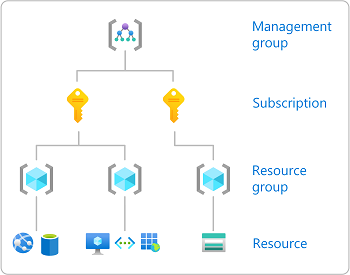
When you assign roles, you must specify a scope. Scope is the set of resources the access applies to. In Azure, you can specify a scope at four levels from broad to narrow: management group, subscription, resource group, and resource.
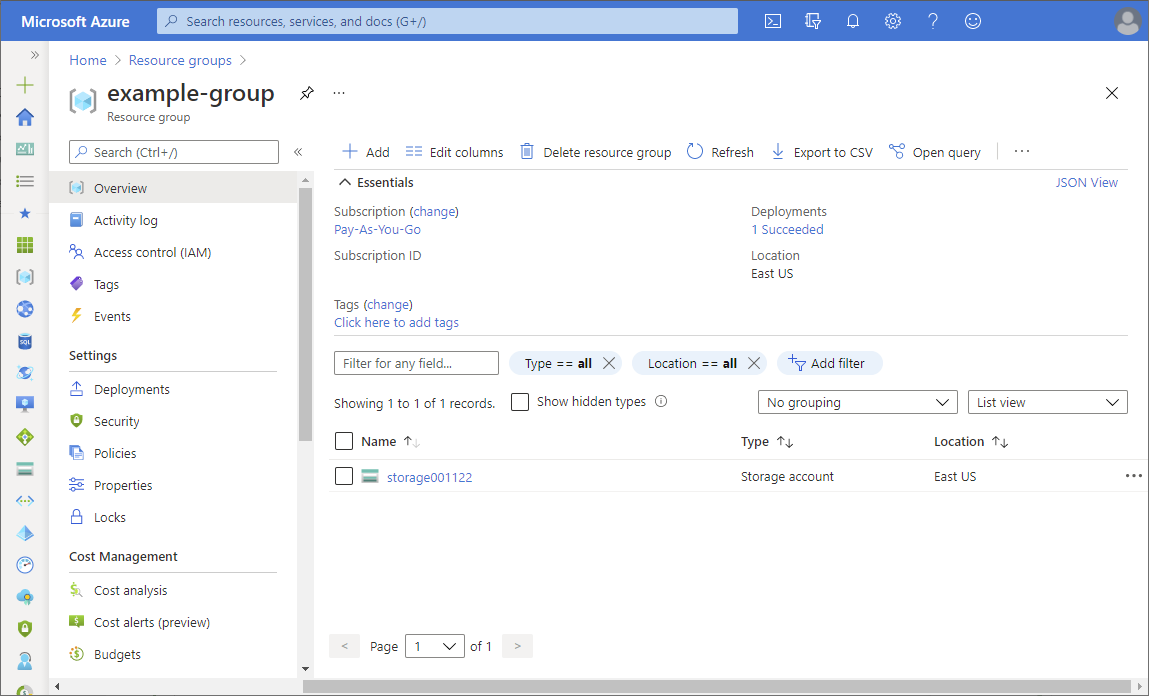
- Sign in to the Azure portal.
- In the Search box at the top, search for the scope you want to grant access to. For example, search for Management groups, Subscriptions, Resource groups, or a specific resource.
- Click the specific resource for that scope.
The following shows an example resource group.
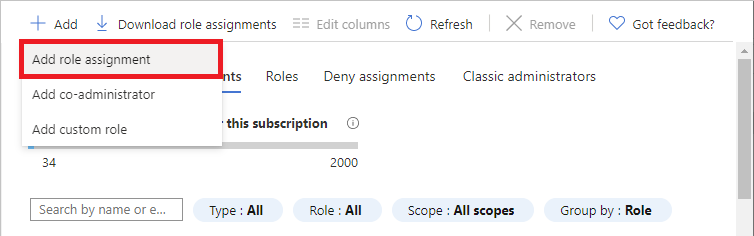
Step 2: Open the Add role assignment page
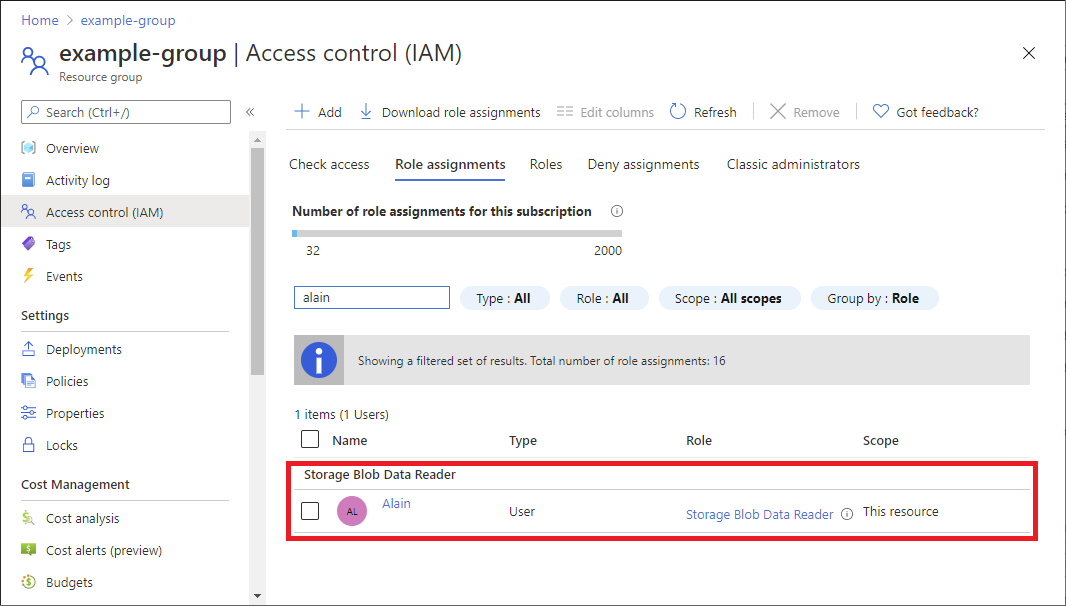
Access control (IAM) is the page that you typically use to assign roles to grant access to Azure resources. It's also known as identity and access management (IAM) and appears in several locations in the Azure portal.
Click Access control (IAM). The following shows an example of the Access control (IAM) page for a resource group.
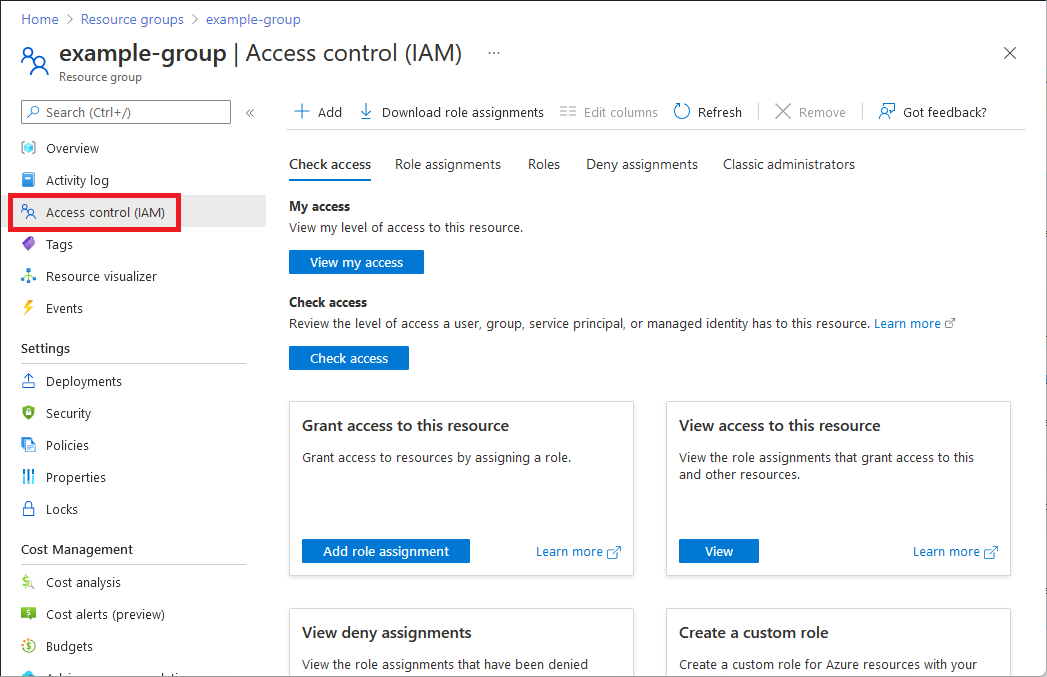
Click the Role assignments tab to view the role assignments at this scope.
Click Add > Add role assignment.
If you don't have permissions to assign roles, the Add role assignment option will be disabled.
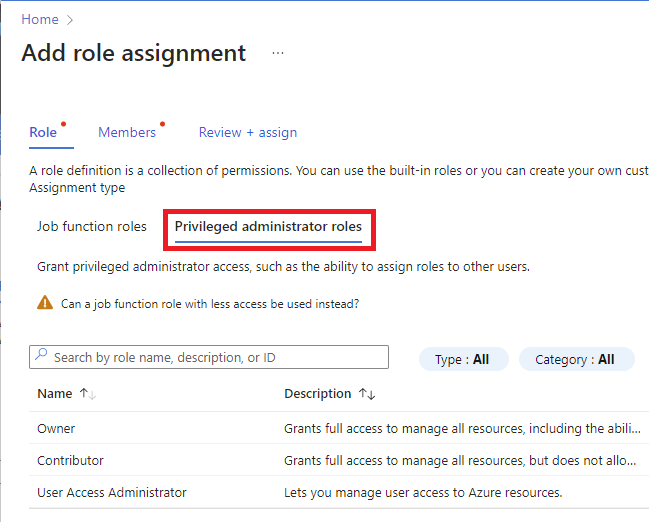
Step 3: Select the appropriate role
On the Role tab, select a role that you want to use. You can search for a role by name or by description. You can also filter roles by type and category.
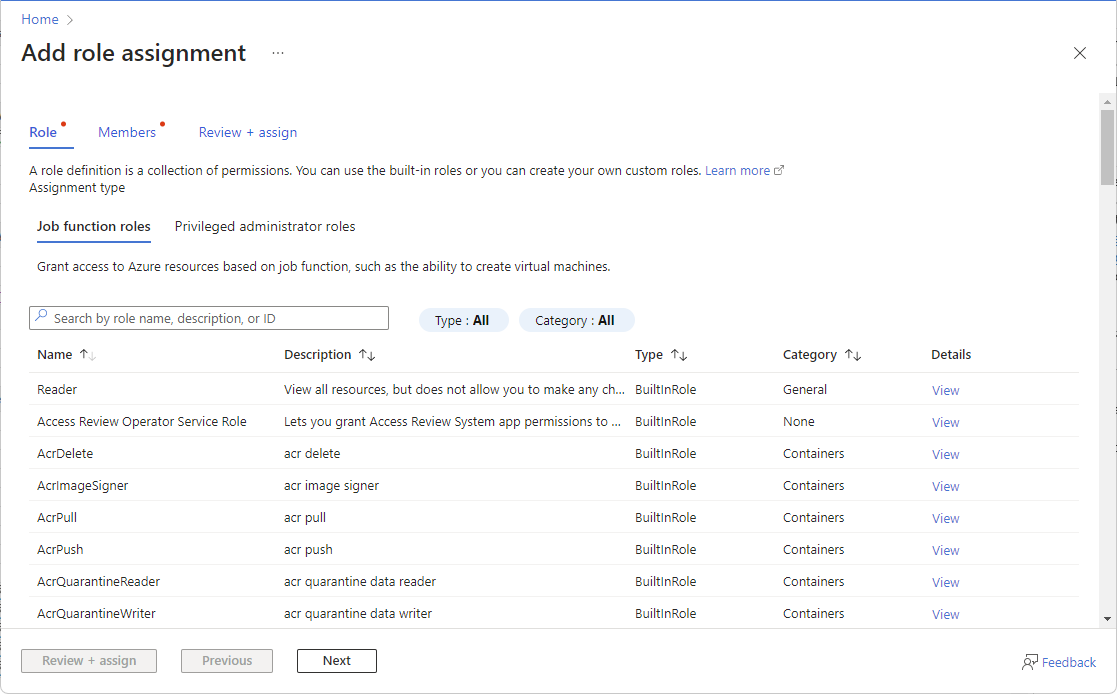
If you want to assign a privileged administrator role, select the Privileged administrator roles tab to select the role. For best practices when using privileged administrator role assignments, see Best practices for Azure RBAC.
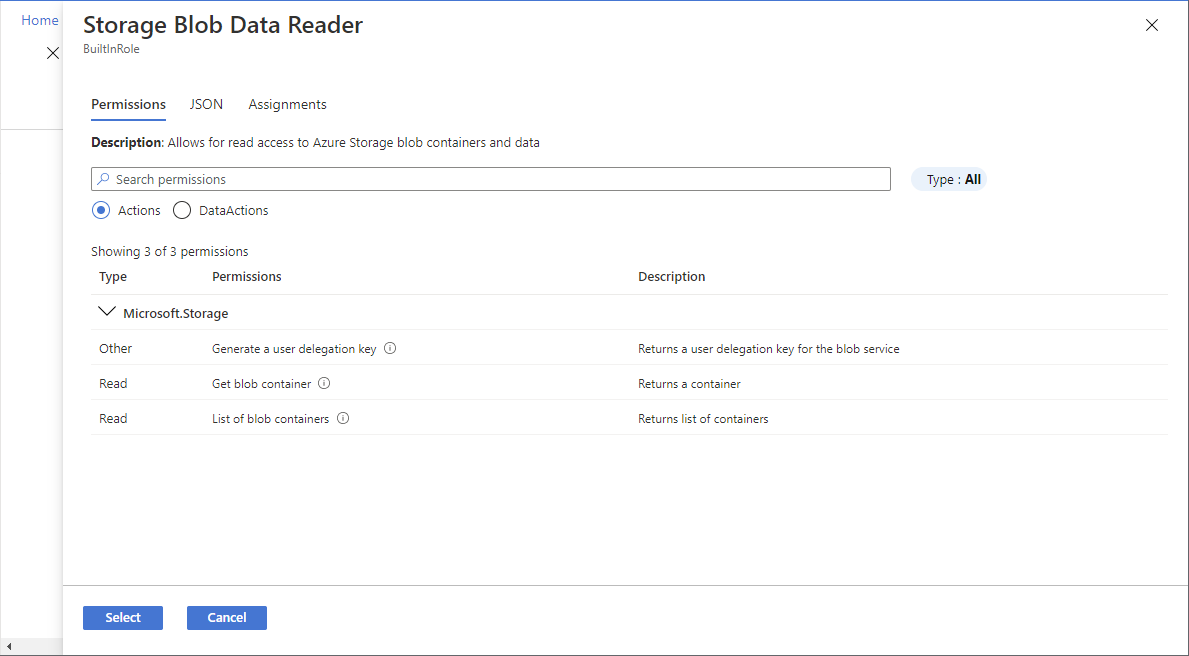
In the Details column, click View to get more details about a role.
Click Next.
Step 4: Select who needs access
On the Members tab, select User, group, or service principal to assign the selected role to one or more Microsoft Entra users, groups, or service principals (applications).
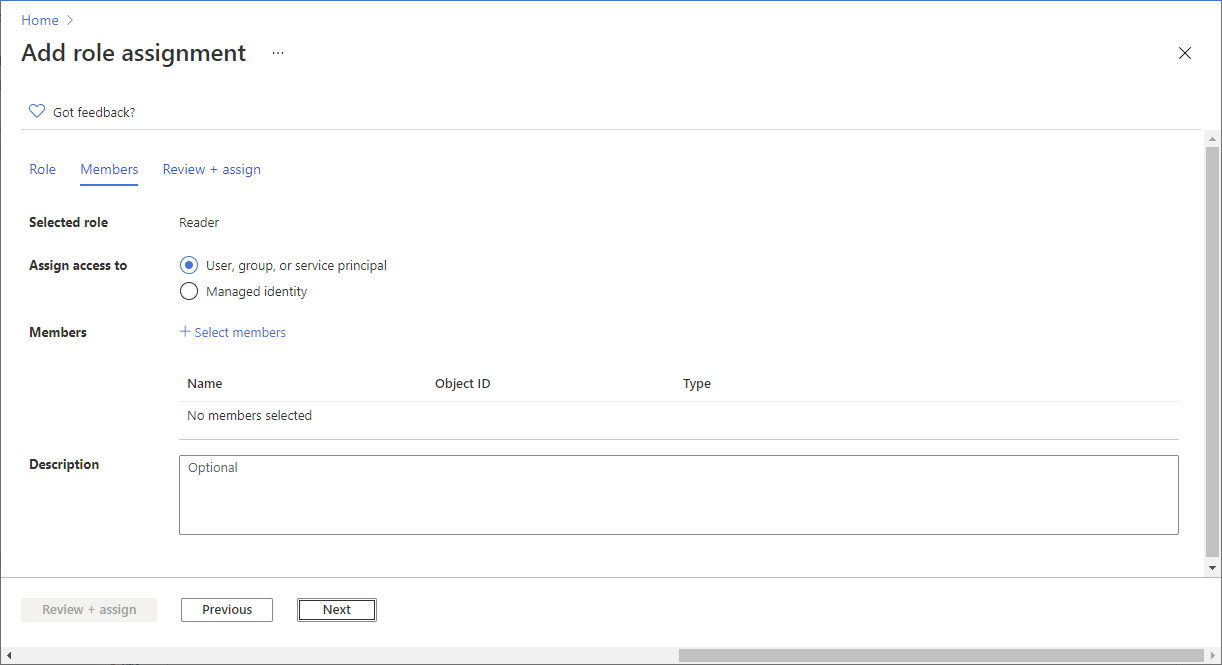
Click Select members.
Find and select the users, groups, or service principals. You can type in the Select box to search the directory for display name or email address.
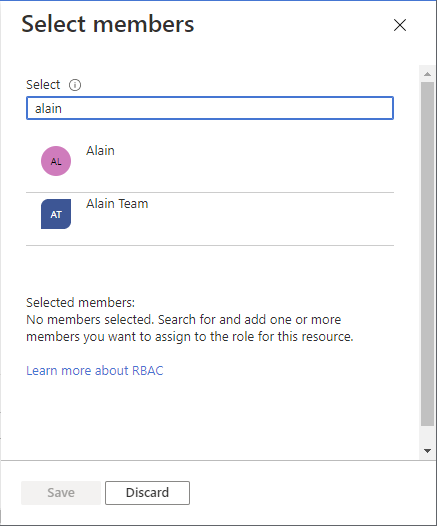
Click Select to add the users, groups, or service principals to the Members list.
To assign the selected role to one or more managed identities, select Managed identity.
Click Select members.
In the Select managed identities pane, select whether the type is user-assigned managed identity or system-assigned managed identity.
Find and select the managed identities.
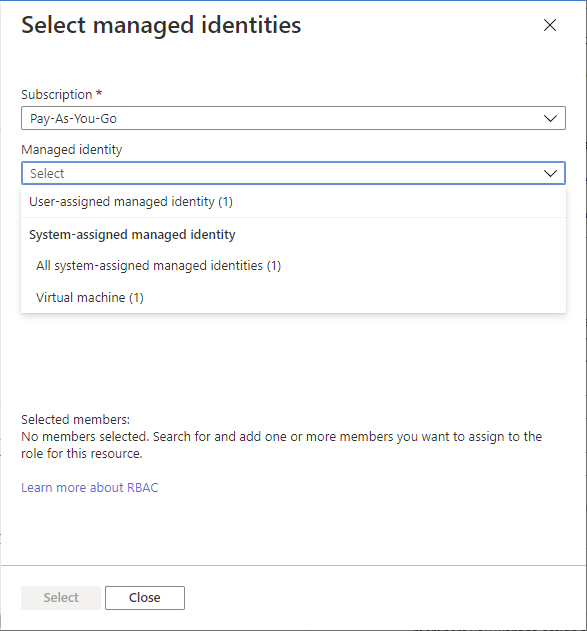
Click Select to add the managed identities to the Members list.
In the Description box enter an optional description for this role assignment. Later you can show this description in the role assignments list.
Click Next.
Step 5: (Optional) Add condition
If you selected a role that supports conditions, a Conditions tab will appear and you have the option to add a condition to your role assignment. A condition is an additional check that you can optionally add to your role assignment to provide more fine-grained access control.
The Conditions tab will look different depending on the role you selected.
Delegating Azure role assignment management with conditions is currently in PREVIEW. See the Supplemental Terms of Use for Microsoft Azure Previews for legal terms that apply to Azure features that are in beta, preview, or otherwise not yet released into general availability.
If you selected one of the following privileged roles, follow the steps in this section.
On the Conditions tab under What user can do, select the Allow user to only assign selected roles to selected principals (fewer privileges) option.
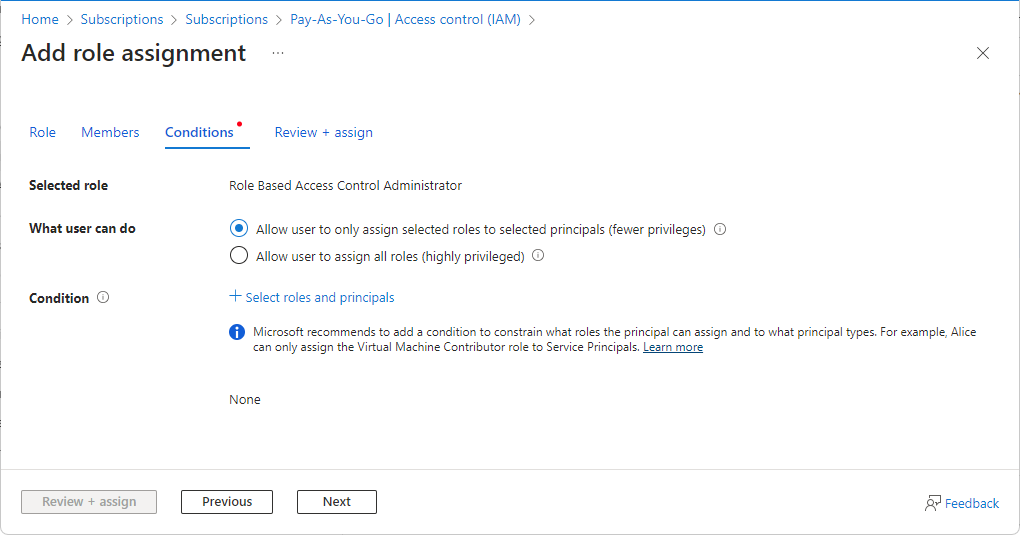
Click Select roles and principals to add a condition that constrains the roles and principals this user can assign roles to.
Follow the steps in Delegate Azure role assignment management to others with conditions.
Step 6: Assign role
On the Review + assign tab, review the role assignment settings.
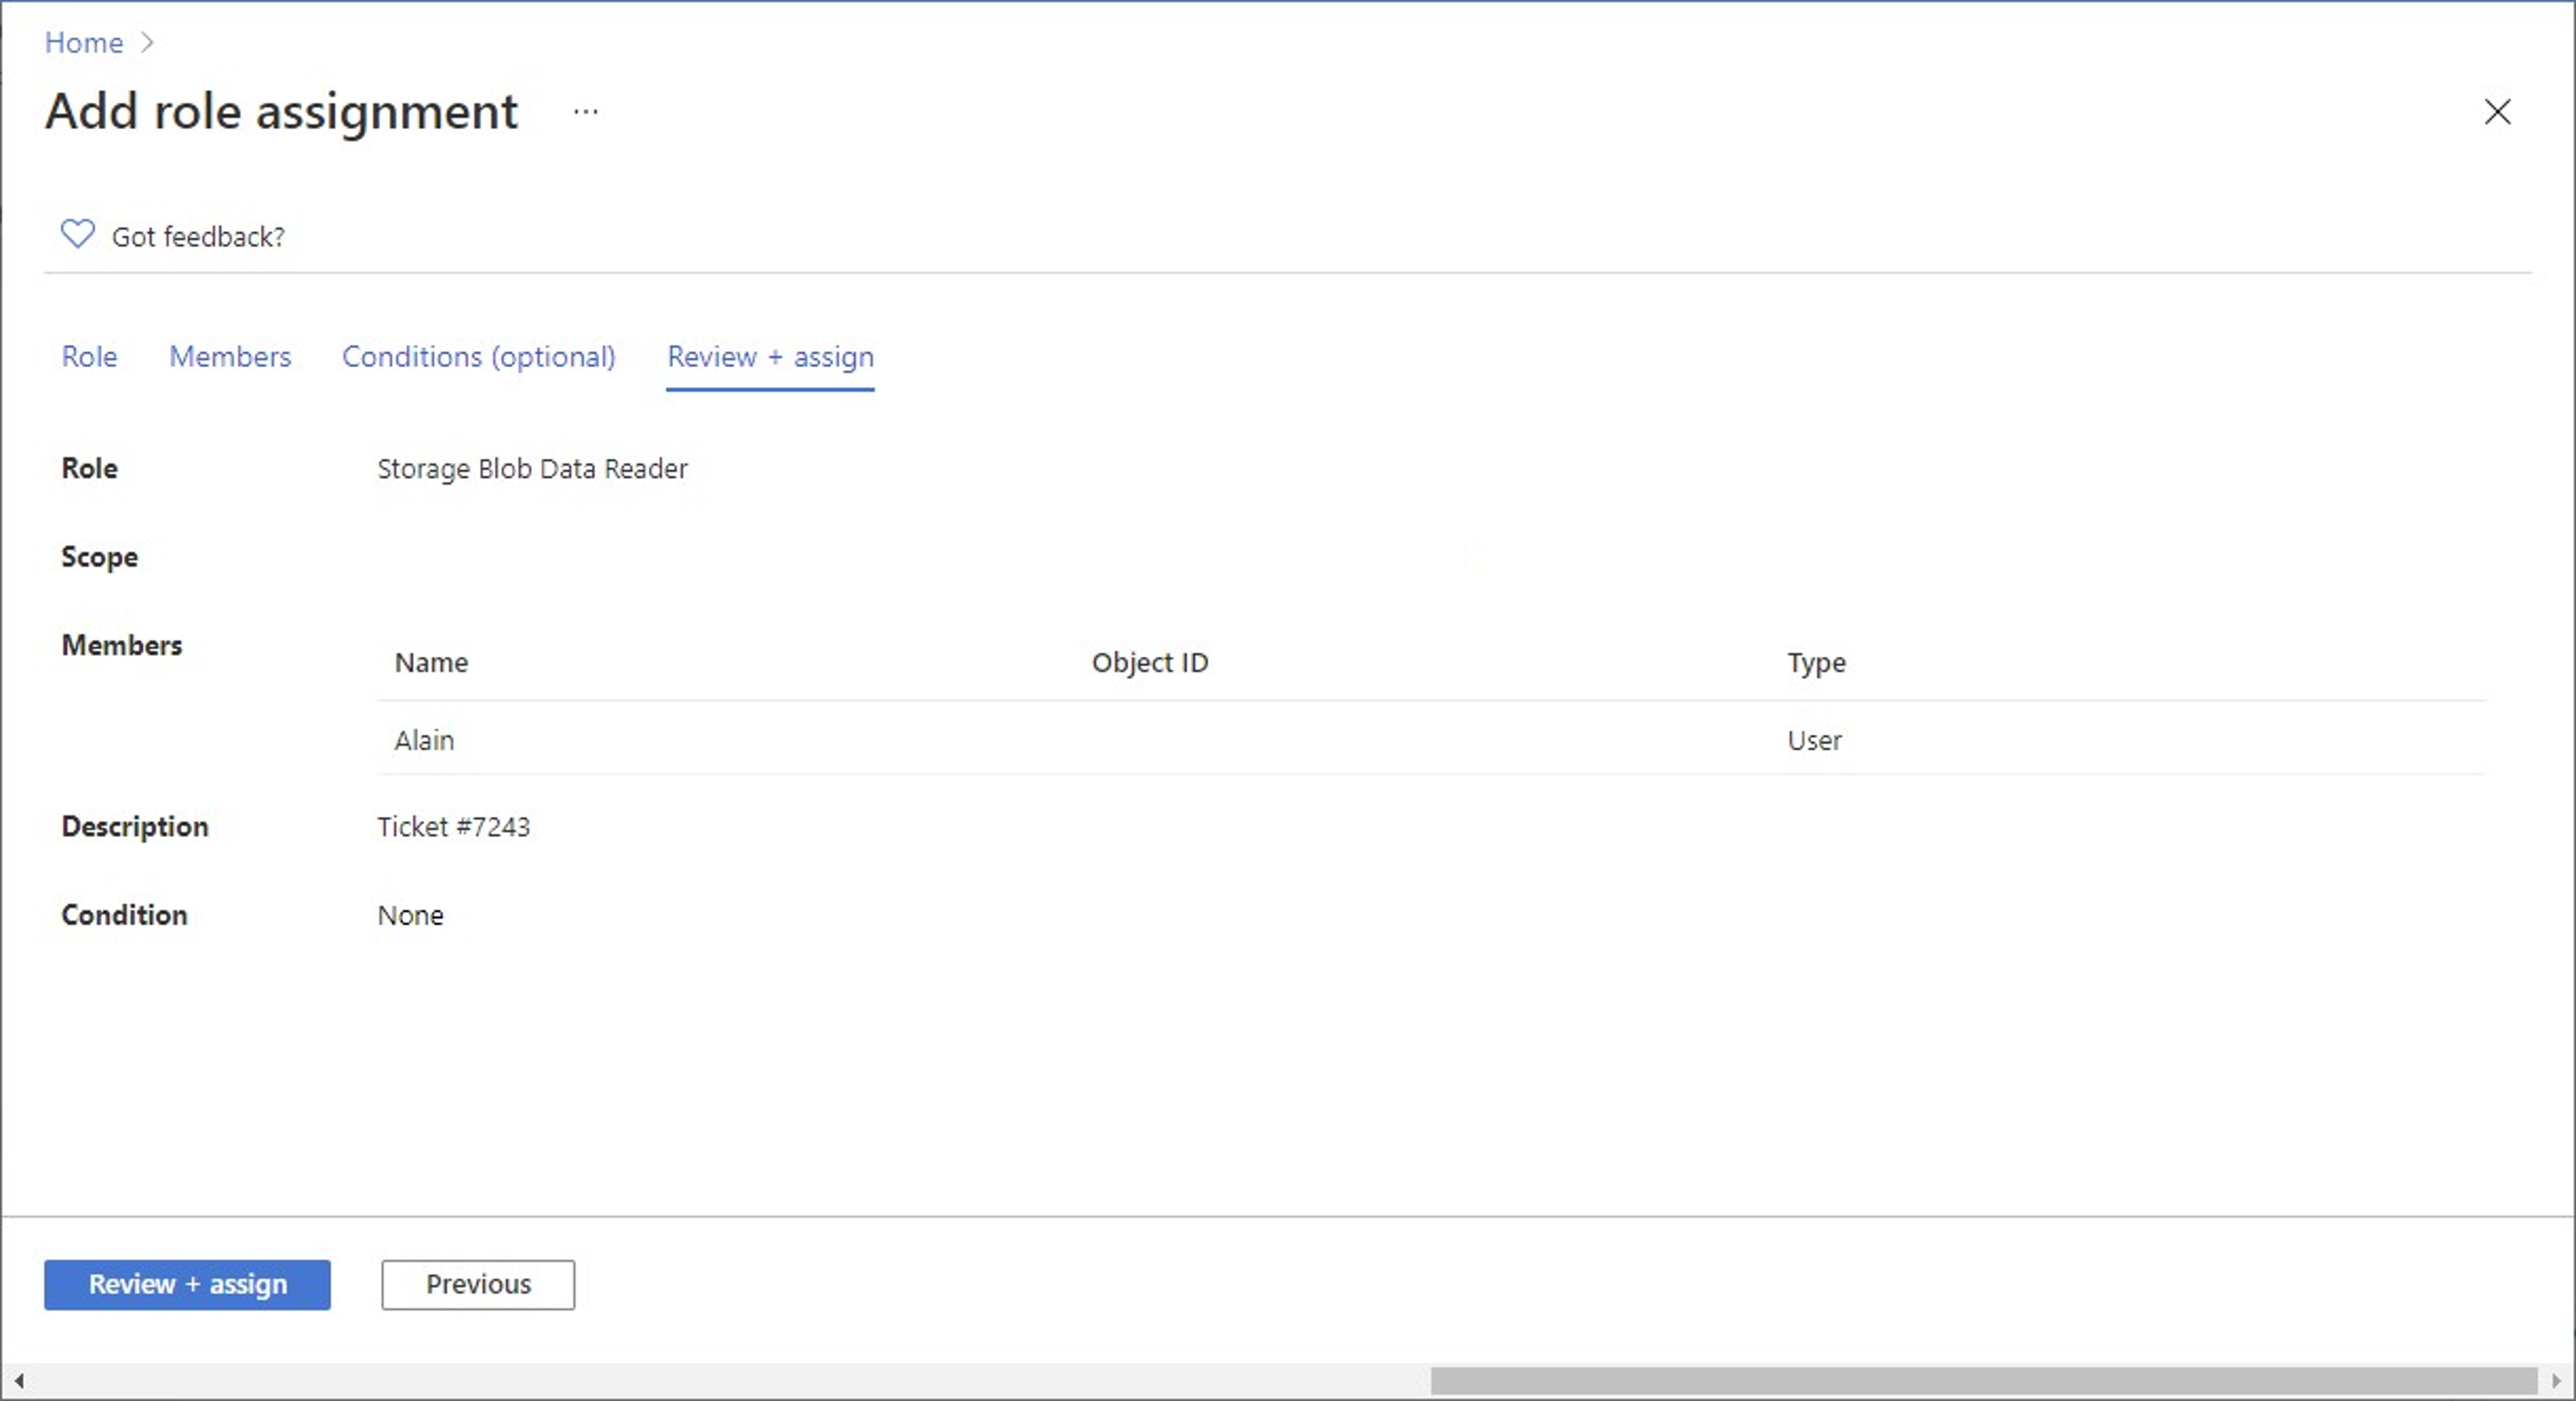
Click Review + assign to assign the role. After a few moments, the security principal is assigned the role at the selected scope.
If you don't see the description for the role assignment, click Edit columns to add the Description column.