Deploy an AKS cluster to Azure Stack HCI
- 11 minutes
Now you've more clarity about the optimal approach to implement containerized workloads that will help Contoso reach its consolidation and modernization goals. You're eager to test the deployment of AKS on the Azure Stack HCI cluster in your proof-of-concept environment. You decide to use Windows Admin Center for this purpose.
Deploy AKS on Azure Stack HCI
The high-level steps for deploying AKS on an Azure Stack HCI cluster by using Windows Admin Center are:
- Downloading AKS on Azure Stack HCI installation software
- Installing and configuring Windows Admin Center for managing the Azure Stack HCI cluster (if not already completed)
- Installing the AKS extension for Windows Admin Center
- Creating an AKS cluster on the Azure Stack HCI cluster
Downloading AKS on Azure Stack HCI installation software
Microsoft offers AKS on Azure Stack HCI installation components on an evaluation basis. You can download them after you complete a short online registration form.
Installing and configuring Windows Admin Center
Install Windows Admin Center on a Windows 10 or Windows Server 2019 computer that is a member of the same Active Directory Domain Services (AD DS) domain as your Azure Stack HCI cluster nodes. Ensure that your Windows Admin Center version build is 2009 or newer.
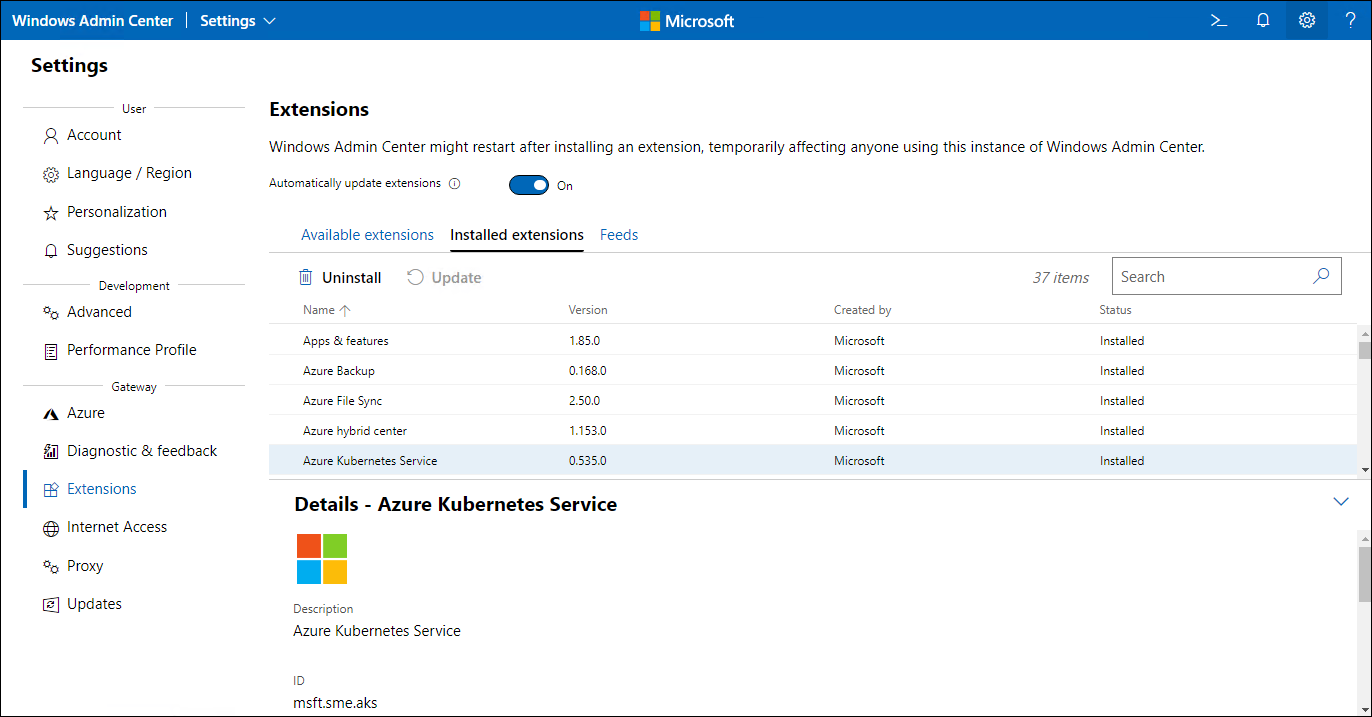
Installing the AKS extension for Windows Admin Center
The installation components you downloaded include a NuGet package (with the .nupkg extension) that contains the AKS extension for Windows Admin Center. To install the extension, add the location of the downloaded package to the list of the extension feeds within the extension manager of Windows Admin Center.
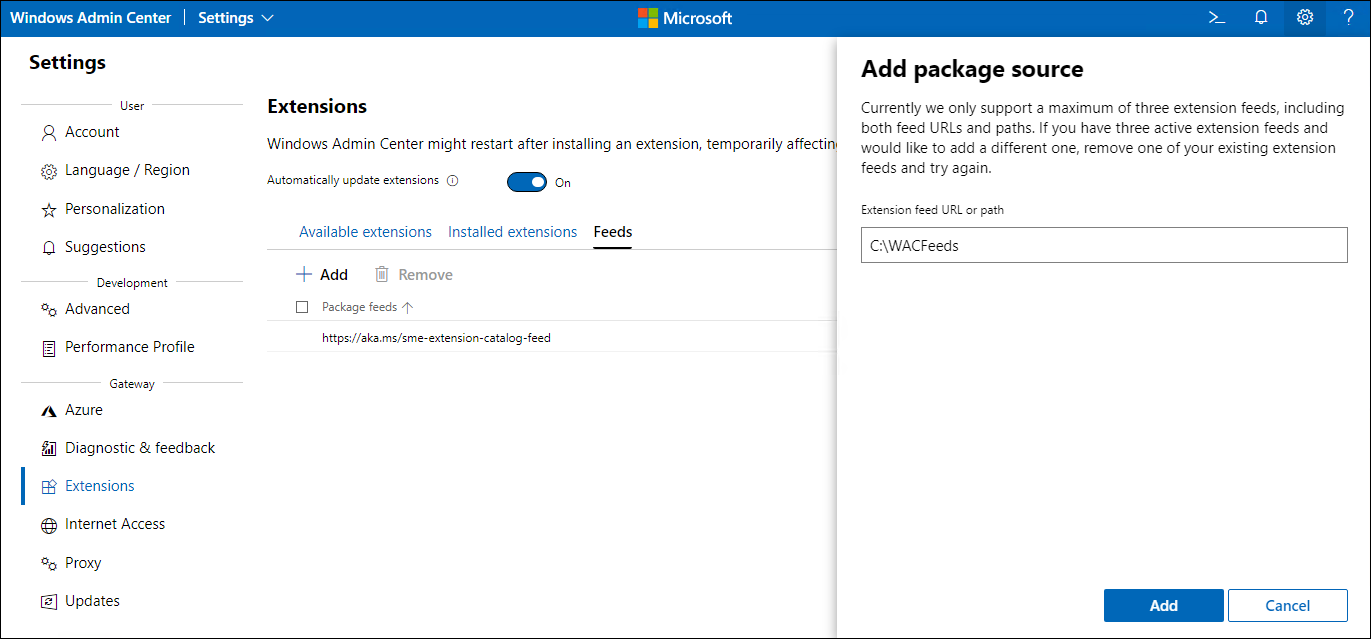
After you add the extension feed to the extension manager, you can install the NuGet package-based extension, which will automatically trigger a reload of the Windows Admin Center page, making the extension available for use.
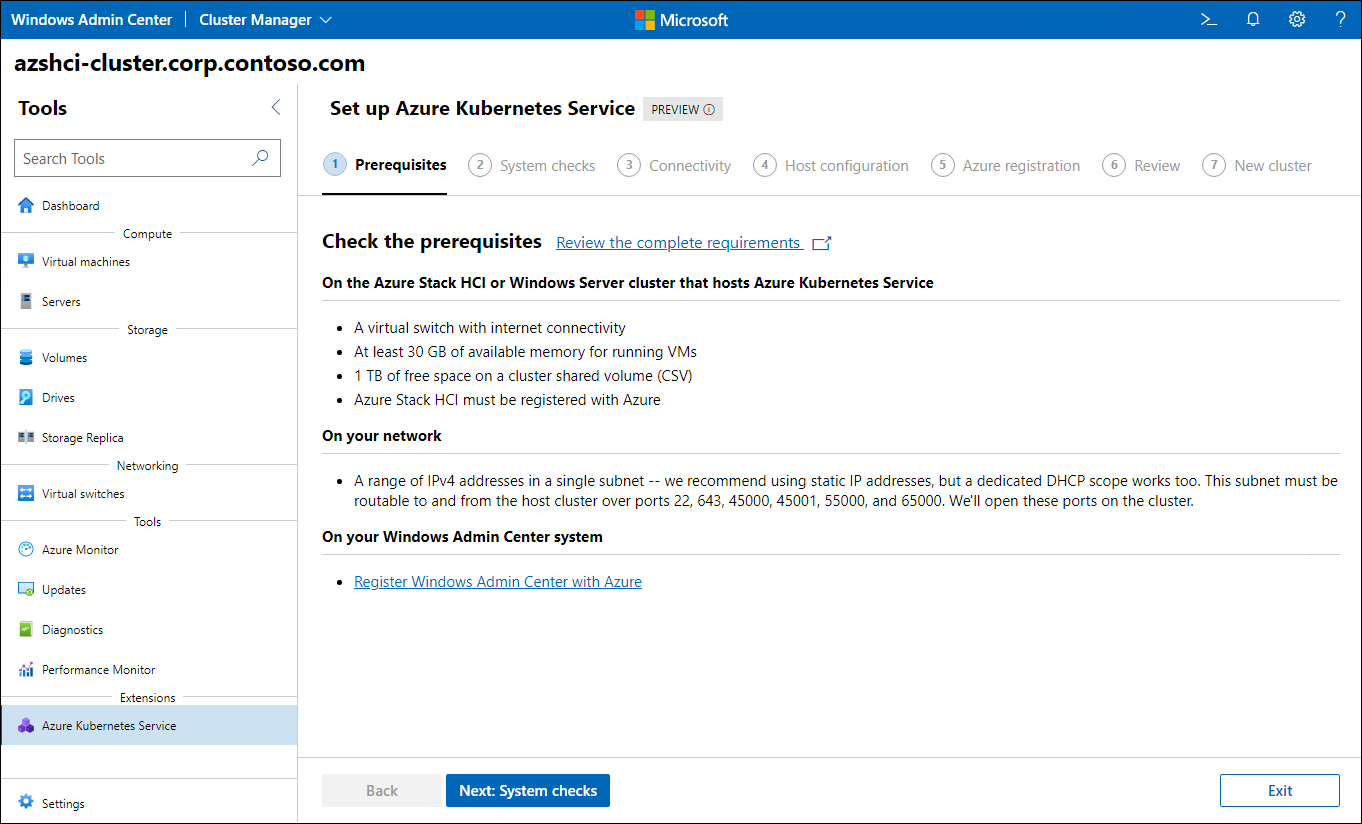
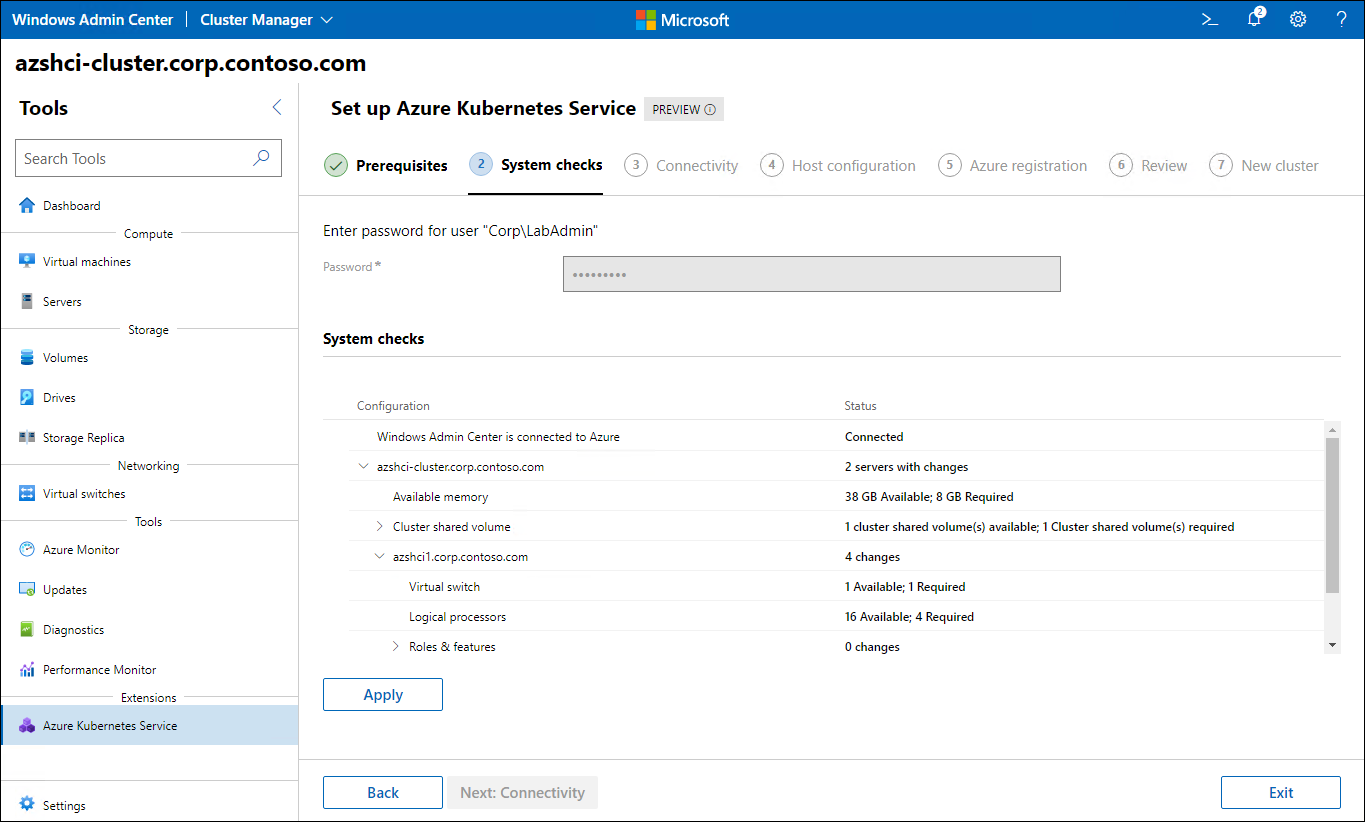
Creating an AKS cluster on the Azure Stack HCI cluster
Windows Admin Center relies on the AKS extension to guide you through the setup process. The process consists of the following steps:
- Prerequisites
- System checks
- Connectivity
- Host configuration
- Azure registration
- Review
- New cluster
Prerequisites
Windows Admin Center lists the compute, storage, network, and software prerequisites for installing AKS on Azure Stack HCI. It is your responsibility to verify that the prerequisites are satisfied.
System checks
Windows Admin Center validates that your current setup is suitable for the installation of AKS on Azure Stack HCI. For example, Windows Admin Center checks whether it's registered with Azure, verifies the presence of a cluster shared volume, and provides an overview of available processors, memory, virtual switches, and installed operating system roles on cluster nodes.
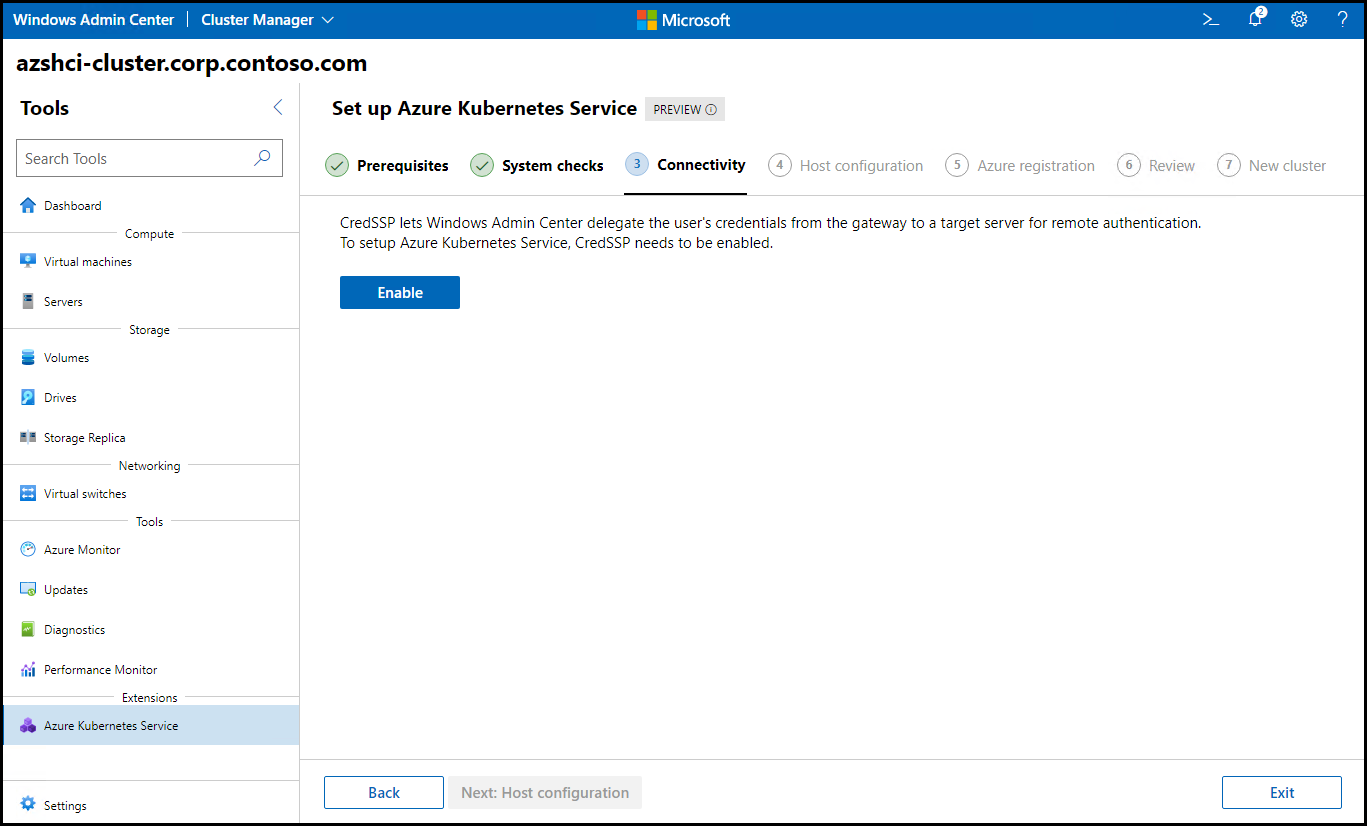
Connectivity
Windows Admin Center prompts you to enable the Credential Security Support Provider (CredSSP) protocol, which is necessary to delegate your credentials from the server running Windows Admin Center to the Azure Stack HCI cluster nodes during AKS setup.
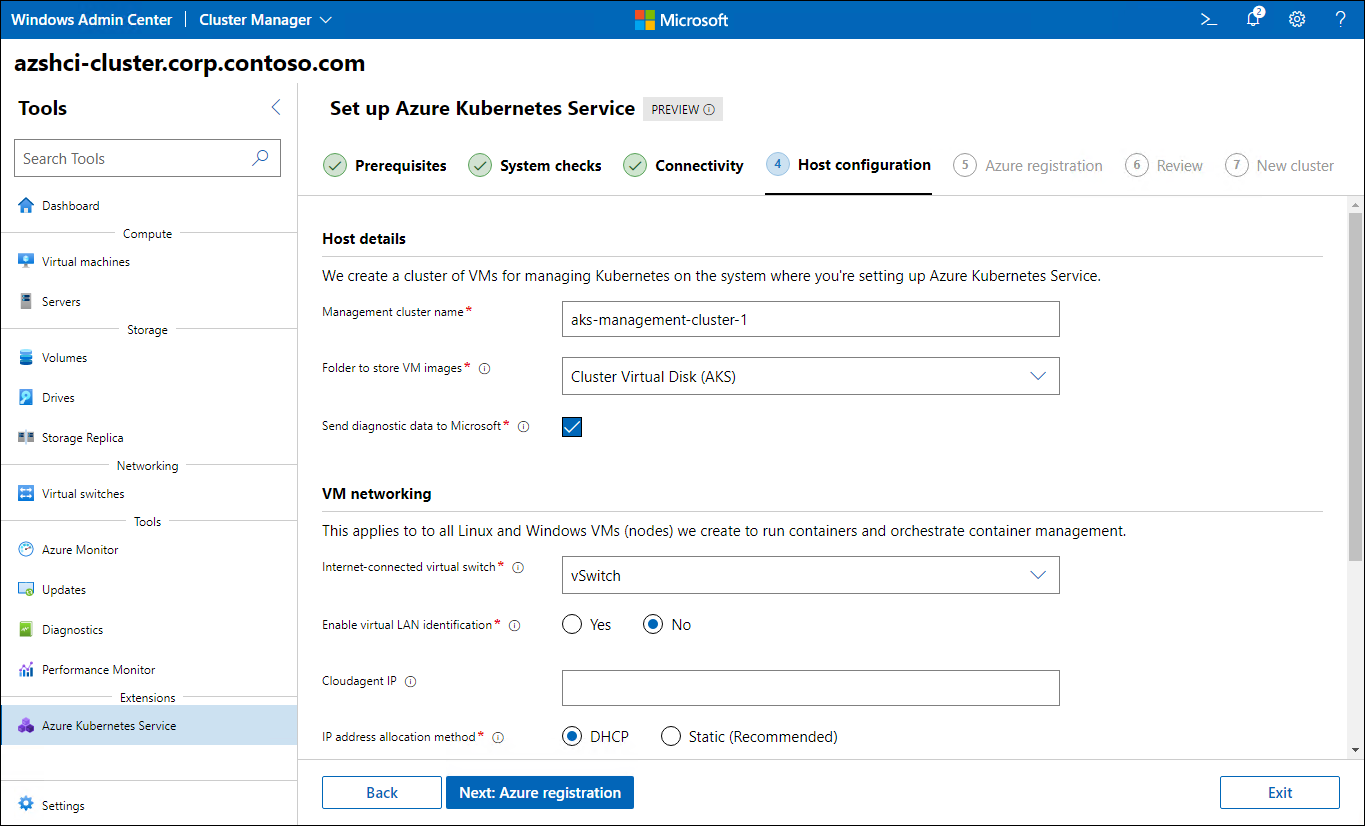
Host configuration
Windows Admin Center requires you to specify some of the settings you intend to apply to the AKS cluster. Besides providing the cluster name, you also must decide whether you'll configure its networking by using static assignments or the Dynamic Host Configuration Protocol (DHCP).
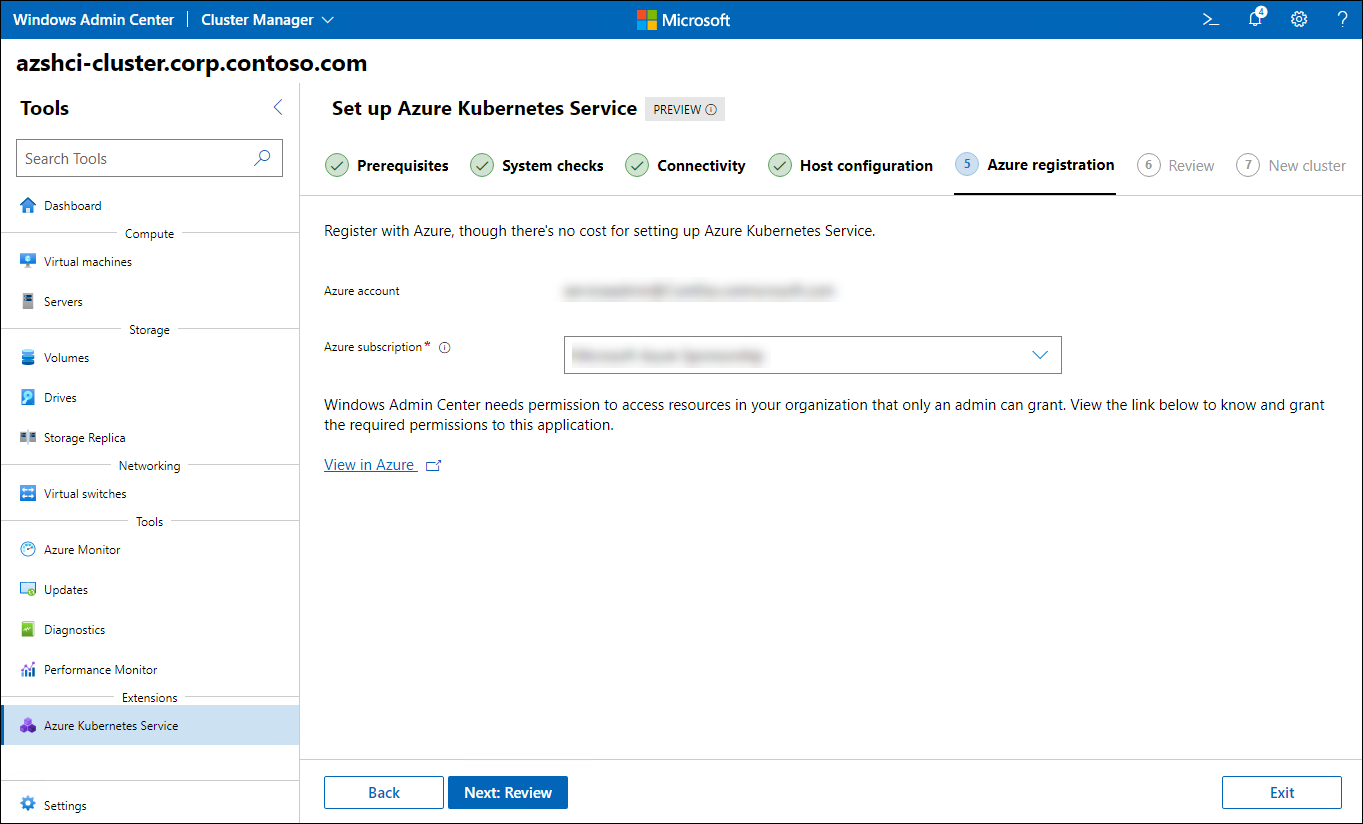
Azure registration
After the deployment completes, Windows Admin Center automatically registers your AKS with Azure. For this registration to succeed, provide the name of your Azure subscription and the resource group you intend to use to host the AKS resource. You also must authorize Windows Admin Center to perform registration on your behalf.
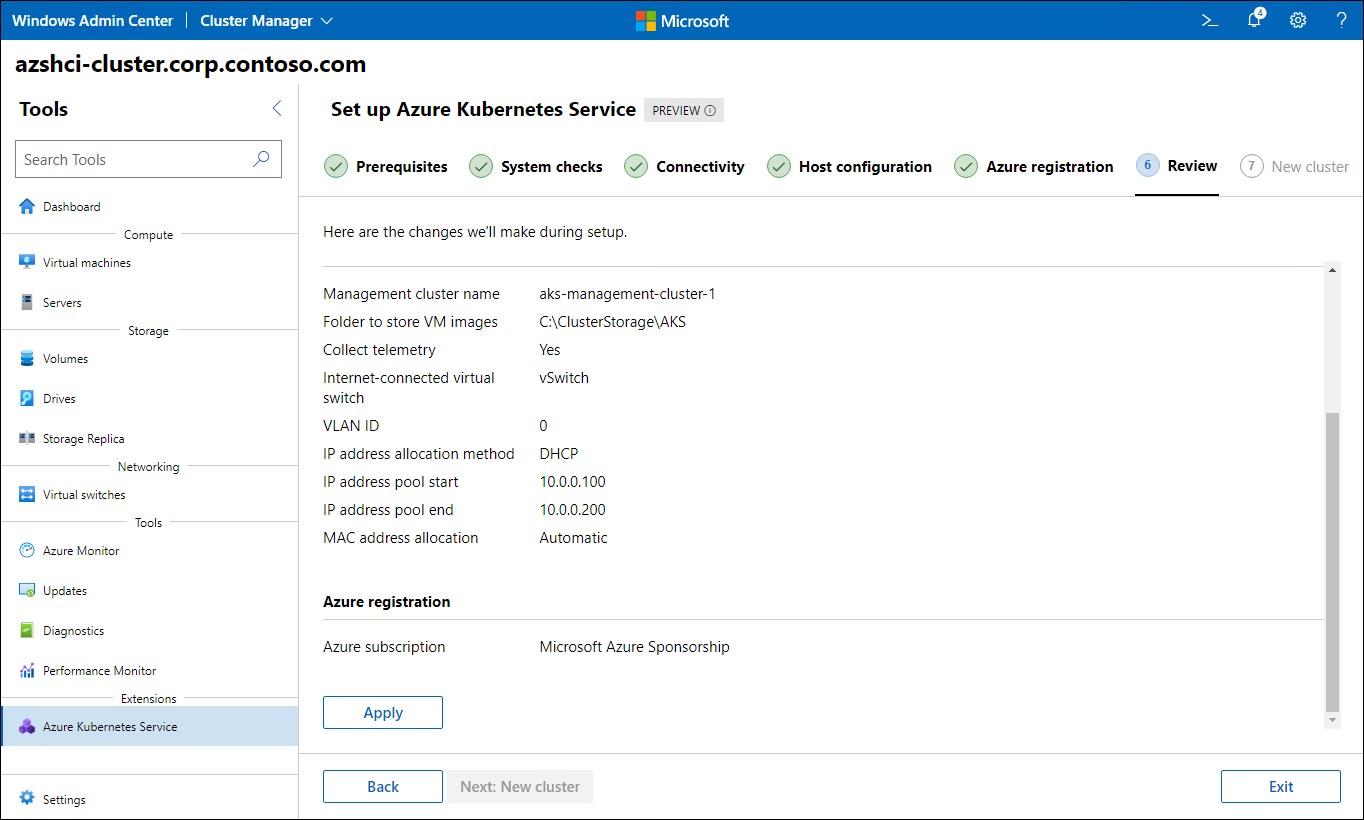
Review
Windows Admin Center provides an overview of the configuration choices you made. After you verify that they are correct, apply the changes. This will trigger the setup process.
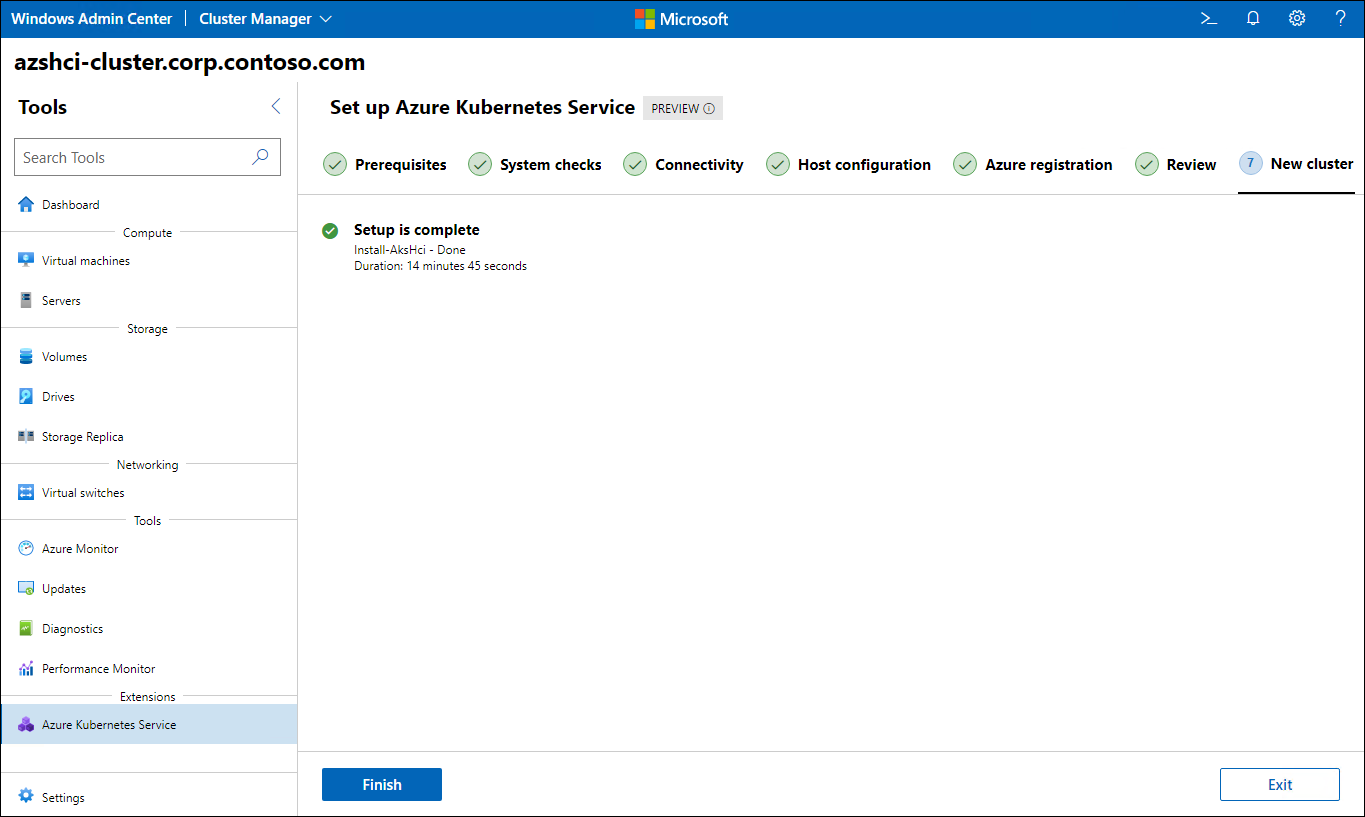
New cluster
Following the successful installation, you can proceed with deploying a Kubernetes cluster.
Note
You can fully automate the process of deploying AKS on Azure Stack HCI by using Windows PowerShell.
Demonstration: Deploy AKS on Azure Stack HCI
In this demonstration, you'll learn how to deploy AKS on Azure Stack HCI.