Exercise 2 - Manage volume backups
In this section, you configure policy-based backups and manual backups. You'll also learn to manage backup vaults, manage backup policies, search backups, restore a backup, and delete backups.
Task 1 - Configure policy-based backups for Azure NetApp Files
Azure NetApp Files backup supports policy-based (scheduled) backups and manual (on-demand) backups at the volume level. You can use both types of backups in the same volume.
To enable a policy-based (scheduled) backup:
Sign in to the Azure portal and navigate to Azure NetApp Files.
Select your Azure NetApp Files account.
Select Backups.
Select Backup Policies.
Select Add.
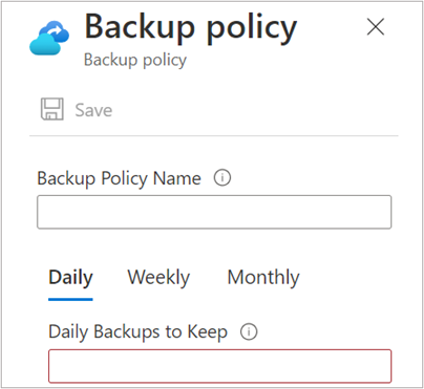
In the Backup Policy page, specify the backup policy name. Enter the number of backups that you want to keep for daily, weekly, and monthly backups. Select Save.
The minimum value for Daily Backups to Keep is 2.
To configure backups for a volume:
Navigate to Volumes then select the volume for which you want to configure backups.
From the selected volume, select Backup under Storage service from the left menu.
Then select Configure.
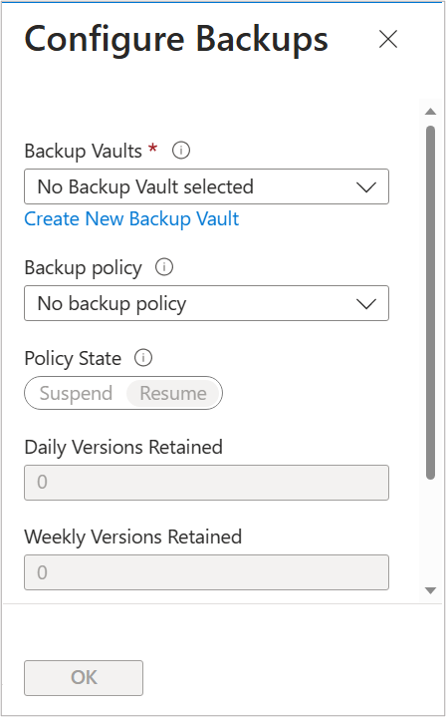
In the Configure Backups page, select the backup vault from the Backup vaults drop-down. For information about creating a backup vault, see Create a backup vault.
In the Backup Policy drop-down menu, assign the backup policy to use for the volume. Select OK.
The Vault information is prepopulated.
Task 2 - Configure manual backups for Azure NetApp Files
Azure NetApp Files backup supports policy-based (scheduled) backups and manual (on-demand) backups at the volume level. You can use both types of backups in the same volume.
Sign in to the Azure portal and navigate to Azure NetApp Files.
Select your Azure NetApp Files account.
Go to Volumes under Storage services and select the specific volume for which you want to configure backups.
From the selected volume, select Backup under Storage service from the left menu.
Then select Configure.
In the Configure Backup page, select the backup vault from the dropdown menu.
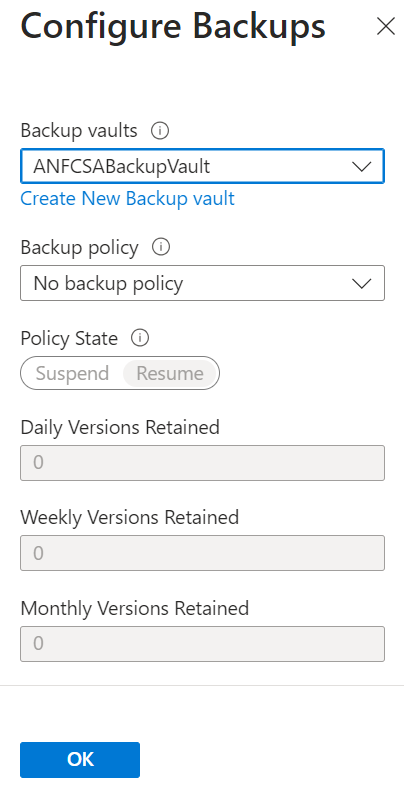
Select OK.
Task 3 - Create a manual backup for a volume
Go to Volumes and select the volume for which you want to create a manual backup.
Select Add Backup.
In the New Backup window that appears:
- Specify a backup name in the Name field.
- If you want to use an existing snapshot for the backup, select the Use Existing Snapshot option.
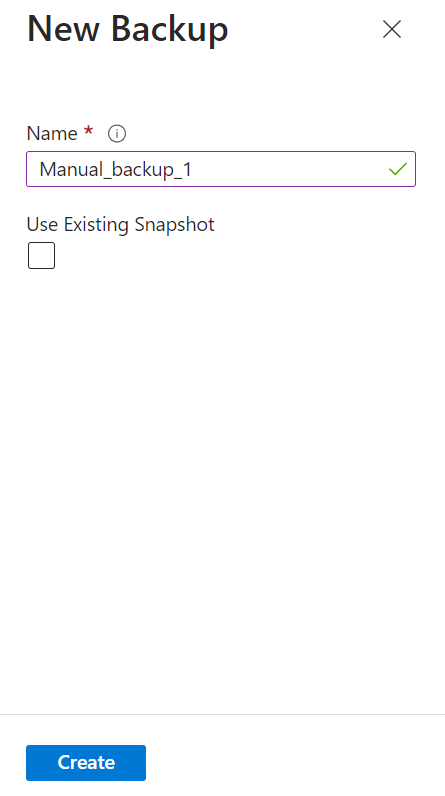
Select Create.
Task 4 - Create a backup vault
Backup vaults store the backups for your Azure NetApp Files subscription.
Although it's possible to create multiple backup vaults in your Azure NetApp Files account, it's recommended you have only one backup vault.
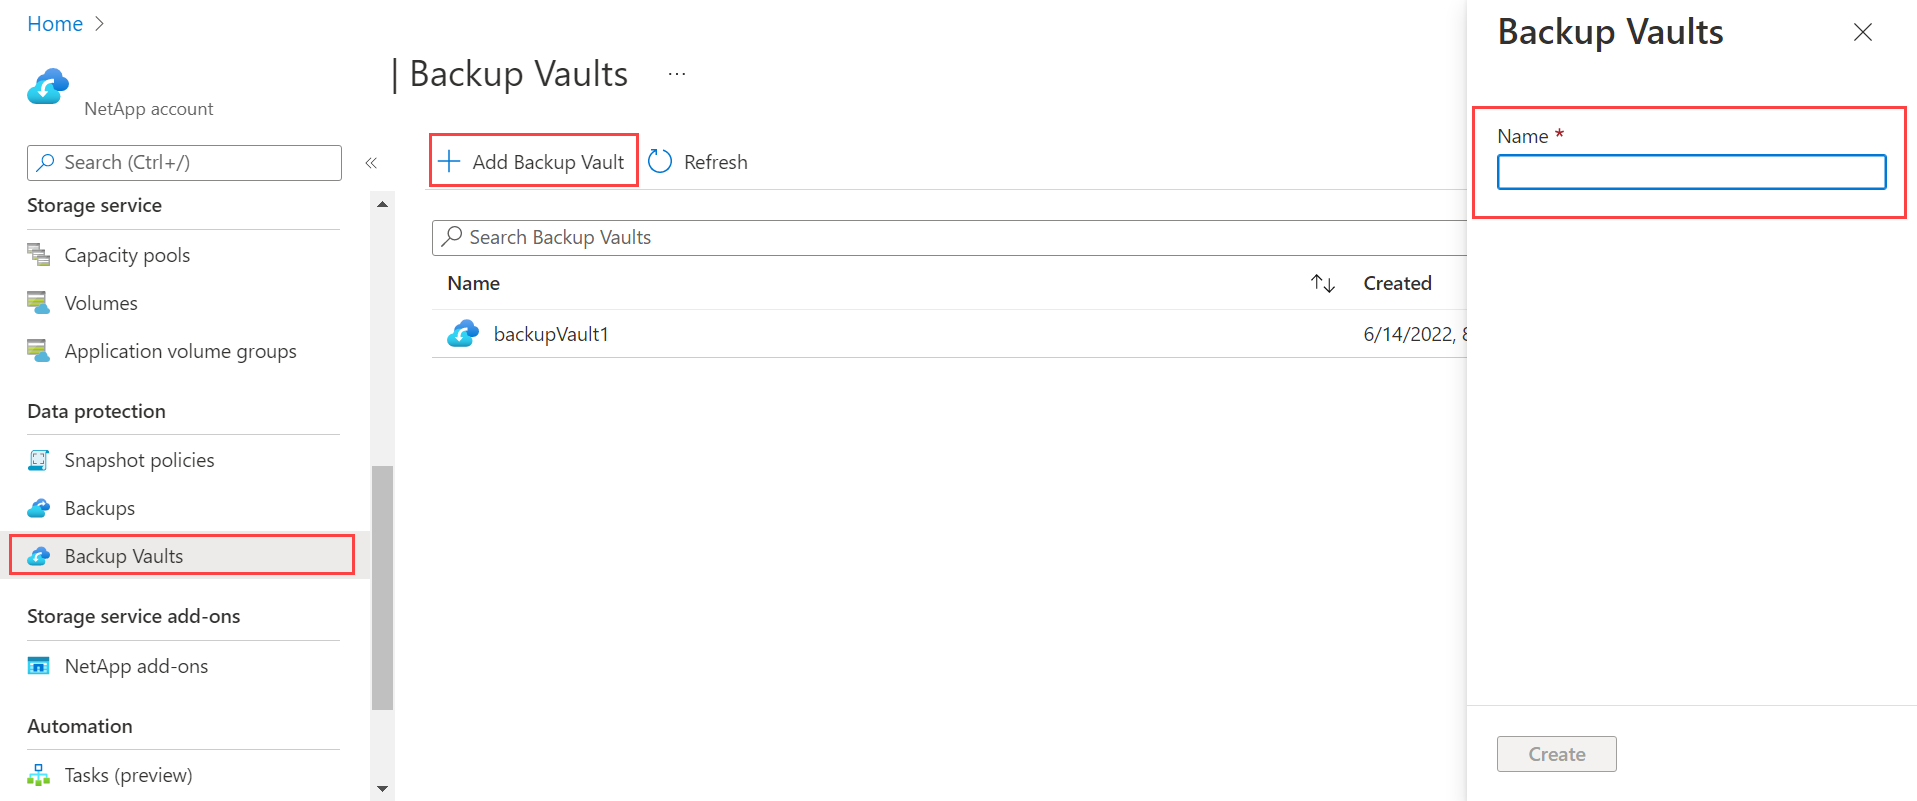
In your Azure NetApp Files account, navigate to the Backup Vaults menu under Data protection.
Select + Add Backup Vault. Assign a name to your backup vault then select Create.
Task 5 - Migrate backups to a backup vault
If you have existing backups, you must migrate them to a backup vault before you can restore from a backup.
Navigate to Backups.
From the banner above the backups, select Assign Backup Vault.
Select the volumes for migrating backups. Then, select Assign to Backup Vault.
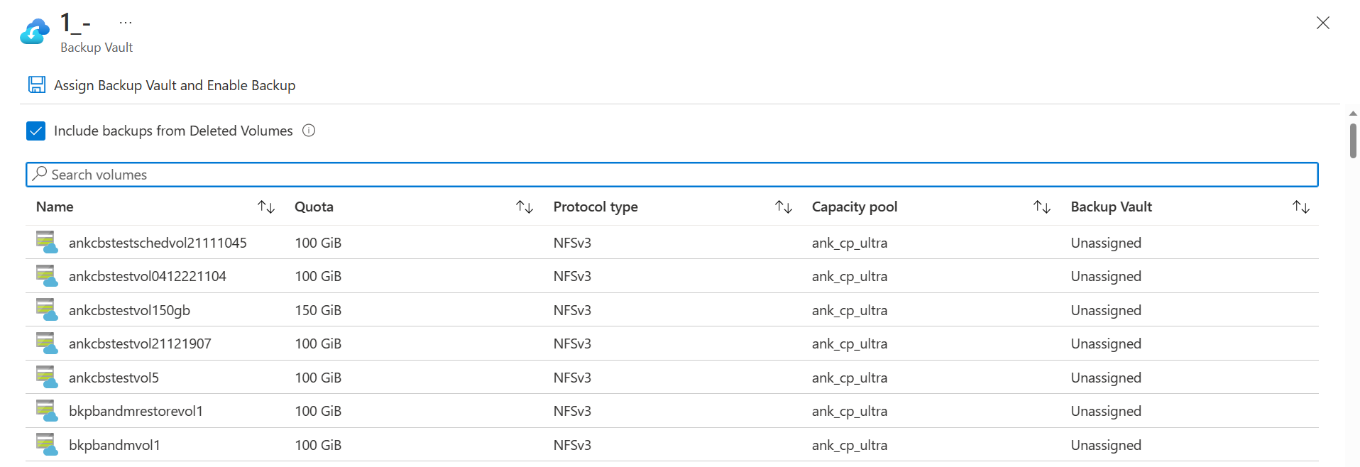
Navigate to the Backup Vault menu to view and manage your backups.
Task 6 - Delete a backup vault
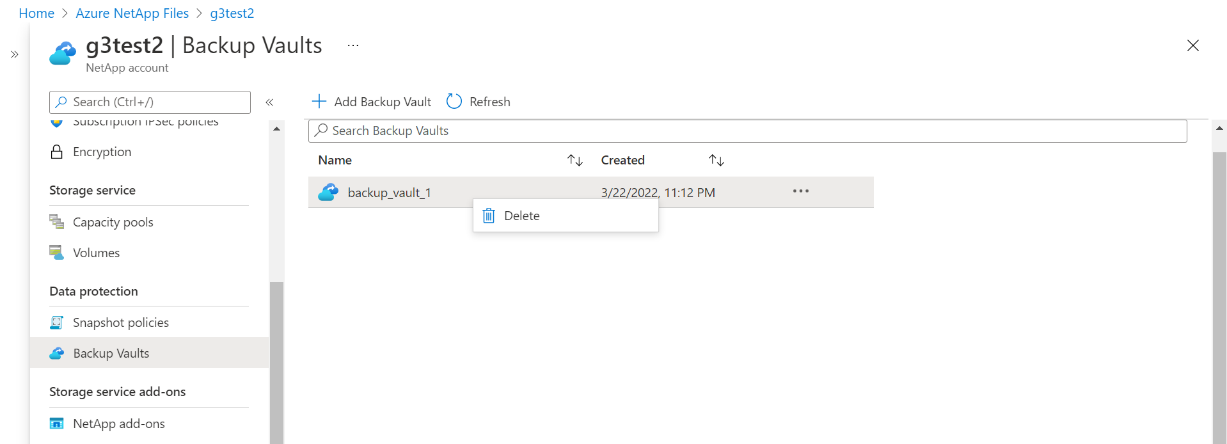
Navigate to the Backup Vault menu.
Identify the backup vault you want to delete and select the three dots ... next to the backup's name. Select Delete.
Task 7 - Modify a backup policy
To modify the backup policy settings:
Navigate to Backups.
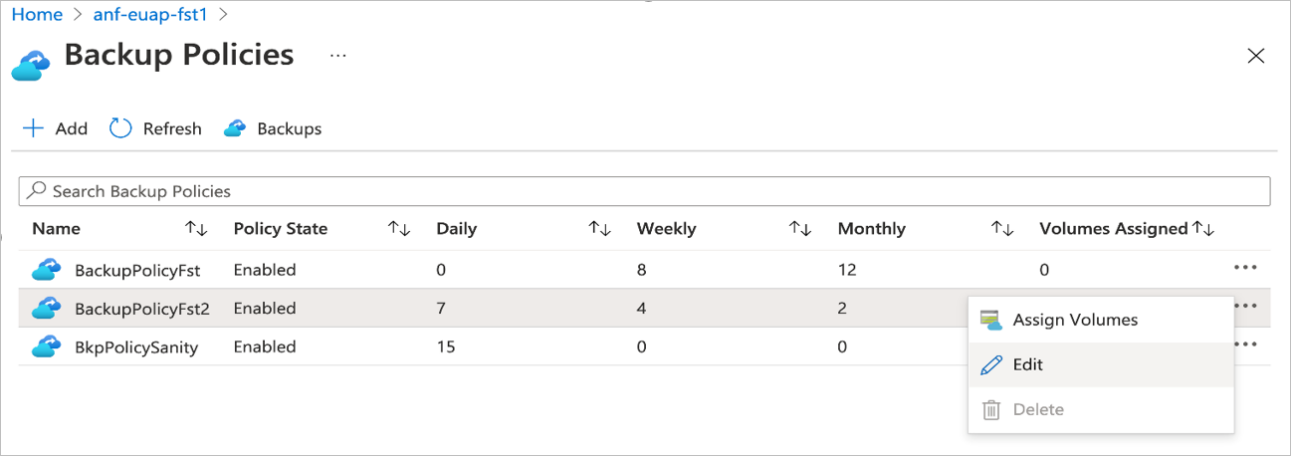
Select Backup Policies then select the three dots (...) to the right of a backup policy. Select Edit.
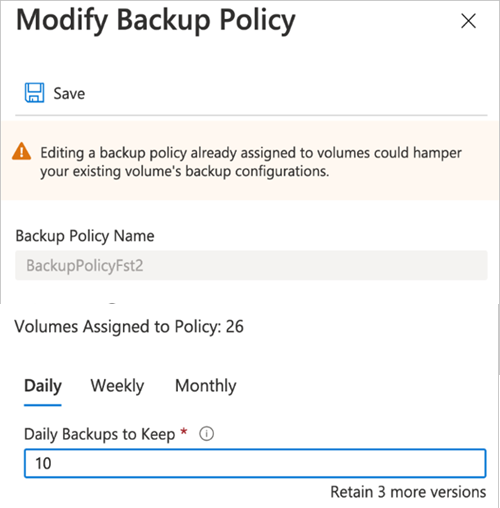
In the Modify Backup Policy window, update the number of backups you want to keep for daily, weekly, and monthly backups. Enter the backup policy name to confirm the action. Select Save.
Task 8 - Search backups of Azure NetApp Files volumes
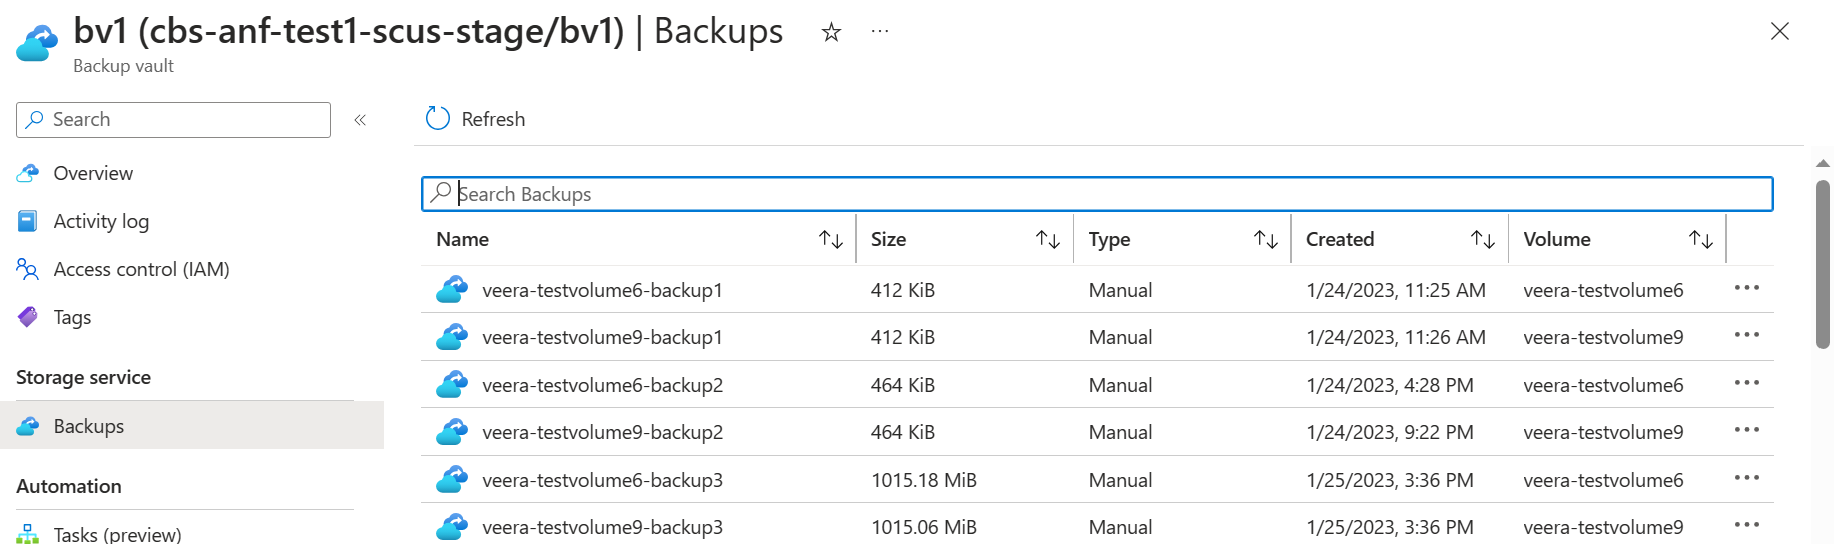
Select Backups.
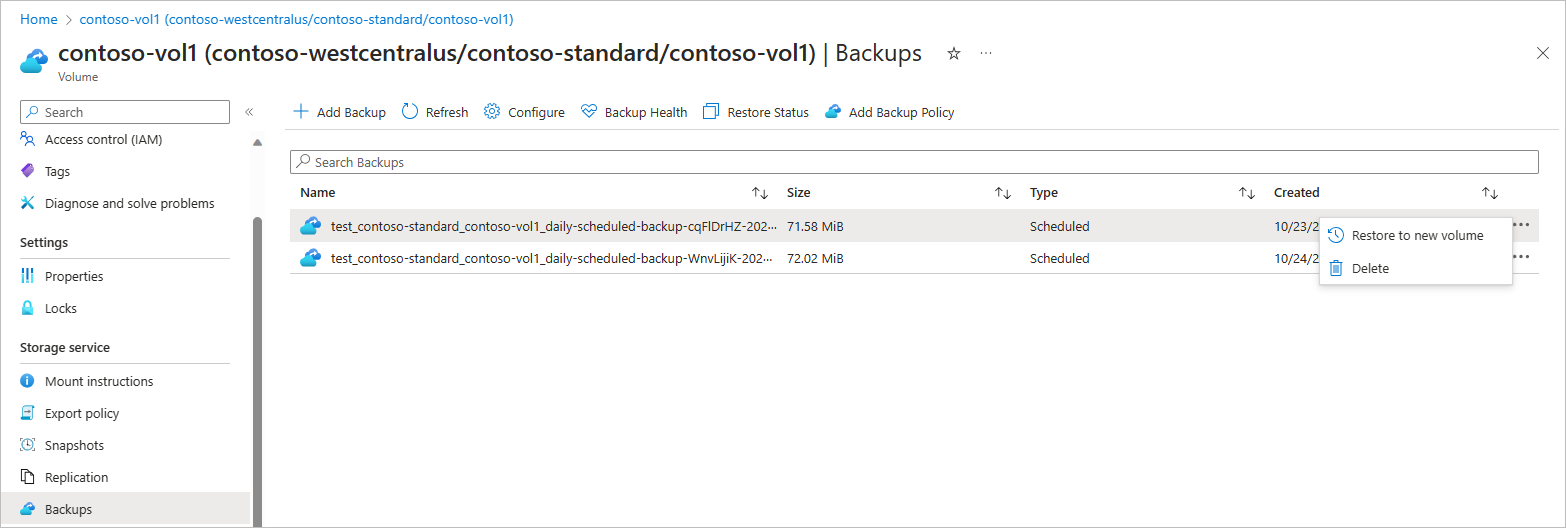
In the Search Backups field, enter the backup name that you want to search for.
A partial search is supported; you don't have to specify the entire backup name. The search filters the backups based on the search string.
Task 9 - Search backups at volume level
Select Volumes.
If you have migrated to a backup vault, navigate to Backup Vault. Select the backup vault. If you haven't yet migrated to a backup vault, navigate to Backups.
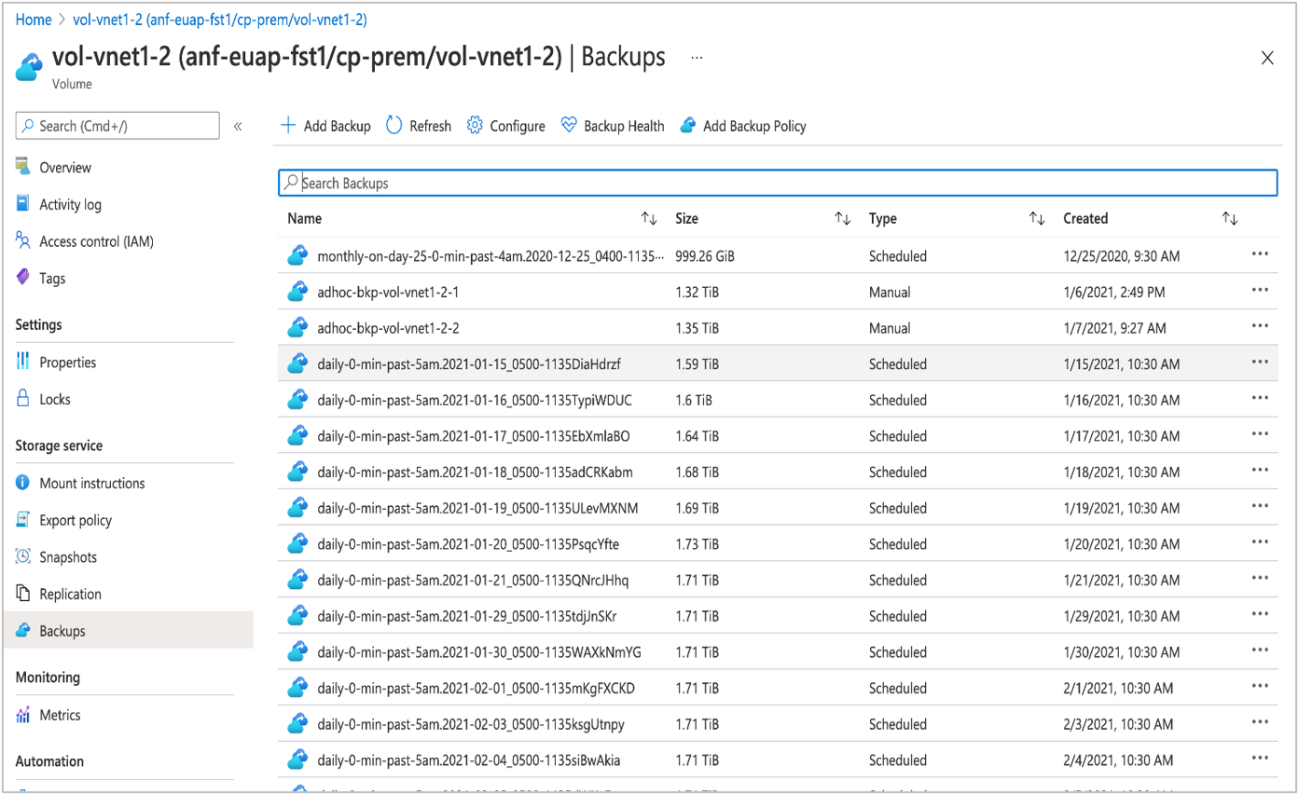
The Type column shows whether the backup is generated by a Scheduled (policy-based) or a manual backup.
In the Search Backups field, enter the backup name that you want to search for.
Task 10 - Restore a backup to a new volume
Restoring a backup creates a new volume with the same protocol type.
Select Backup Vault. Navigate to Backups.
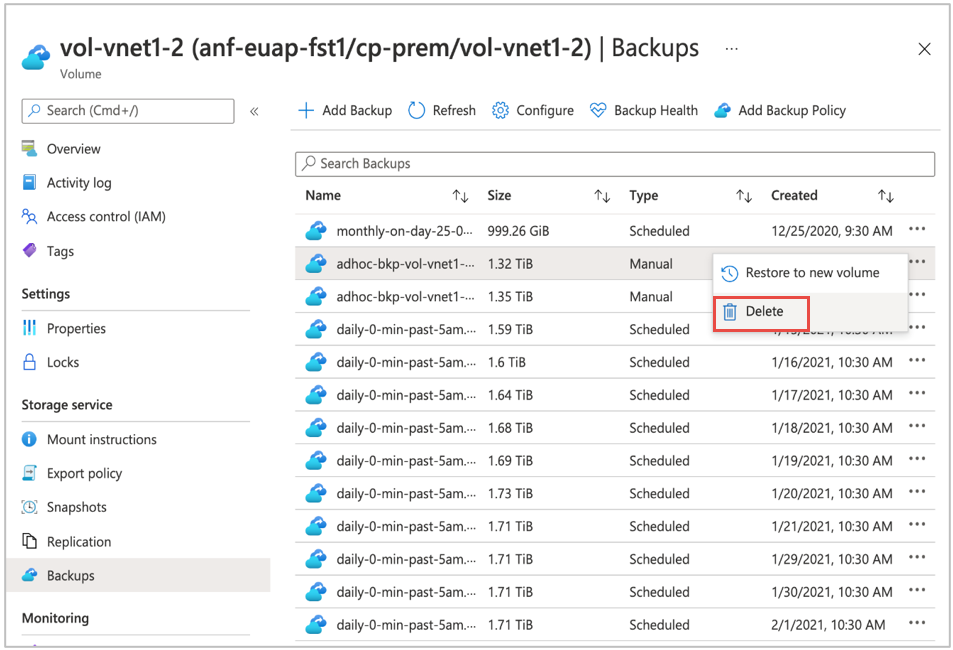
From the backup list, select the backup to restore. Select the three dots (...) to the right of the backup, then select Restore to new volume from the Action menu.
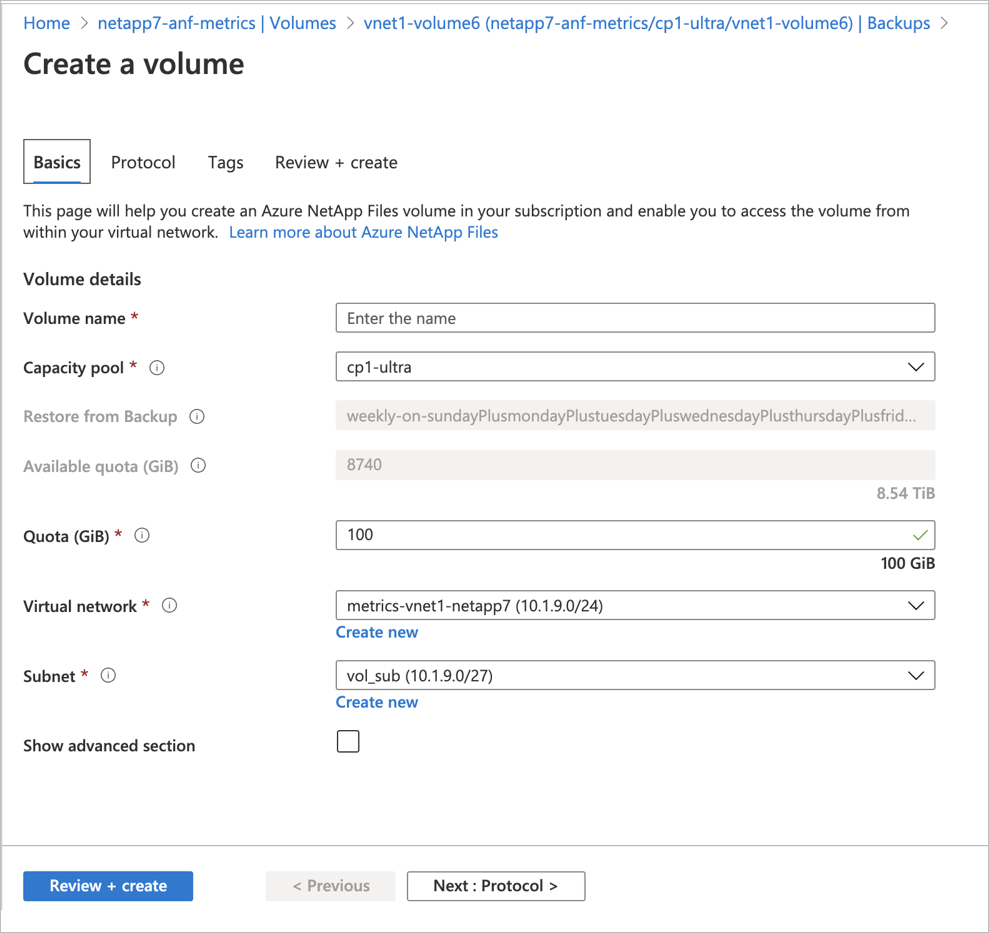
In the Create a Volume page that appears, provide information for the fields in the page as applicable, and select Review + Create to begin restoring the backup to a new volume.
- The Protocol field is prepopulated from the original volume and can't be changed.
- The Quota value must be at least 20% greater than the size of the backup from which the restore is triggered. Once the restore is complete, the volume can be resized depending on the size used.
- The Capacity pool that the backup is restored into must have sufficient unused capacity to host the new restored volume. Otherwise, the restore operation fails.
Task 11 - Delete backups of a volume
You can delete individual backups that you no longer need to keep for a volume. Deleting backups deletes the associated objects in your Azure Storage account, resulting in space saving.
Select Volumes.
Navigate to Backups.
From the backup list, select the backup to delete. Select the three dots (...) to the right of the backup then Delete from the Action menu.