Exercise - Control deployment order of resources
In this part, you start by performing a few basic setup tasks. In Visual Studio Code, you connect a terminal session to the Azure subscription that's provided by the free Azure sandbox environment. Doing so enables you to authenticate commands to Azure.
Then, you run a basic ARM template that provisions a Linux virtual machine (VM). After the deployment completes, you verify that the VM is running and connectable.
Although working with VMs is a common task, you discover that a VM resource requires networking and storage components that must exist before the VM can be created. You see how the dependsOn construct enables you to set the order in which resources are provisioned.
Setup
Here, you open Visual Studio Code, create a PowerShell session, and connect to the Azure subscription that's provided by the free Azure sandbox environment.
You need to perform these setup tasks one time during this module. You can refer back to these steps if you sign out or become disconnected in a later exercise.
Open PowerShell in Visual Studio Code
Open Visual Studio Code.
Open a terminal window by using the Terminal menu.
If the drop-down menu on the right of the terminal window shows pwsh, you have the right shell to work from, and you can skip to the next section.

If not, select the drop-down and choose Select Default Shell.
Select pwsh.
Select the + in the terminal to create a new terminal with pwsh as the shell.
Sign in to Azure
Run
Connect-AzAccountto sign in to your account.Connect-AzAccountA browser window appears.
Select the account that you used to activate the sandbox, and close the browser window when prompted.
Set the active subscription
Run
Get-AzSubscriptionto get the subscription ID for the sandbox environment.Get-AzSubscriptionLook for
Concierge Subscription, and copy the second column. It will look something like cf49fbbc-217c-4eb6-9eb5-a6a6c68295a0.Run
Set-AzContextto change your active subscription to the Concierge Subscription.Note
Be sure to substitute {Your subscription ID} with the ID of the Concierge Subscription you just got in the last command.
$subscription = Get-AzSubscription -SubscriptionId {Your subscription ID}
Set-AzContext $subscription
Set default resource group
Normally, when you run an Azure CLI command, you need to specify a resource group.
The sandbox provides a default resource group for you. To make the Azure CLI commands that follow easier to run, here you set the default resource group.
Run the Set-AzDefault cmdlet to set the default resource group.
Set-AzDefault -ResourceGroupName <rgn>resource group name</rgn>
Note
Normally, when you use PowerShell to deploy resource on Azure, you need to specify a resource group. You're bypassing this requirement by setting the context of your deployment, using Set-AzDefault.
What's in a typical VM deployment
When you deploy a VM, keep in mind that there are several resources that need to be deployed along with it in order for the VM to work.
Here's a brief summary of the types of resources that typically need to be deployed along with a VM:
- Microsoft.Storage/storageAccounts. A storage account provides disk space for the operating system and files.
- Microsoft.Network/publicIPAddresses. A public IP address enables you to connect to the VM from the internet.
- Microsoft.Network/networkSecurityGroups. A network security group contains rules for handling inbound and outbound traffic to your virtual network.
- Microsoft.Network/virtualNetworks. Your VM needs to be placed in a virtual network. This resource requires the network security group to be deployed before it.
- Microsoft.Network/networkInterfaces. This resource depends on two other resources: the public IP address and the virtual network.
- Microsoft.Compute/virtualMachines. The virtual machine is the primary resource you want to deploy. It's dependent on two different resources: the storage account and the network interfaces.
Deploy a Linux VM
Here, you download an ARM template from a GitHub repository that we provide for you. The template provisions a Linux VM and all of the resources necessary to run it.
Run the following
curlcommand to download the ARM template:curl -O 'https://raw.githubusercontent.com/Azure/azure-quickstart-templates/master/quickstarts/microsoft.compute/vm-simple-linux/azuredeploy.json'Run the
ConvertTo-SecureStringcmdlet, and assign the results to a PowerShell variable named$secure:$secure = "insecurepassword123!" | ConvertTo-SecureString -AsPlainText -ForceNow you have an encrypted version of your password that you can pass the deployment script next.
Run the command
New-AzResourceGroupDeploymentto deploy the template:New-AzResourceGroupDeployment ` -TemplateFile "./azuredeploy.json" ` -adminUsername "azureuser" ` -vmName "vm1" ` -adminPasswordOrKey $secureThe command can take a few minutes to run. While the command runs, you can examine the ARM template from a separate browser tab if you'd like.
Note the resource dependencies by searching for the
dependsOnkey. For example, the virtual machine resource depends on the network interface:"type": "Microsoft.Compute/virtualMachines", "apiVersion": "2020-06-01", "name": "[parameters('vmName')]", "location": "[parameters('location')]", "dependsOn": [ "[resourceId('Microsoft.Network/networkInterfaces/', variables('networkInterfaceName'))]" ],
Verify the deployment
Verify that the VM is provisioned and is connectable over SSH. To do so:
Run the
Invoke-Expressioncommand to connect to the VM over SSH:Invoke-Expression (Get-AzResourceGroupDeployment -Name azuredeploy -ResourceGroupName <rgn>your resource group</rgn>).outputs.sshCommand.valueWhen prompted, enter
yesto continue connecting. Then enter the administrator password,insecurepassword123!.Important
In practice, keep passwords safe. You can also use public key authentication, which is typically more secure than using passwords.
From your SSH connection to the VM, run
hostnameto print the VM's hostname:hostnameYou see the VM's internal hostname,
vm1:vm1Run
exitto leave your SSH session.exit
Congratulations, you've successfully deployed a Linux VM by using an ARM template. A VM is a common resource type that includes dependent resources.
Setup
Here, you open Visual Studio Code, create a terminal session, and connect to the Azure subscription that's provided by the free Azure sandbox environment.
You need to perform these setup tasks one time during this module. You can refer back to these steps if you sign out or become disconnected in a later exercise.
Open a shell in Visual Studio Code
Open Visual Studio Code.
Open a terminal window by using the Terminal menu.
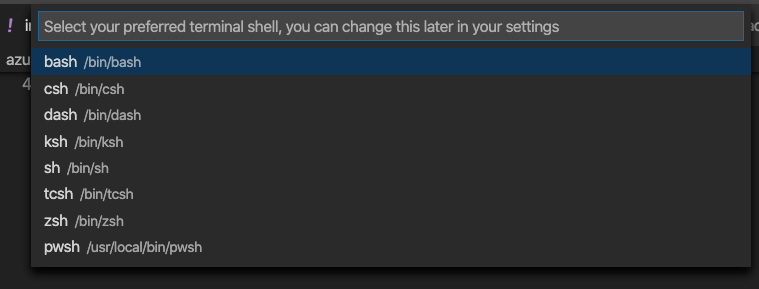
If the drop-down menu shows your preferred shell (bash or zsh, for example), you can skip to the next section.
If not, select the drop-down and choose Select Default Shell.
Select the type of shell you want.
Select the + in the terminal to create a new terminal with your selected shell type.
Sign in to Azure
From the terminal, run
az login:az loginA browser window appears.
Select the account that you used to activate the sandbox and close the browser window when prompted.
Set the active subscription
Run the following az account set command to set the Azure sandbox environment as your active subscription:
az account set -s "Concierge Subscription"
Note
If the command fails, run az account list --refresh --all, and then rerun the az account set command.
Set the default resource group
Normally, when you run an Azure CLI command, you need to specify a resource group.
The sandbox provides a default resource group for you. To make the Azure CLI commands that follow easier to run, here you set the default resource group.
Run the following az configure command to set the default resource group:
az configure --defaults group=<rgn>resource group name</rgn>
What's in a typical VM deployment
When you deploy a VM, keep in mind that there are several resources that need to be deployed along with it in order for the VM to work.
Here's a brief summary of the types of resources that typically need to be deployed along with a VM:
- Microsoft.Storage/storageAccounts. A storage account provides disk space for the operating system and files.
- Microsoft.Network/publicIPAddresses. A public IP address enables you to connect to the VM from the internet.
- Microsoft.Network/networkSecurityGroups. A network security group contains rules for handling inbound and outbound traffic to your virtual network.
- Microsoft.Network/virtualNetworks. Your VM needs to be placed in a virtual network. This resource requires the network security group to be deployed before it.
- Microsoft.Network/networkInterfaces. This resource depends on two other resources: the public IP address and the virtual network.
- Microsoft.Compute/virtualMachines. The virtual machine is the primary resource you want to deploy. It's dependent on two different resources: the storage account and the network interfaces.
Deploy a Linux VM
Here, you download an Azure Resource Manager (ARM) template from a GitHub repository that we provide for you. The template provisions a Linux VM and all of the resources necessary to run it.
Run the following
wgetcommand to download the ARM template:wget https://raw.githubusercontent.com/Azure/azure-quickstart-templates/master/quickstarts/microsoft.compute/vm-simple-linux/azuredeploy.jsonIf you don't have
wgetinstalled, you can run thiscurlcommand:curl https://raw.githubusercontent.com/Azure/azure-quickstart-templates/master/quickstarts/microsoft.compute/vm-simple-linux/azuredeploy.json > azuredeploy.jsonRun the
az deployment group createcommand to deploy the template:az deployment group create \ --template-file azuredeploy.json \ --parameters adminUsername=azureuser vmName=vm1 adminPasswordOrKey='insecurepassword123!'The command can take a few minutes to run. While the command runs, you can examine the ARM template from a separate browser tab if you'd like.
Note the resource dependencies by searching for the
dependsOnkey. For example, the virtual machine resource depends on the network interface:"type": "Microsoft.Compute/virtualMachines", "apiVersion": "2020-06-01", "name": "[parameters('vmName')]", "location": "[parameters('location')]", "dependsOn": [ "[resourceId('Microsoft.Network/networkInterfaces/', variables('networkInterfaceName'))]" ],
Verify the deployment
Verify that the VM is provisioned and is connectable over SSH. To do so:
Run the following
az deployment group listcommand to list the deployment groups in your subscription:az deployment group list --output tableYou see one deployment group, named azuredeploy:
Name         ResourceGroup                               State      Timestamp                         Mode
-----------  ------------------------------------------  ---------  --------------------------------  -----------
azuredeploy  learn-1ef901aa-3f6a-46aa-8e93-a7f11e5192b8  Succeeded  2020-11-24T17:55:39.762517+00:00  Incremental
Run the following
az deployment group showcommand to show the SSH command you can use to connect to the VM:az deployment group show \ --name azuredeploy \ --query properties.outputs.sshCommand.value \ --output tsvThe ARM template defines this property in the
outputsection. Here's an example:ssh azureuser@simplelinuxvm-a33zb3sc332ue.westus.cloudapp.azure.comRun the command again, this time using the
$()syntax to execute the SSH command:$(az deployment group show \ --name azuredeploy \ --query properties.outputs.sshCommand.value \ --output tsv)When prompted, enter
yesto continue connecting. Then enter the administrator password,insecurepassword123!.Important
In practice, keep passwords safe. You can also use public key authentication, which is typically more secure than using passwords.
From your SSH connection to the VM, run
hostnameto print the VM's hostname:hostnameYou see the VM's internal hostname,
vm1:vm1Run
exitto leave your SSH session.exit
Congratulations, you've successfully deployed a Linux VM by using an ARM template. A VM is a common resource type that includes dependent resources.