Review the Azure IoT Central UI tools for device management
As an Azure IoT Central operator or developer, you can:
- Use the Devices page to view, add, and delete devices connected to your Azure IoT Central application.
- Maintain an up-to-date inventory of your devices.
- Keep your device metadata up to date by changing the values stored in the device properties from your views.
- Control the behavior of your devices by updating a setting on a specific device from your views.
In addition to the tools that are built into the IoT Central application, you can also build custom tooling with the IoT Central REST API. The IoT Central REST API lets you develop client applications that integrate with IoT Central applications. You can use the REST API to control devices in your IoT Central application. The REST API lets you:
- Read the last-known telemetry value from a device.
- Read property values from a device.
- Set writable properties on a device.
- Call commands on a device.
For more information on using the IoT Central REST APIs, see the following resources:
- Use the REST API to manage devices: How to use the IoT Central REST API to manage devices.
- Use the REST API to query devices: How to use the IoT Central REST API to query devices
- General reference to the IoT Central REST API: Azure IoT Central REST API reference
View your devices
To view an individual device:
- Select Devices on the left pane. The Devices page provides access to your devices and device templates.
- Select a device template. The right-hand pane of the Devices page lists the devices created from the chosen device template.
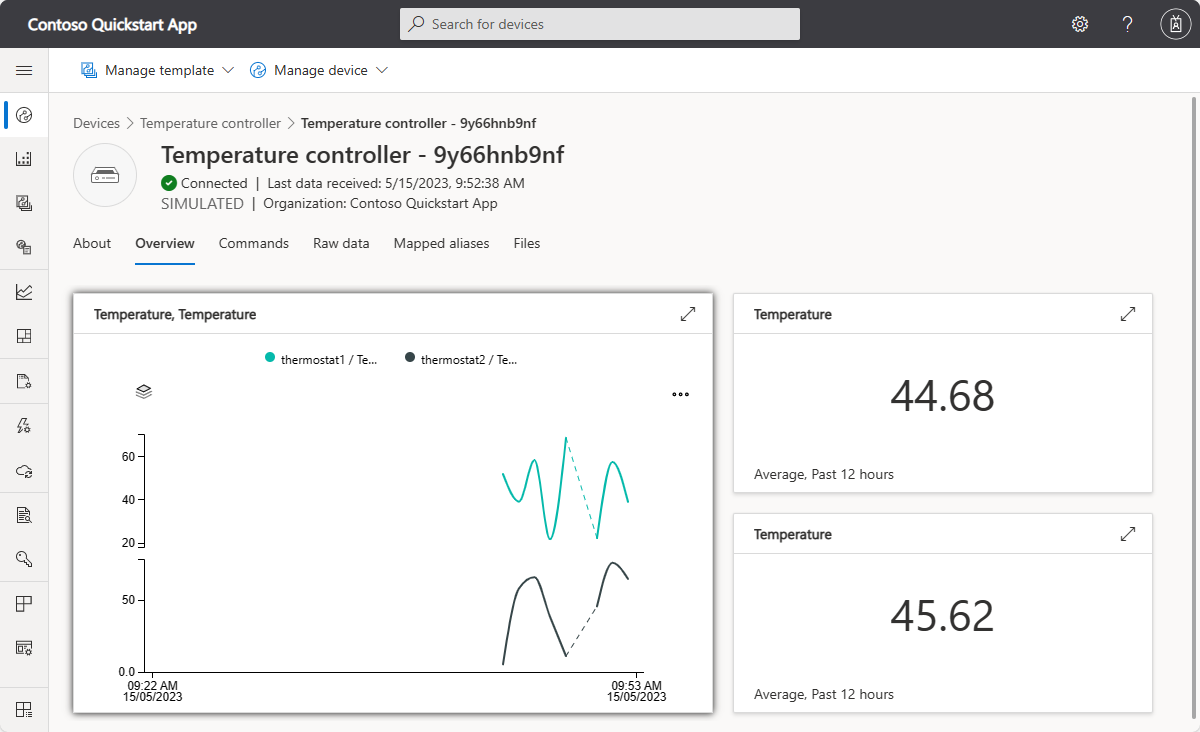
- Select an individual device to see the device details page for that device.
Add a device
To add a device to your Azure IoT Central application:
- Select Devices on the left pane.
- Select the device template from which you want to create a device.
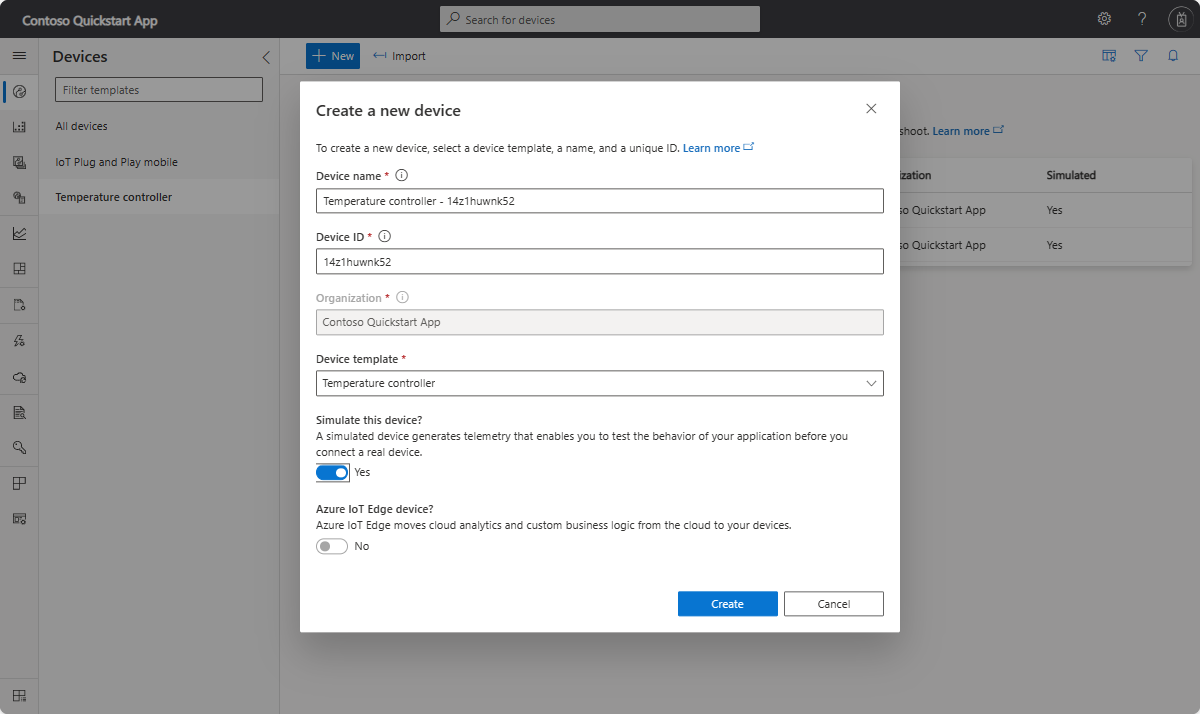
- Select + New.
- Turn the Simulated toggle to On or Off. A real device is for a physical device that you connect to your Azure IoT Central application. A simulated device has sample data generated for you by Azure IoT Central.
- Select Create.
Your new device now appears in your device list for this template. Select the device to see the device details page that contains all views for the device.
Import devices
To connect large number of devices to your application, you can bulk import devices from a CSV file. The CSV file should have the following columns and headers:
- IOTC_DeviceID - the device ID should be all lowercase.
- IOTC_DeviceName - this column is optional.
To bulk-register devices in your application:
Select Devices on the left pane.
On the left panel, choose the device template for which you want to bulk create the devices.
Tip
If you do not have a device template yet, then you can import devices under All devices and register them without a template. After devices have been imported, you can then migrate them to a template.
Select Import.
Select the CSV file that has the list of device IDs to be imported. Device import starts once the file has been uploaded. You can track the import status in the Device Operations panel. This panel appears automatically after the import starts or you can access it through the bell icon in the top right-hand corner.
Once the import completes, a success message is shown in the Device Operations panel.
If the device import operation fails, you see an error message on the Device Operations panel. A log file capturing all the errors is generated that you can download.
Migrating devices to a template
If you register devices by starting the import under All devices, then the devices are created without any device template association. Devices must be associated with a template to explore the data and other details about the device.
Follow these steps to associate devices with a template:
- Select Devices on the left pane.
- On the left panel, select All devices.
- Select the devices you want to associate with a template. The display grid showing your devices includes a Device Template column. A value of Unassociated is assigned for any devices that are not currently associated with a device template.
- Select Migrate. A list of available device templates is displayed.
- Select the desired template and select Migrate.
The selected devices will now be associated with the device template that you chose.
Export devices
To connect a real device to IoT Central, you need its connection string. You can export device details in bulk to get the information you need to create device connection strings. The export process creates a CSV file with the device identity, device name, and keys for all the selected devices.
To bulk export devices from your application:
- Select Devices on the left pane.
- On the left pane, select the device template from which you want to export the devices.
- Select the devices that you want to export, and then select the Export action. The export process starts. You can track the status using the Device Operations panel. When the export completes, a success message is shown along with a link to download the generated file.
- To download the file to a local folder on the disk, select the Download File link.
The exported CSV file contains the following columns: device ID, device name, device keys, and X509 certificate thumbprints
Delete a device
To delete either a real or simulated device from your Azure IoT Central application:
- Select Devices on the left pane.
- Select the device template of the device you want to delete. Use the filter tools to filter and search for your devices.
- Check the box next to the devices that you want to delete.
- Select Delete. You can track the status of this deletion in your Device Operations panel.
Change a property
Cloud properties are the device metadata associated with the device, such as city and serial number. Writable properties control the behavior of a device. In other words, they enable you to provide inputs to your device. Device properties are set by the device and are read-only within IoT Central. You can view and update properties on the Device Details views for your device.
- Select Devices on the left pane.
- Select the device template of the device whose properties you want to change, and then select the target device.
- Select the view that contains properties for your device. This view enables you to see the properties of your device and their current values. Cloud properties and writable properties have editable fields, while device properties are read-only. For writable properties, you can see their sync status at the bottom of the field. A Save button is located at the top of the page.
- Modify the properties to the values you need. You can modify multiple properties one at a time and update them all at the same time.
- Select Save. If you saved writable properties, the values are sent to your device. When the device confirms the change for the writable property, the status returns back to synced. If you saved a cloud property, the value is updated.