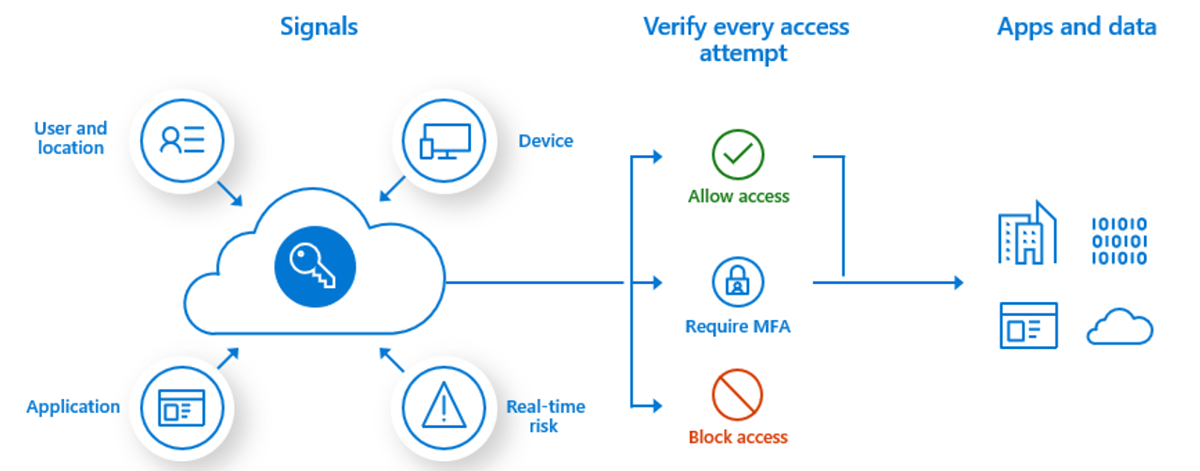
Plan and implement multifactor authentication (MFA) in Azure Virtual Desktop
The Windows client for Azure Virtual Desktop integrates Azure Virtual Desktop with your local machine. However, when you configure your Azure Virtual Desktop account into the Windows client, there are certain actions you'll need to take to keep your users safe.
When you first sign in, the client asks for your username and password. The next time you sign in, the client will remember your token from your Microsoft Entra Enterprise Application. When they select Remember me on the prompt for credentials for the session host, your users can sign in after restarting the client without needing to reenter their credentials.

While remembering credentials is convenient, it can also make deployments on Enterprise scenarios or personal devices less secure. To protect your users, you can make sure the client keeps asking for multifactor authentication credentials more frequently.
This unit shows you how to configure the Conditional Access policy for Azure Virtual Desktop to enable this setting.
Here's what you'll need:
- Assign users a license that includes Microsoft Entra ID P1 or P2.
- A Microsoft Entra group with your users assigned as group members.
- Enable multifactor authentication for all your users.
Create a Conditional Access policy
Here's how to create a Conditional Access policy that requires multifactor authentication when connecting to Azure Virtual Desktop:
- Sign in to the Azure portal as a global administrator, security administrator, or Conditional Access administrator.
- Browse to Microsoft Entra ID > Security > Conditional Access.
- Select New policy.
- Give your policy a name. We recommend that organizations create a meaningful standard for the names of their policies.
- Under Assignments, select Users and groups.
- Under Include, select Select users and groups > Users and groups > Choose the group you created.
- Select Done.
- Under Cloud apps or actions > Include, select Select apps.
- Select one of the following apps based on which version of Azure Virtual Desktop you're using. Choose Azure Virtual Desktop (App ID 9cdead84-a844-4324-93f2-b2e6bb768d07)
- Go to Conditions > Client apps, then select where you want to apply the policy to:
- Select Browser if you want the policy to apply to the web client.
- Select Mobile apps and desktop clients if you want to apply the policy to other clients.
- Select both check boxes if you want to apply the policy to all clients.
- Once you've selected your app, choose Select, and then select Done.
- Under Access controls > Grant, select Grant access, Require multifactor authentication, and then Select.
- Under Access controls > Session, select Sign-in frequency, set the value to the time you want between prompts, and then select Select. For example, setting the value to 1 and the unit to Hours, will require multifactor authentication if a connection is launched an hour after the last one.
- Confirm your settings and set Enable policy to On.
- Select Create to enable your policy.