Setting security policies
In this unit, you'll learn more about the preventive measures you can take to maintain the health of your GitHub repositories.
Suppose you're an administrator who is helping to onboard many new collaborators to your organization. You need to make sure they contribute to the proper repositories and have easy access to assistance if they discover a security threat. To do this, you set security policies.
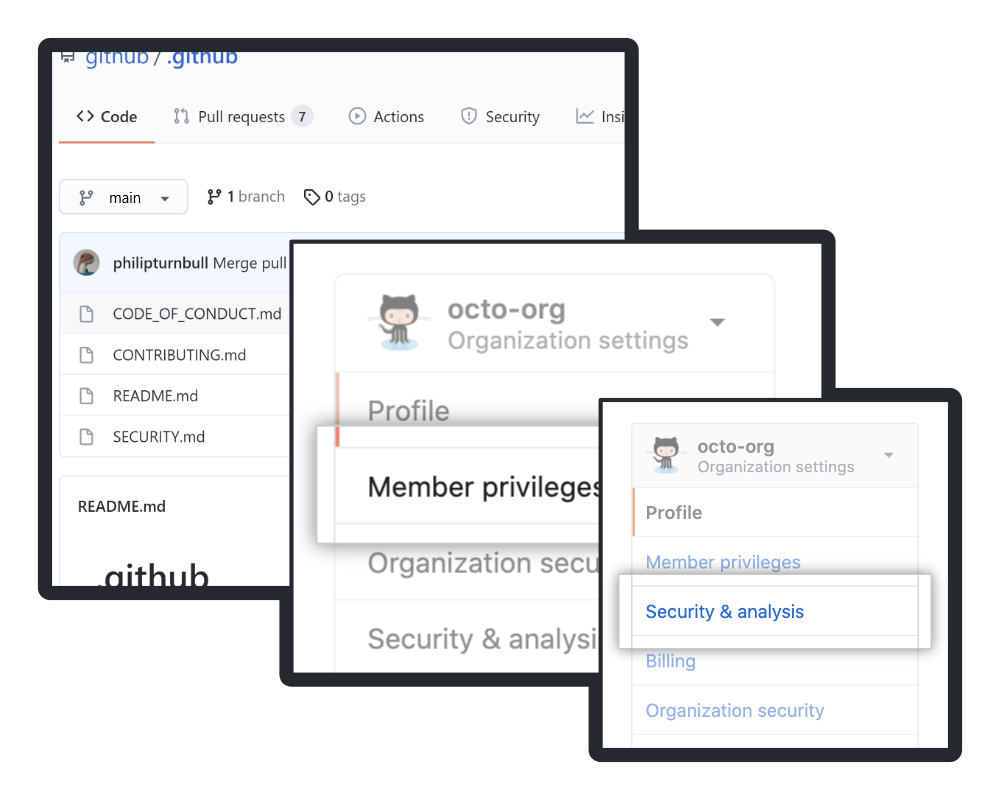
A repository, organization, or enterprise's security policies are the practices and settings that maintain the integrity of users' data and systems. A security policy defines what it means for a system, organization or other entity to be secure, and limits permissions to support that definition. What does that mean for you and your GitHub ecosystem? When you create security policies, you're telling collaborators how to work in ways that maintain code health. Security policies also provide resources for responding to security vulnerabilities, and limit collaborators' access.
As an administrator, you can set some security policies individually at each level of your control (repo, organization, and enterprise). For instance, you can give individual organization owners permission to allow collaborator write-access or other kinds of access, or as the admin, you can require all organizations in an enterprise allow only a certain kind of access.
Documentation and security settings serve three broad purposes.
- Standardization: Security policies ensure that everyone on your project responds in the same way to common issues, making it easier to know what is happening and why.
- Compliance: The countries/regions where you plan to develop and publish your projects might require that you follow industry-standard practices in coding and recording security events.
- Preventing critical failure: Most importantly, solid policies defend against events that threaten continued development, like publishing trade secrets or intellectual property.
Documentation
As an administrator working on the team responsible for setting up a new repository, the first thing you should do is create certain default community health files. GitHub assigns special significance to these files that makes it easy for collaborators to find them. In this section, you'll learn about the characteristics of these key files.
If you've ever contributed to or looked at an open source project, you'll quickly be able to tell if that project has a healthy contribution level. This is directly related to how closely the project follows recommended community standards, which include a list of recommended documentation files like a README, CODE_OF_CONDUCT.md, or CONTRIBUTING.md file. Just like an open source project with documentation on how to best contribute, your repository, organization, or enterprise benefits from a list of recommended documentation on your specific security policies.
These files record information about security preparation, key contacts, and the project background. They tell collaborators and other users what measures you've taken to protect them, what to do or who to call in the event of a security issue, and provide guidelines for contributing to the project.
SECURITY.md
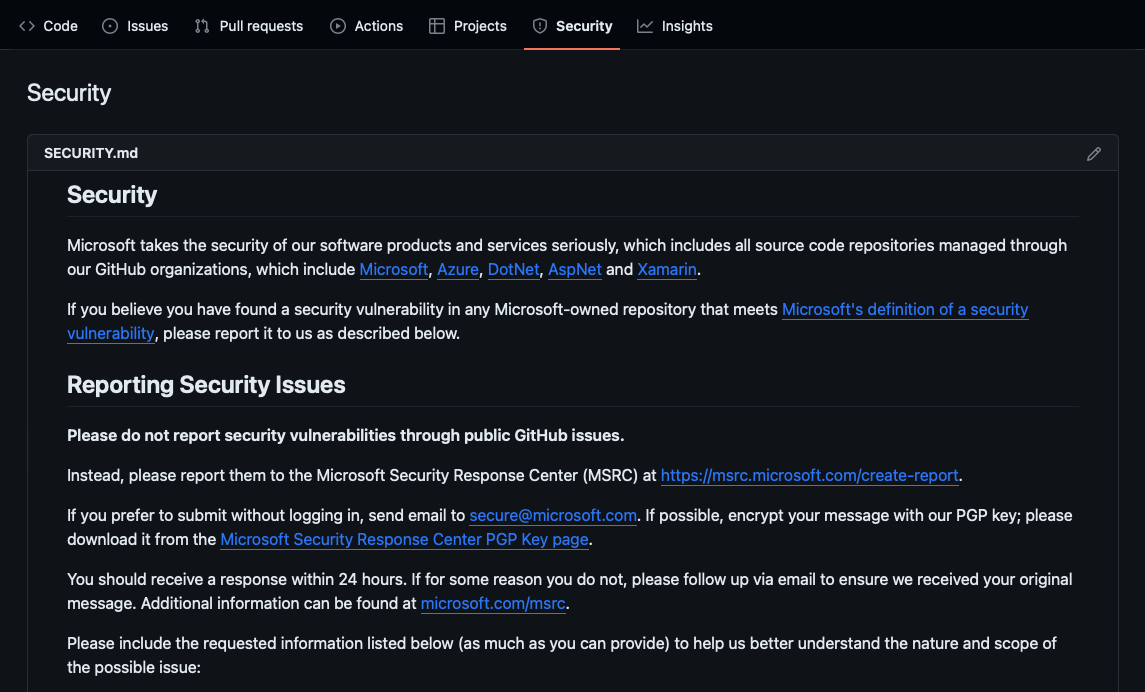
To give people instructions for reporting security vulnerabilities in your project, you can add a SECURITY.md file to your repository. SECURITY.md is the primary document for communicating security information. It's a Markdown file in a repository's root, docs, or .github folder. The SECURITY.md file should include:
- A list of supported versions of the project.
- A way to report a security vulnerability.
It might also include:
- Information about the project's compliance with key privacy and security laws.
- Technologies that administrators and stakeholders use to secure information.
- Known risks.
Other default community health files
A user might add other community health documentation at the organization level or in their user account. GitHub supports the following community health documentation:
| Community health file | Description |
|---|---|
| CODE_OF_CONDUCT.md | A CODE_OF_CONDUCT file defines standards for how to engage in a community. |
| CONTRIBUTING.md | A CONTRIBUTING file communicates how people should contribute to your project. |
| Discussion category forms | Discussion category forms customize the templates that are available for community members to use when they open new discussions in your repository. |
| FUNDING.yml | A FUNDING file displays a sponsor button in your repository to increase the visibility of funding options for your open source project. |
| GOVERNANCE.md | A GOVERNANCE file lets people know about how your project is governed. For example, it might discuss project roles and how decisions are made. |
| Issue and pull request templates and config.yml | Issue and pull request templates customize and standardize the information you'd like contributors to include when they open issues and pull requests in your repository. |
| README.md | A README file a guide that provides users with a detailed description of your project. |
| SECURITY.md | A SECURITY file gives instructions for how to report a security vulnerability in your project. |
| SUPPORT.md | A SUPPORT file lets people know about ways to get help with your project. |
GitHub considers files of these types to have specific purpose, and requires you to follow the listed naming scheme when creating or updating them.
GitHub uses and displays these default files for any repository owned by the account that doesn't have its own file of that type in any of the following places:
- The root of the repository
- The
.githubfolder - The
docsfolder
Security settings
The other component of creating robust security policies is taking advantage of GitHub's built-in security settings and features. Imagine you're onboarding collaborators whose scope of work varies; some are part of focused teams to implement a feature, while others are responsible for watching over the code base for issues, and a few others might need to assist you with administrative duties. In this section, you'll learn about settings that define user permissions and allow automation of common security tasks.
Change settings according to a trust and control position
Every organization has a trust and control position: circumstances that determine how much trust you can safely extend to individual collaborators and teams, and how much control you need to maintain over basic permissions.
If your organization is a new business with a small team, it likely has few moving parts and few areas of potential security vulnerability. After all, when team members work in the same office or in nearby time zones, it's easy to identify who can take specific actions and how to contact them. In this case, you can safely trust most or all collaborators with high levels of access and capability.
On the other hand, if your organization is very large, with teams in many separate time zones or continents, determining who to contact to resolve incidents can be difficult. Even getting in touch with the right person once you've identified them might require significant planning. This means that team leaders are in a position to trust fewer people with high levels of access and capability, because troubleshooting problems takes more time as the team extends privileges to more users.
At what levels can administrators change security settings?
Before we go further, you should know that you can configure security settings at the organization and enterprise level. These choices are also part of organization policies and Enterprise policies; choosing settings for individual organizations or for the entire enterprise goes hand in hand with creating the proper documentation as discussed previously.
Here's an example of a basic security setting you could change at the organization level or for a whole enterprise.
- You might choose to set base permissions for all members of one organization working in any repository owned by that organization. Select Settings in Your organizations to give collaborators a uniform level of access (None, Read, Write, or Admin). With this setting, one organization's members could have Read access to its repositories, while another organization's members could have Write access.
- Alternately, you could apply that setting to every organization covered by the Enterprise plan. Select an enterprise from Your enterprises and choose Policies. The Repository policies tab enables you to review the base permissions for every user in every organization in the enterprise, and change them to None, Read, Write, or Admin. With this setting, only specific individuals to whom you grant special privileges are able to exceed the base permission level.
As you can see, settings that Enterprise administrators enforce cascade down to all organizations covered by the GitHub Enterprise plan, while settings not covered by Enterprise administrators are free to be customized by organization administrators. Only GitHub Enterprise administrators and organization owners can configure organization security settings.
Changing security settings at the organization level or for all organizations covered by the Enterprise plan is powerful, because it can standardize user capabilities during unusual circumstances. In the preceding example, you might need to restrict capabilities to all but a few users for an organization—or even for the whole enterprise—in response to a security threat. In contrast, you could temporarily allow greater capabilities to all users in an organization during a rare development effort where you need help from extra personnel.
Note
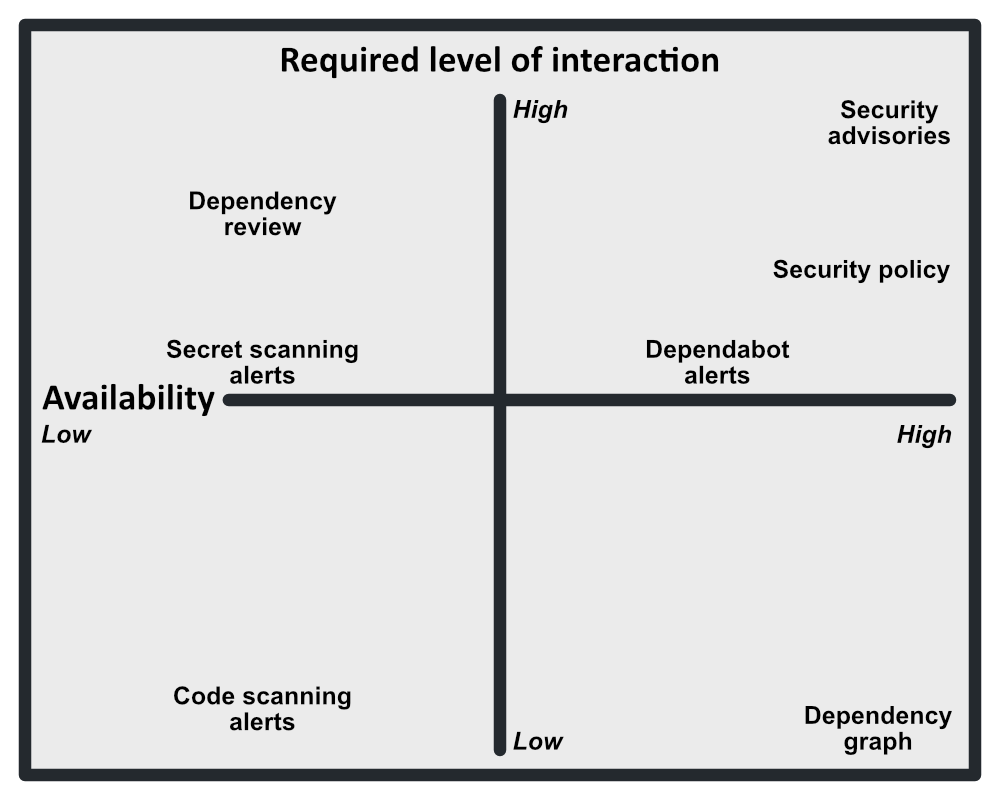
Available settings and tools differ based on the type of repository. In addition, these settings and features differ in their level of required user interaction.
What kinds of security settings are available to administrators?
Access restrictions, security documentation, advisories, Dependabot alerts and security updates, Dependabot version updates, and the GitHub dependency graph are available for all repositories. Documentation and advisories require the most significant manual interaction, but applying Dependabot to your code base automates parts of the security process, up to and including updating dependencies.
Code scanning alerts, secret scanning alerts, and dependency review provide further automation to the security process. Enabling these GitHub features will flag vulnerabilities in code submitted to a repository, highlighting suspicious code. However, these features are only available for private repositories with an Advanced Security license or public repositories.
If you have a security vulnerability, you can create a security advisory to privately discuss and fix the vulnerability.
Security advisories
You've been vigilant in your efforts to maintain healthy code, establishing clear policies and enacting settings to help collaborators work within their scope. But despite your team's efforts, someone identified a vulnerability in published code. This happens to every team sooner or later--no one is perfect.
When you identify a security threat, your team's response will go beyond patching offending sections of code. In this section, you'll learn the basics of the GitHub security advisory tools that allow you to draft and publish comprehensive documentation on the nature of the threat.
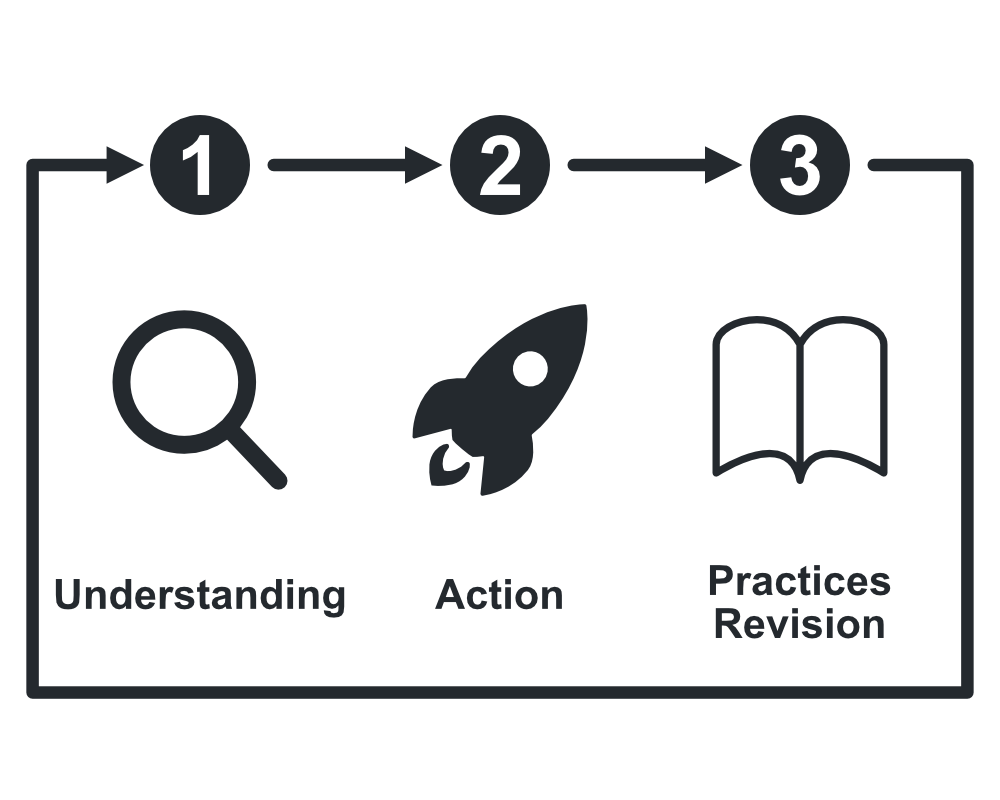
GitHub security advisories provide a historical narrative for users that demonstrates that you understand the nature of the threat, have addressed the immediate threat, and have taken steps to prevent similar threats in the future.
In service of these goals, a security advisory should be comprehensive and include following information:
- Product and versions affected
- Severity
- Types of security weaknesses addressed by the project owners' actions
- Impact, status of patches, and workarounds
Administrators are responsible for publishing security advisories. GitHub's system for publishing security advisories guides the administrator through the process of writing comprehensive documentation.
Check if the vulnerability you're patching matches an existing entry on the Common Vulnerabilities and Exposures list, or if it fits into a Common Weakness Enumeration category. GitHub's tools for creating security advisories are geared toward presenting this information, because it allows users to quickly understand the security vulnerabilities they face.