Deploy and install VMware HCX
Remember that VMware HCX Advanced deploys by default when Azure VMware Solution deploys in Azure. Before configuring site pairings for your migration, use the next steps for deployment and configuration of VMware HCX Connector on-premises.
To complete the exercises, you need access to an Azure subscription with contributor rights assigned to configure an Azure VMware Solution environment.
Download VMware HCX Connector
Before you deploy VMware HCX Connector in the on-premises vCenter, download the VMware HCX Connector OVA file from the Azure portal.
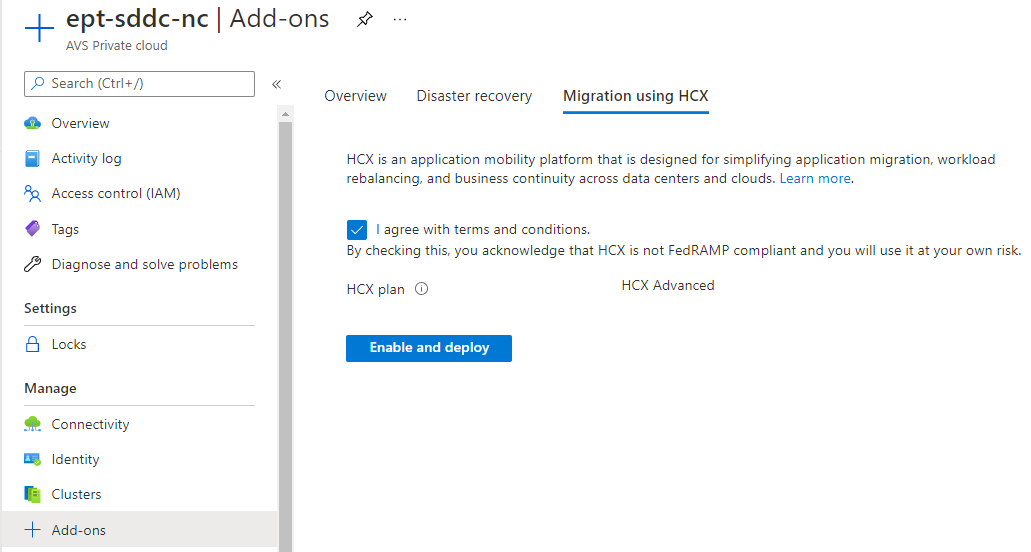
Search for and select the Azure VMware Solution private cloud in the Azure portal.
Under Manage, select Add-ons.
Select the Migration using HCX tab, place a check mark next to I agree with terms and conditions, and select Enable and deploy.
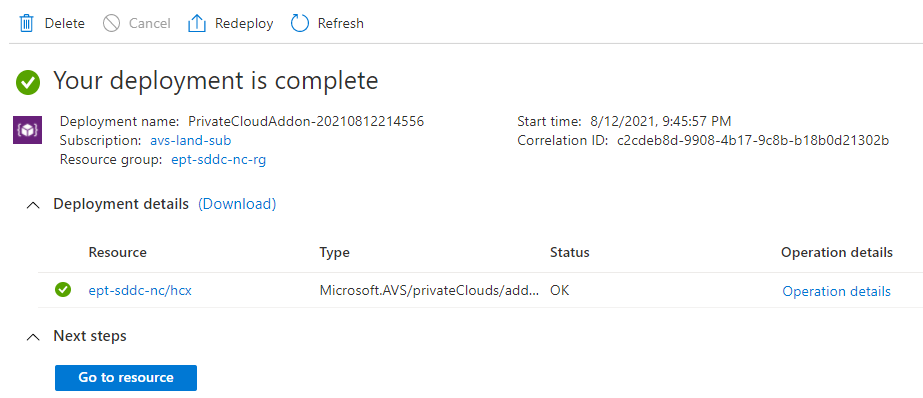
This action triggers a build of VMware HCX Advanced within the Azure VMware Solution private cloud.
After the build completes, you should see a similar screen to the following image:
Within the Azure VMware Solution resource, under Manage, select Add-ons again.
In the Migration using HCX tab, you should now have HCX plan, Configure HCX appliance, and Connect with on-premise using HCX keys. All of these new options for configuration built out during the HCX Advanced deployment on the private cloud.
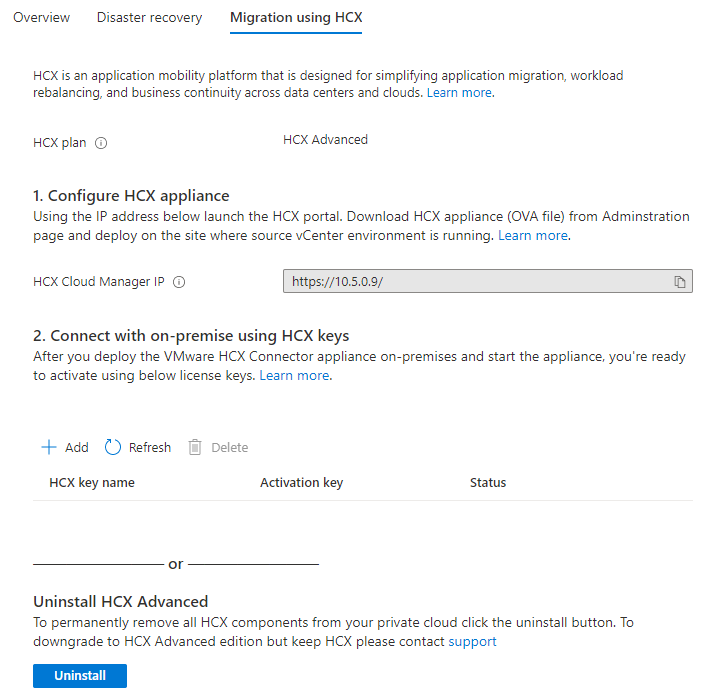
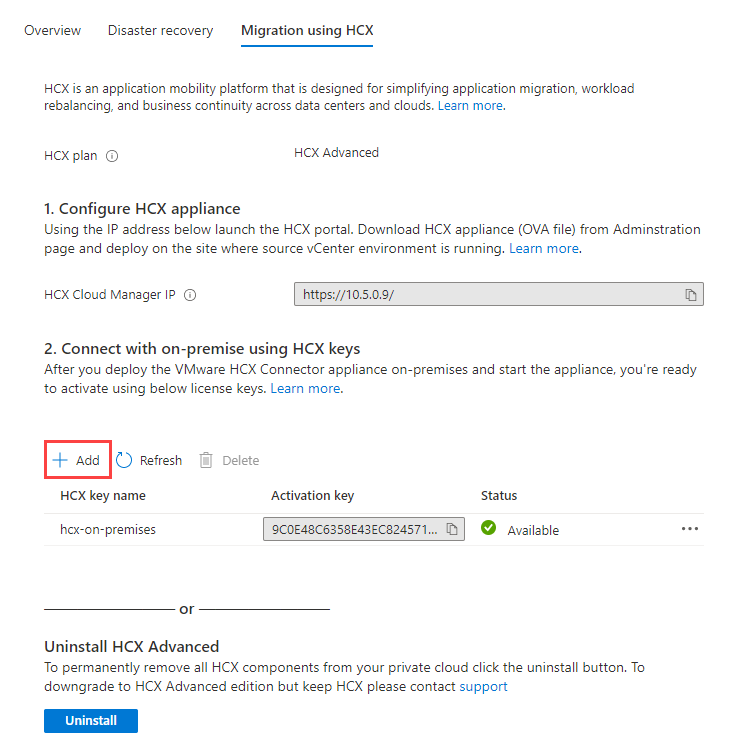
Select + Add under Connect with on-premise using HCX keys to generate a key that you use for the on-premises HCX Connector installation.
Supply a VMware HCX key name and you see the activation key shows up within this pane. This key is used to activate the on-premises VMware HCX Connector appliance.
Next, under Manage on the Azure VMware Solution private cloud, select Identity.
The URLs and user credentials for the Azure VMware Solution vCenter and NSX-T Manager appears. Use the copy feature to paste the credential information into the web browser on the jump host VM.
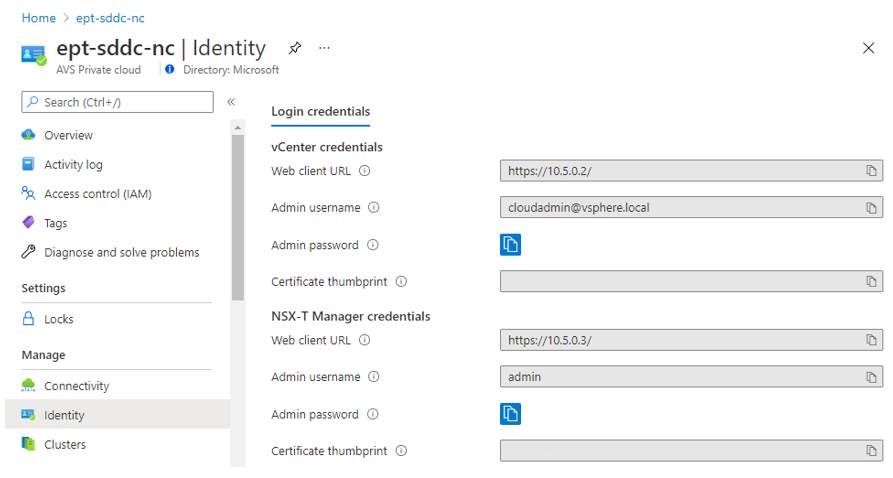
Open a browser window within the jump host behind Azure Bastion. Sign in to the Azure VMware Solution VMware HCX Manager on
https://x.x.x.9over port 443. Replace the x's with the CIDR address block used to configure with Azure VMware Solution.Use the cloudadmin@vsphere.local user credentials to sign in.
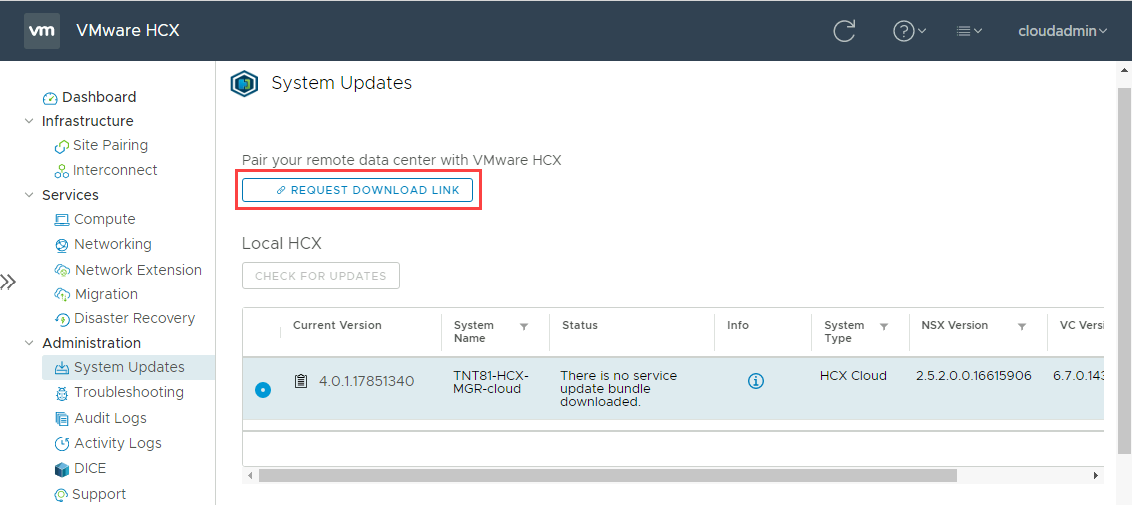
Within VMware HCX Cloud Manager, select Administration > System Updates > Check for Updates.
After VMware HCX checks for a software update, select Request Download Link.
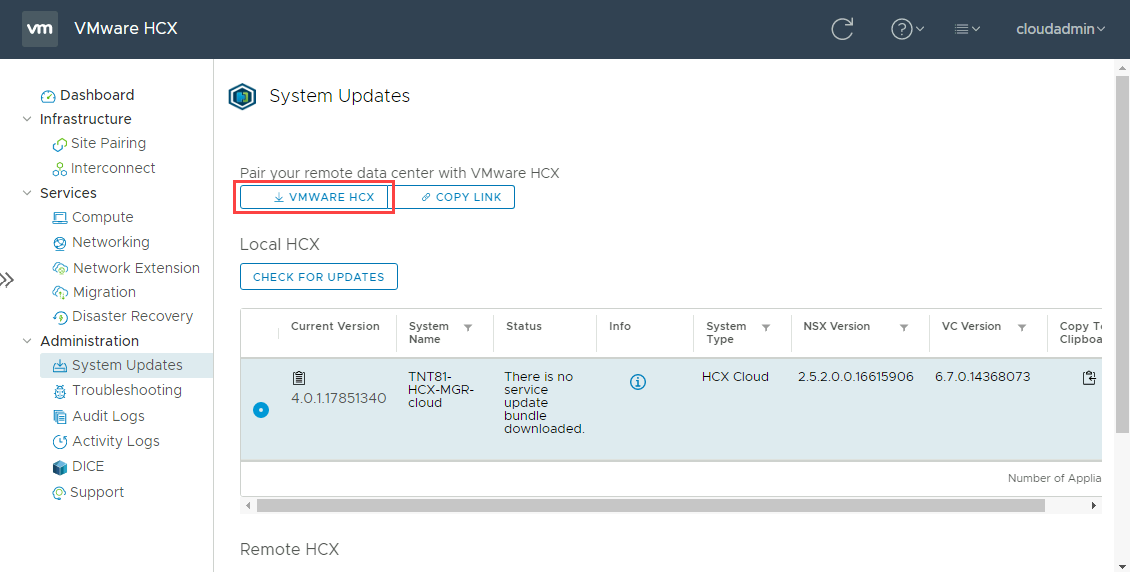
Select VMware HCX to download the VMware HCX Connector OVA file.
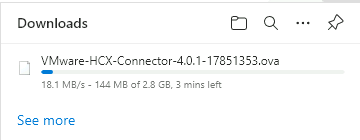
In the web browser you chose to use, you see a status bar. This status bar highlights how long it takes to download the OVA file.
Deploy the VMware HCX Connector OVA on-premises
Next, the VMware HCX Connector OVA file needs to be installed in the on-premises VMware environment. Sign in to the web GUI of vCenter and begin deployment of the OVA file on-premises.
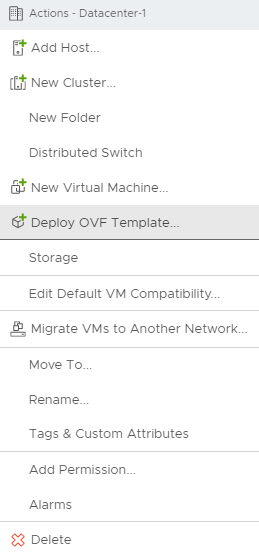
Right-click the vCenter datacenter and select Deploy OVF Template.
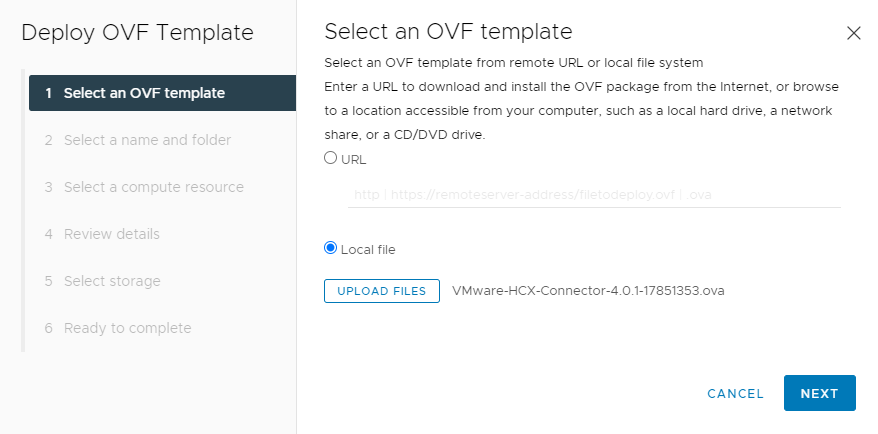
Select the local VMware HCX Connector OVA file already downloaded from the Azure portal.
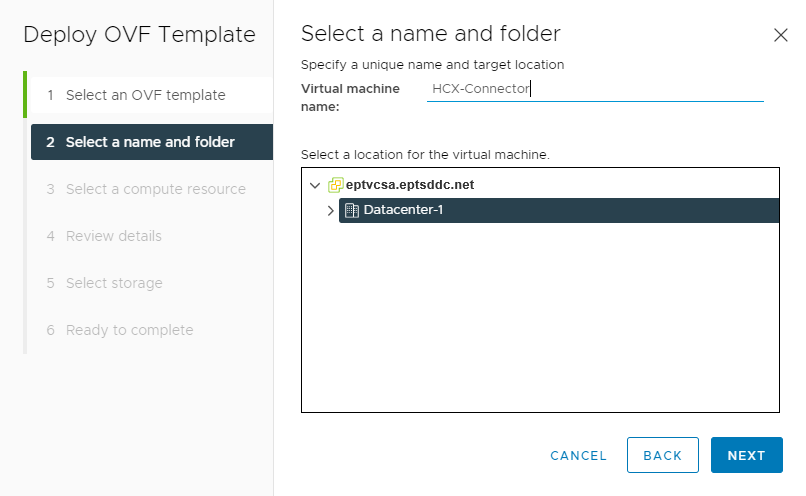
For Select a name and folder, provide a name for the VMware HCX Connector appliance, select the datacenter resource, and select Next.
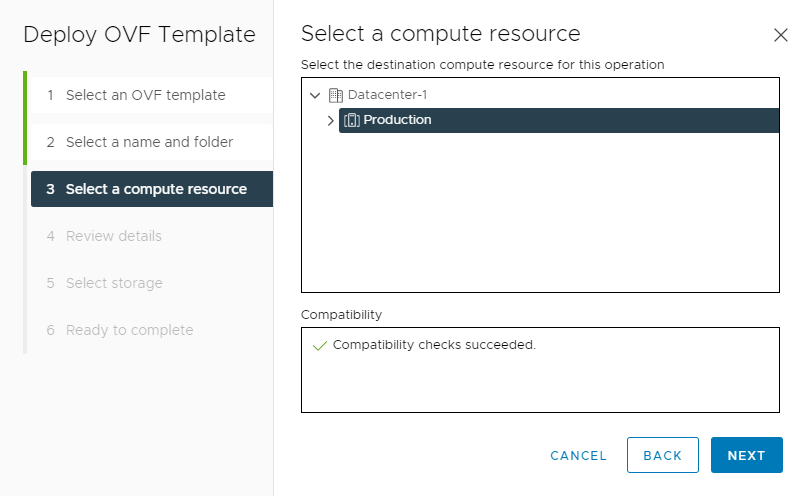
For Select a compute resource, select the vSphere cluster, then select Next.
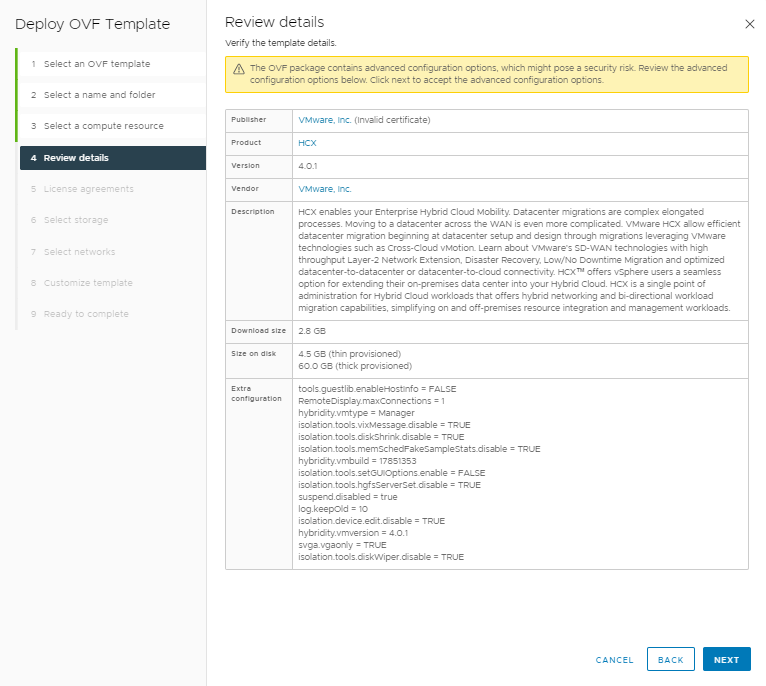
Review the advanced configuration options and select Next.
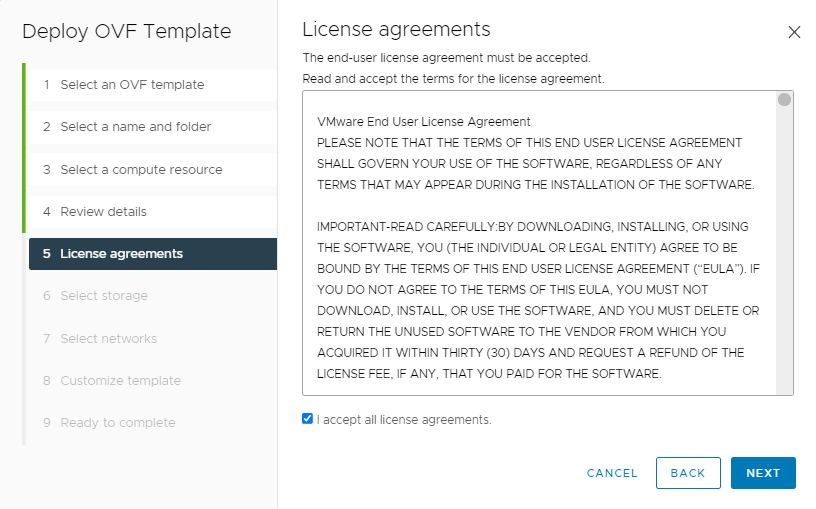
For License agreements, if you agree, select I accept all license agreements, then select Next.
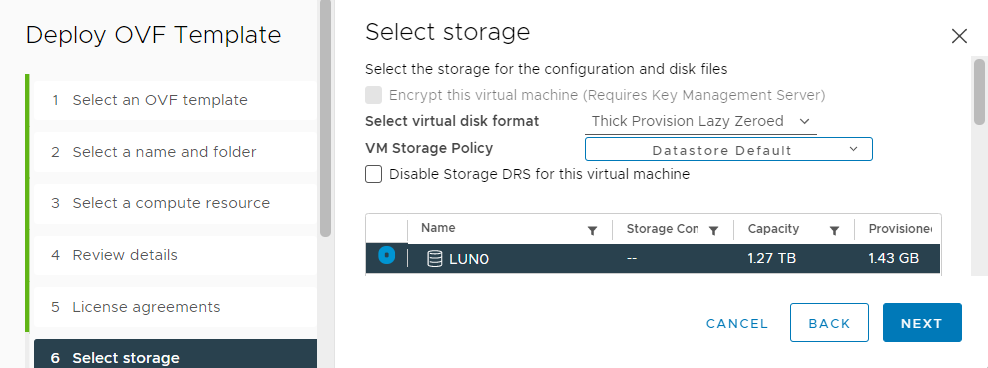
Select the right storage on which to deploy VMware HCX Connector, then select Next.
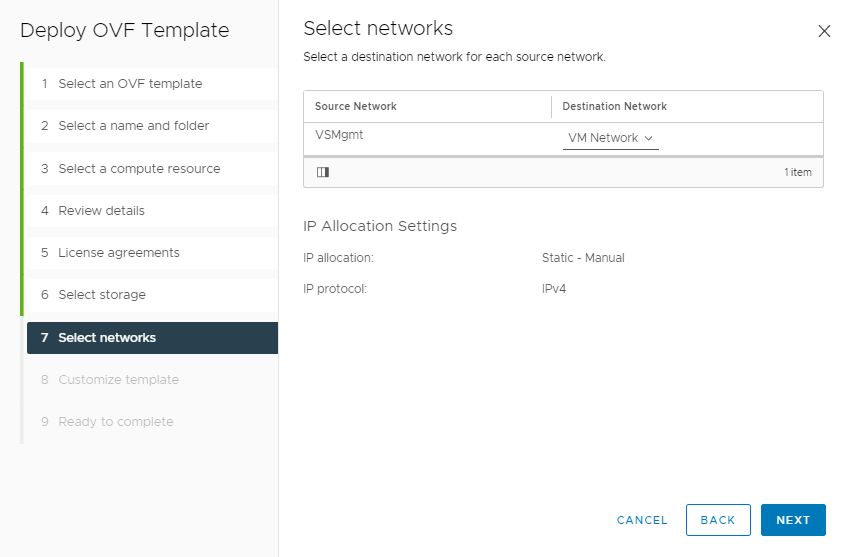
Select the VMware HCX management network segment, then select Next.
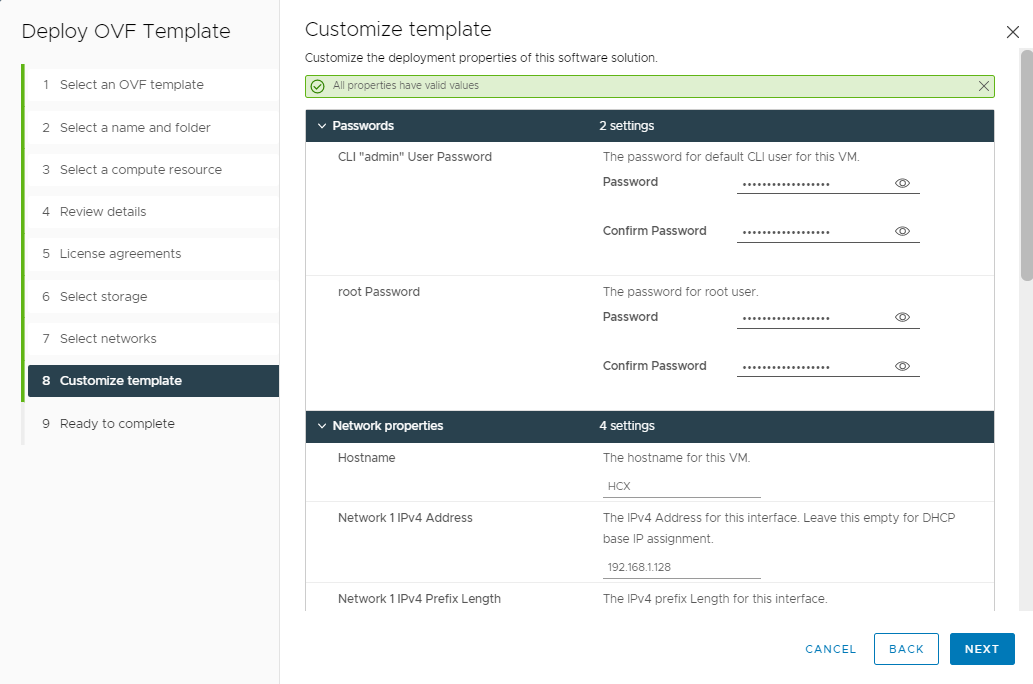
In Customize template, note the user account used to configure VMware HCX Connector is admin. Enter all required information, then select Next.
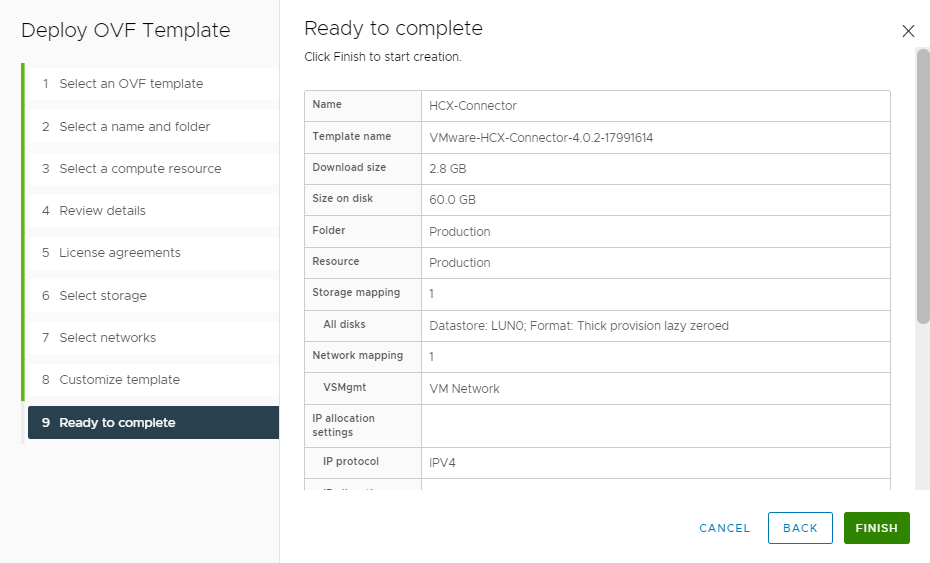
On Ready to complete, verify all configurations and select Finish.
After the appliance deploys, you'll need to power on the virtual appliance manually in vCenter. Then wait 10-15 minutes before finishing the configuration.
Activate VMware HCX
After deploying and powering on the VMware HCX Connector appliance on-premises, you activate VMware HCX Connector. You need to get a license key from the Azure VMware Solution environment in Azure.
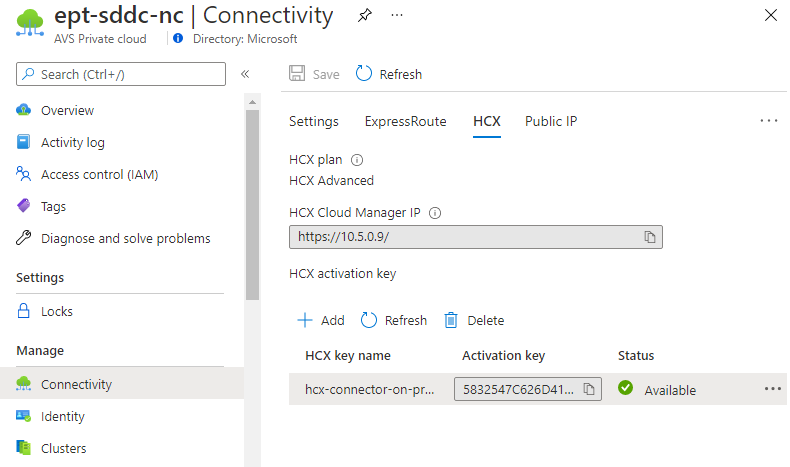
Under Manage > Connectivity, select the HCX tab, and then select + Add.
Provide a name for the key and wait for Azure to generate a VMware HCX Advanced key for use on-premises.
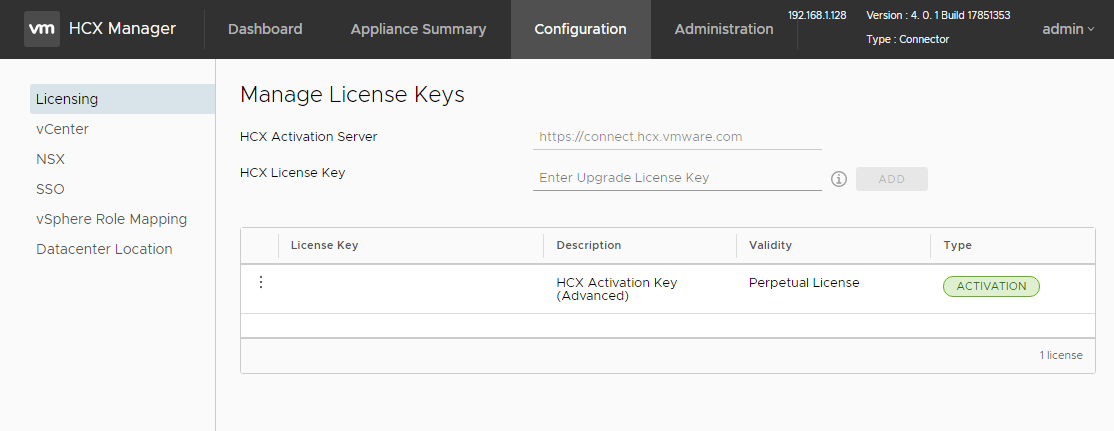
Use the admin credentials you configured earlier to sign in to the on-premises VMware HCX Manager at
https://x.x.x.x:9443. Replace the x's with the IP address configured for the on-premises appliance.When prompted, enter your key for HCX License Key, then select Add. If you receive any errors during activation, the on-premises environment might not have open internet access or a proxy configured for activation. Check internet connectivity if VMware HCX Connector on-premises doesn't activate.
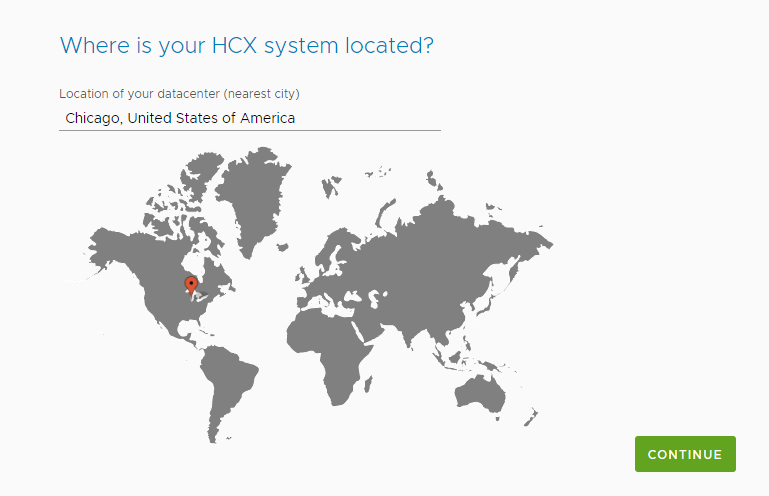
In Datacenter Location, provide the nearest location for installing VMware HCX Connector on-premises, then select Continue.
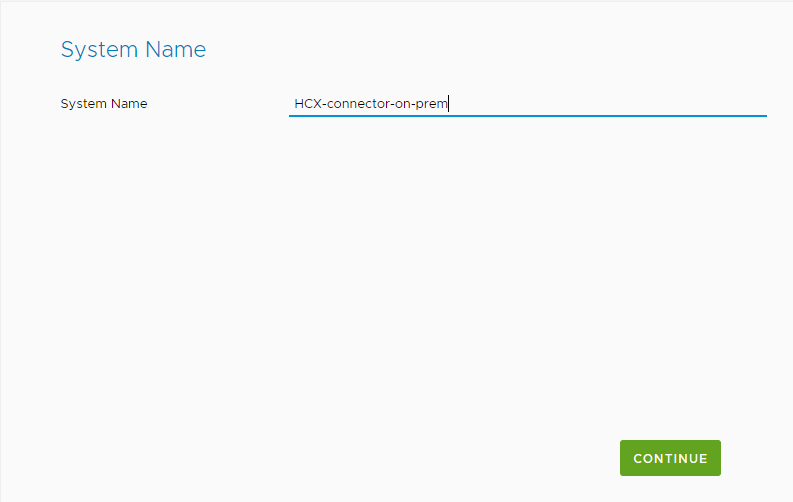
In System Name, modify the VMware HCX Connector appliance name or accept the default name, and select Continue.
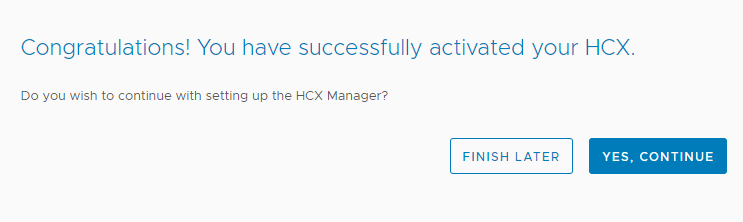
On the next screen, select Yes, Continue to continue setting up VMware HCX Connector on-premises.
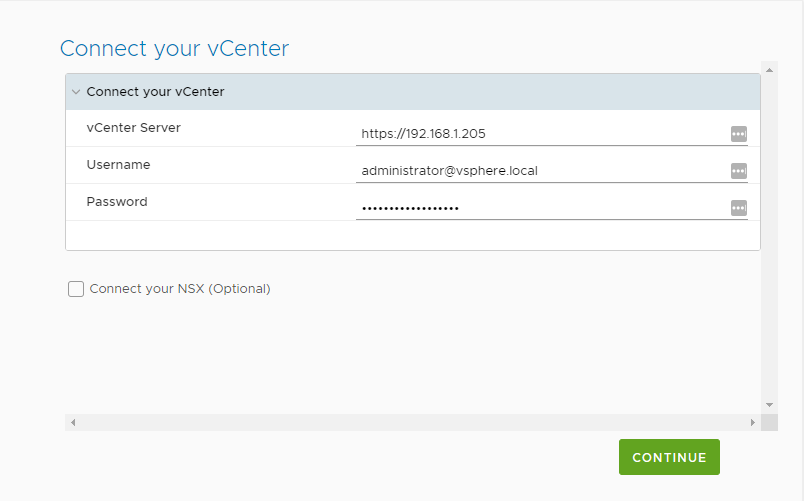
For Connect your vCenter, provide the FQDN or IP address of your vCenter server on-premises.
Use a username and password of an account that can access vCenter on-premises, then select Continue.
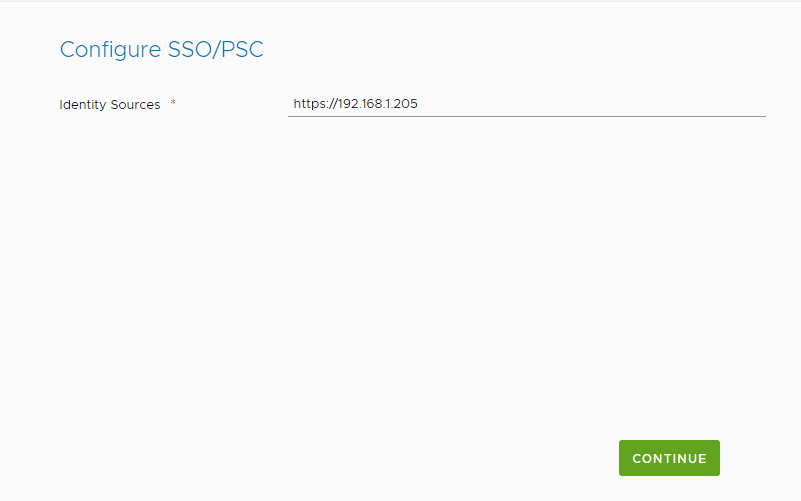
In Configure SSO/PSC, provide the FQDN or IP address of your Platform Services Controller, then select Continue.
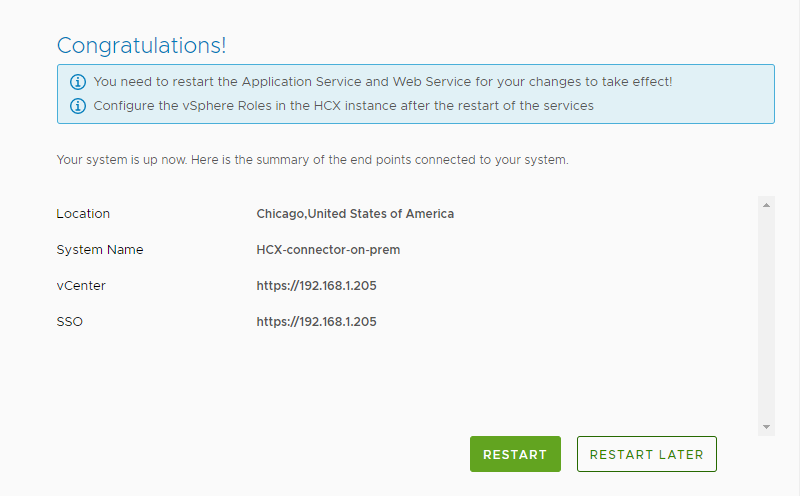
On the next screen, verify that the information is correct and select Restart. A restart can take some time to complete.
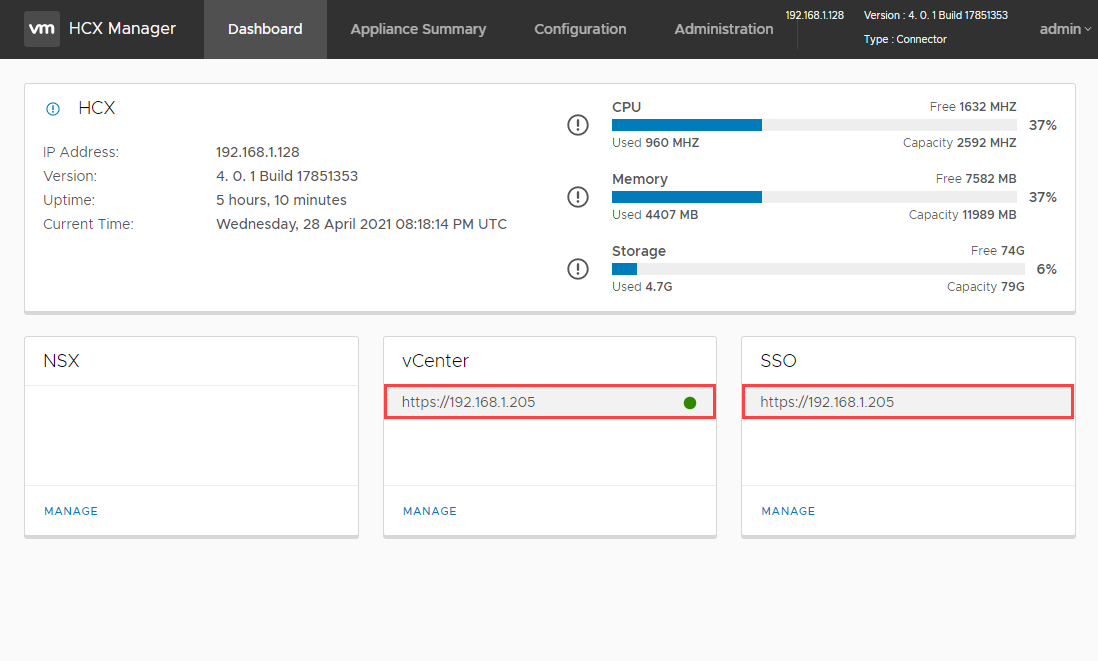
After the appliance restarts, sign back in to the VMware HCX Manager on-premises.
If configured correctly, vCenter appears with a green circle after you sign in.
Additionally, SSO indicates that VMware HCX Connector is configured to use the Platform Services Controller on-premises.
In the next unit, we'll cover how to set up a site pairing, add networking profiles, and add a compute profile.