Configure networking and compute profiles for VMware HCX
After VMware HCX Connector is installed on-premises, link it to VMware HCX Cloud in Azure VMware Solution. This unit and the next one go over the steps involved in this task.
What is a site pair?
The first step involves creating a site pair. A site pair provides network connectivity needed for management, authentication, and orchestration of VMware's HCX migration services across a source and destination VMware vSphere environment. In your scenario, the source is the on-premises VMware vSphere environment and the destination is Azure VMware Solution. The following table provides additional details:
| Component | Notes |
|---|---|
| HCX Connector (source) | - Deployed in the on-premises vSphere environment after Azure VMware Solution deploys. - Creates a unidirectional site pairing to Azure VMware Solution. - Starts migrations to Azure VMware Solution. |
| HCX Cloud (destination) | - Provisioned with Azure VMware Solution when the private cloud deploys in Azure. - Generally the destination for VMware HCX site pairing. - VMware HCX Cloud site is always a software-defined datacenter. - Supports network extension at layer 2 in the networking stack, which is optional. |
Add a site pair
Sign in to the on-premises vCenter Server.
Under Menu, select HCX.
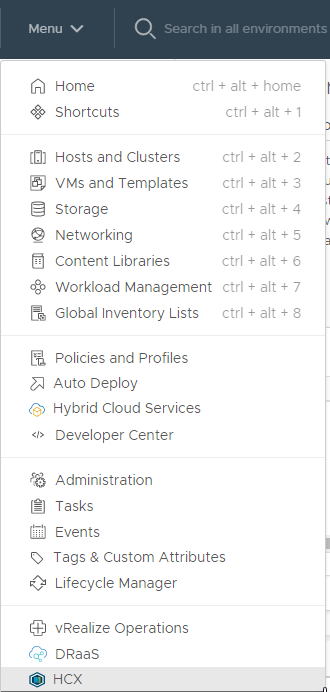
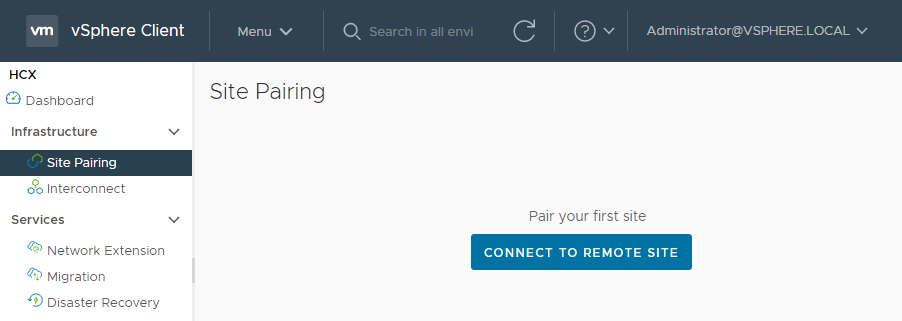
Under Infrastructure, select Site Pairing.
Under Pair your first site, select Connect To Remote Site.
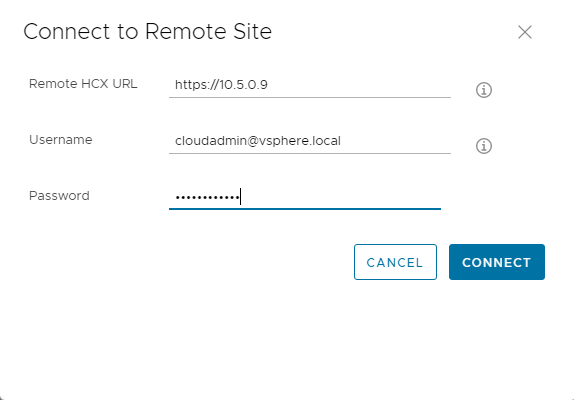
Enter the Azure VMware Solution HCX Cloud Manager IP address that you obtained from the last unit.
Enter the Azure VMware Solution cloudadmin@vsphere.local username and the password from the Azure portal.
Select Connect. If you receive a message about a certificate warning, import the certificate to continue.
For the connection to work, VMware HCX Connector needs to route to the VMware HCX Cloud Manager IP over port 443. Use Azure ExpressRoute, which you deployed on-premises.
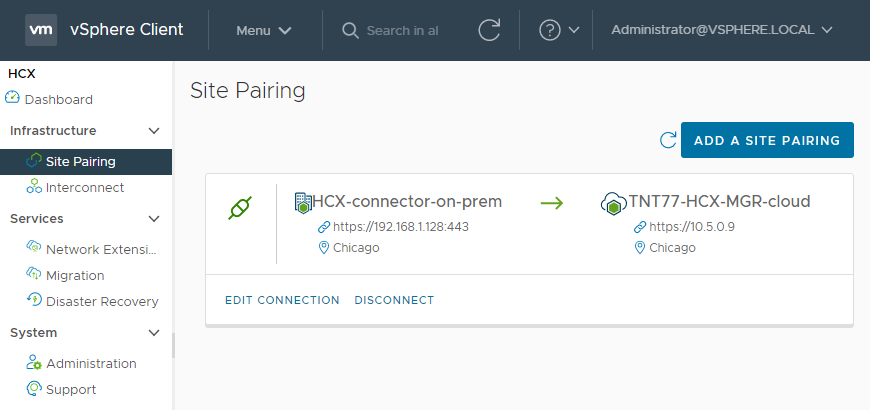
You get a screen showing that VMware HCX Cloud Manager in Azure VMware Solution and the on-premises VMware HCX Connector are connected, or paired.
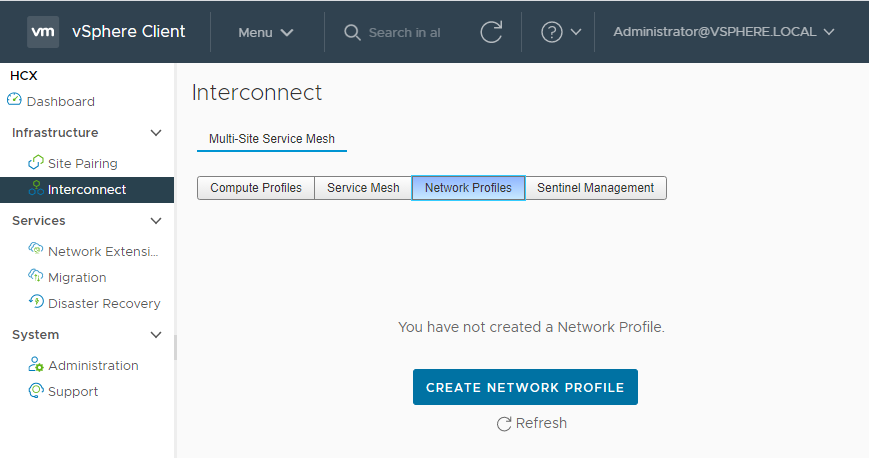
Create network profiles
VMware HCX Connector on-premises deploys a set of automated virtual appliances that require multiple IP segments. You need to first configure network profiles. You'll create these network profiles for each network intended for use with VMware HCX. When you create network profiles, you'll use the IP segments identified during the VMware HCX deployment planning phase.
Sign in to the on-premises VMware HCX Connector.
Create four network profiles:
- Management
- vMotion
- Replication
- Uplink
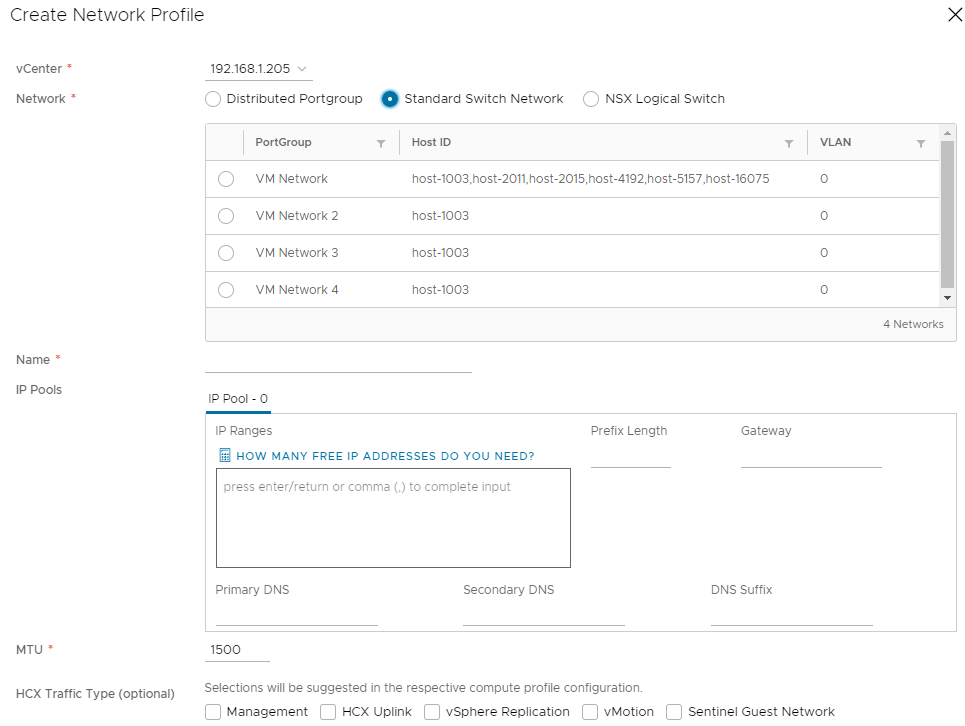
Under Infrastructure, select Interconnect > Multi-Site Service Mesh > Network Profiles. Then select Create Network Profile.
For each network profile, select the network and port group, provide a name, and create the segment's IP pool. Then select Create.
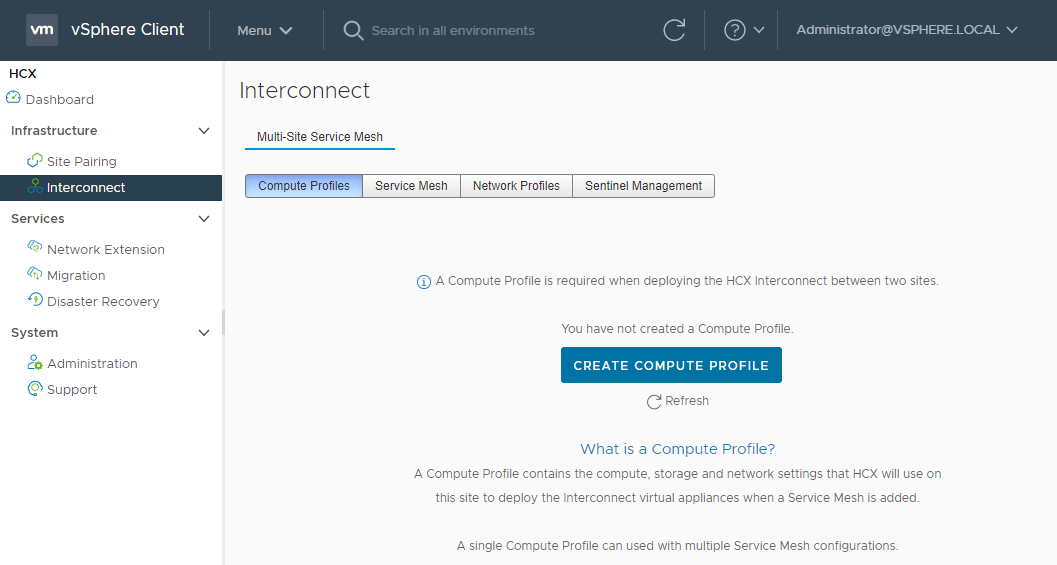
Create a compute profile
After the network profiles are created, you'll need to create a compute profile. The compute profile contains the compute, storage, and network settings that VMware HCX uses to configure the service mesh. The service mesh is what allows VM migrations from on-premises into Azure VMware Solution.
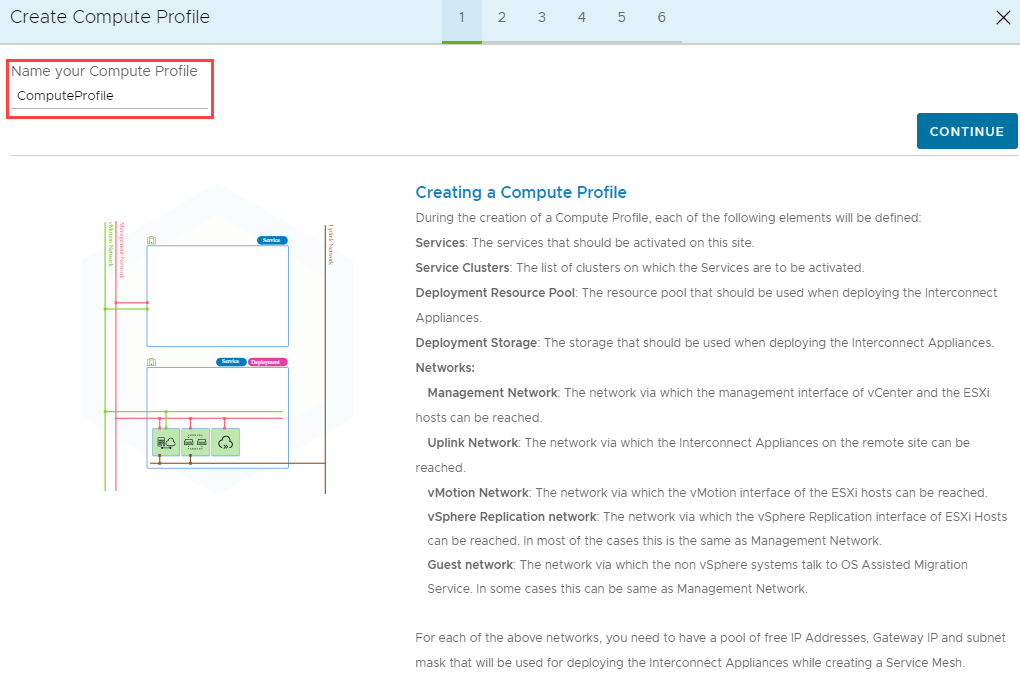
Under Infrastructure, select Interconnect > Compute Profiles > Create Compute Profile.
Enter a name for the profile and select Continue.
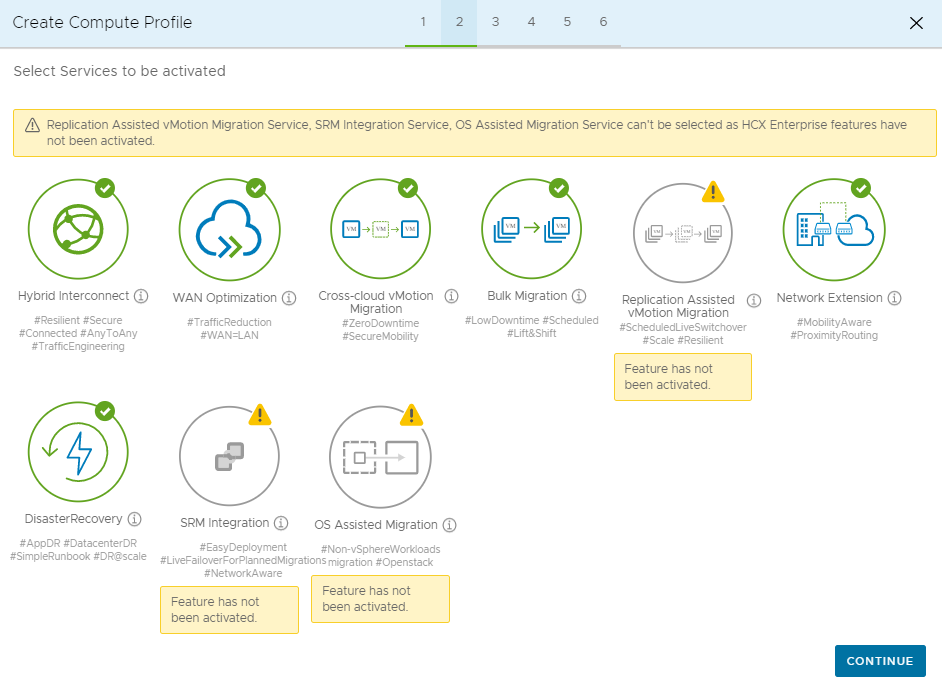
On the next screen, you have services set for activation. Recall that VMware HCX Enterprise deploys with Azure VMware Solution. If you need HCX Enterprise, you must open a ticket with support.
Leave all default services checked that can be enabled with the HCX Enterprise key and select Continue.
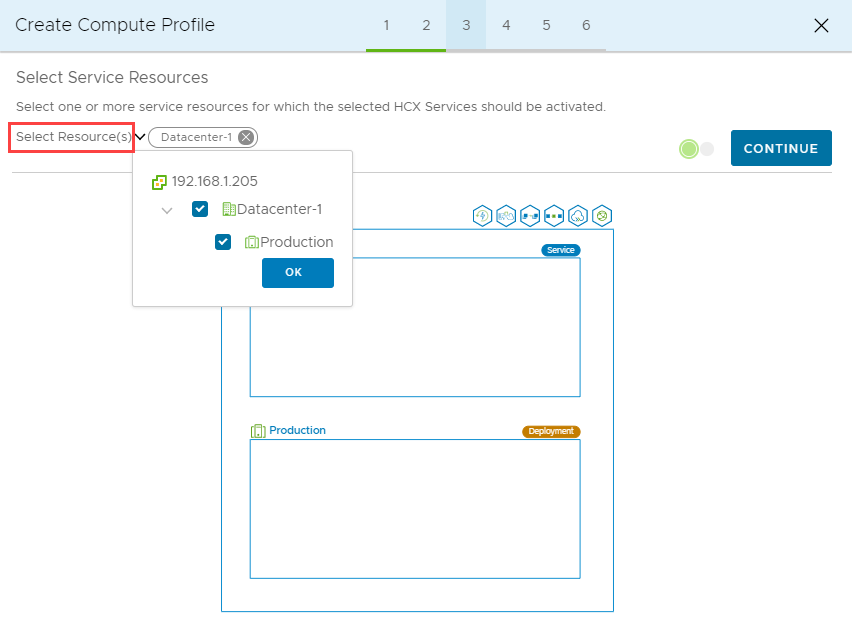
In Select Service Resources, select one or more service resources (clusters) to enable the selected VMware HCX services.
When you have the clusters in your on-premises datacenter, select Continue.
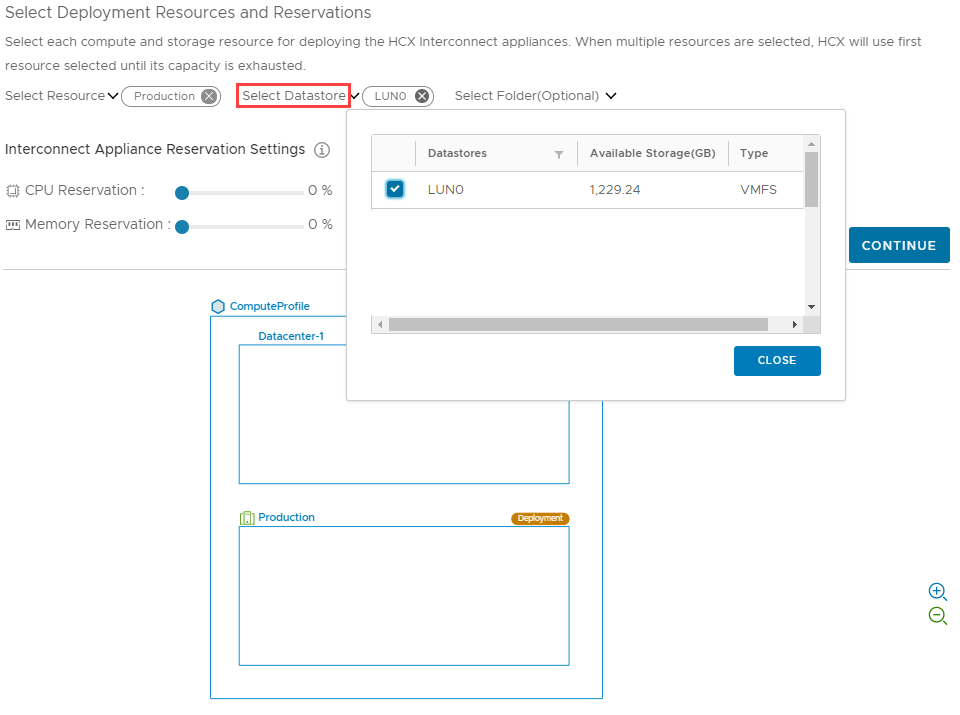
On the Select Datastore pane, select the datastore storage resource for deploying the VMware HCX Interconnect appliances. Then select Continue. Note that when you select multiple resources, VMware HCX uses the first resource selected until its capacity is exhausted.
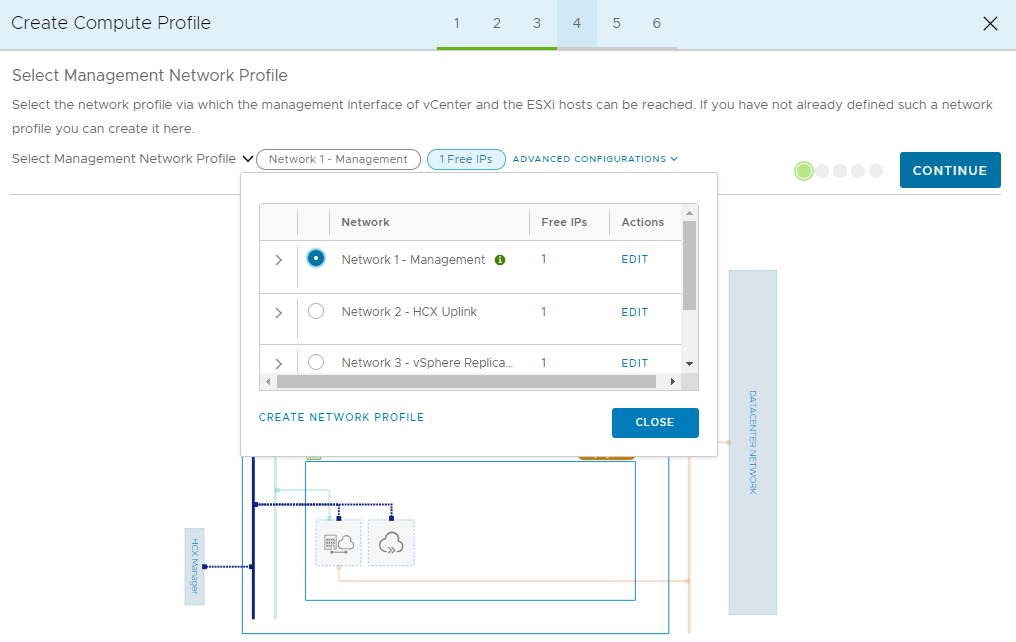
On the Select Management Network Profile pane, select the management network profile that you created in previous steps, then select Continue.
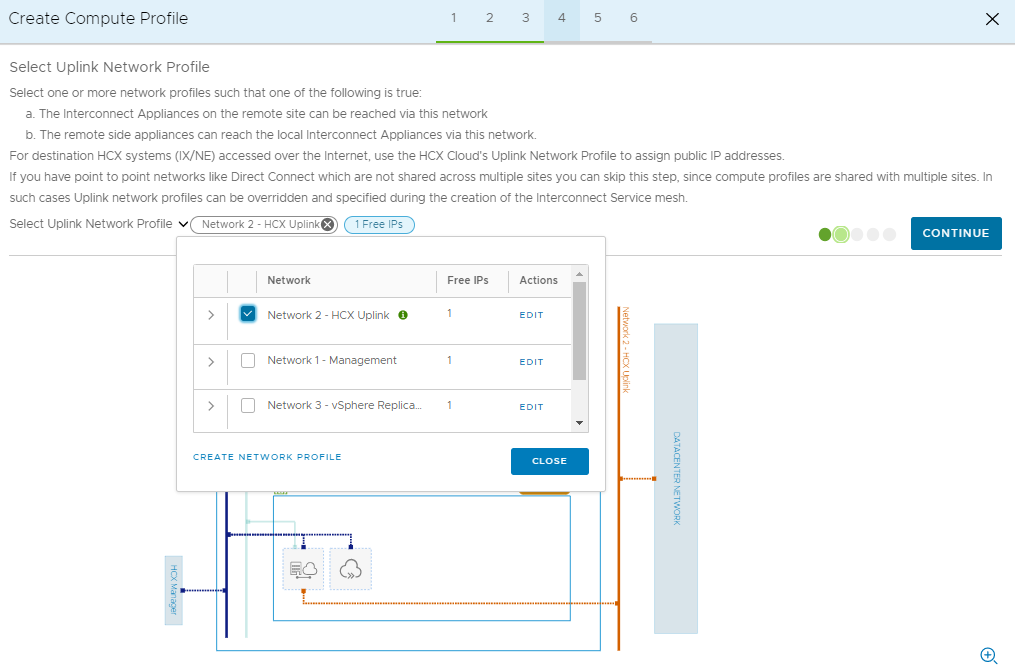
On the Select Uplink Network Profile pane, select the uplink network profile you created in the prior steps, then select Continue.
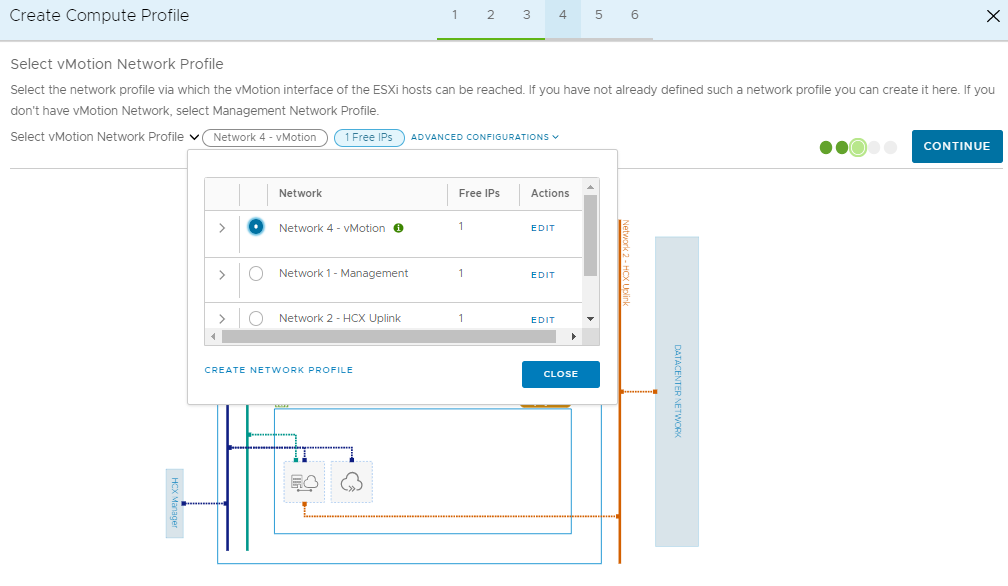
On the Select vMotion Network Profile pane, select the vMotion network profile that you created in prior steps, then select Continue.
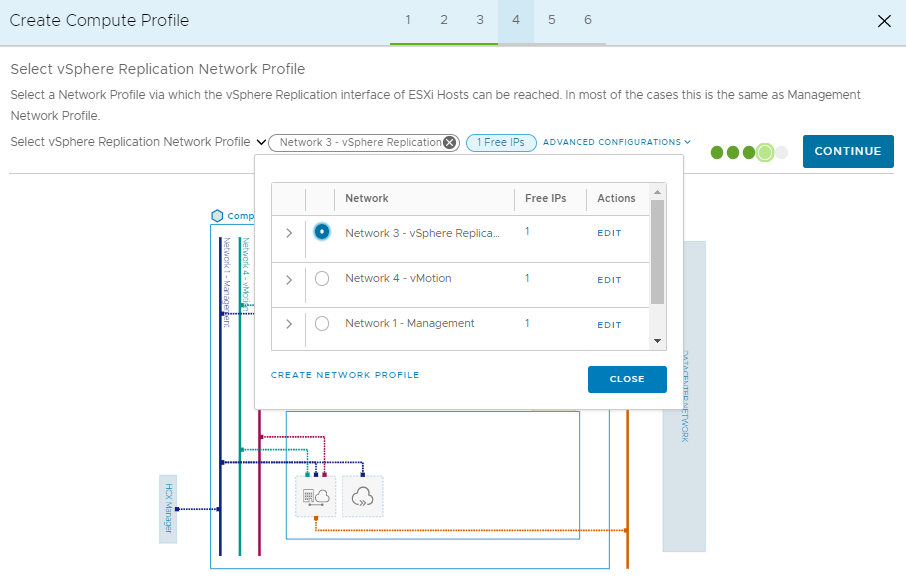
On the Select vSphere Replication Network Profile pane, select the replication network profile that you created in prior steps, then select Continue.
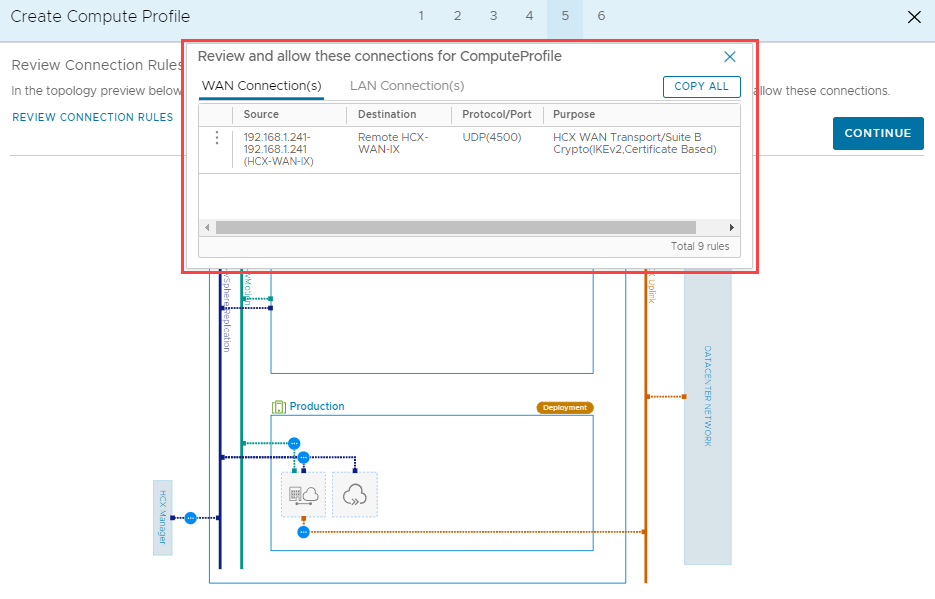
Review the connection rules and select Continue.
Select Finish to create the compute profile.
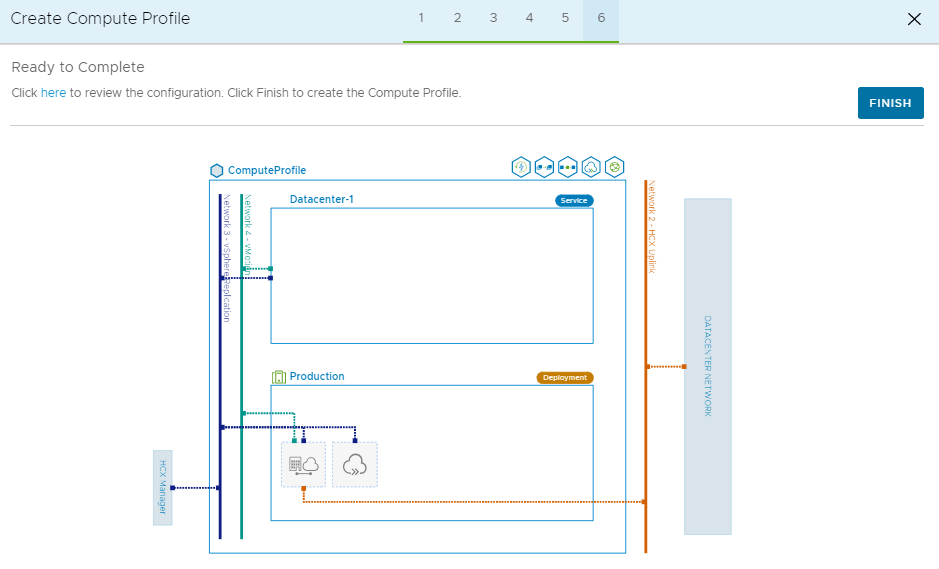
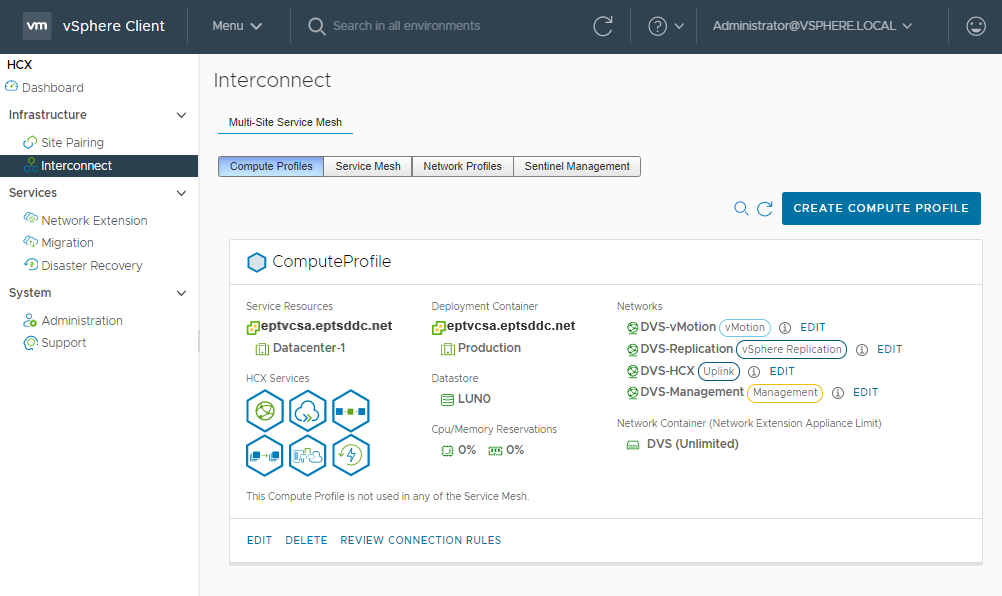
After the compute profile finishes creation, the compute profile is listed in the Compute Profiles within Interconnect.
In the next unit, we'll cover how to set up a service mesh to complete the on-premises configuration of VMware HCX Connector.