Release: Build your simple house
Alright, now that we’ve gone over movement and placing and mining blocks together, you’re ready to try yourself. Remember, this is our teaching model of teach, release, reflect. We just taught you these skills, and now we'll release you to build! This is exactly how you can open any Minecraft lesson with your students.
Your turn: Build your house
Now it's time for you to apply the skills you just learned and put it into practice. Similarly, when it's time to teach your students' movement, you'll want them to dive into build right away. You can walk around to help them.
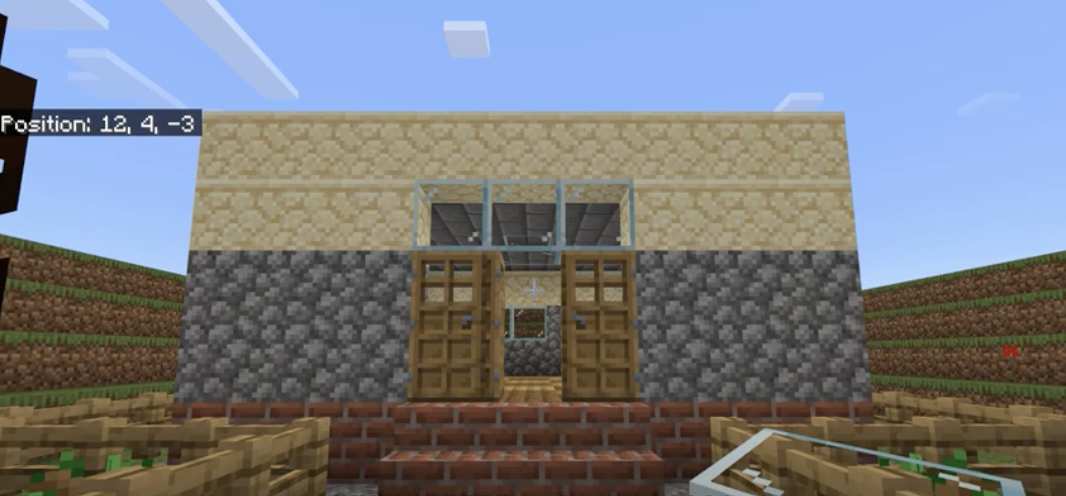
Watch and do (Pause and play): Build a house (12 minutes 5 seconds)
Pause as much as you'd like as we start to build our house from scratch using items in the inventory. Good luck!
Turn in your creation: Assessment
Minecraft Education provides an interactive digital environment that allows students to create learning for all to see. Students can create in an engaging virtual world and demonstrate their learning of key concepts by using tools to capture progress and document learning adventures.
As the educator, you need to decide the aspects of learning in Minecraft Education that you want to assess. As with any good planning, the best place to start is with your learning goals. Then determine the best way to assess, which may be through discussion, writing, reflecting, administering tests, or using some of the in-game Minecraft Education tools.
Assessment is a process used by educators and students during and after instruction. Assessment provides feedback to adjust ongoing teaching/learning and improve students' achievement of intended instructional outcomes. Minecraft Education offers educators and students many opportunities to reflect on learning outcomes and make adjustments along the way that show progression of the learning. It's the perfect tool for assessment.
“Minecraft is easy to use and implement in a classroom. It promotes student independence and creativity, but it's also an immensely collaborative tool that I have witnessed being integrated across all grade levels and content areas. Students can apply their understanding in truly unique and often unanticipated ways.”
— John Miller, Educator and Global Mentor
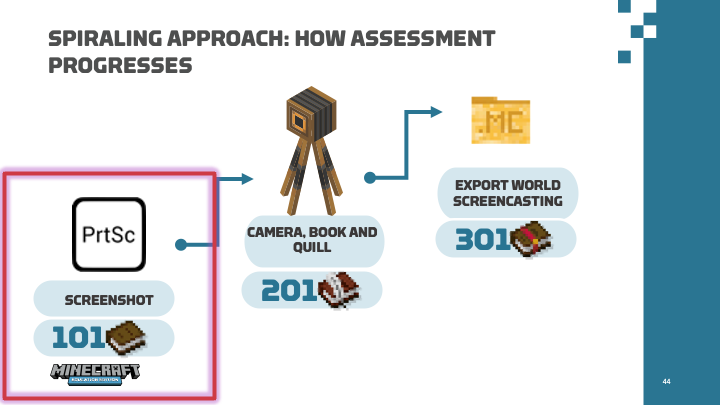
Today, we'll be reviewing one of the simplest ways you can capture students' builds by using a screenshot and turning that into a shared online space. In Minecraft 201, we'll use some of Minecraft's in-game tools, and in Minecraft 301, we'll see what it's like to export an entire world or use screen casting to narrate a world.
Don't forget our rubric:
- Four walls and a roof, 3 points
- Use at least two different building materials, 1 point
- Submit a screenshot for assessment, 1 point
Do: Take a screenshot of your build
To take a screenshot of your house:
- Windows (full screen): Press PrtScn
- Windows (Snip tool - part of screen) Press Windows+Shift+S
- Mac (part of screen): Press Shift+Command+4
- Chromebook: Press Ctrl+Shift+Window Switch
Where screenshots live on your device:
- Windows: The screenshot is copied to your Windows clipboard. Note that each successive capture replaces the last. If you wish to save these screenshots, they must be pasted into an app that can save them, like Word or PowerPoint.
- Windows snip tool (part of screen): Your screenshot is saved in the Screenshots folder (OneDrive > Pictures > Screenshots) and will also be copied to your clipboard.
- Mac (part of screen): By default, screenshots save to your desktop with the name Screenshot [date] at [time].png.
- Chromebook: All screenshots on Chromebooks are saved in the Downloads folder.
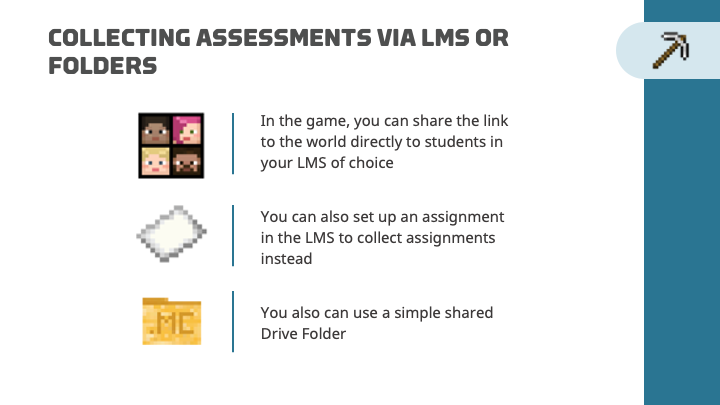
Collect assessments
When you're ready to assess your students' creations in Minecraft, you’ll need a way to collect what you're assessing. There are many ways to share creations and give them to you. If you have an LMS like Teams or Google Classroom, create an assignment and collect screenshots that way. One of the easiest ways to start is to simply open up a shared drive folder and invite students to upload their creations there.
You can review the screenshots in front of the class and ask students to share more about their build, or you can provide individual feedback via a grading feedback system in an LMS. Students having other students see their creations is one of the most magical parts of creativity in the classroom!
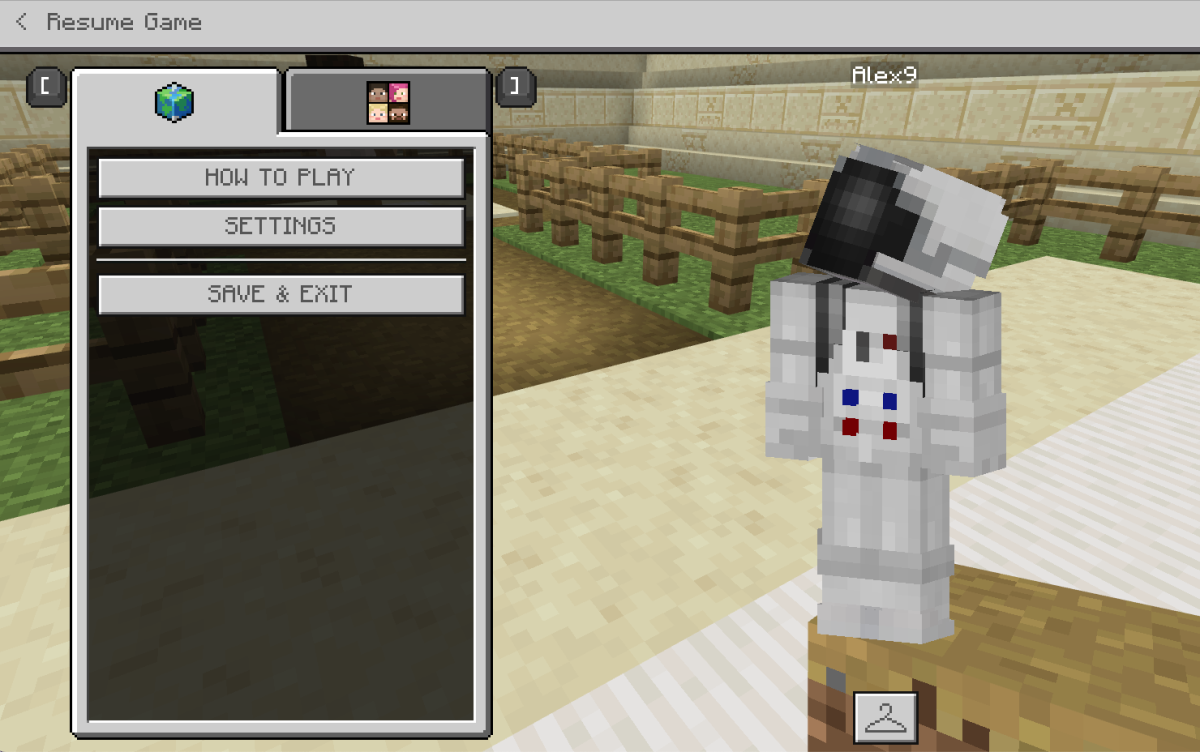
When students have submitted a screenshot, it's important to have them save their world so they can come back to put finishing touches on the house. Worlds save to the local device only; they DO NOT save to Cloud Storage. Worlds, once saved to local device, can be found again in My Worlds in your in-game menu. To save, press the Escape key, and then select Save and Exit.
Next step
Now that you've captured your own screenshot of and thought about how you'll submit your masterpiece, let's reflect on the work you've done.