Exercise - Import to Power BI Desktop
Overview
The estimated time to complete this exercise is 20 minutes.
In this exercise, you'll complete the following tasks:
- Import from Excel to Power BI Desktop: Customers & Quotes queries & tables
- Edit imported Queries to include a Dates table
- Close Power Query & load the Dates table into the Data Model
Note
This exercise has been created based on the sales activities of the fictitious Wi-Fi company called SureWi which has been provided by [P3 Adaptive. The data is property of P3 Adaptive and has been shared with the purpose of demonstrating Excel and Power BI functionality with industry sample data. Any use of this data must include this attribution to P3 Adaptive. If you have not already, download and extract the lab files from https://aka.ms/modern-analyst-labs into your C:\modern-analyst-labs folder.
Exercise 1: Import from Excel to Power BI Desktop: Customers and quotes queries and tables
In this exercise, you'll launch Power BI Desktop and import the Customers & Quotes queries and tables from Excel to Power BI Desktop.
Task 1: Launch Power BI Desktop
In this task, you'll launch Power BI Desktop and save the new PBIX file.
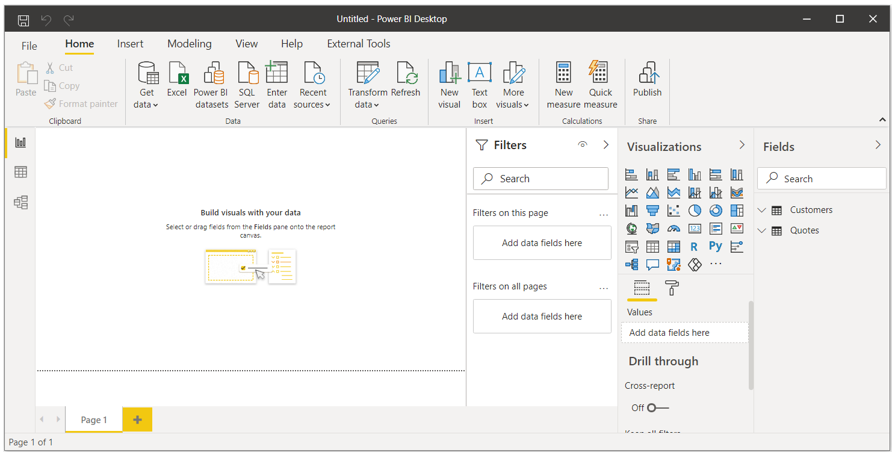
Launch Power BI Desktop.

If applicable, use the "X" in the upper right-hand corner to close the Welcome window.
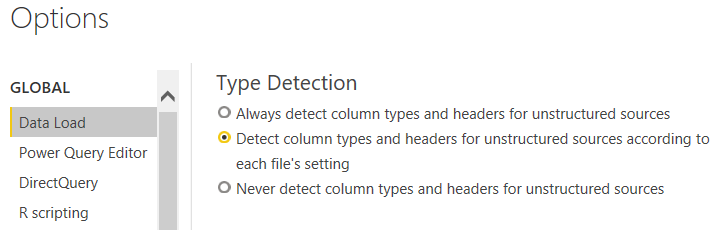
Task 2: Verify Settings
In the Main Power BI Ribbon, navigate to File > Options and settings > Options.
In the Global section, select Data Load and in the Type Detection section, be sure that the Detect column type and headers for unstructured sources box is checked.
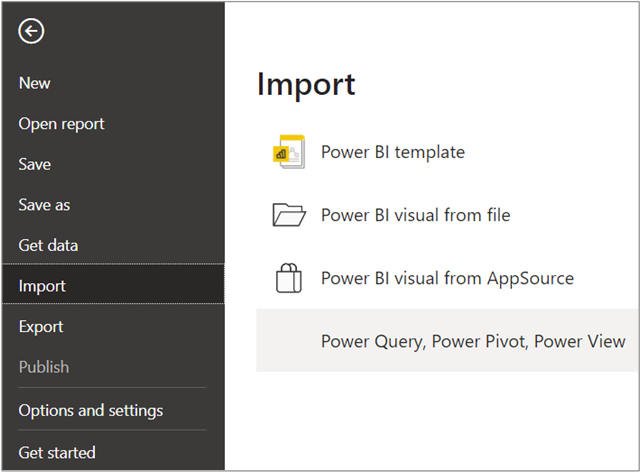
Task 3: Import Power Query, Power Pivot, Power View
In this task, you'll navigate and open the starting XLSX file then start the import process.
Select File > Import > Power Query, Power Pivot, Power View.
Navigate to the C:\modern-analyst-labs\Lab 02A folder.
Select the file MAIAD Lab 02A - Start.xlsx and choose Open.
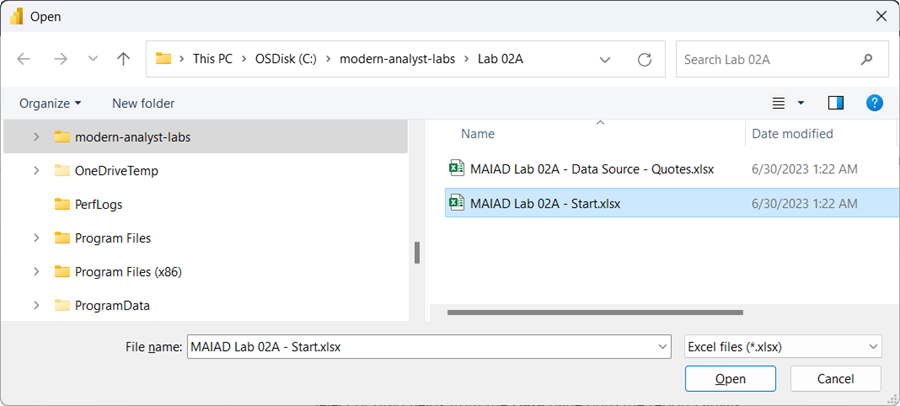
Select the Start button to begin the import.
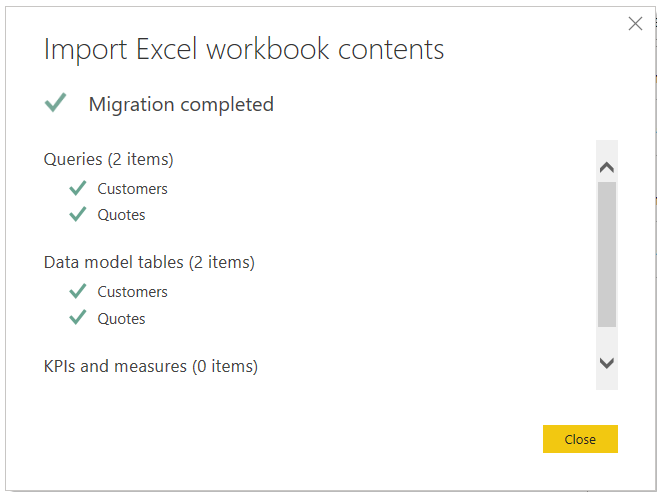
View the Import Excel workbook contents report.
Then select the Close button.
Note
Importing from Excel to Power BI Desktop is a one-way transition. Any Queries, Data Model tables, KPIs and measures will be imported into Power BI Desktop. Any subsequent imports with the same file name will overwrite the existing PBIX.
Note that the Customers and Quotes tables are available in the Fields list.
Task 4: Save the PBIX file
In this task, you'll save the file with a new file name.
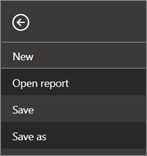
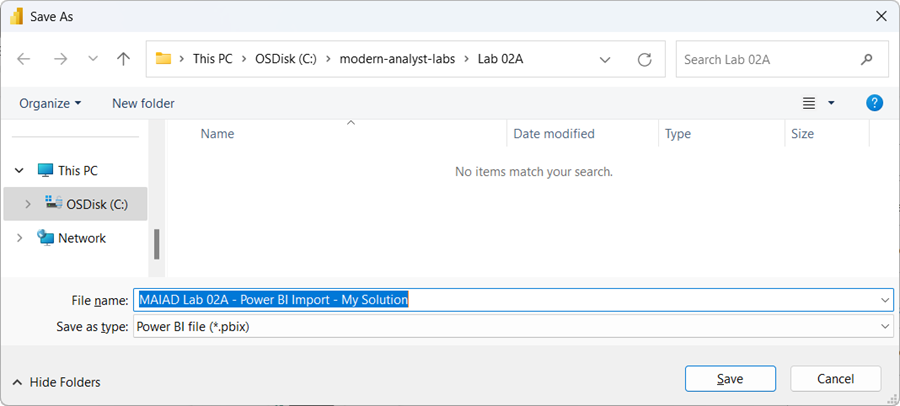
Select File > Save as.
Save the file as MAIAD Lab 02A - Power BI Import - My Solution.pbix.
Exercise 2: Edit imported queries to Include a dates table
In this exercise, you'll launch the Power Query Editor from Power BI Desktop and edit the imported Queries to add a new Dates query and table to the Data Model.
Task 1: Launch Power Query from Power BI Desktop
In this task, you'll launch Power Query from Power BI Desktop and edit the existing queries to add a new Dates table.
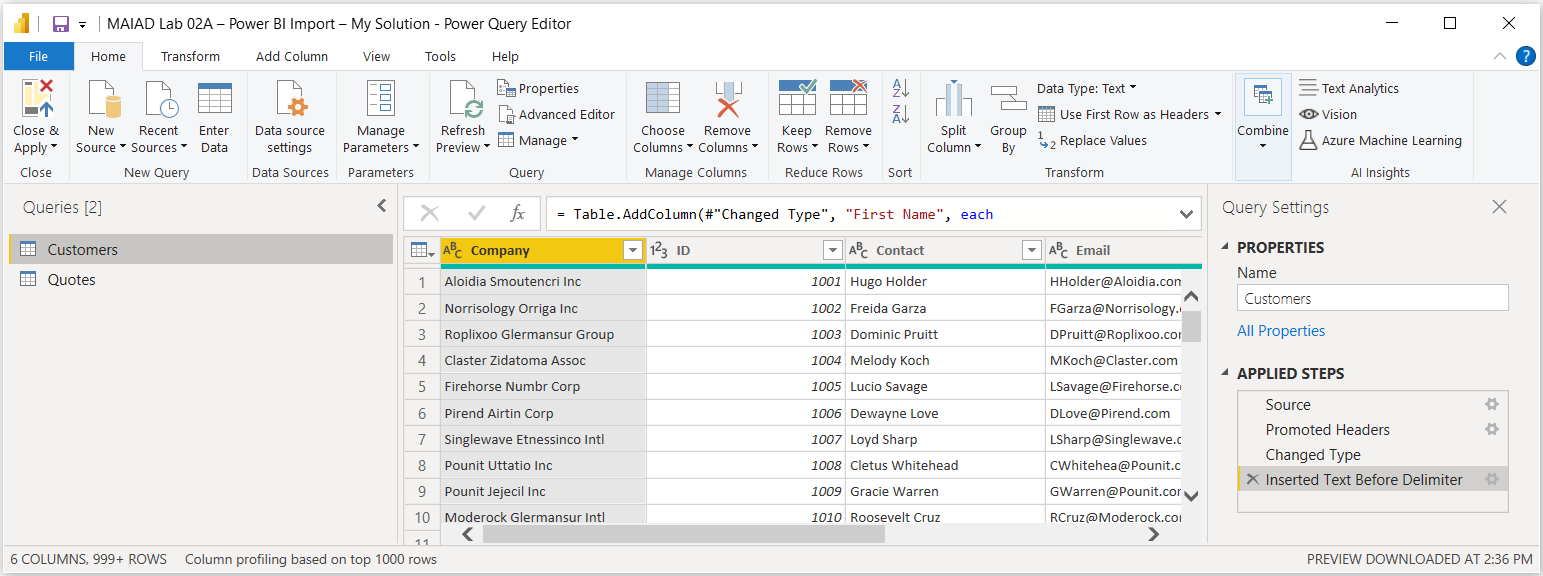
From the Home ribbon, select Transform data > Transform data option.
Note
This will launch Power Query from Power BI Desktop. It looks very similar to Power Query in Excel and both the Customers and Quotes queries have been imported with their transformation.
Note
You may see a file location error message:
DataSource.Error: Could not find a part of the path 'C:\MAIAD\Attendee\Lab Materials\Lab 02A\MAIAD Lab 02A - Data Source - Customers.csv'. Details: C:\MAIAD\Attendee\Lab Materials\Lab 02A\MAIAD Lab 02A - Data Source - Customers.csv
You’ll need to select each query from the Queries pane > then in the Applied Steps of the Query Settings pane, select the Source step > and then select the Gear icon to the right of the Source step and update the file path location, as applicable.

Task 2: New Source - Add a dates table
In this task, you'll add a Dates table to the existing Queries, and Load that new query and table to the Data Model.
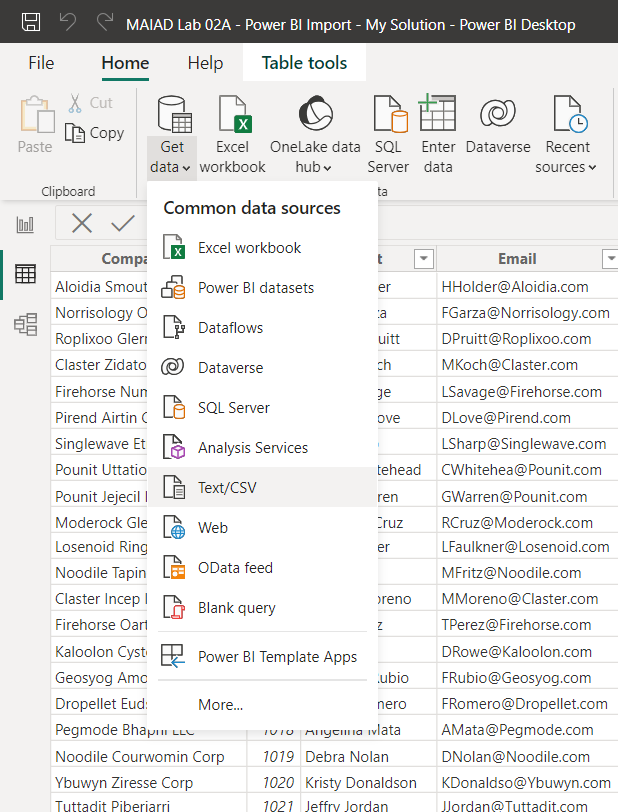
From the Power Query Editor Home ribbon, select Get data > Text/CSV option.
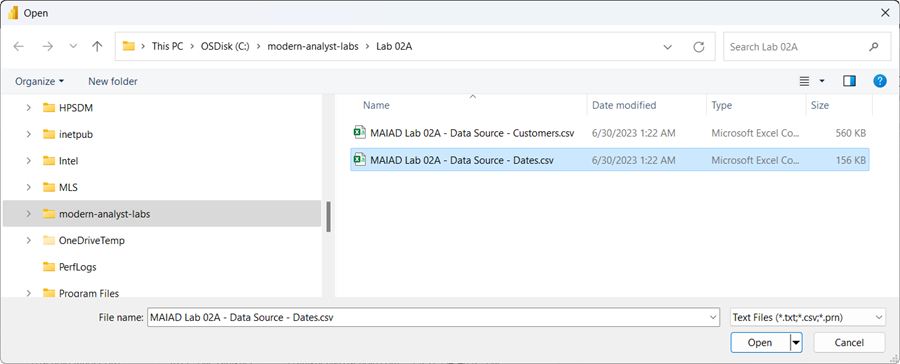
Navigate to the C:\modern-analyst-labs\Lab 02A folder.
Select the file MAIAD Lab 02A - Data Source - Dates.csv and choose Open.
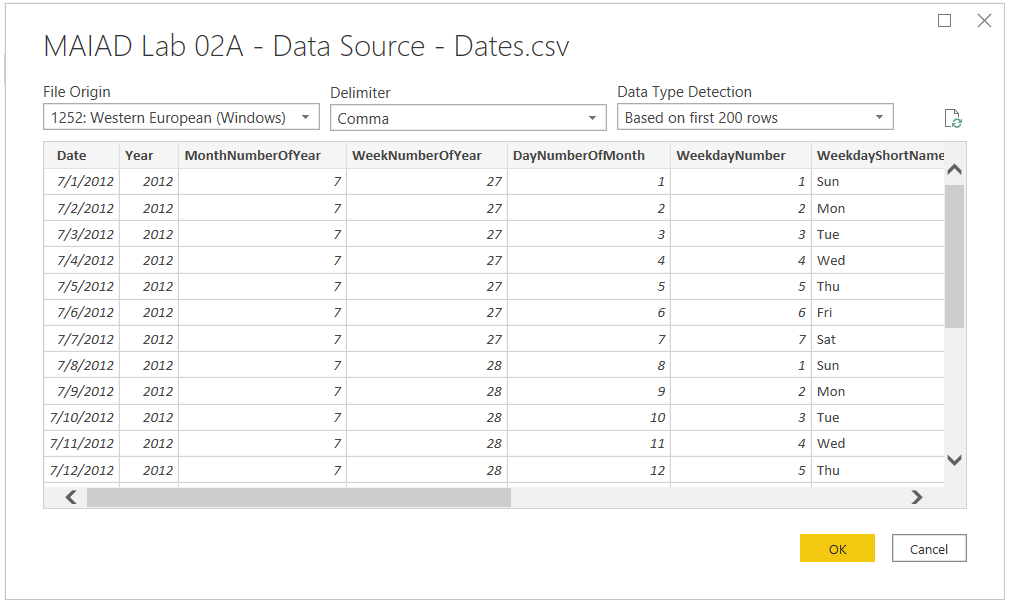
If displayed, accept the default File Origin, Delimiter, and Data Type Detection options. Then select the OK button.
Task 3: Rename query
In this task, you'll add a rename the Query to use a user-friendly noun name versus the default file name.
Double-click in the Queries Pane on "MAIAD Lab 02A - Data Source - Dates" to rename the default Query name.
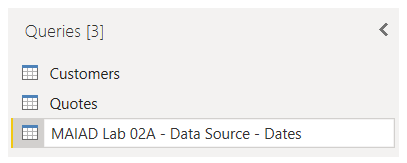
Rename from "MAIAD Lab 02A - Data Source - Dates" to just "Dates".
Task 4: Perform a data type transformation
In this task, you'll add a change the default data type for the [Year] column of the #"Dates" query.
On the Home ribbon, select Transform data to open the Query window.
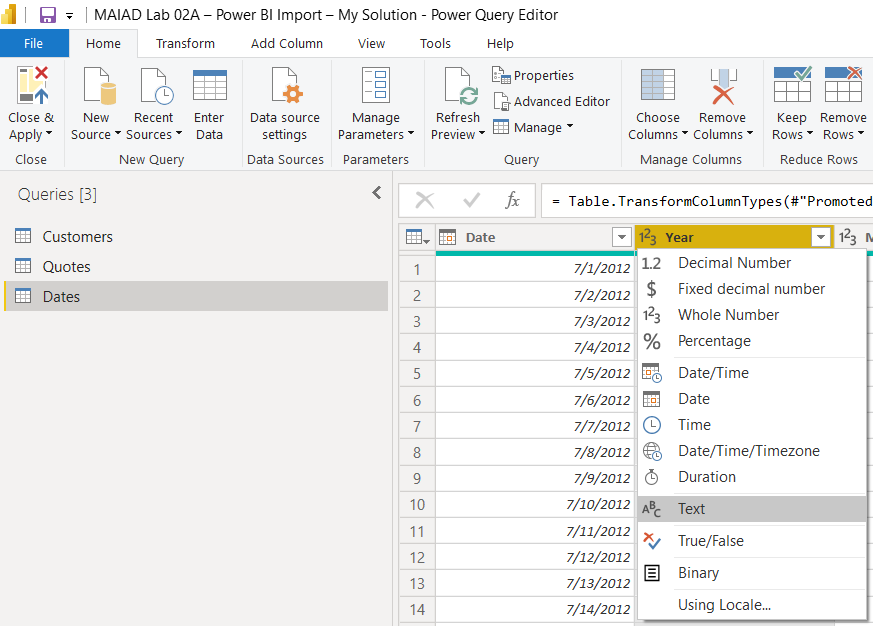
In the Preview area, select the "123" data type icon of the [Year] column and change the data type from a Whole Number to Text.
Note
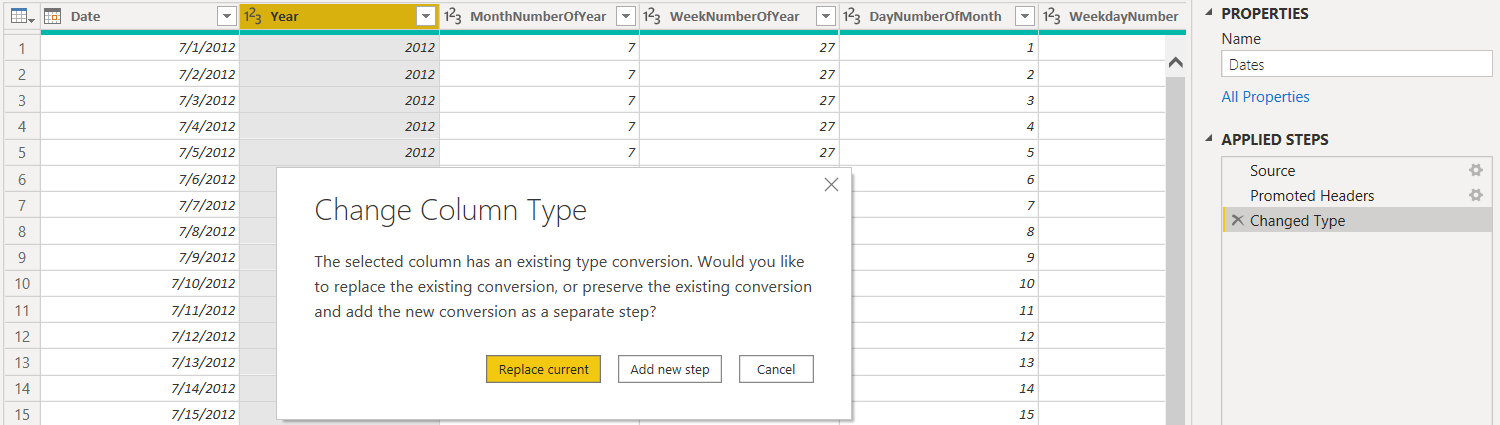
Column data types drive different functionality in Power BI, for example, a Whole Number will default to aggregate. It wouldn't make sense to SUM the [Year] column, so by changing to a Text data type, we prevent this default aggregation.
Select the Replace current button from the Change Column Type window.
Note
Since we are on the Change Type step in the Applied Steps, this message confirms that we want to change the [Year] to the Text data type in this existing step. The Add new step option would change the [Year] to the Text data type but add that as a new step in the Applied Steps list.
Exercise 3: Close Power Query & load dates table to the data model
In this exercise, you'll Close & Apply the Power Query Editor changes, and Load the Dates table to the Data Model.
Task 1: Close & Apply
In this task, you'll use the Close & Apply button to save the Dates query in the Power Query Editor and Load the Dates table to the Data Model.
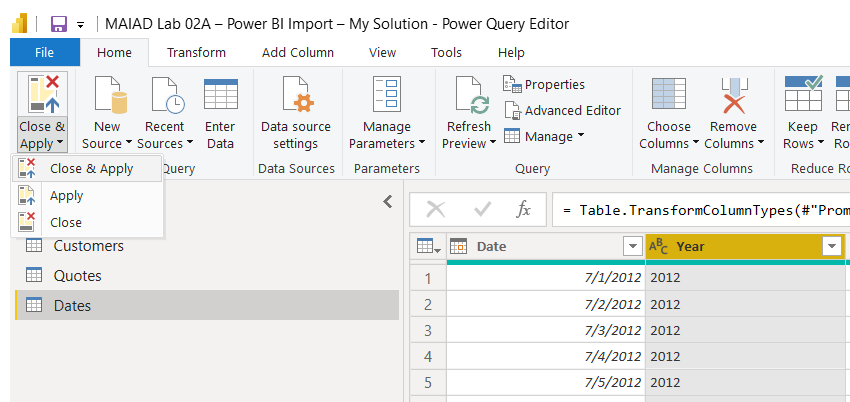
From the Power Query Editor Home ribbon, select Close & Apply button > Close & Apply option to load the new Dates table to the Data Model.
Task 2: View the Dates table in the Fields list
In this task, you can see the new Dates table is now also available in the Fields list.
:::image type="content" source="../media/customers-dates-quotes.png" alt-text="Screenshot of Power BI Desktop with Customers, Dates, and Quotes displayed in the Fields pane.":::
Conclusion
In this lab, you started with an existing Excel file that contained Power Query data connections to an Excel and CSV file from the previous Lab. You launched the Power BI Desktop application and imported the existing Power Connections from Excel to Power BI Desktop and saved them as a PBIX file. Then you used the Transform data button to launch the Power Query Editor from within Power BI Desktop to load a new Dates query from a CSV data source, and then used the Preview area to perform a data type transformation of the [Year] column. Lastly, you used the Close & Apply option to add the Dates query as a new table to the Data Model.