Exercise - Upload user files
Here are the steps to add an upload feature to your app.
Display a browser file input element
Open Pages/Files.cshtml in your code editor.
Locate the existing
formelement and notice that it contains a file input control. The input has anasp-forvalue ofUploadedFile.<form method="post" enctype="multipart/form-data"> <input asp-for="UploadedFile" type="file"> <input type="submit" value="Upload File"> </form>Open Pages/Files.cshtml.cs in your code editor.
The file uploaded by a user will be assigned to a property in the
FilesModelclass namedUploadedFile.Locate the
OnPostAsync()method and replace the existing code with the following code to handle copying the uploaded file to a MemoryStream. Once the stream is created, it's passed to the_graphFilesClient.UploadFile()method.if (UploadedFile == null || UploadedFile.Length == 0) { return; } _logger.LogInformation($"Uploading {UploadedFile.FileName}."); using (var stream = new MemoryStream()) { await UploadedFile.CopyToAsync(stream); await _graphFilesClient.UploadFile( UploadedFile.FileName, stream); } await OnGetAsync();Save the Files.cshtml.cs file before continuing.
Add large file upload support
Open Graph/GraphFilesClient.cs in your code editor.
Locate the
UploadFile()method and note that it handles the following tasks:- The size of the uploaded file is determined.
- If the file is greater than 4 MB, a call is made to a method named
UploadLargeFile(). - If the file is less than 4 MB, a PUT request is made to upload the file.
Locate the
UploadLargeFile()method. It accepts an item path and the file stream to upload as parameters. It also creates aDriveItemUploadablePropertiesobject that handles replacing files during the upload process if they already exist in OneDrive.Locate the
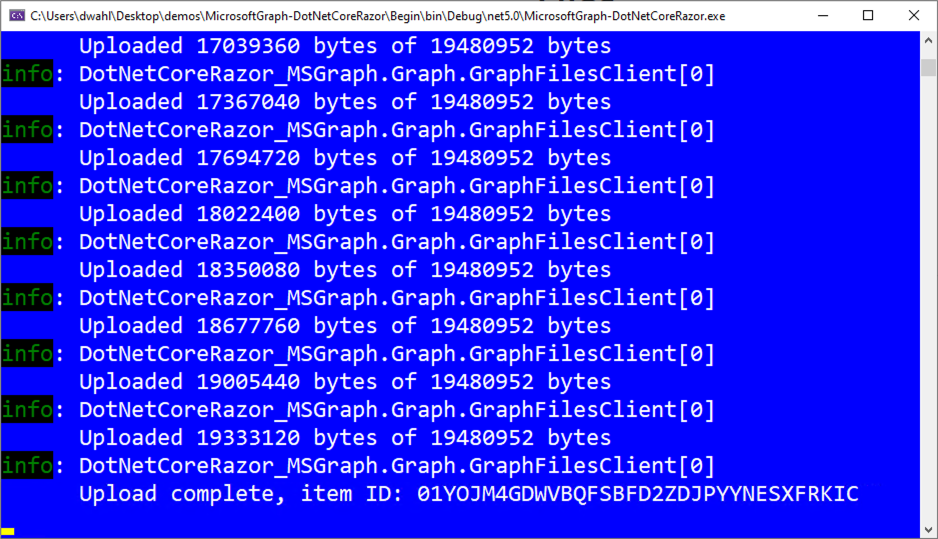
Create the upload sessioncomment. Add the following code immediately after the comment:var uploadSession = await _graphServiceClient.Me.Drive.Root .ItemWithPath(itemPath) .CreateUploadSession(uploadProps) .Request() .PostAsync(); // Max slice size must be a multiple of 320 KiB int maxSliceSize = 320 * 1024; var fileUploadTask = new LargeFileUploadTask<DriveItem>(uploadSession, stream, maxSliceSize); // Create a callback that is invoked after // each slice is uploaded IProgress<long> progress = new Progress<long>(prog => { _logger.LogInformation($"Uploaded {prog} bytes of {stream.Length} bytes"); });This code does the following tasks:
- Creates an upload session.
- Creates a
LargeFileUploadTaskobject and passes the upload session, stream to upload, and maximum slice size to it. - Creates a large file upload
Progressobject that logs information about the upload process.
Locate the
tryblock and replace the existing code with the following code:// Upload the file var uploadResult = await fileUploadTask.UploadAsync(progress); if (uploadResult.UploadSucceeded) { _logger.LogInformation($"Upload complete, item ID: { uploadResult.ItemResponse.Id}"); } else { _logger.LogInformation("Upload failed"); }This code starts the large file upload process and logs information about the success or failure.
Save the GraphFilesClient.cs file before continuing.
Run your app
It's time to run your application and upload a file!
Perform the following step based on your code editor:
Visual Studio
Press F5 to build and run the project.
Visual Studio Code or another code editor
Open a terminal window in the Begin folder and run the following command:
dotnet run
Open a browser and visit
https://localhost:5001.Sign in using the Microsoft 365 developer tenant that you used earlier when registering the Microsoft Entra Application.
Select the Files link in the header to view the user’s OneDrive files.
Select the Choose File button and select a file from your machine that you'd like to upload.
Select the Upload File button to start the upload process. Once the file upload has completed, you'll see the file listed in the page.
Note
If the file size is greater than 4 MB, switch to the running terminal window. You'll see the status of the uploaded file displayed. Once the upload completes, an item ID value will be written out in the terminal window and you'll see the file name displayed in the browser.
Close your browser and press CTRL+C in the terminal window to stop the server before continuing.
Note
If you’ve opened the project in Visual Studio, you can close the browser or select SHIFT+F5 in Visual Studio to stop the server. Close the terminal window Visual Studio created if it's still open.