Exercise - Load a user's emails in batches
In this exercise, you'll extend the app to let you load a user's emails in batches of 10 items.
Load emails in batches of 10 items
Start, by modifying the GraphEmailClient class to supporting loading batches of emails.
In your code editor, open the Graph/GraphEmailClient.cs file.
Take a moment to locate the
GetNextLink()method. Notice that it accepts an IUserMessagesCollectionPage object namedpagedMessagesas a parameter. It uses this parameter to check if a next page request URL value exists.Locate the
GetUserMessagesPage()method and notice that it accepts a parameter namednextPageLinkthat represents the URL of the next batch of emails to retrieve. The method also accepts a parameter namedtop.GetUserMessagesPage()returns a tuple object that contains the retrieved messages and the URL for the next batch of emails.C#public async Task<(IEnumerable<Message> Messages, string NextLink)> GetUserMessagesPage( string nextPageLink = null, int top = 10) { }Replace the existing code in the
GetUserMessagesPage()method with the following code:C#IUserMessagesCollectionPage pagedMessages; try { } catch (Exception ex) { _logger.LogError($"Error calling Graph /me/messages to page messages: {ex.Message}"); throw; } return (Messages: pagedMessages, NextLink: GetNextLink(pagedMessages));Add the following code in the
tryblock.C#if (nextPageLink == null) { // Get initial page of messages pagedMessages = await _graphServiceClient.Me.Messages .Request() .Select(msg => new { msg.Subject, msg.BodyPreview, msg.ReceivedDateTime }) .Top(top) .OrderBy("receivedDateTime desc") .GetAsync(); } else { // Use the next page request URI value to get the page of messages var messagesCollectionRequest = new UserMessagesCollectionRequest(nextPageLink, _graphServiceClient, null); pagedMessages = await messagesCollectionRequest.GetAsync(); }This code does the following checks:
- If no
nextPageLinkvalue exists, the_graphServiceClientinstance injected into the class is used to retrieve the initial batch of messages. - If a
nextPageLinkvalue does exist, the code retrieves the next batch of emails by passingnextPageLinkand_graphServiceClientto a new instance ofUserMessagesCollectionRequest.
- If no
Save GraphEmailClient.cs before continuing.
Open Pages/Email.cshtml.cs in your code editor.
Replace the code in the
OnGetAsync()method with the following to use theGetUserMessagesPage()method you modified previously:C#var messagesPagingData = await _graphEmailClient.GetUserMessagesPage(NextLink); Messages = messagesPagingData.Messages; NextLink = messagesPagingData.NextLink; await Task.CompletedTask;Save Email.cshtml.cs before continuing.
Open Pages/Email.cshtml in your code editor and locate the following code. This code block handles storing the
NextLinkproperty value in the page. As the user selects the Next Page button, the link value will be passed to the server and used to retrieve the next batch of emails.C#@if (!String.IsNullOrEmpty(Model.NextLink)) { <a asp-page="/Email" asp-route-nextlink="@Model.NextLink" class="btn btn-primary">Next Page</a> }
Run your app
Before running the application, ensure that the account used to sign in has some emails in it.
Perform the following step based on your code editor:
Visual Studio
Press F5 to build and run the project.
Visual Studio Code or another code editor
Open a terminal window in the Begin folder and run the following command:
Consoledotnet run
Open a browser and visit
https://localhost:5001.Sign in using the Microsoft 365 developer tenant that you used earlier when registering the Microsoft Entra Application.
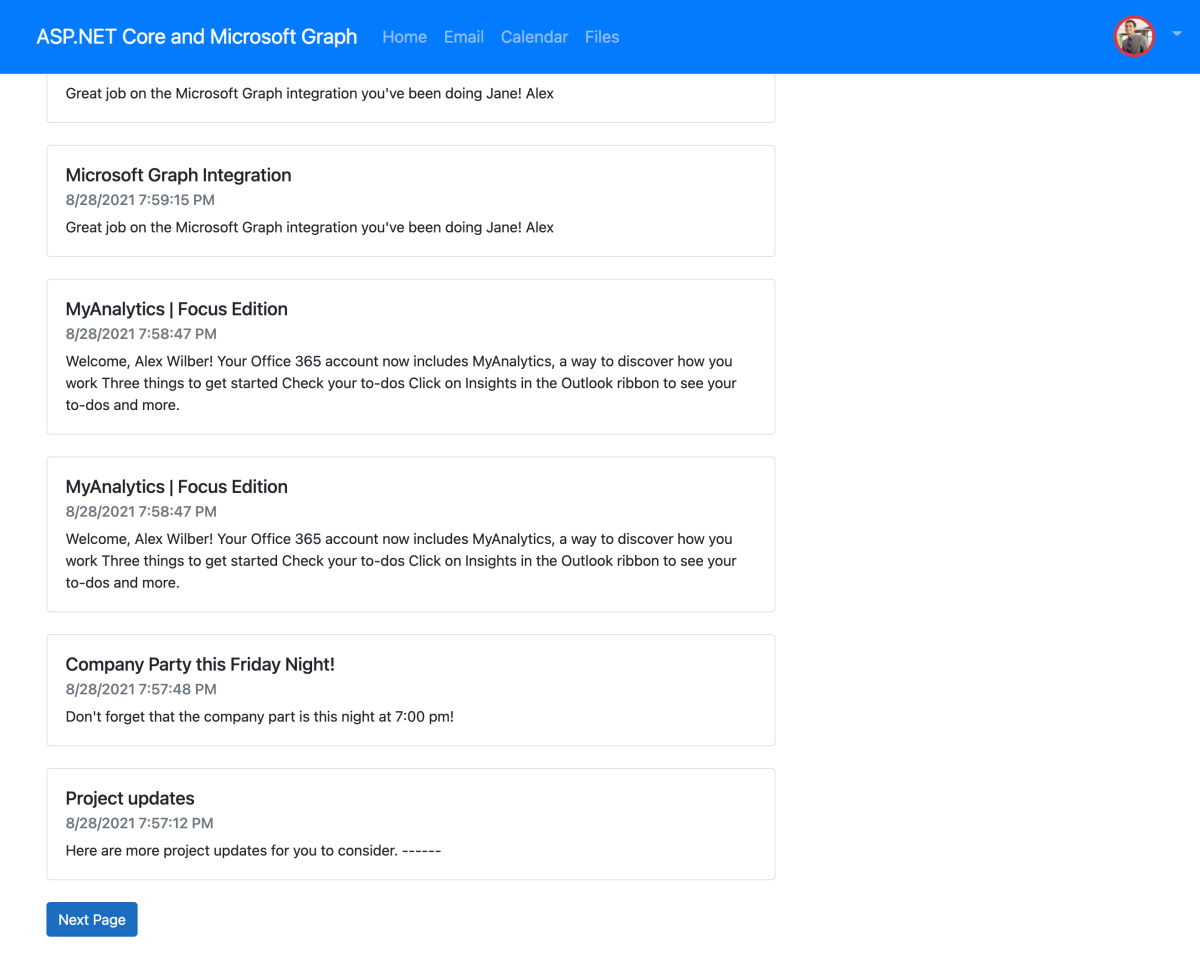
Select the Email link in the header to view the user’s email messages.
When the page loads, the user’s email messages will be displayed. If there are more than 10 messages, you should see a Next Page button at the bottom of the page. Select the button to view the next batch of email messages.
Note
If you’re not seeing any email messages, please ensure that there are emails in the inbox of the account that you use to sign in to the app.
Close your browser and press Ctrl+C in the terminal window to stop the server before continuing.
Note
If you’ve opened the project in Visual Studio, you can close the browser or select Shift+F5 in Visual Studio to stop the server. Close the terminal window Visual Studio created if it's still open.
You've successfully demonstrated how to access and display Microsoft 365 email messages for a signed in user using Microsoft Graph and ASP.NET Core!
Next unit: Summary
Having an issue? We can help!
- For issues related to this module, explore existing questions using the #ASP.NET Core Training tag or Ask a question on Microsoft Q&A.
- For issues related to Certifications and Exams, post on Certifications Support Forums or visit our Credentials Help.