Exercise - App navigation practice
You're nearing the end of this module, so let's apply what you’ve learned in a guided exercise.
In this example, you’ll continue configuring screen transitions in the Contoso Coffee Machines app. If you're using another multi-screen app, you can follow along with similar steps.
Note
When entering formulas, it’s best to type them directly in the formula (fx) bar. Avoid copy-pasting from other sources, as single and double quotation marks may not translate correctly in Power Apps.
Sign in to the Power Apps home page, and open the Contoso Coffee Machines app in edit mode.
On the home screen, select the View Catalog button (Button2 in the example below). In its
OnSelectproperty, replace:Navigate('Catalog Screen')with:
Navigate('Catalog Screen',ScreenTransition.Cover)
Still on the home screen, select the Admin Screen button. In its
OnSelectformula, change:Navigate('Admin Screen')to:
Navigate('Admin Screen',ScreenTransition.Fade)Preview the app. Select the Catalog and Admin buttons to observe the transitions. Then, use your Back buttons to return to the home screen.
Switch back to edit mode. On the Admin Screen, select the arrow icon used as a back button. Update its OnSelect property:
Back()to:
Back(ScreenTransition.UnCoverRight)Preview the app again. Select the Admin Screen button, then select the back button. Notice the difference in the return transition.
In edit mode, insert a new screen: New screen > Templates > Success. Rename it to
Success Screen.On the Catalog Screen, select your Form control from the Tree view.
Set the form's OnSuccess property to:
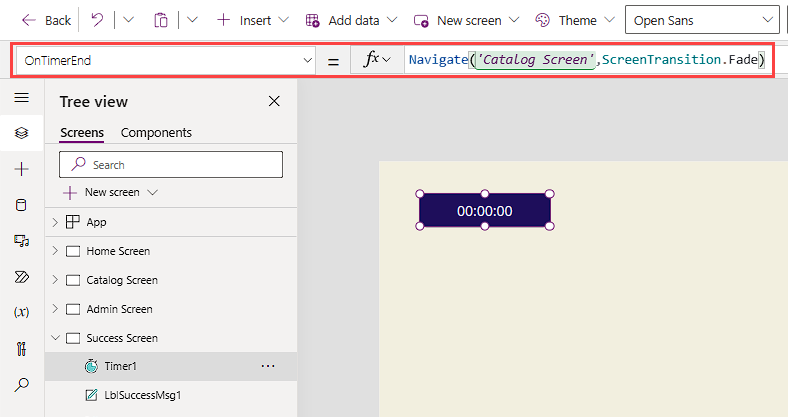
Navigate(‘Success Screen’,ScreenTransition.Fade)Navigate to the Success Screen in the Tree view, and insert a Timer control.
Set these Timer control properties:
AutoStart:
trueDuration:
4000OnTimerEnd:
Navigate(‘Catalog Screen’,ScreenTransition.Fade)Visible:
false
Return to the Catalog Screen and preview the app. Make a change in the form and select Save changes.
The app should display the Success Screen for four seconds, then return to the Catalog Screen.
Exit preview mode and return to the Home Screen. Now, add a dropdown navigation menu.
Insert a Dropdown control and position it under the upper-left area of the header rectangle.
Add a Text label control above the dropdown and set its Text property to:
Screen NavigationSet its Color property to:
Color.WhiteSelect the
Dropdowncontrol and set its properties:Default:
""Items:
["", "Catalog Screen", "Admin Screen"]
Set its OnChange property:
Switch(
    Self.SelectedText.Value,
    "Catalog",
    Navigate(
        'Catalog Screen',
        ScreenTransition.Cover
    ),
    "Admin",
    Navigate(
        'Admin Screen',
        ScreenTransition.Cover
    )
);
Reset(Self)
Preview the app again. Test the dropdown to confirm navigation between screens.
Return to edit mode, select the Catalog Screen. Copy the Back icon (Ctrl+C), then paste it (Ctrl+V). Move the duplicate icon to the top right of the header rectangle.
Change the duplicated icon to a Home icon.
Set the OnSelect property of the Home icon to:
Navigate('Home Screen', ScreenTransition.CoverRight)Preview the app. On the Catalog Screen, confirm that selecting the Home icon takes you back to the Home Screen.


You successfully configured navigation features in your app:
- Navigate and Back functions with screen transitions.
- A Success Screen displayed on form submission using OnSuccess.
- A Timer that navigates after a delay via OnTimerEnd.
- A Dropdown menu for navigation using OnChange.
- A Home icon for returning to the home screen.
Next, you'll complete a knowledge check.