Deploy an App Services resource provider
In this unit you learn how to deploy App Service in Azure Stack Hub, which gives your users the ability to create Web, API and Azure Functions applications. You need to:
- Add the App Service resource provider to your Azure Stack Hub deployment using the steps described in this unit.
- After you install the App Service resource provider, you can include it in your offers and plans. Users can then subscribe to get the service and start creating apps.
Run the App Service resource provider installer
Installing the App Service resource provider takes at least an hour. The length of time needed depends on how many role instances you deploy. During the deployment, the installer runs the following tasks:
- Registers the required resource providers in the Default Provider Subscription
- Grants contributor access to the App Service Identity application
- Create Resource Group and Virtual network (if necessary)
- Create Storage accounts and containers for App Service installation artifacts, usage service, and resource hydration.
- Download App Service artifacts and upload them to the App Service storage account.
- Deploy the App Service.
- Register the Usage Service.
- Create DNS Entries for App Service.
- Register the App Service admin and tenant resource providers.
- Register Gallery Items - Web, API, Function App, App Service Plan, WordPress, DNN, Orchard, and Django applications.
To deploy App Service resource provider, follow these steps:
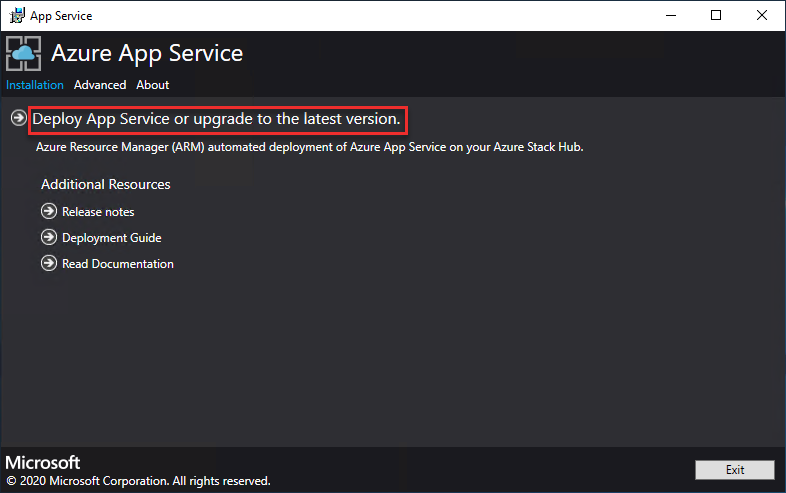
Run appservice.exe as an admin from a computer that can access the Azure Stack Hub Admin Azure Resource Management Endpoint.
Select Deploy App Service or upgrade to the latest version.
Review and accept the Microsoft Software License Terms and then select Next.
Review and accept the third-party license terms and then select Next.
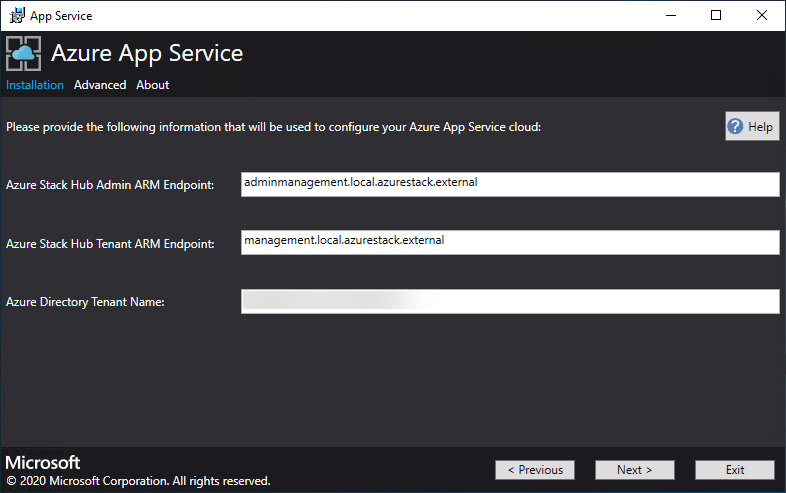
Make sure that the App Service cloud configuration information is correct.
Now you can deploy into an existing virtual network, or let the App Service installer create a new virtual network and subnets.

Enter the info for your file share and then select Next. The address of the file share must use the Fully Qualified Domain Name (FQDN) or the IP address of your File Server.
On the next App Service Installer page, follow these steps:
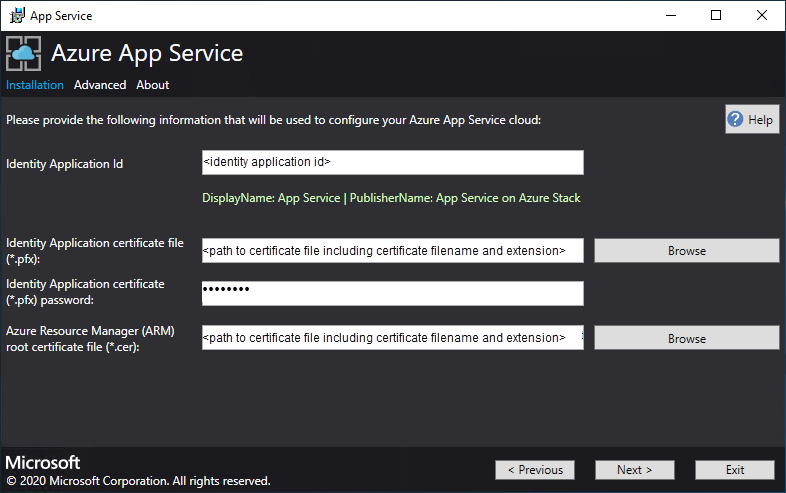
In the Identity Application ID box, enter the GUID for the Identity application you created.
In the Identity Application certificate file box, enter (or browse to) the location of the certificate file.
In the Identity Application certificate password box, enter the password for the certificate. This password is the one that you made note of when you used the script to create the certificates.
In the Azure Resource Manager root certificate file box, enter (or browse to) the location of the certificate file.
Select Next.
For each of the three certificate file boxes, select Browse and navigate to the appropriate certificate file. Provide the password for each certificate. Select Next after entering all the information.
Box
Certificate file name example
App Service default SSL certificate file
_.appservice.local.AzureStack.external.pfx
App Service API SSL certificate file
api.appservice.local.AzureStack.external.pfx
App Service Publisher SSL certificate file
ftp.appservice.local.AzureStack.external.pfx
If you used a different domain suffix when you created the certificates, your certificate file names don't use local.AzureStack.external. Instead, use your custom domain info.

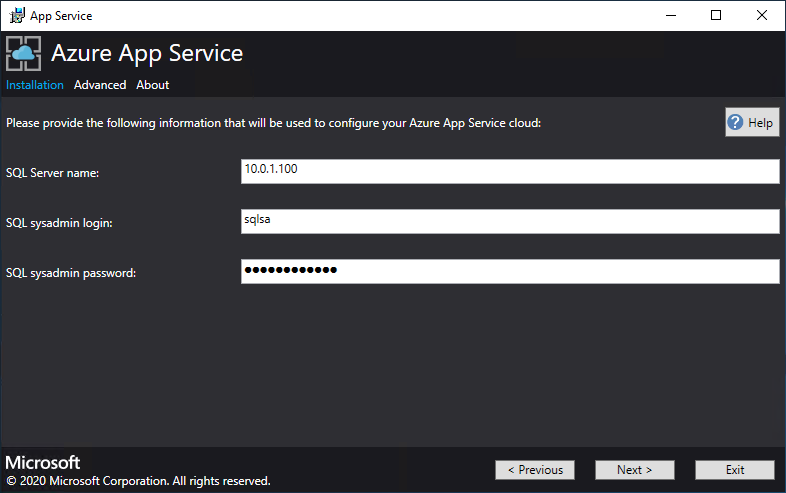
Enter the SQL Server details for the server instance used to host the App Service resource provider database and then select Next. The installer validates the SQL connection properties. The App Service installer tries to test connectivity to the SQL Server before proceeding. If you're deploying to an existing virtual network, this connectivity test might fail. You're given a warning and a prompt to continue. If the SQL Server info is correct, continue the deployment.
Review the role instance and SKU options. The defaults populate with the minimum number of instances and the minimum SKU for each role in a production deployment. For ASDK deployment, you can scale the instances down to lower SKUs to reduce the core and memory commit but you will experience a performance degradation. A summary of vCPU and memory requirements is provided to help plan your deployment. After you make your selections, select Next.
Role
Minimum instances
Minimum SKU
Notes
Controller
2
Standard_A4_v2 - (4 cores, 8192 MB)
Manages and maintains the health of the App Service cloud.
Management
1
Standard_D3_v2 - (4 cores, 14336 MB)
Manages the App Service Azure Resource Manager and API endpoints, portal extensions (admin, tenant, Functions portal), and the data service. To support failover, increase the recommended instances to 2.
Publisher
1
Standard_A2_v2 - (2 cores, 4096 MB)
Publishes content via FTP and web deployment.
FrontEnd
1
Standard_A4_v2 - (4 cores, 8192 MB)
Routes requests to App Service apps.
Shared Worker
1
Standard_A4_v2 - (4 cores, 8192 MB)
Hosts web or API apps and Azure Functions apps. You might want to add more instances. As an operator, you can define your offering and choose any SKU tier. The tiers must have a minimum of one vCPU.
In the Select Platform Image box, choose your deployment Windows Server 2016 virtual machine image from the images available in the compute resource provider for the App Service cloud. Select Next.
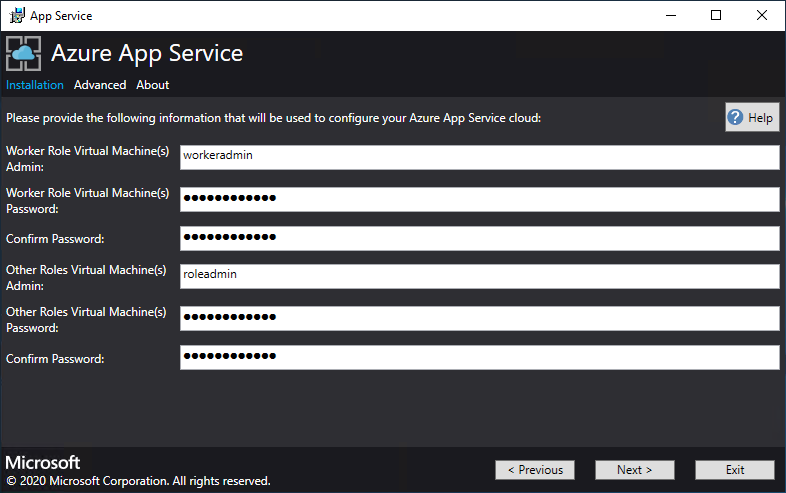
On the next App Service Installer page, follow these steps:
Enter the Worker Role virtual machine admin user name and password.
Enter the Other Roles virtual machine admin user name and password.
Select Next.
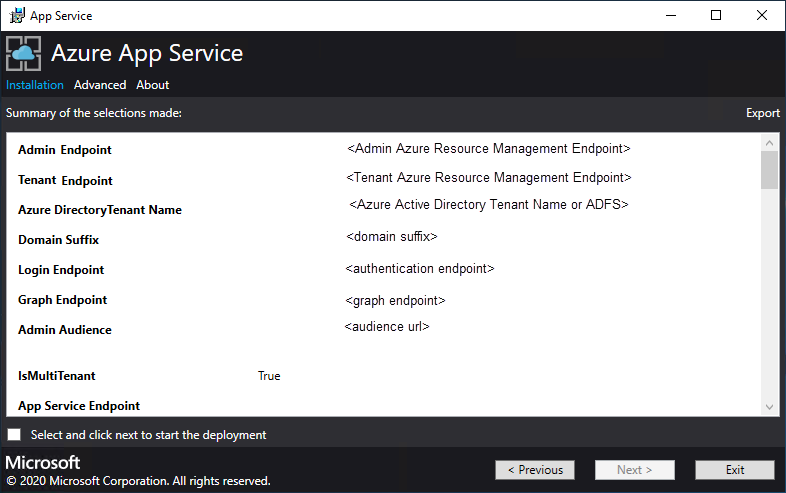
On the App Service Installer summary page, follow these steps:
Verify the selections you made. To make changes, use the Previous buttons to visit previous pages.
If the configurations are correct, select the check box.
To start the deployment, select Next.
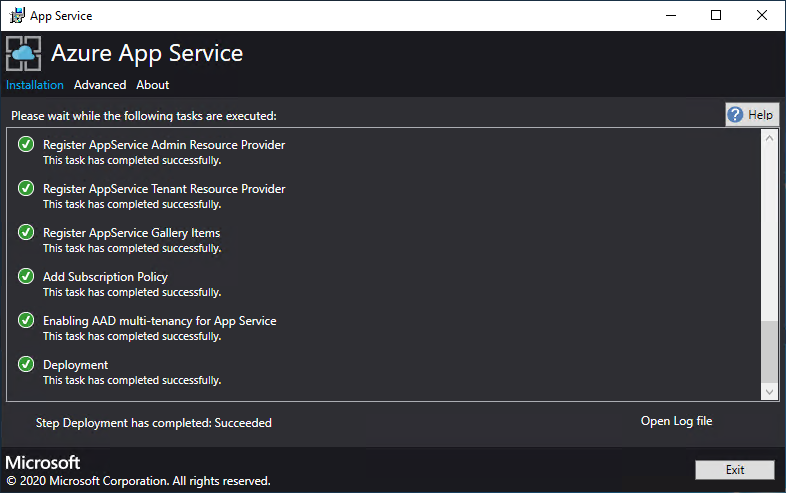
On the next App Service Installer page, follow these steps:
Track the installation progress. App Service on Azure Stack Hub can take up to 240 minutes to deploy based on the default selections and age of the base Windows 2016 Datacenter image.
After the installer successfully finishes, select Exit.
Post-deployment Steps
If you're deploying to an existing virtual network and using an internal IP address to connect to your file server, you must add an outbound security rule. This rule enables SMB traffic between the worker subnet and the file server. In the administrator portal, go to the WorkersNsg Network Security Group and add an outbound security rule with the following properties:
- Source: Any
- Source port range: *
- Destination: IP addresses
- Destination IP address range: Range of IPs for your file server
- Destination port range: 445
- Protocol: TCP
- Action: Allow
- Priority: 700
- Name: Outbound_Allow_SMB445
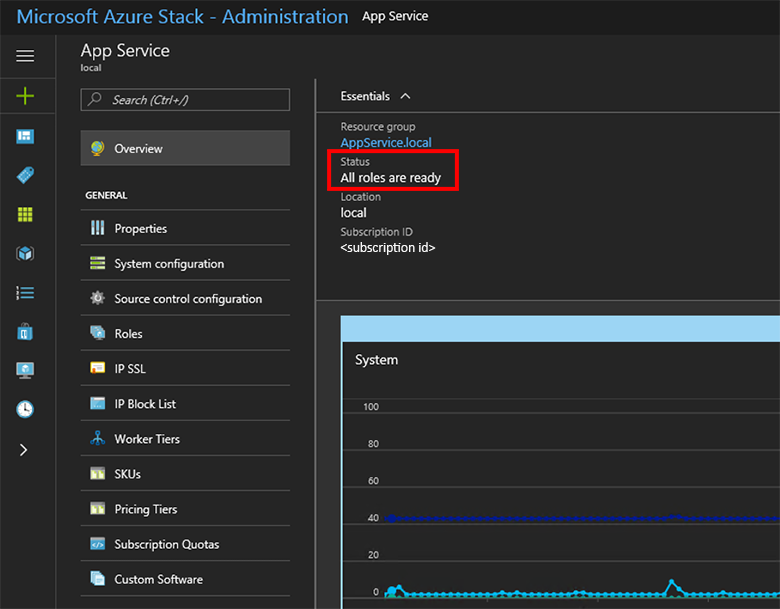
Validate the App Service on Azure Stack Hub installation
In the Azure Stack Hub administrator portal, go to Administration - App Service.
In the overview, under status, check to see that the Status displays All roles are ready.