Create a plan
Azure Stack Hub plans are groupings of one or more services and their quotas. As a provider, you can create plans to offer to your users. In turn your users subscribe to your offers to use the plans, services, and quotas they include. This unit shows you how to create a plan that includes the compute, network, and storage resource providers. This plan gives subscribers the ability to provision virtual machines.
Create a plan
Sign in to the Azure Stack Hub administrator portal
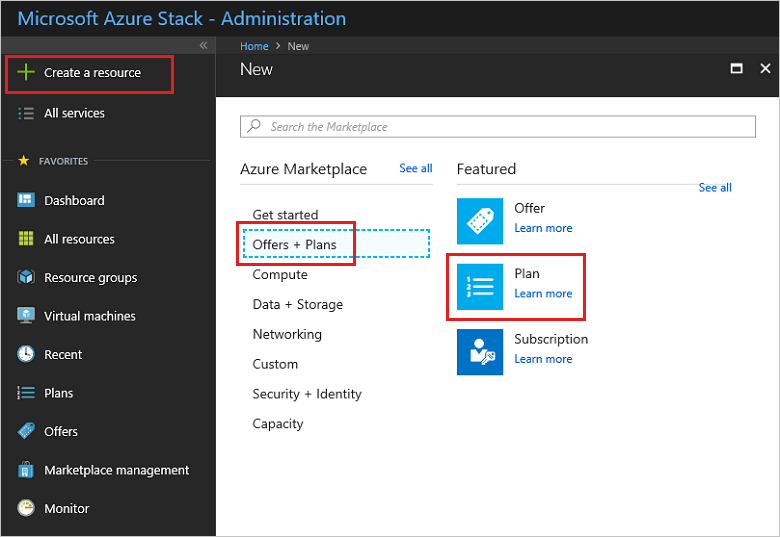
https://adminportal.local.azurestack.external.To create a plan and offer that users can subscribe to, select + Create a resource, then Offers + Plans, then Plan.
A tabbed user interface appears that enables you to specify the plan name, add services, and define quotas for each of the selected service.
Create a new Resource Group, or select an existing one, as a container for the plan.

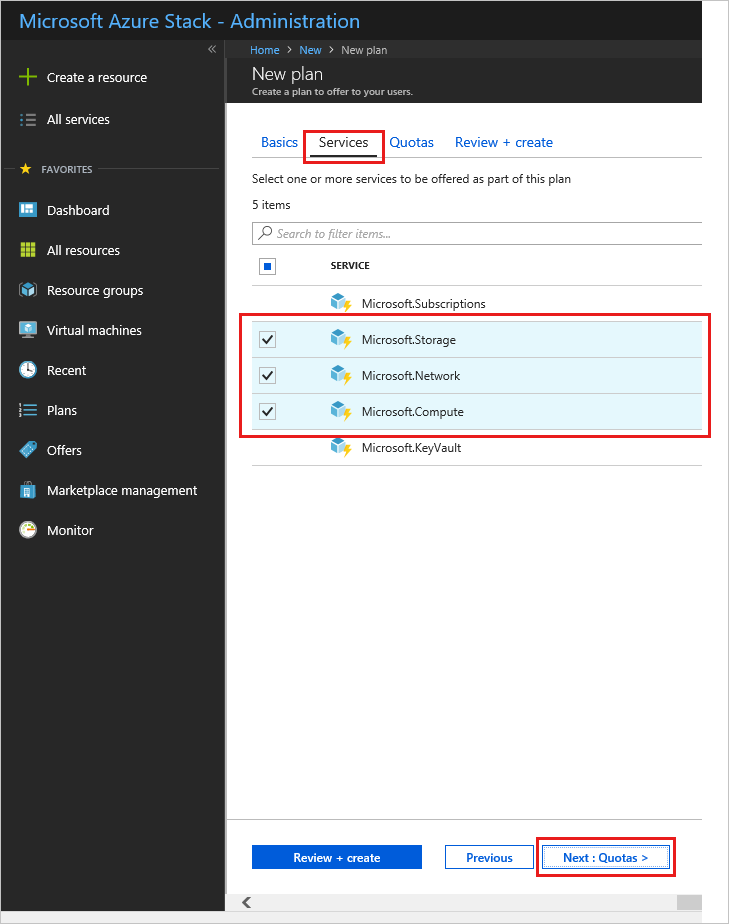
Select the Services tab, or click the Next : Services > button, and then select the checkbox for Microsoft.Compute, Microsoft.Network, and Microsoft.Storage.
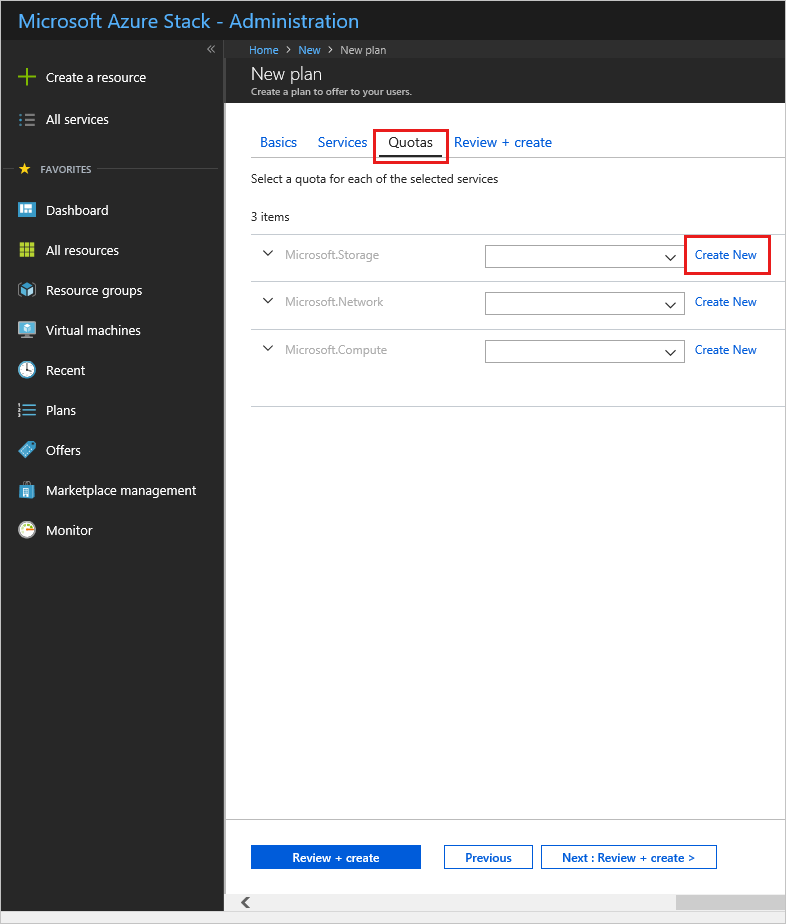
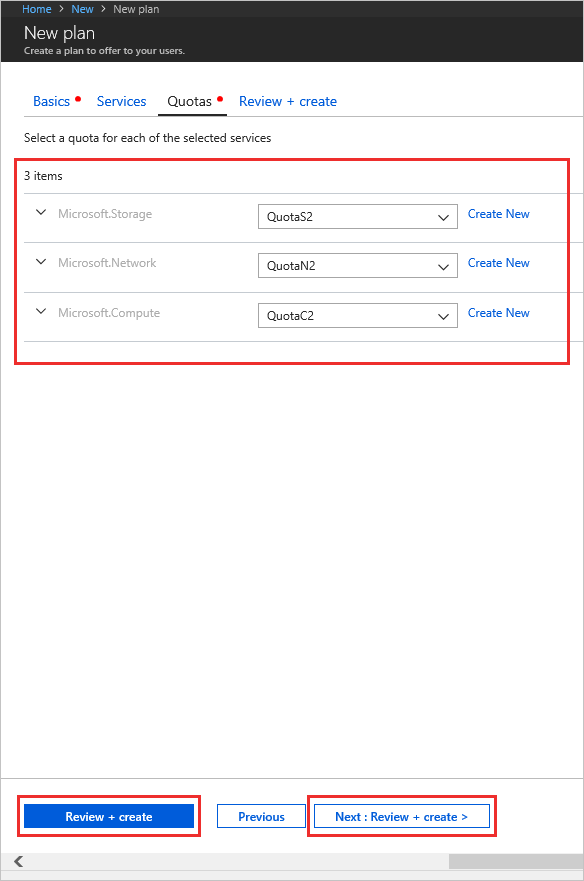
Select the Quotas tab, or click the Next : Quotas > button. Next to Microsoft.Storage, choose either the default quota from the dropdown box, or select Create New to create a customized quota.
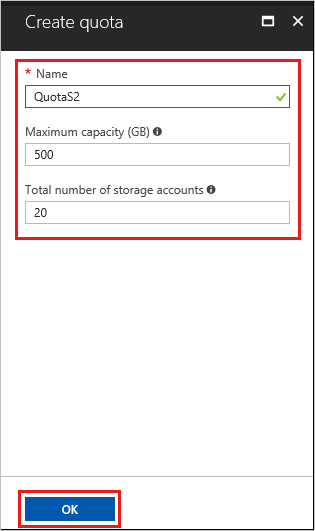
If you're creating a new quota, enter a Name for the quota, and then specify the quota values. Select OK to create the quota.
Repeat steps 6 and 7 to create and assign quotas for Microsoft.Network and Microsoft.Compute. When all three services have quotas assigned, they'll look like the next example.
Select Review + create to review the plan. Review all values and quotas to ensure they're correct. The interface enables you to expand the quotas in the chosen plans one at a time to view the details of each quota in a plan. You can also go back to make any necessary edits.
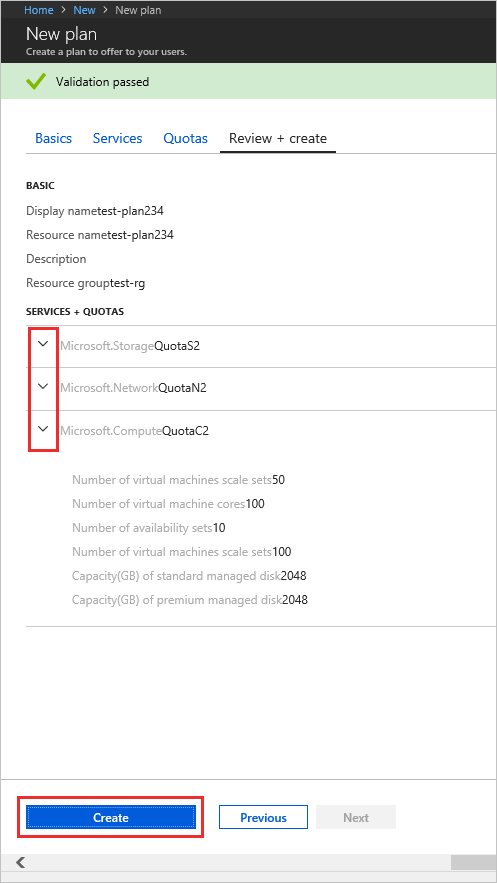
When you're ready, select Create to create the plan.
To see the new plan, on the left-hand side click All services, select Plans, and then search for the plan and select its name.
Next unit: Create an add-on plan
Having an issue? We can help!
- For issues related to this module, explore existing questions using the #azure training tag or Ask a question on Microsoft Q&A.
- For issues related to Certifications and Exams, post on Certifications Support Forums or visit our Credentials Help.